|
Think of chicken fricassee as a chicken pot pie without the pie. It’s a treasured dish, here and in Germany where it is called chicken fricassee (Hühnerfrikassee). 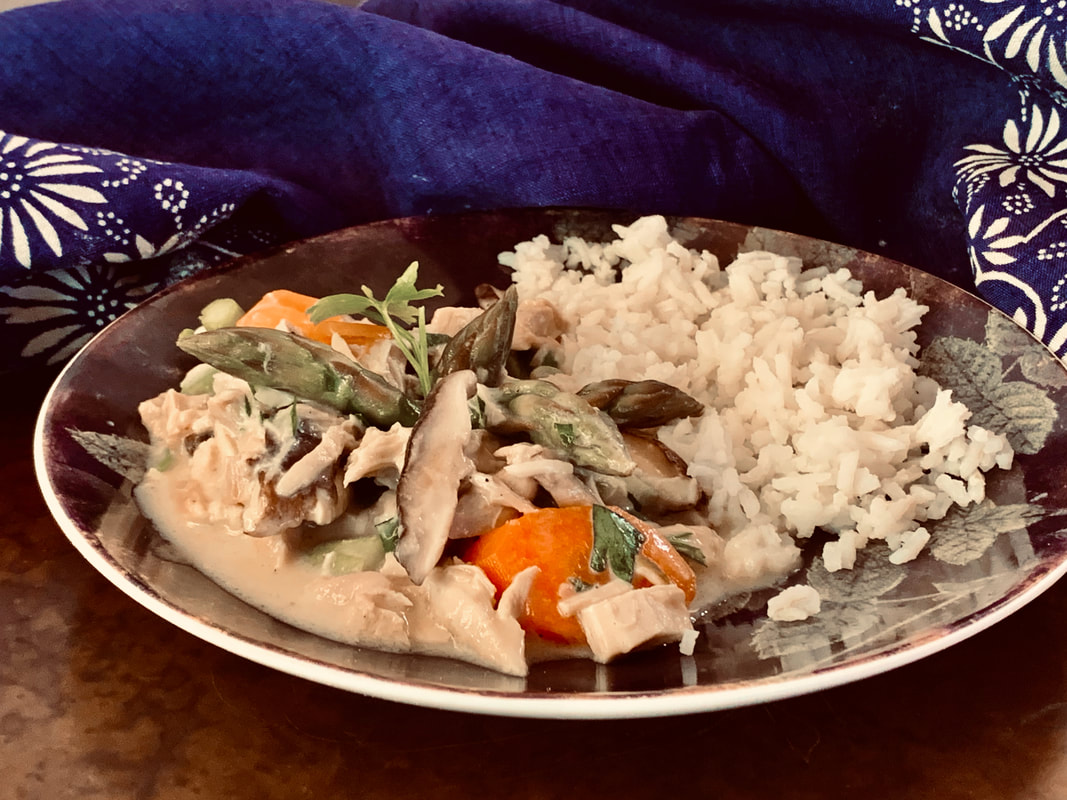 In this country, it is more of a home-cooked everyday meal, while in Germany its can be a fancy dish. In the 1960s, it was often served at weddings in a Vol-au-Vent (a small hollow case of puff pastry). It was part of my wedding dinner when I got married decades ago in Germany. But more often, chicken fricassee is served with rice, mashed potatoes or noodles. I had it with homemade Spätzle. The vegetables in this dish can vary; when in season asparagus is often added. Peas, carrots and mushroom are called for in most recipes. In the old days, canned white asparagus and canned mushrooms were added . 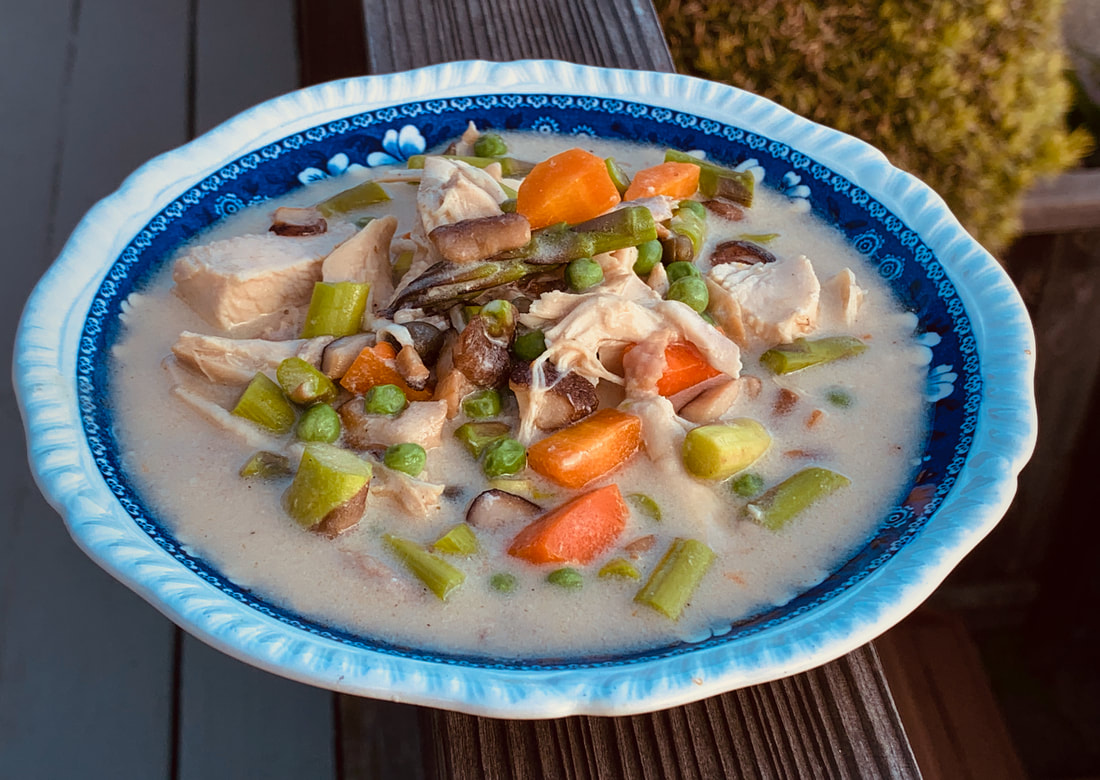 I have always enjoyed cooking this dish; it is the essence of comfort food. A few weeks ago, I was the personal chef of a friend of mine who was caring for her father during his last days. I made a big batch using two whole chickens, fresh asparagus, carrots, shiitake mushrooms and peas. I have made much smaller portions using chicken legs or breasts. The dish freezes well. I froze a portion for my husband to have when I go to Germany this spring. 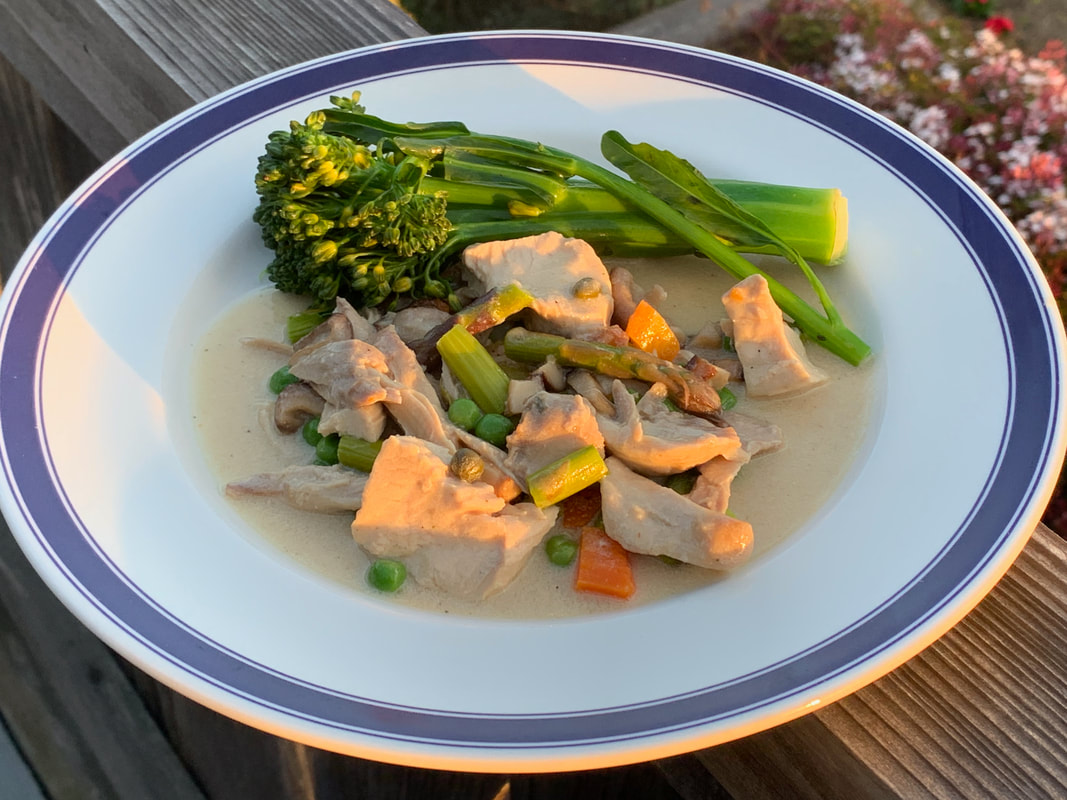 I have prepared this dish many times. And I have to say, the secret is in the sauce. I boil the chicken with veggies to make a homemade broth. Usually, I do this a day before. When I was cooking the dish for my friends, I prepared a large casserole and put a sheet of puff pastry on the top. Then I baked it in the oven following the instructions on the puff pastry package. I have also made it with a homemade cream cheese crust in individual serving dishes. If you use a crust, make sure you have plenty of sauce because the dish tends to dry out while baking. That happened to me. Recipe for Chicken FricasseeThis recipe will make 8-10 portions. Ingredients: For the chicken broth: 2 small whole chickens 2 carrots 2-3 celery stalks (with leaves) 1 onion (with peel) 1 leek (or clean dark leek leaves) A handful of parsley 1bay leaves 1-2 tsp of salt 1tsp garlic salt 1-2 tsp pepper The Fricassee: 8 ounces carrots (6 small ones) 6-7 ounces mushrooms 2 lb. green asparagus 4 TBs capers 3 TBs butter 3 TBs flour 4 or more cups chicken broth 1 or more cups of milk ½ cup cream or half and half 1 tsp Worcester sauce 1 tsp. salt 1 tsp. pepper 4 tsp. capers 1-2 TBs fresh lemon juice Directions: Cooking the Chicken Place the chicken pieces or whole chicken in a large pot and add the vegetables. Cover everything with cold water. Bring it to a boil, and skim off the white foam from the top. Reduce the heat and simmer in the covered pot until chicken is cooked through, about 45 minutes. Cook the chicken breast less until the meat thermometer reads 165° degrees. Transfer the chicken to a large bowl and cool. Discard the skin and bones. Cut or pull the meat into 1-inch pieces. Strain the chicken broth and put the cooled broth in the refrigerator. Preparing the vegetables Bring a pot of water to a boil, add salt and blanch the carrots for about two minutes until they are al dente. Do the same with the asparagus. You have the choice of blanching the mushrooms or sautéing them in a mixture of butter and olive oil over a medium heat. I have done both and honestly I can’t tell the difference. The sauce and assembling the fricassee Melt butter in a large sauce pan, add the flour and whisk for two minutes. Make sure you don’t brown the roux. Gradually add in the chicken broth, one cup at a time. Before you add another cup, whisk the mixture until totally smooth for a creamy sauce. Add milk, Worcestershire sauce, capers, and let the sauce simmer for 5-10 minutes. Add cream or half and half, salt, pepper, freshly ground nutmeg and lemon juice. Add the chicken and bring it all to a simmer, then add the carrots, mushrooms, and asparagus . Season and serve. If you want to add a crust, put the fricassee in a buttered oven-proof dish, cover the top with the puff pastry, and follow the instructions on the package. Cut some slits in the pastry and bake the dish until golden brown. I would like to share with you some blog posts from prior Easter celebration in Germany. There are so many traditions and good recipes. Click on the photo for the link.
Happy Easter 2022
and Guten Appetit! from the Sunnycovechef
15 Comments
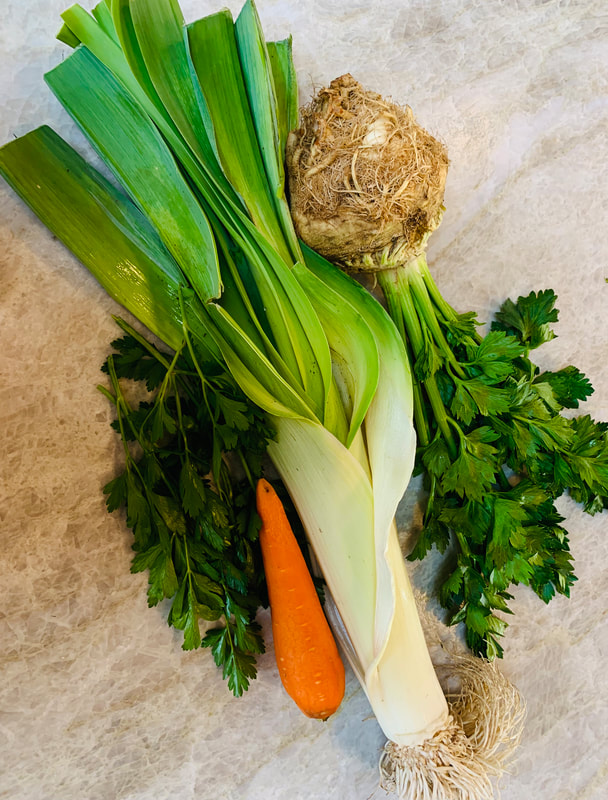
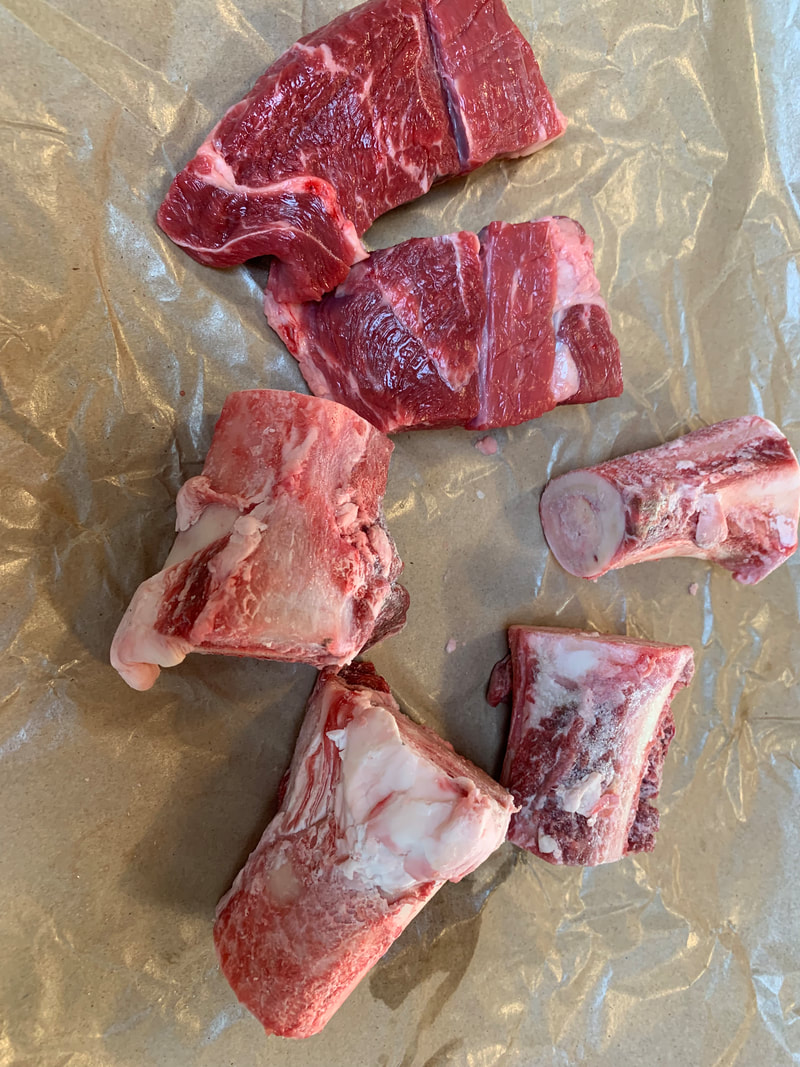
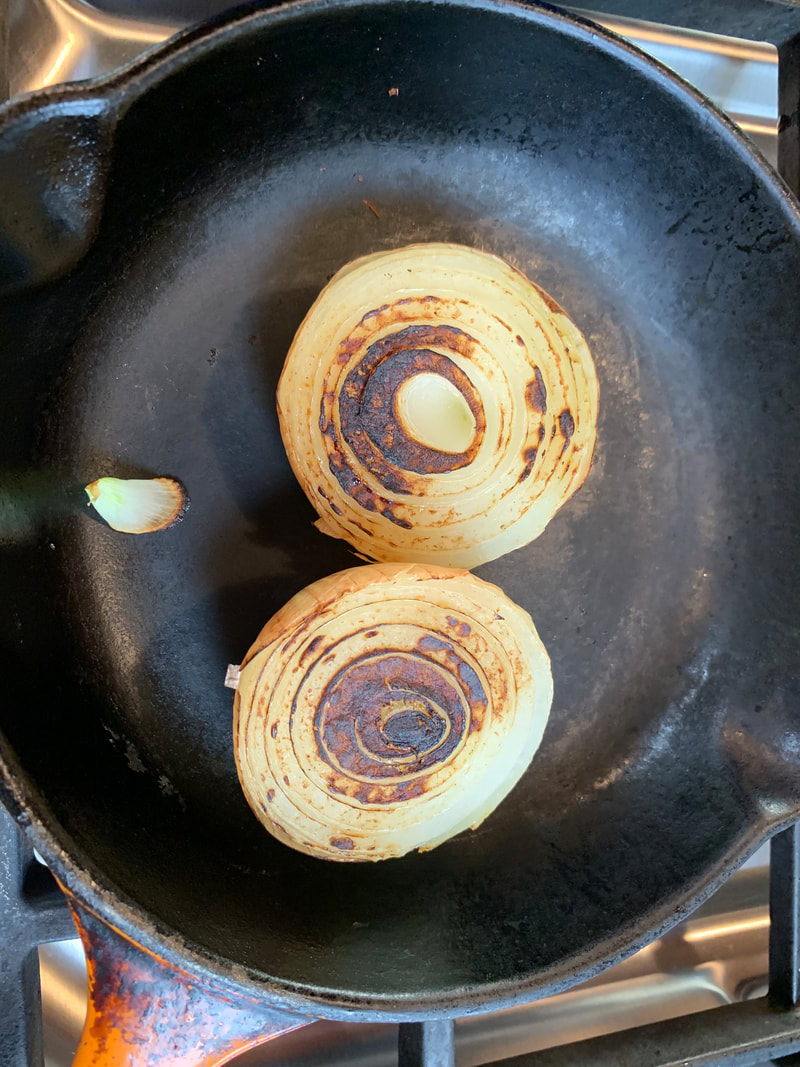
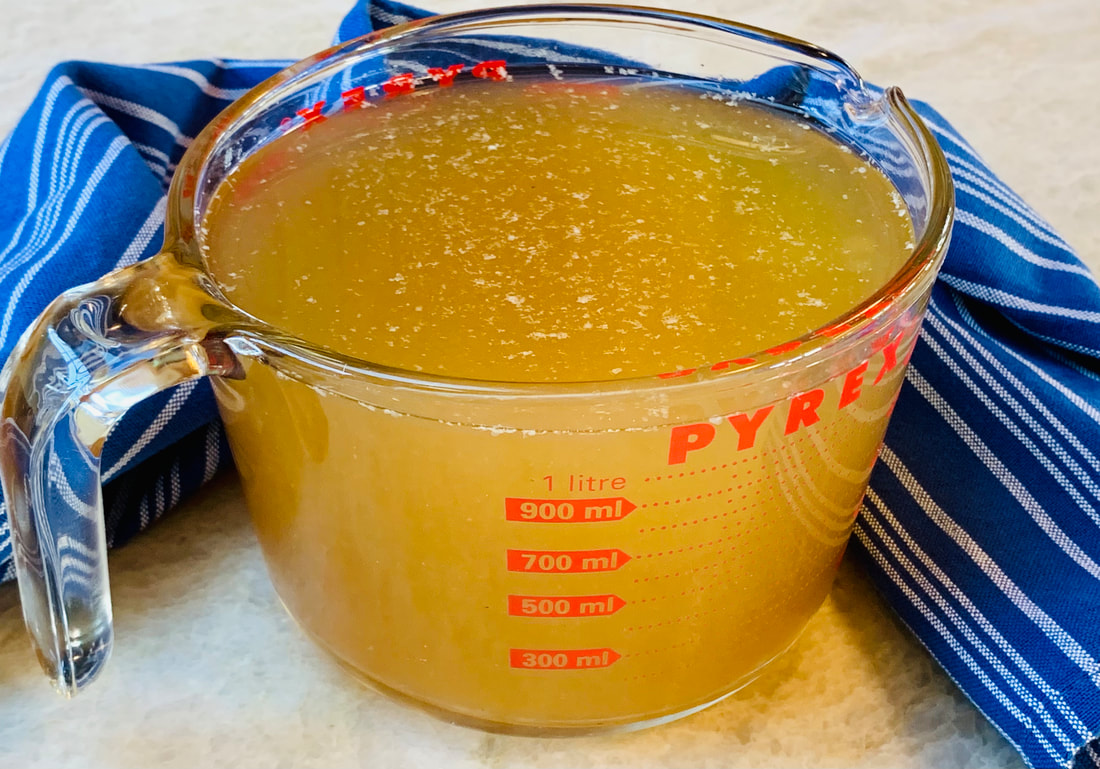
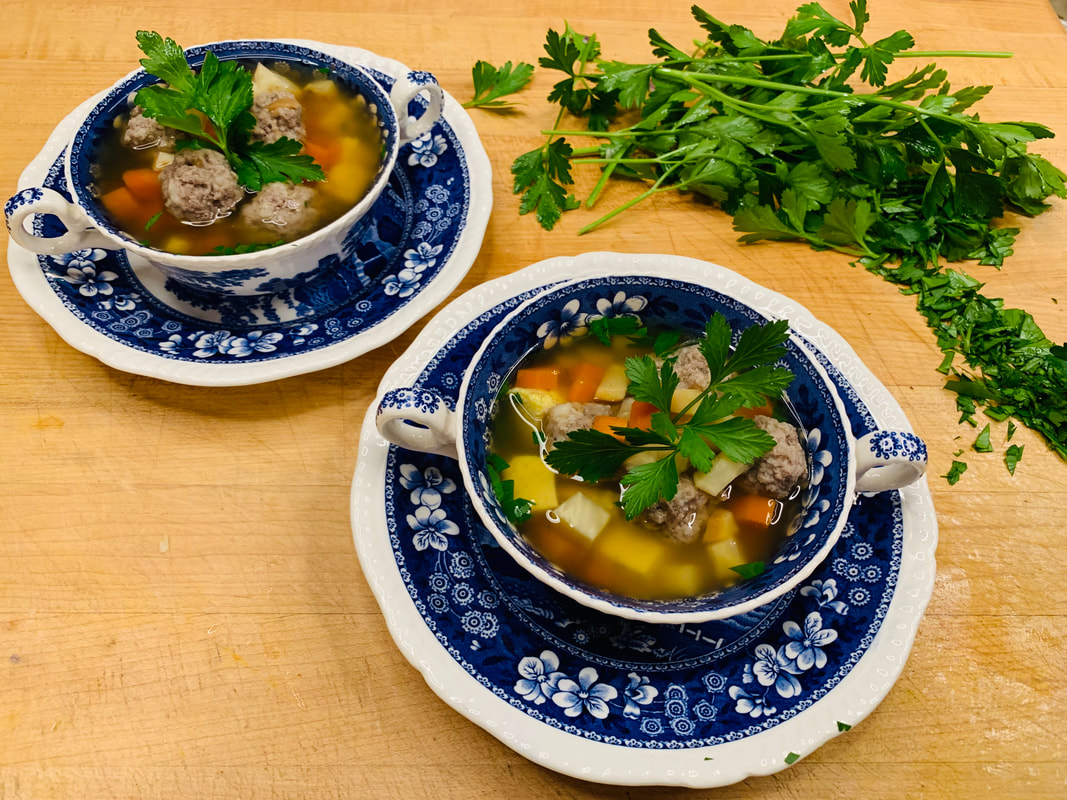
Many of you have followed my blog for years. It feels like a community to me, even though I don’t know each of you personally. There were times when your comments gave me great comfort, especially when I lost my mom and my girlfriend. Your sincere comments and condolence wishes meant a lot to me. Unfortunately, the comments are archived because of my new blog design. I am so sad about that. Maybe some day, I will find someone who can put them back where they belong. When I wrote the blogpost about my mom’s passing, I promised you the recipe for the wedding soup that I make. Well, here it is six years later, and I am finally getting around to doing it. In these times of war and loss we need comfort food. 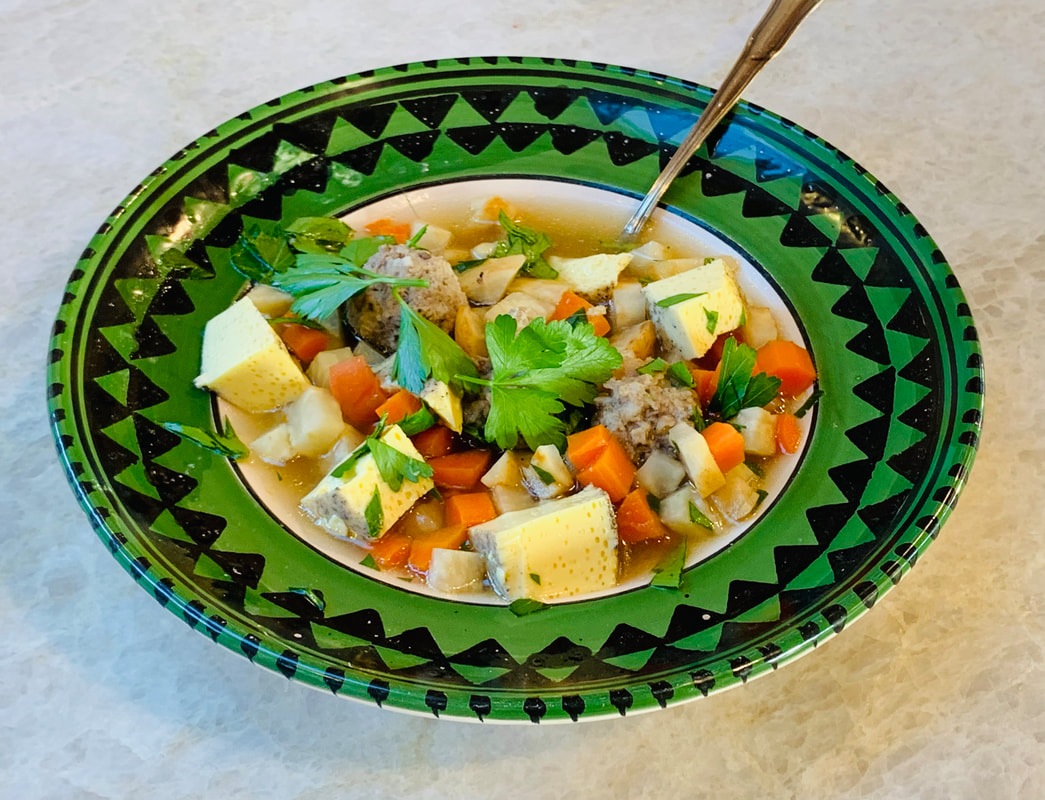 There are many versions of wedding soups. Even in Germany, they vary in the different regions. What I am sharing with you is a recipe from Lower Saxony where I am from. I liked this soup ever since I was a child. Whenever I visit Germany I will look for restaurants that serve wedding soup.
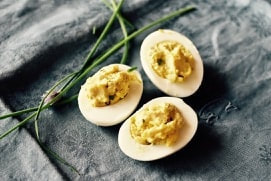
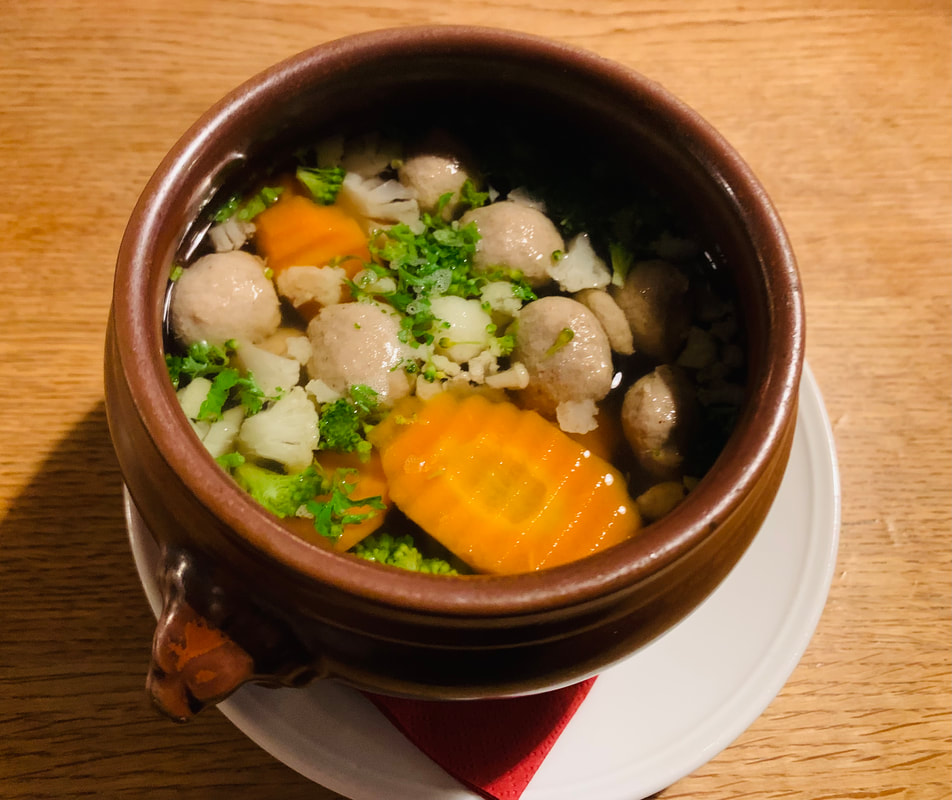
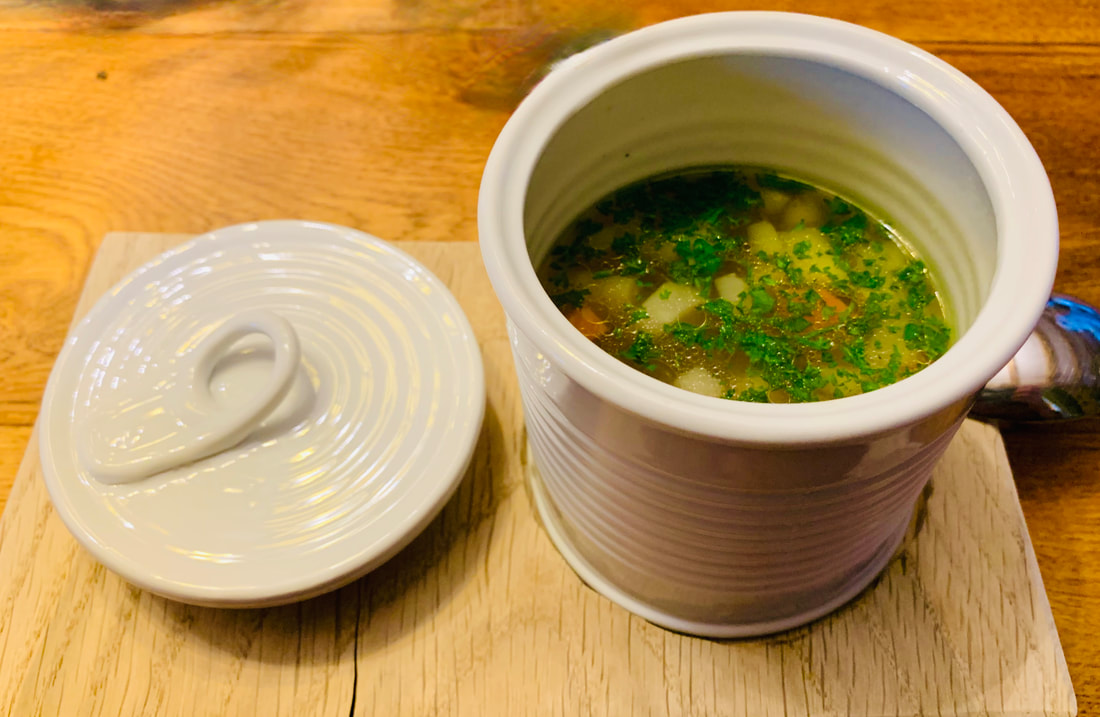
My favorite in the soup is the egg custard cubes or Eierstich as we call them in Germany. The broth should be almost clear with a few vegetable pieces and egg custard. In my childhood, it was often the first course at a wedding or other celebration. Sometimes meatballs or bone narrow dumplings are added. The wedding soup was supposed to give the just-married couple strength for the upcoming wedding night! The main ingredients in the soup is the broth. It takes some time and effort to make. I freeze half of the broth.
|
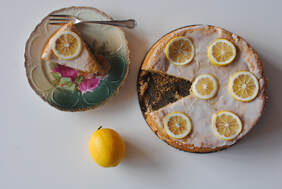
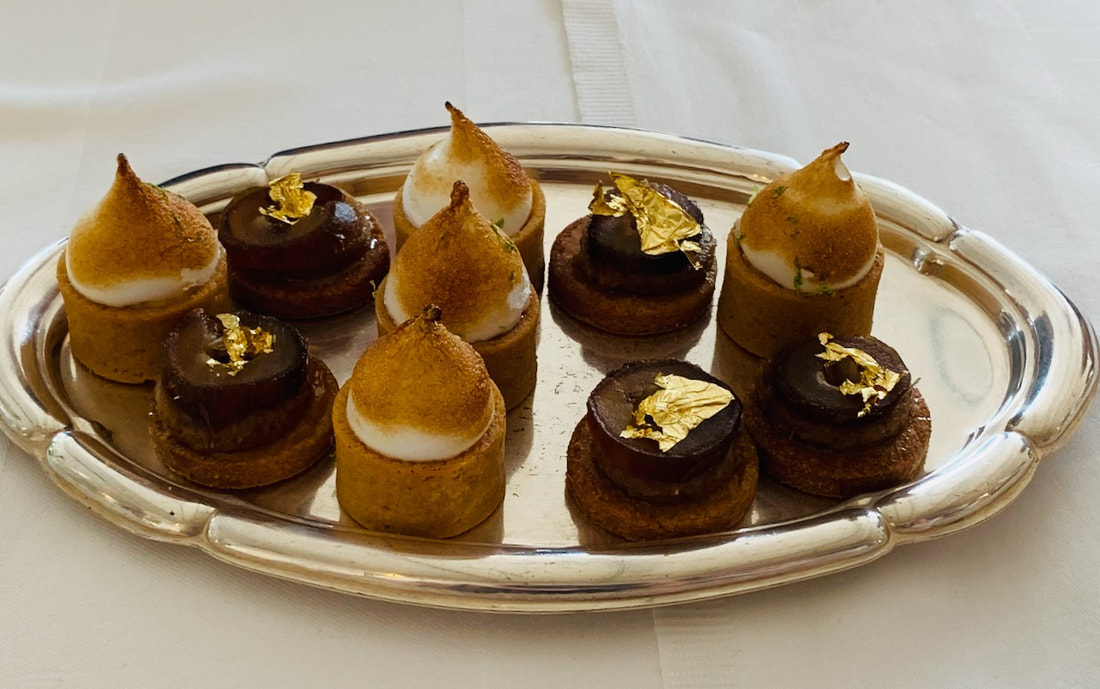
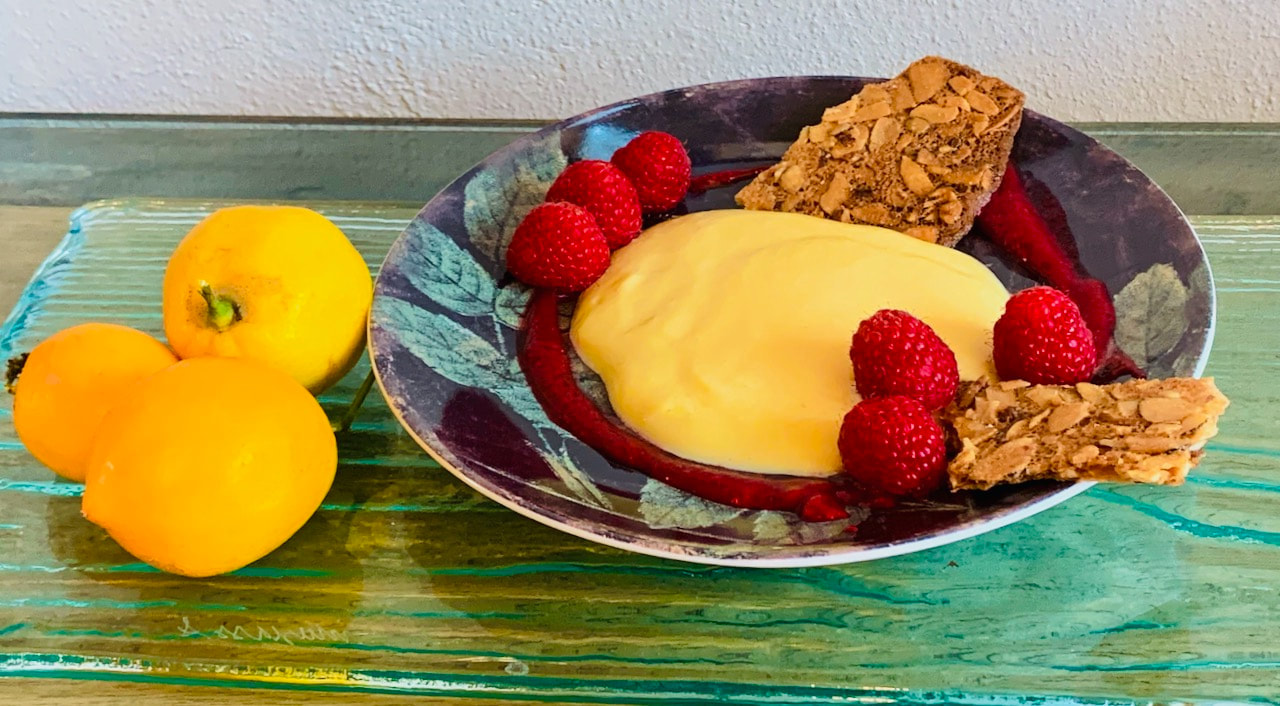
 Lemon Mousse | 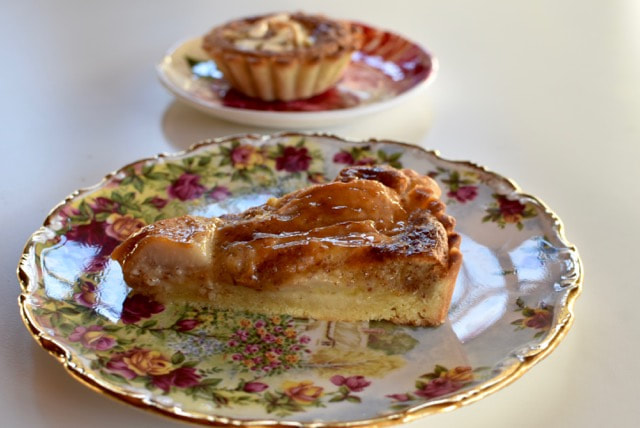 Almond Pear Tart |
  |  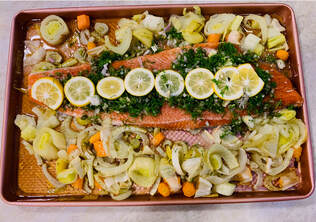 |
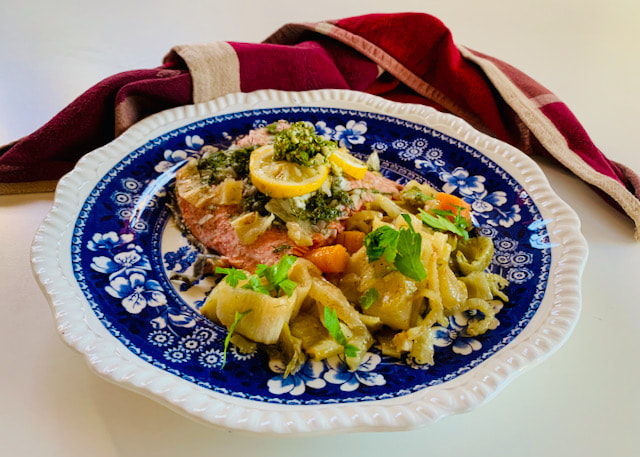
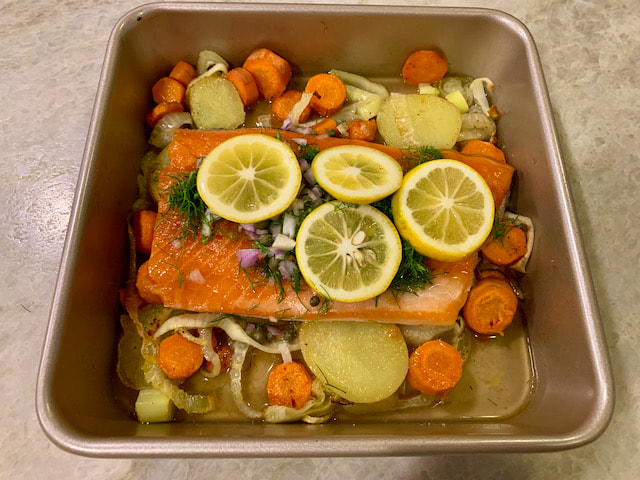
The Recipe for Salmon with leeks, Fennel, carrots and potatoes
serves 4
Ingredients:
1 ½ lb. salmon
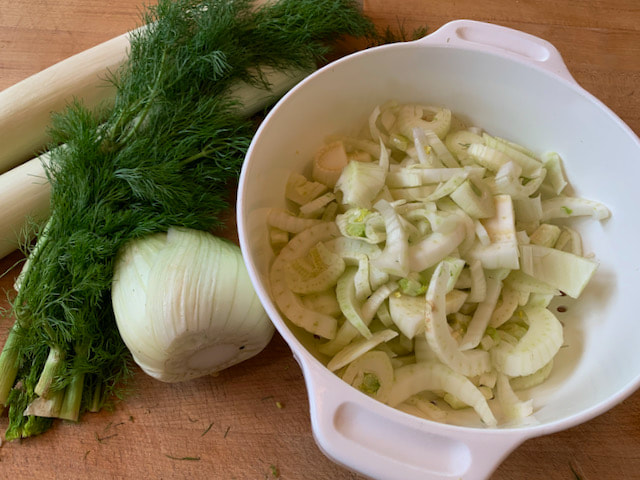
2 fennel bulbs, with fronds
1 large leek, the white part only
2 carrots
2 yellow Finn potatoes
2 TBS olive oil
2 TBS capers, rinsed
1 oz (25g) butter
several lemon slices
¾ cup (185ml) fish stock
¼ cup (60ml) dry vermouth
2 TBS chopped parsley
1 lemon
Directions:
Preheat the oven to 400 º Fahrenheit (200 º Celsius)
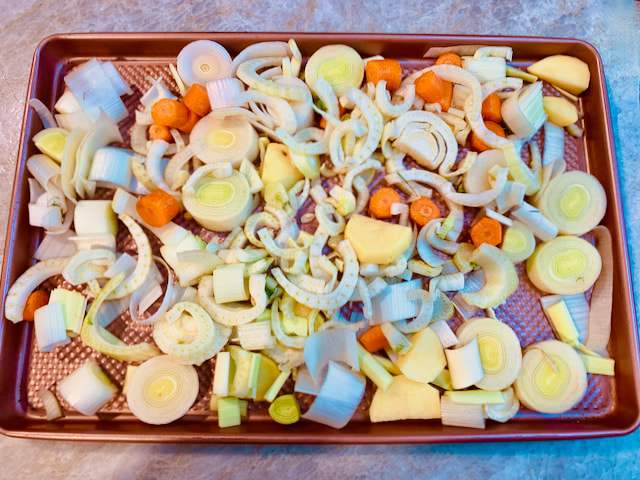
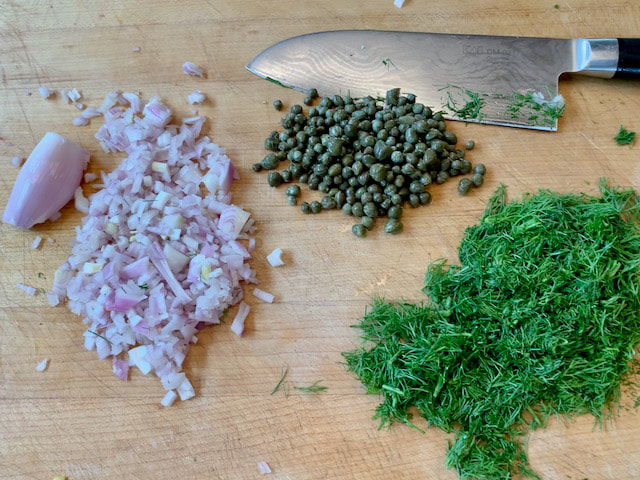
Cut off the fennel fronds from the bulb and put them aside. Slice the fennel bulbs into thin slices crosswise. Clean the carrots and slice them into bite-sized pieces. Do the same with the potatoes. Slice the leek into ½ inch slices. Give it a thorough bath in a tub of water and make sure all the dirt is removed. Drain the leeks in a colander. Put the vegetables on a cookie sheet and drizzle with olive oil, salt and pepper. Toss the veggies with the oil and the seasoning. Bake in the middle shelf of the oven for about 20 minutes.
Meanwhile, chop one of the fennel fronds and mix it with about 2 TBS of capers and finely chopped shallots.
When the vegetables are almost done, make a space for the salmon in the pan. Pour the vermouth and stock over the salmon. Add slices of butter on top of the salmon. Sprinkle the capers, fennel and frond mixture over the salmon. Top the fish with thinly cut lemon slices. Bake for about 15 minutes (or an internal temperature of 145° F). You want to undercook (not overcook) the salmon. Sprinkle the dish with parsley before serving.
Guten Appetit!
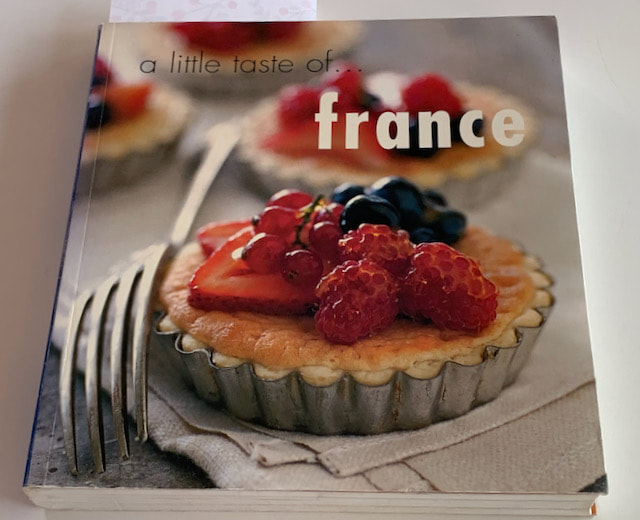
Recipe adapted from the cookbook:
A Little Taste of France
Posted by Sunnycovechef.com
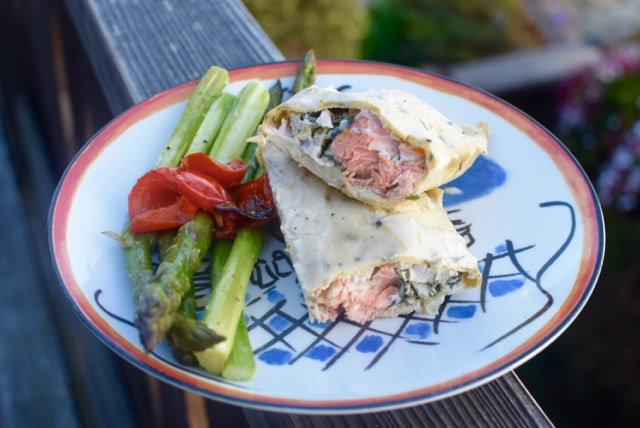
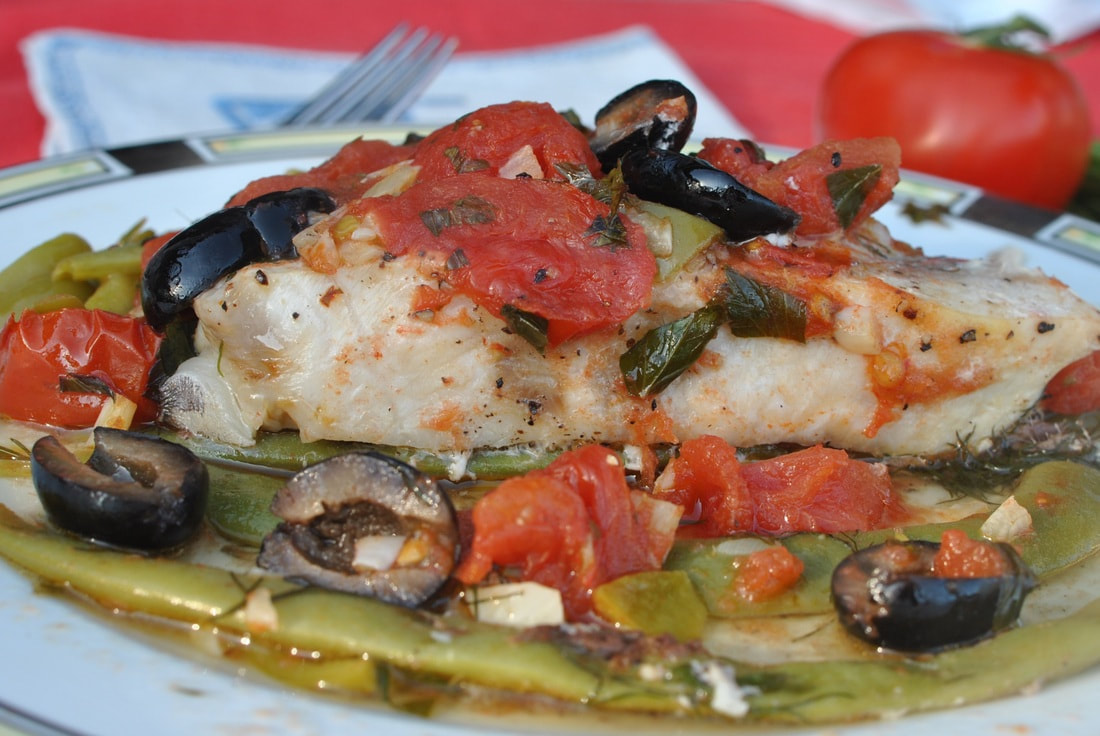 fish cooked in parchment paper |  crepes with salmon and fennel |
You might also like my recipe for fish baked in parchment paper which uses anchovies and green beans with tomatoes, a tasty Mediterranean dish. Or if your are looking for an elegant dinner check out my crepes with salmon and fennel filling. In Italy it is called Cannelloni Ripieni. By preparing these tasty seafood dishes we can pretend that we are in Italy or France.
Stay safe my friends and be well.
  |   |
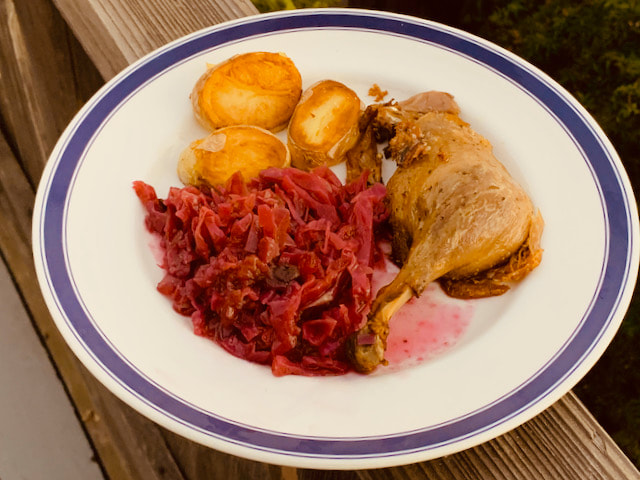
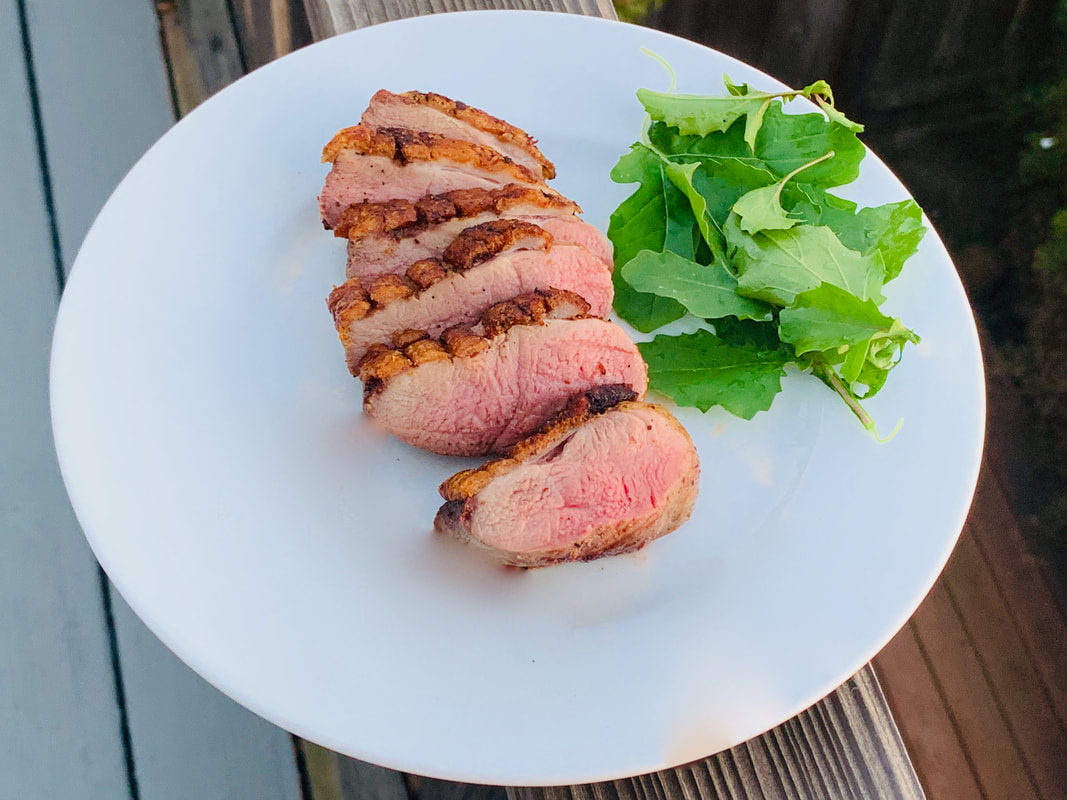
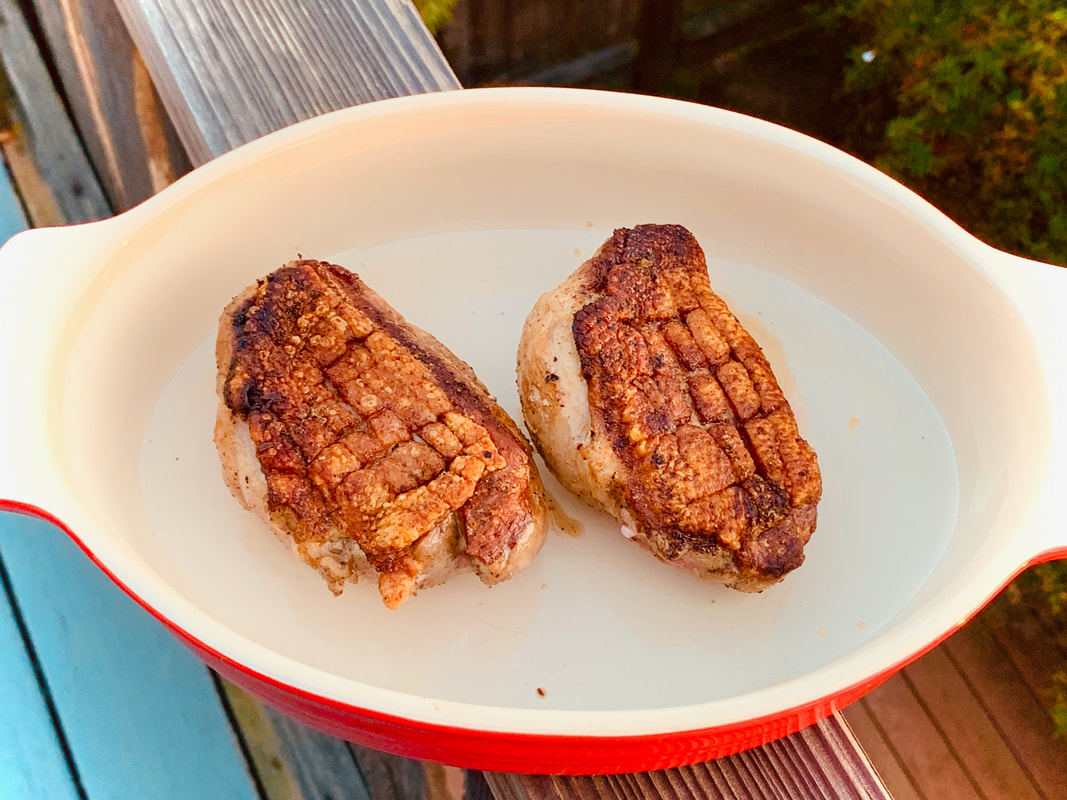
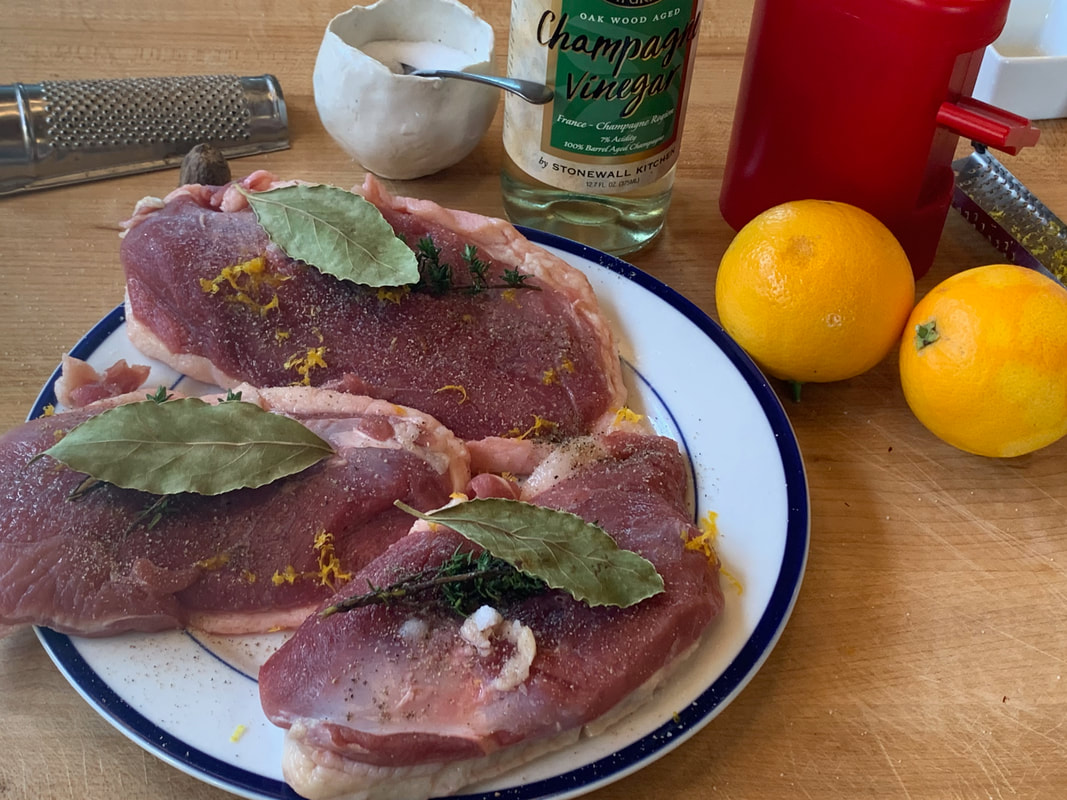
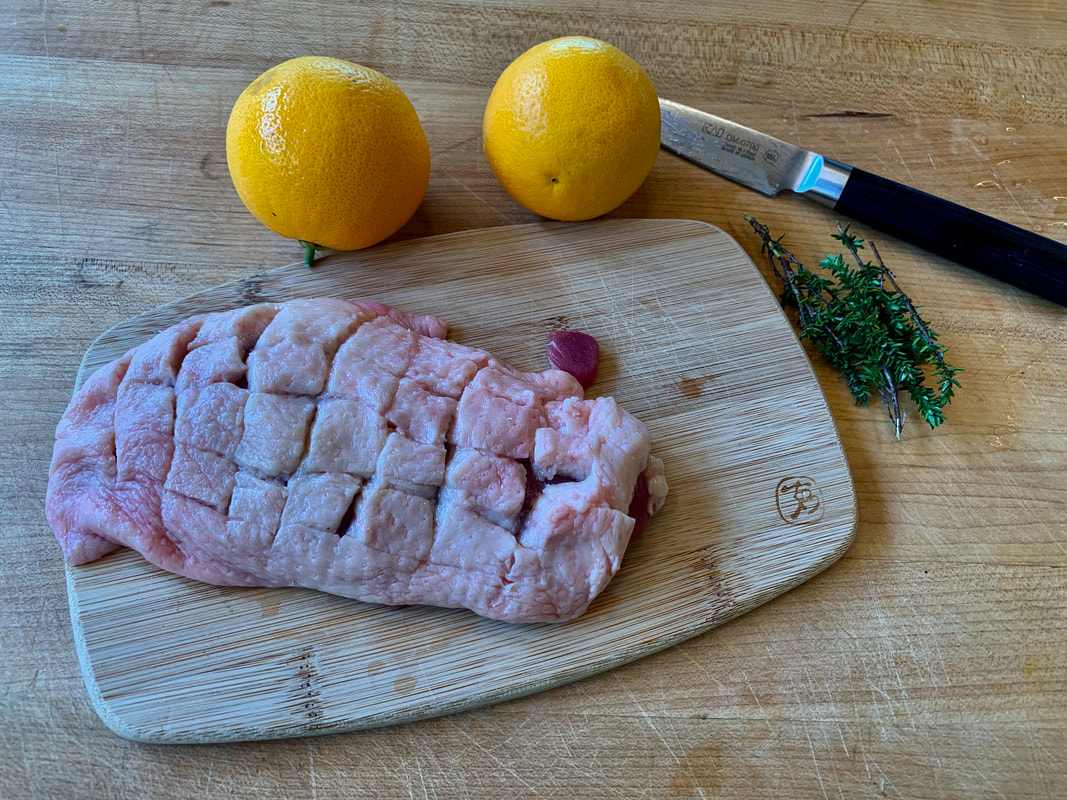
The Recipe for Duck Confit legs
6 duck legs
for the rub:
2 TBS peppercorns
2 TBS coriander seeds
3 Tbs kosher salt
The aromatics
3 pieces of 1 inch ginger
1 jalapeño pepper or other hot pepper (optional)
1 head of garlic
Directions :
With a sharp knife puncture the skin of the duck legs, trying not to puncture the meat. Turn the legs over and puncture the fat pocket on the inside of the legs. Doing this will help the fat flow out of the legs. The legs need to be immersed in fat to cook them confit style.
Crush the peppercorn and coriander seeds lightly with a mortar and pestle, add salt and mix together. It’s important that you cover the legs with the mixture, especially the salt. Put the legs in a ziplock bag and keep them in the fridge for 10-12 hours or overnight. When you take the legs out of the bag brush off the spices and most of the salt, I use a paper towel for that.
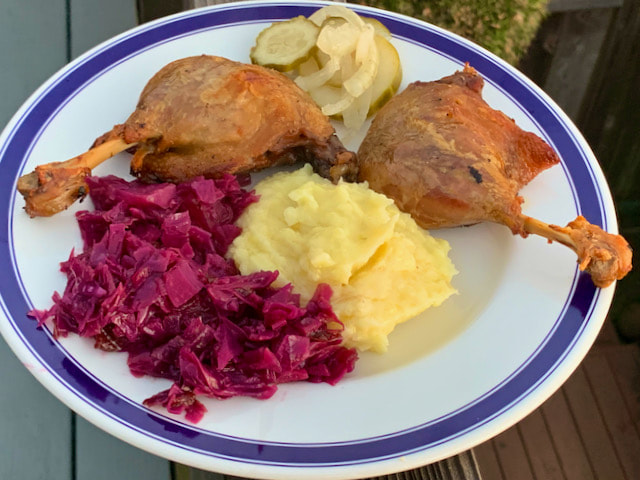
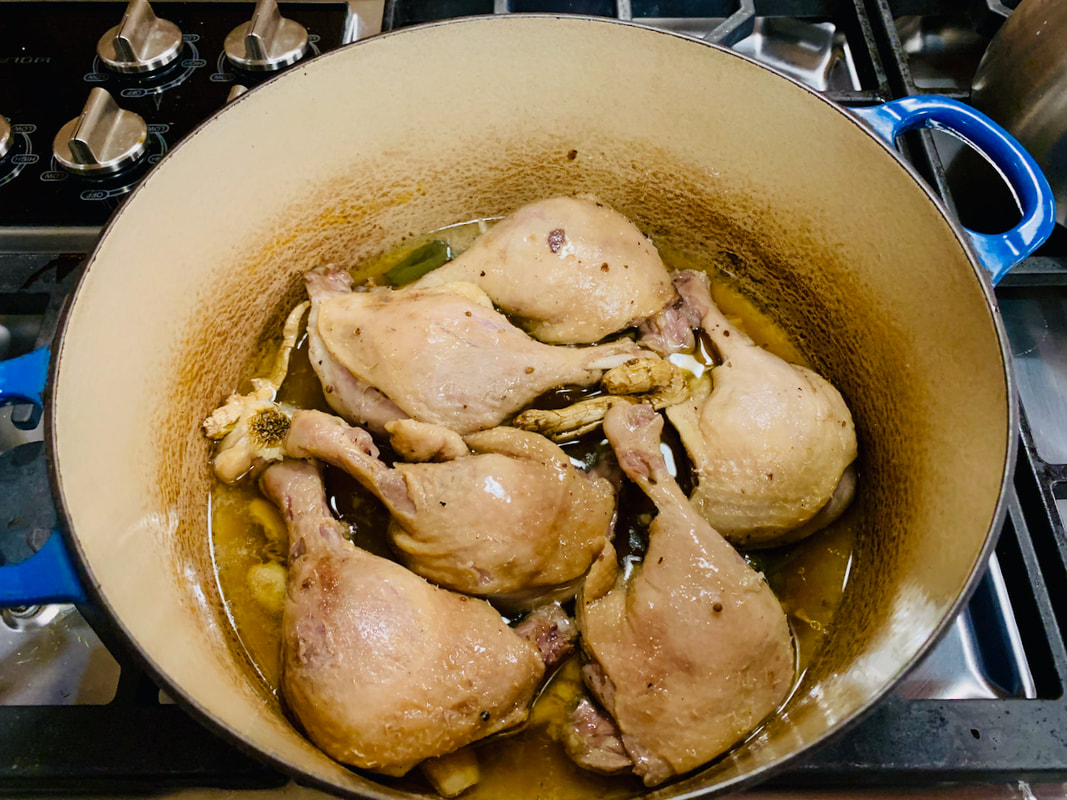
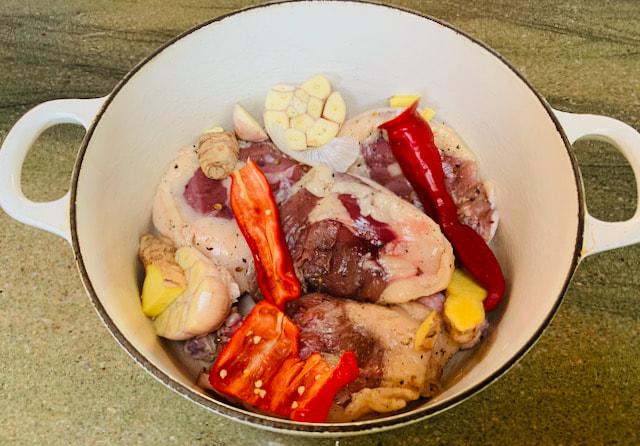
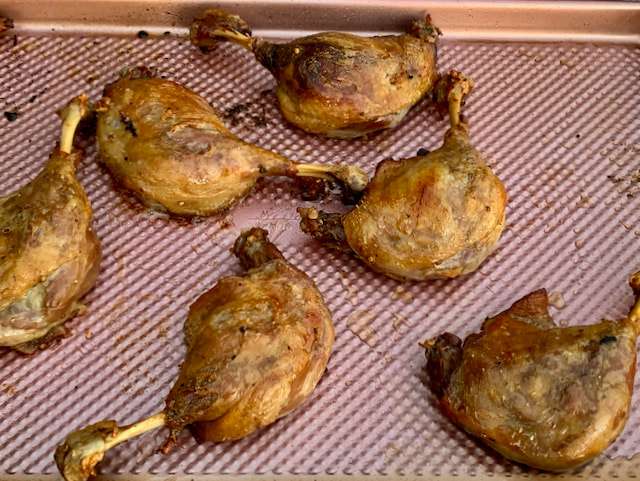
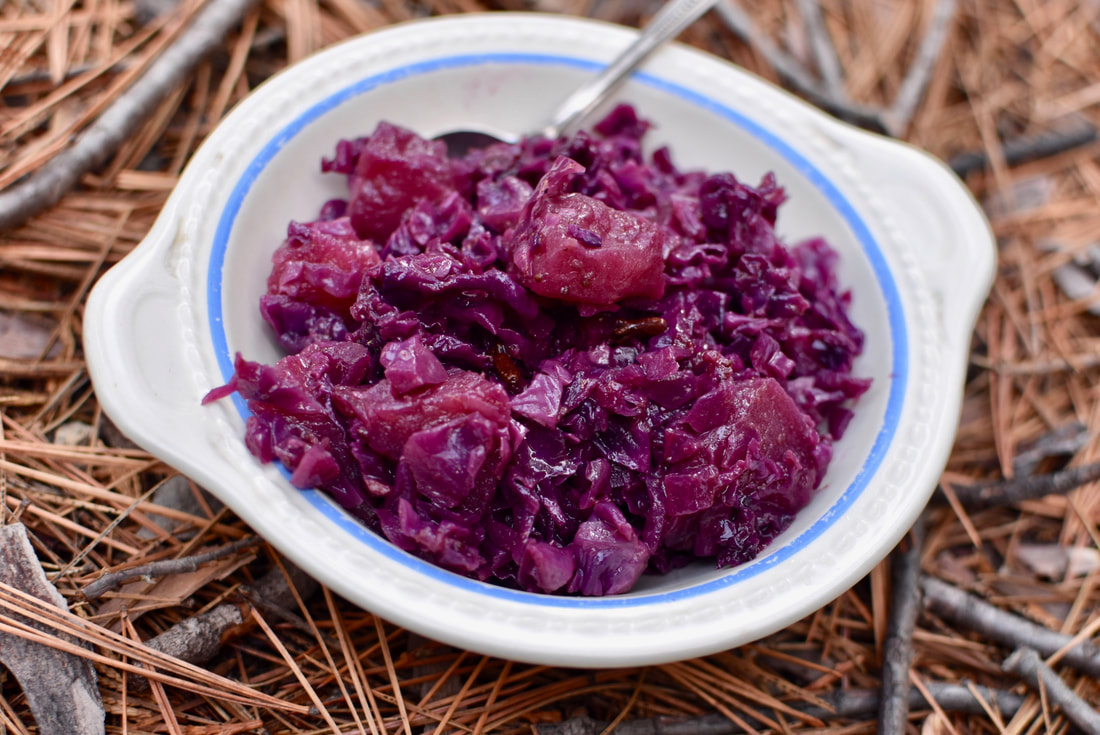
Put the duck legs in a dutch oven with the skin side down. They are going to shrink as they cook. Half the ginger and score the fleshy side. I added ½ seeded jalapeño pepper. Cut the garlic bulb in half and add all your aromatics to the pot. Add ½ cup of water, put the pot with the lid on in a 250˙ degree preheated oven. After one hour check the duck legs. The fat will have started to render. Move the legs around a little bit without breaking the skin. Put them in the oven for another hour. After they have been in the oven for two hours turn the duck legs over skin side up making sure that the meat is still immersed in the fat. Cook for another 2 hours. Take them out of the oven and put the legs on a baking sheet to finish them in a 450 ˙degree preheated oven for about 10-15 minutes until the skin is crispy and has released most of its fat. Make sure you don’t burn them. That would be a shame. I often keep the legs in the fridge and crisp them the next day. In the meantime drain the fat, discard the aromatics . Put the fat in a container. It will last for months in the fridge and will take fried potatoes to another level. I also put it in my red cabbage .
If you decide to make this I hope you enjoy it as much as we did. I enjoyed watching the video.
Guten Appetit!
Click on the link below to watch the video
Recipe from the Test Kitchen of Bon Appetit by Carla Lalli Music
Posted by ©Sunnycovechef.com
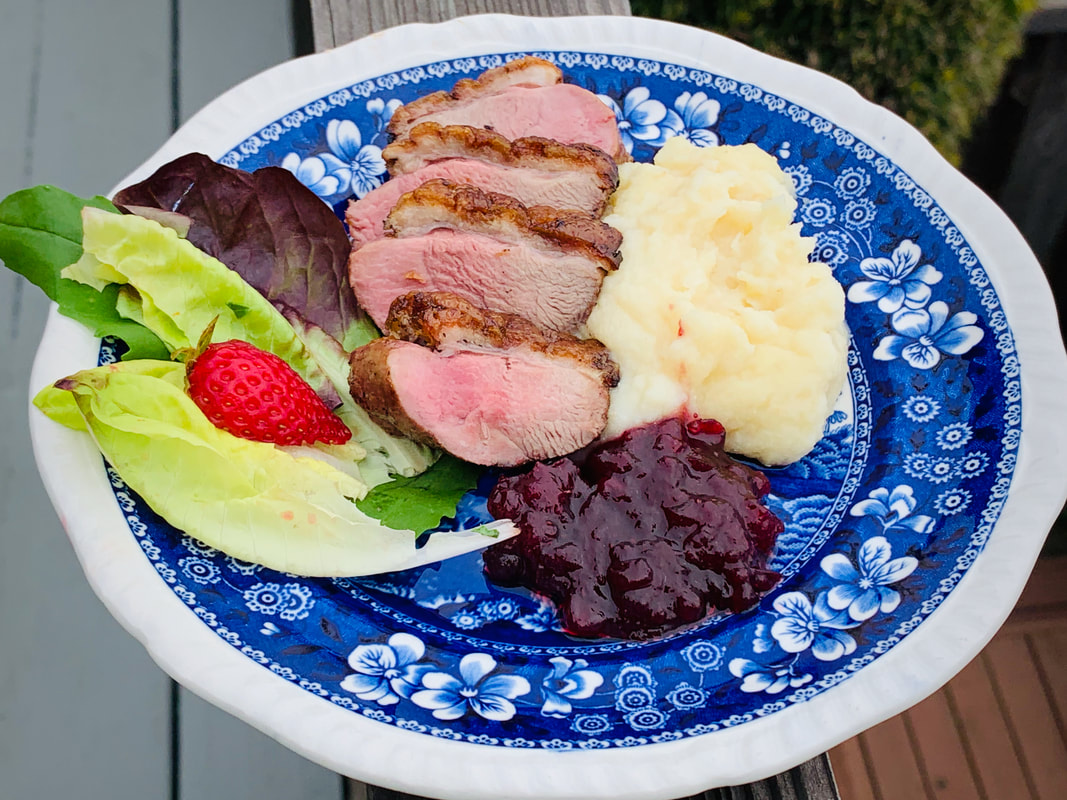
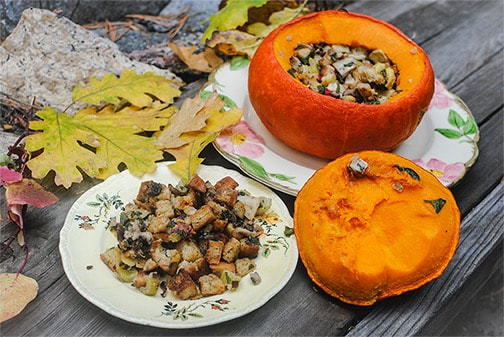
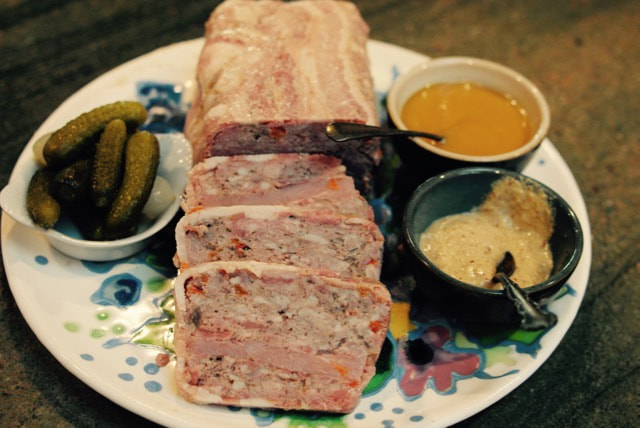
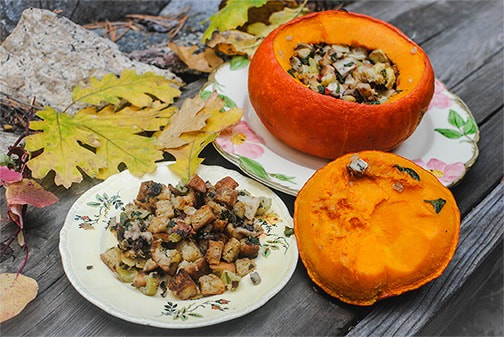 Chestnut shiitake mushroom stuffing  French Country Páte | 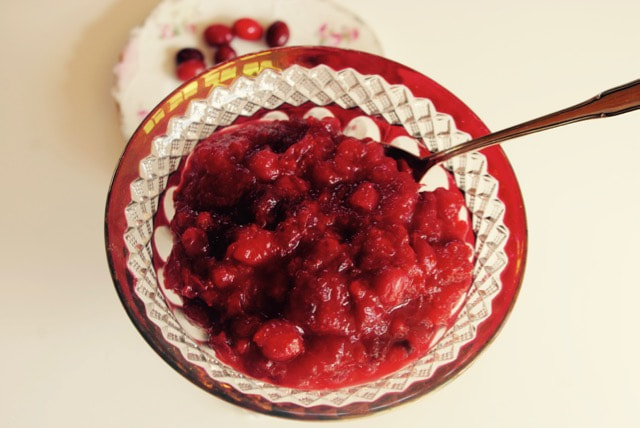 cranberry sauce 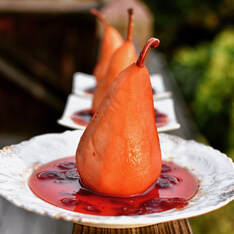 Poached Pears |
 |  |


 |  |
 |  |
From Lüneburg, I went to Berlin for a few days. I invited my 16-year-old grand nephew to join me. We had a very good time together. I showed him the city and my friend, Tara, introduced him to Thai food. He loved it. As the oldest of three children, he was an agreeable and delightful travel companion. I enjoyed his company.
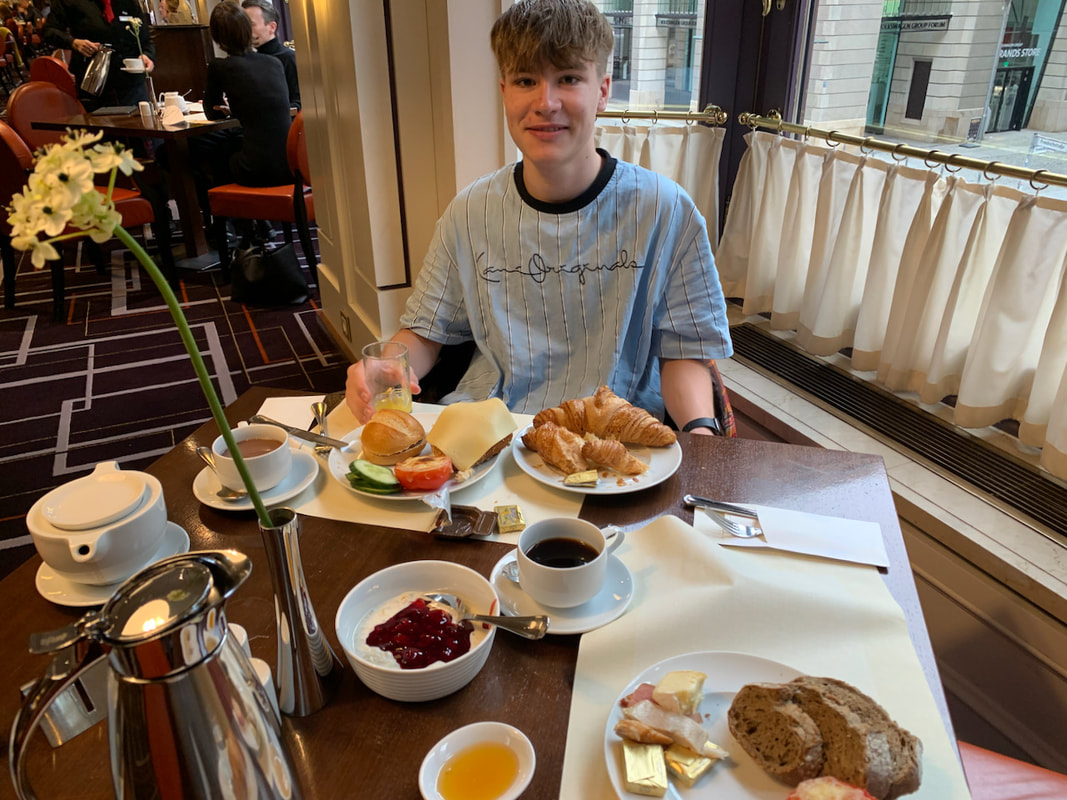 A good German breakfast | 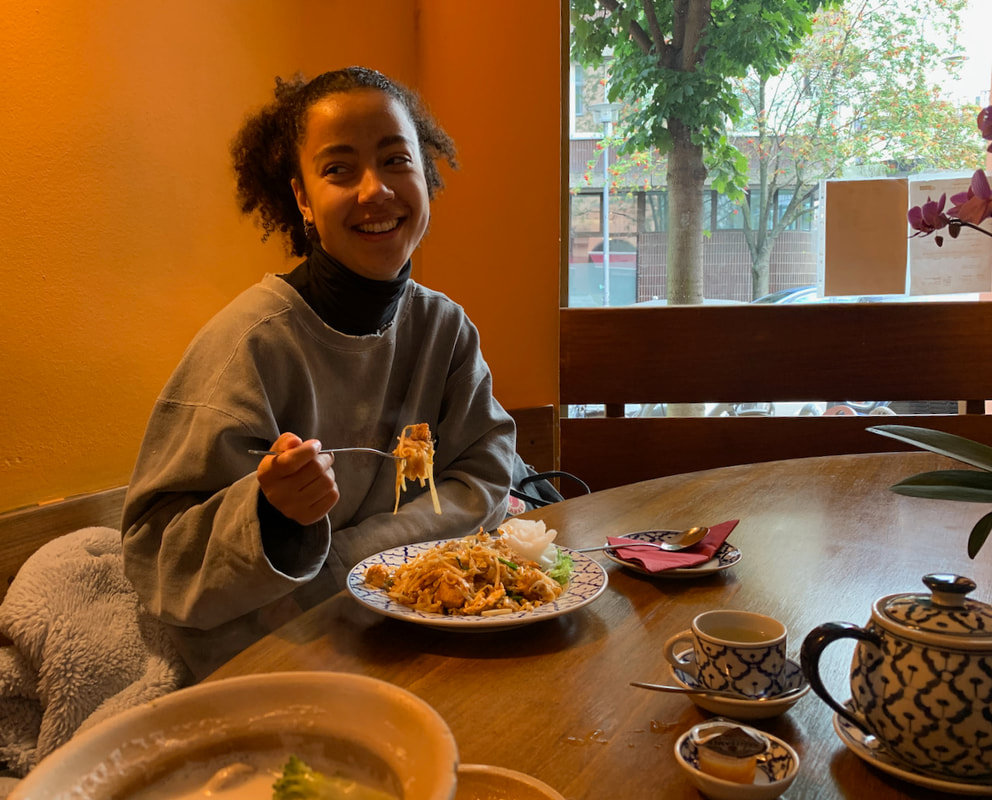 Pad Thai |


As for COVID, Germany seems to have gotten it together after a very rocky start and no vaccines in the beginning. Everyone is being tracked; you have to show an app or in my case (as a foreigner) a vaccination card to enter a restaurant, theater, hotel and more. For two dollars, you can buy a self-test which is used frequently. I tested myself for the new baby and when I returned from Berlin. Just because I am adventurous doesn’t mean I should endanger my family or anybody else. I never felt unsafe. Everybody wears a medical mask inside and in public places. To re-enter the US, I had to take a PCR test 72 hours before my departure flight, which I did at a local train station. A young, extremely helpful person person downloaded the appropriate app on my phone and I was all set. United has a travel-ready site where I downloaded all the needed information. All I had to do at the airport was to check in my luggage and show my passport. It's important to prepare and do your homework in advance.

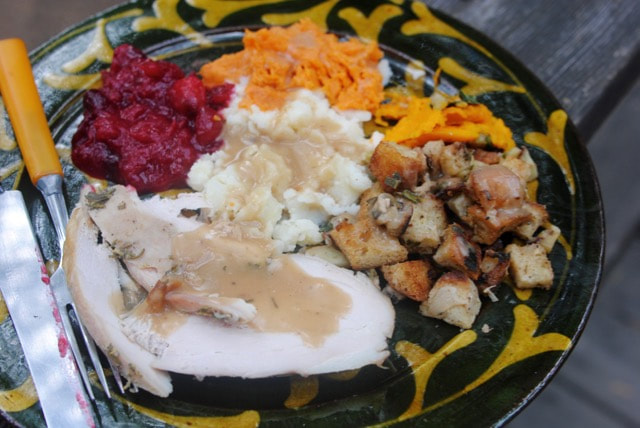  |   |
Here is the link for the recipes.
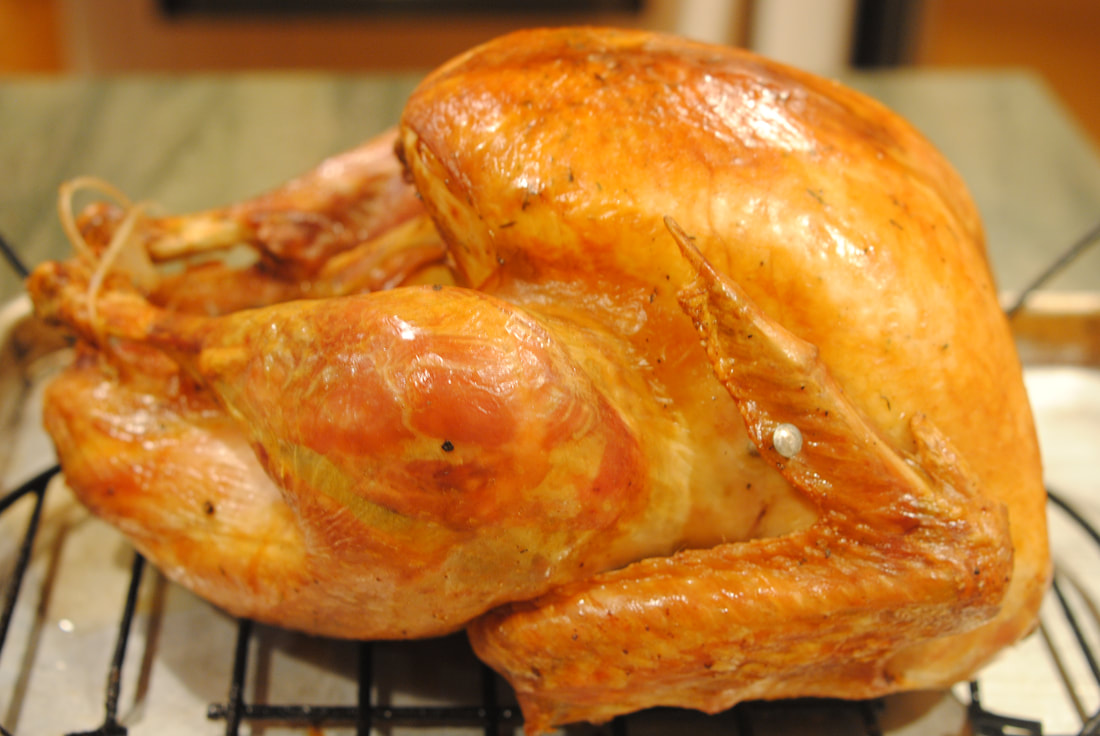
I wish you all a happy and peaceful Thanksgiving , sharing good food with family and friends.
 The family farm |  |
 |  |
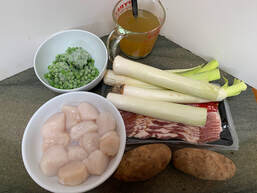  |   |
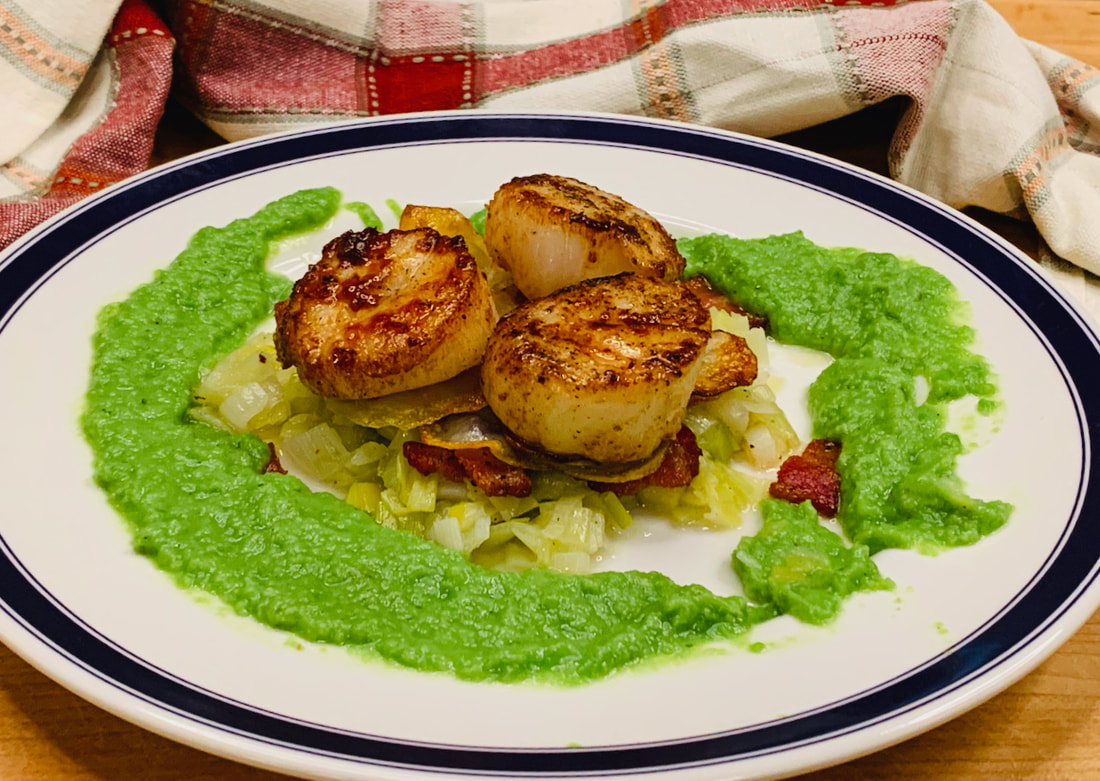
The Recipe For Scallops on Potato GALETTES with leeks and peas
Pea Purée
1 ½ cups 7oz. 200g frozen peas thawed
½-1 cup vegetable broth (the amount depends on the desired consistency of your puree)
Salt and pepper to taste
Scallops and Leeks
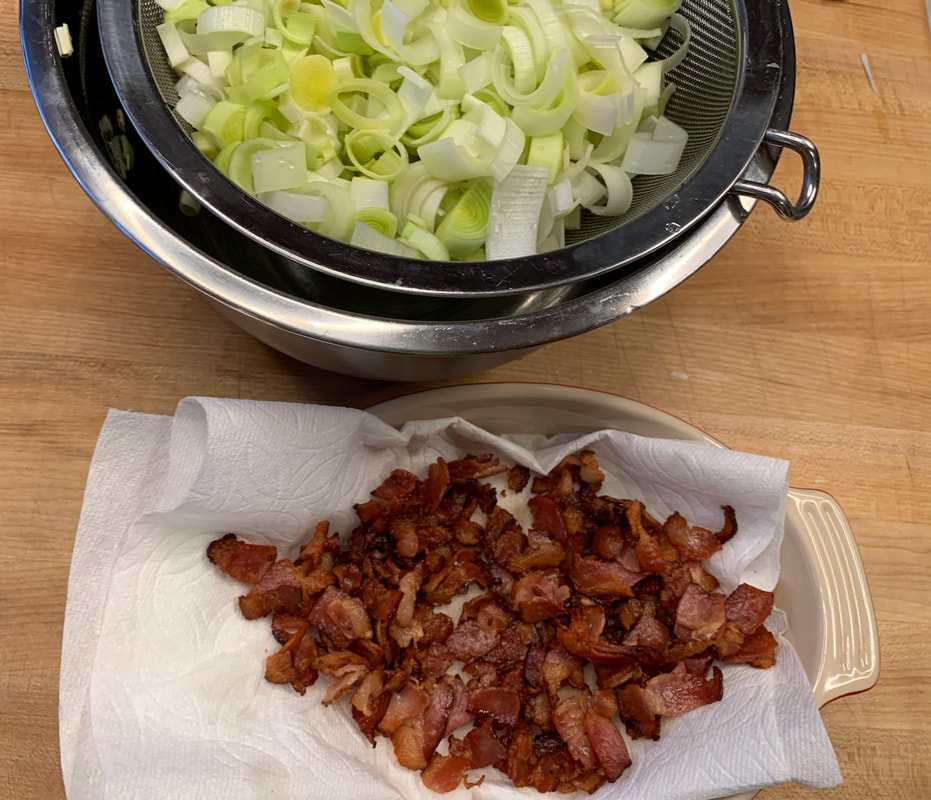
6 bacon slices of hickory smoked bacon
3 TBS butter, divided
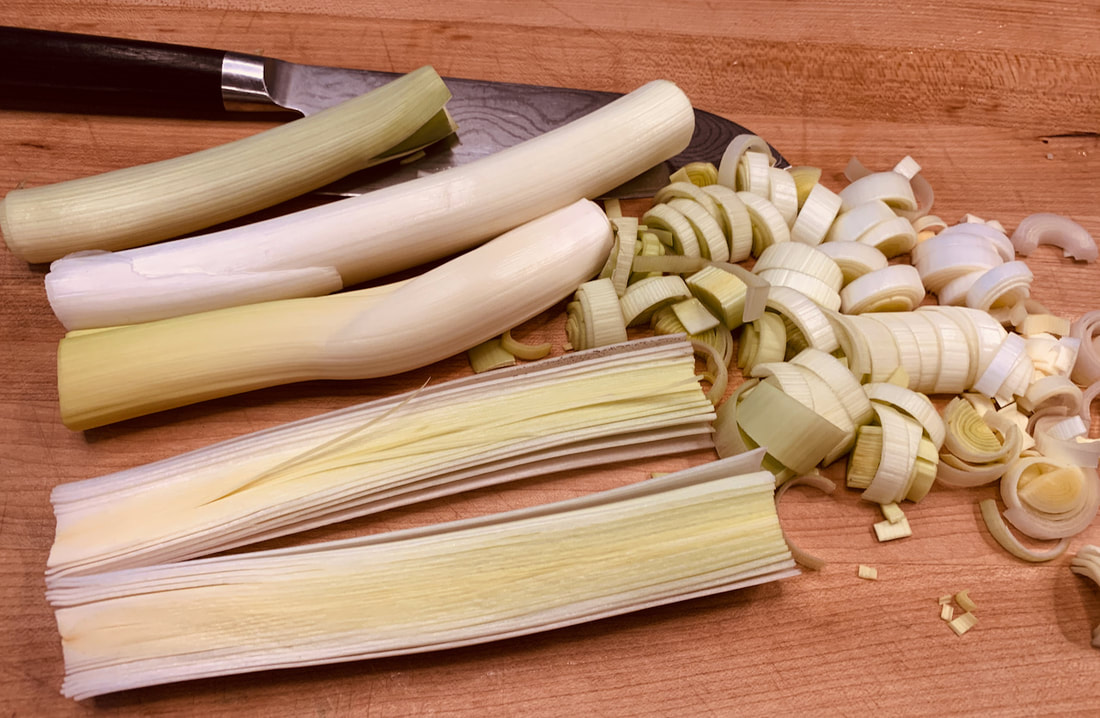
4 leeks (about 4 cups)
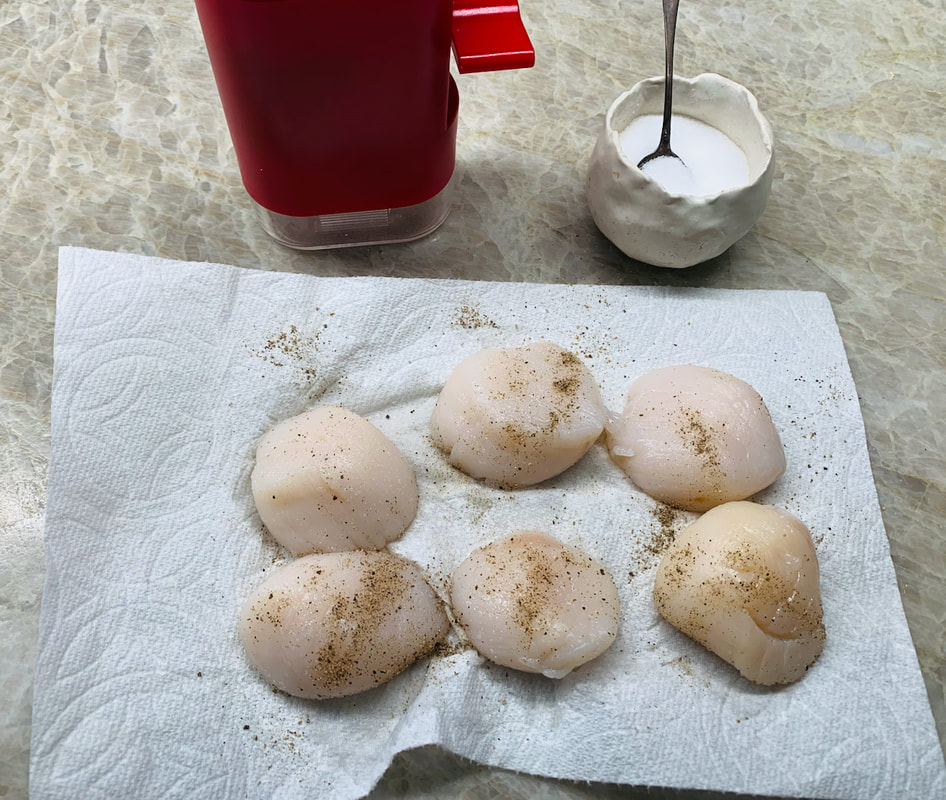
16 large sea scallops
1 TBS olive oil
Salt and pepper
Potato Galettes
5 TBS olive oil or more
2 8-ounce potatoes
Directions:
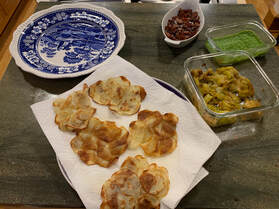
This dish needs to be timed correctly. The leeks and pea purée can be made ahead of time but the scallops and potato galettes need to be done as close to dinner as possible. Warm the serving plates in the oven, and when it is time to serve, plate the food. Put the leeks on the bottom of the dish, add one or two potato galettes, and top with four scallops. Add the juices from the frying pan over the scallops. Pour the pea purée around the food and sprinkle the whole thing with bacon. It makes a stunning presentation.
Pea Purée
Purée the defrosted peas (10 ounces) with ½ to 1 cup of broth until smooth. Adjust the pea purée to your taste. I like mine smooth and a little runny. I used my Vita Mix to get a smooth consistency. Season with salt and pepper. This can be made one day ahead, but cover and refrigerate it. Reheat it and before serving, and thin it with broth if the purée is too thick.
Scallops and Leeks
Heat the oven to 200 degrees Fahrenheit to keep the food warm.
Cut the bacon into ½-inch slices and sauté in a heavy large skillet over medium heat until crisp. Drain on a paper towel and keep warm in the oven.
Use only the white part of the leeks. I freeze the green part to use in making broth. If the leek is large, quarter the white part lengthwise and then slice it into small slices. Wash them in a bowl of water and drain. You want about 4 cups of leeks.
Melt 2 TBS of butter in a large frying pan, add the leeks and sauté until they they begin to soften, about 3 minutes. Add ½ cup of water, cover, and simmer until the leeks are very tender but not brown. Cook until the liquid has evaporated, stirring often, about 8 minutes. Put the leeks in an oven-proof dish and keep them warm in the oven.
Dry the scallops on paper towels until there is no moisture left. You might have to repeat this. Put the dry scallops on paper towels and season them on all sides with salt and freshly ground pepper. Melt remaining 1 TBS of butter with the oil in a large large frying pan over high heat until hot. Add scallops one at a time and leave them alone for about 2 minutes. This is how they get a nice sear. Turn them over for a minute or so and remove them to a plate. You want the scallops just opaque in the center. Deglaze the frying pan with a little bit of white wine that your husband has opened and served you in a glass. Pour the juices that have accumulated on the plate with the scallops into the frying pan with the sauce. I cook the scallops last, when I am finished with my potato galettes.
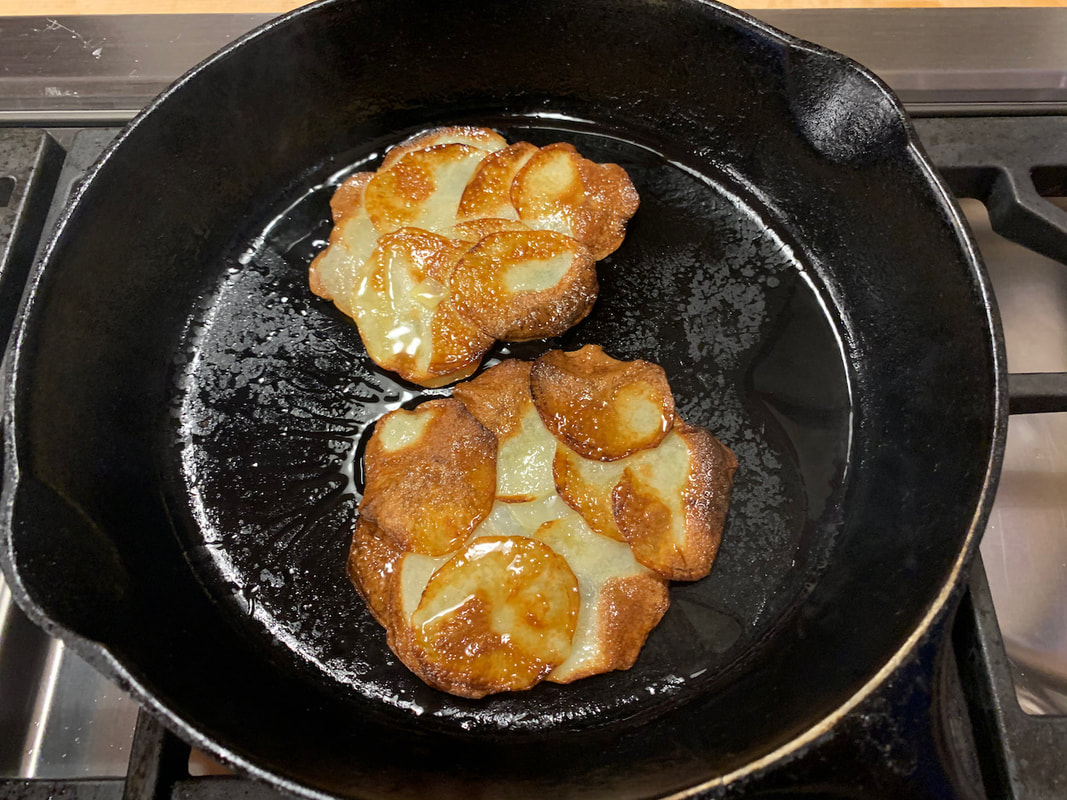
Potato Galettes
I use the same frying pan for the bacon, leeks and scallops. I wipe the pan clean in between with paper towels. For the potato galettes, I use my cast iron frying pan. Peel the potatoes and slice them into 1/16-inch-thick rounds. I used my mandoline for this. The potatoes will discolor quickly, so I prepare them as soon as they are peeled. Heat a little bit of oil in the frying pan and carefully arrange potato slices in a round circle in skillet, overlapping slightly and forming a 3 ½-4 inch circle. I made three galettes at a time. Cook until each galette is golden brown on the bottom, about 3-4 minutes. Turn the galettes over with a wide spatula (rearrange if they fall apart) and cook until potatoes are tender. Keep the galettes warm in the oven. They are best eaten right away. If you keep them warm for a long time, they will become soft and soggy.
Guten Appetit!
recipe author unknown
adopted by©Sunnycovechef.com
 Black Forest Chocolate Mouse |  Poached Pears | Almond Pear Tart |


  |  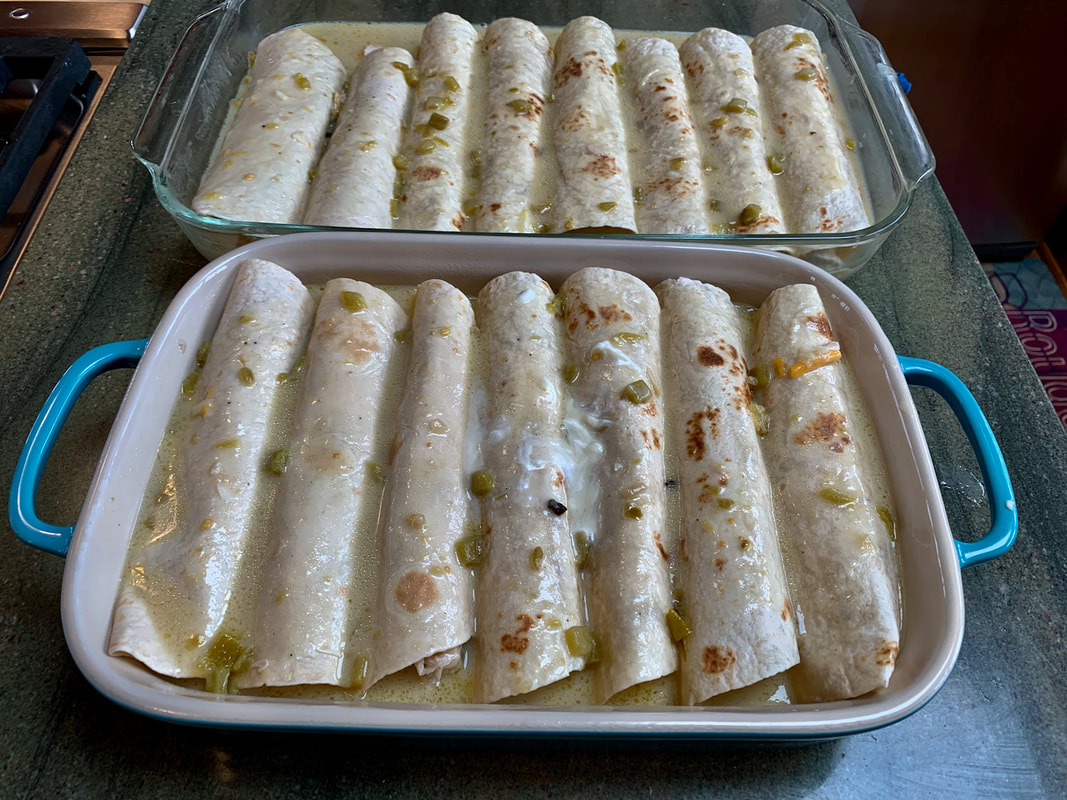 |
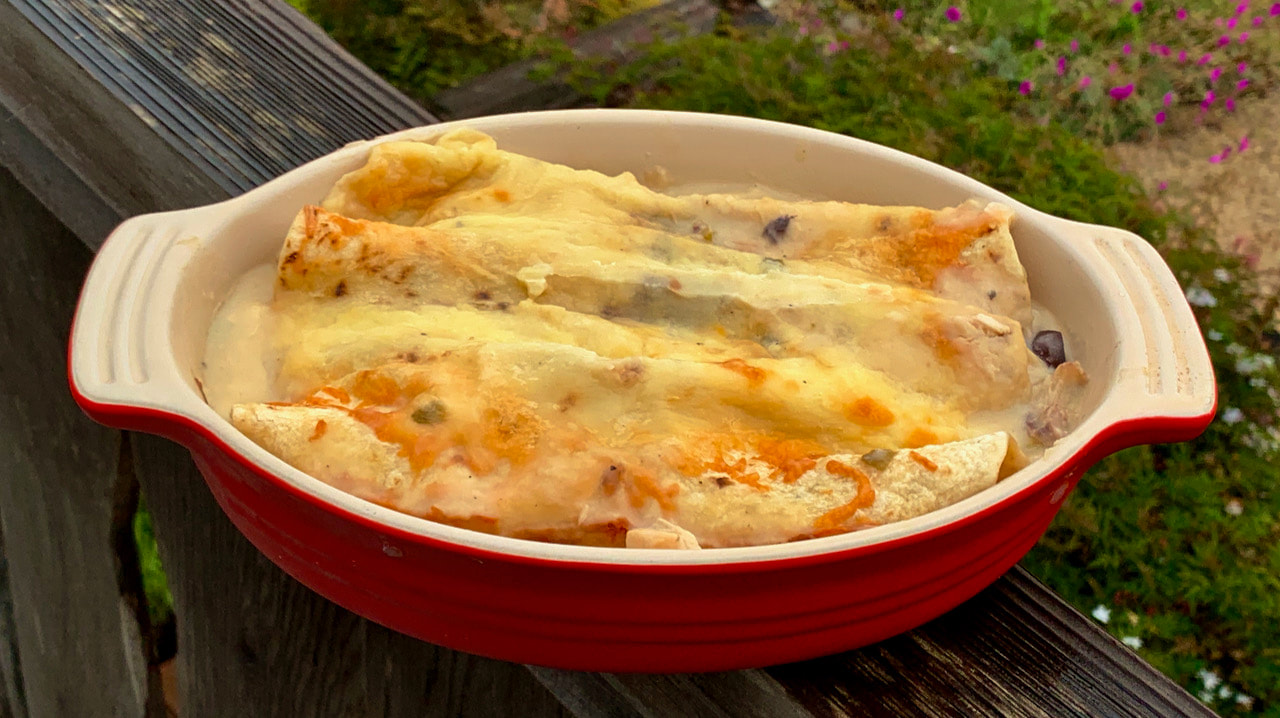
You will need one large or two smaller baking pans. I made 15 enchiladas which will serve 6-8 people.
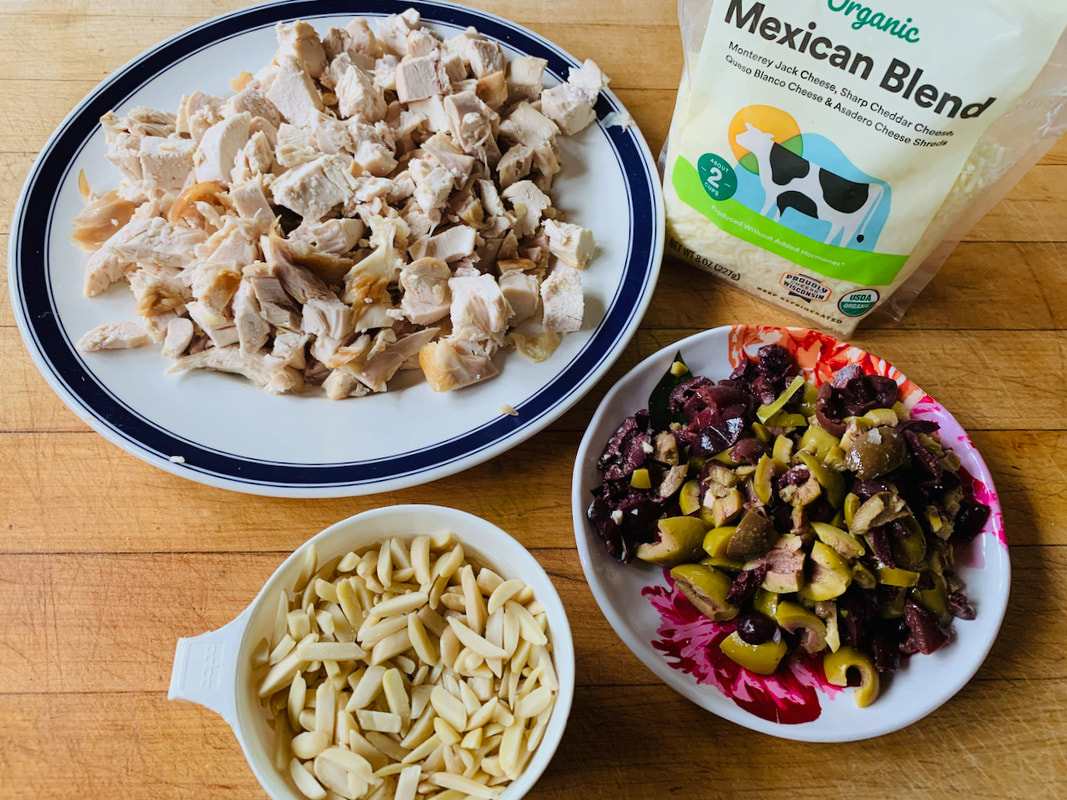
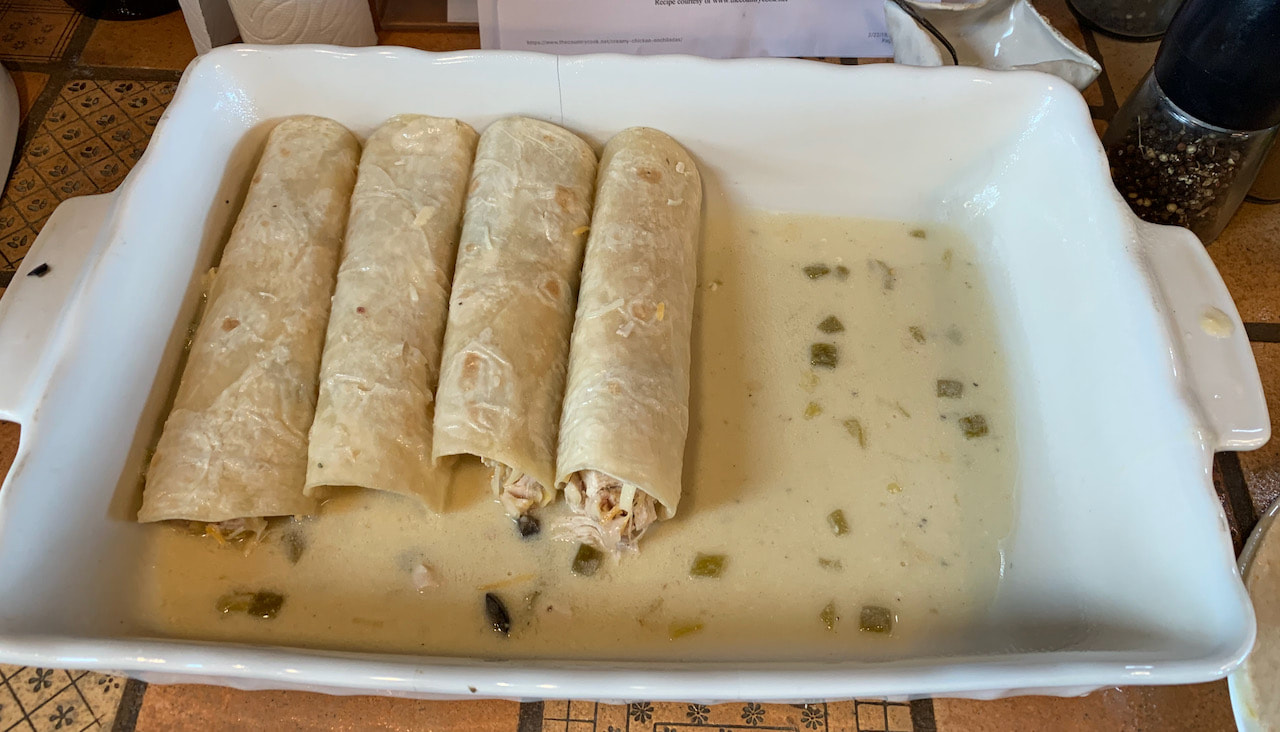
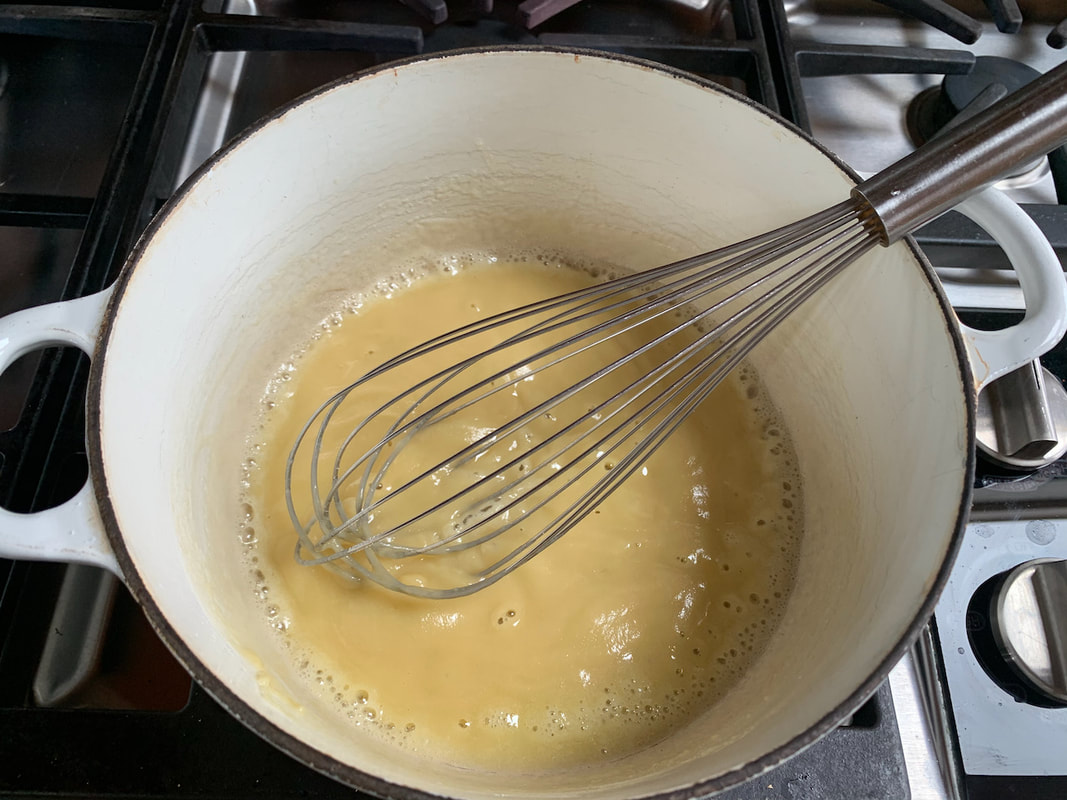
| Ingredients: 15 flour tortillas (taco size) 8 ounces shredded mozzarella cheese 12 ounces shredded Mexican blend cheese The Sauce 7 TBS butter 9 TBS flour 6 cups chicken broth 1 (4-ounce) can diced chilis ½ cup salsa verde ½ cup crème fraîche ½ cup half and half a pinch of chipotle peppers salt and pepper to taste The Filling 6-7 cups cooked, diced chicken 1 cup slivered almonds 1 (6 ounces ) Kalamata olives, chopped 1 cup shredded mozzarella ¾ cup of the sauce salt and pepper to taste  | Directions: The Sauce Melt the butter over medium heat, stir in the flour and let it cook and thicken for one or two minutes (don’t let it brown or burn). Add the chicken broth (one cup at a time) and whisk it each time until it is smooth. You don’t want lumps in your sauce. Cook the sauce for 6-7 minutes until it thickens slightly. Add the can of chilis and salsa. Add the crème fraîche and the half and half and whip the mixture until smooth. Sometimes I add more crème fraîche to make the sauce thicker. The sauce can be made a day ahead, but heat it up before using it. The Filling Mix the chicken, almonds, shredded mozzarella, and olives in a large bowl. Add the sauce and season it with salt, pepper and a pinch of dried chipotle peppers. The Enchiladas Preheat the oven to 350˙Fahrenheit I had to use two dishes to bake the enchiladas: 1 10” x15” and one 1 8”x 11“ dish Spray both dishes with a nonstick cooking spray. Add about ½ cup of sauce to the bottom of the pan. Place a large spoonful of filling on each tortilla. Roll it up and put them in a dish seam-side down. Once all the enchiladas are cuddling together, pour the sauce over them. The sauce should come up to about ⅓ of the pan. Sprinkle mozzarella and Mexican blend cheeses over the enchiladas. Cover the dishes with foil and bake for about 20 minutes. Remove the foil and bake an additional 20 minutes. The sauce should be bubbling and the cheese should be slightly browned. The Garnish sour cream or crème fraîche cilantro your favorite salsa sliced avocados or guacamole Guten Appetit! Recipe by ©Sunnycovechef.com |
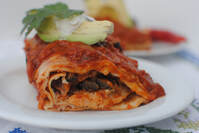 Turkey Enchiladas in Red Sauce | 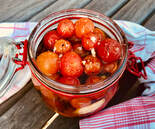 Slow Roasted Cherry Tomatoes | 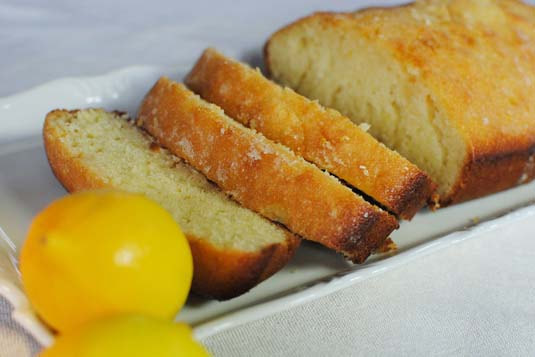 Lemon Tea Bread |
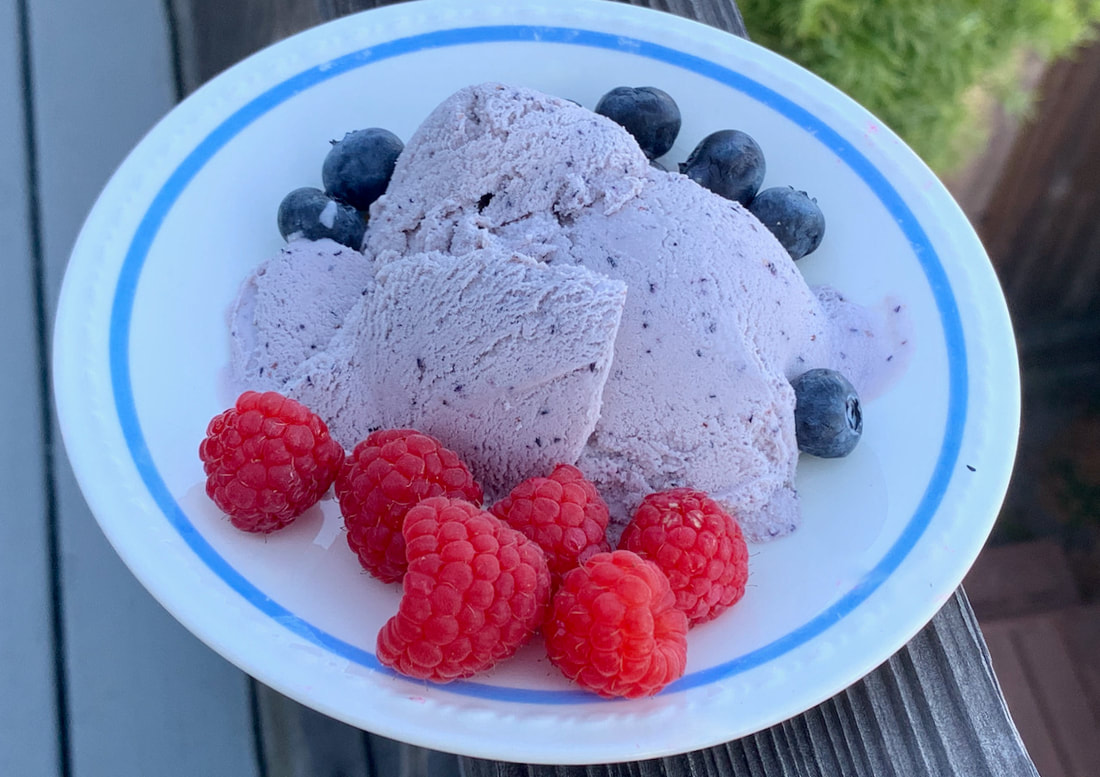


You will need an ice cream maker and food processor or mixer to make this recipe.
It makes about 8 servings. It is best when it comes out of the ice cream maker or is frozen for only a few hours.
| Ingredients: ⅔ cup fresh blackberries ⅔ cup fresh blueberries ⅔ cup fresh raspberries ⅓ cup sugar 1 tsp lemon zest 1 tsp vanilla 1 cup cream 1 cup half and half ½ cup milk (I used 2%) 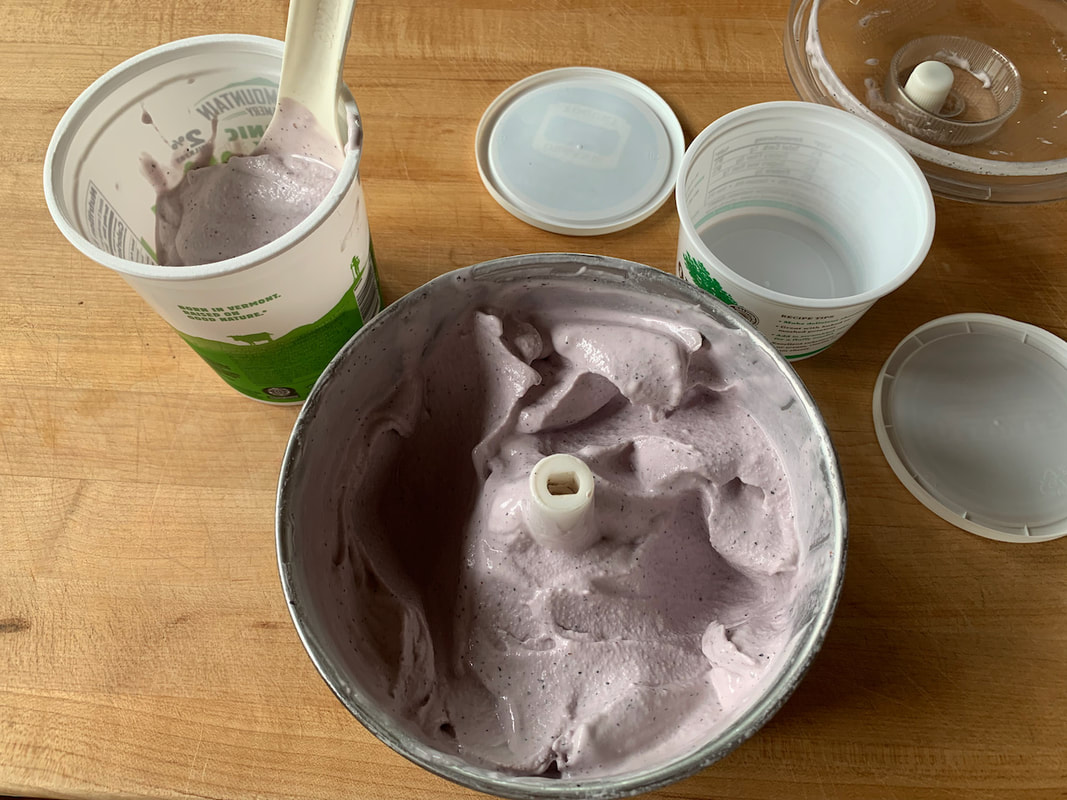 | Directions: Purée the berries, sugar, and lemon zest in a mixer or food processor. Let it stand or 10 minutes. Strain the mixture through a fine-mesh sieve to remove all the seeds. Put the purée back into the mixer or food processor.Add the rest of the ingredients and purée until is mixed well. Pour the mixture into an ice cream maker and freeze according to the manufacture’s directions. My old cranky ice cream maker needed 25 minutes. Transfer the ice cream to an airtight container and freeze until firm. Take the ice cream out of the freezer and let it sit for a few minutes to soften before serving. Guten Appetit! Recipe from Allrecipes Magazine Adapted by©Sunnycovechef.com |
click on the photo to link to the post
 Fregolotto , an Italian shortbread tart | 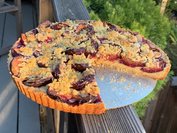 A German plum tart called Zwetschgen Kuchen | 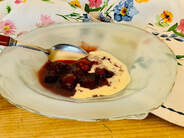 Rote Grütze, a German fruit compote with vanilla sauce |
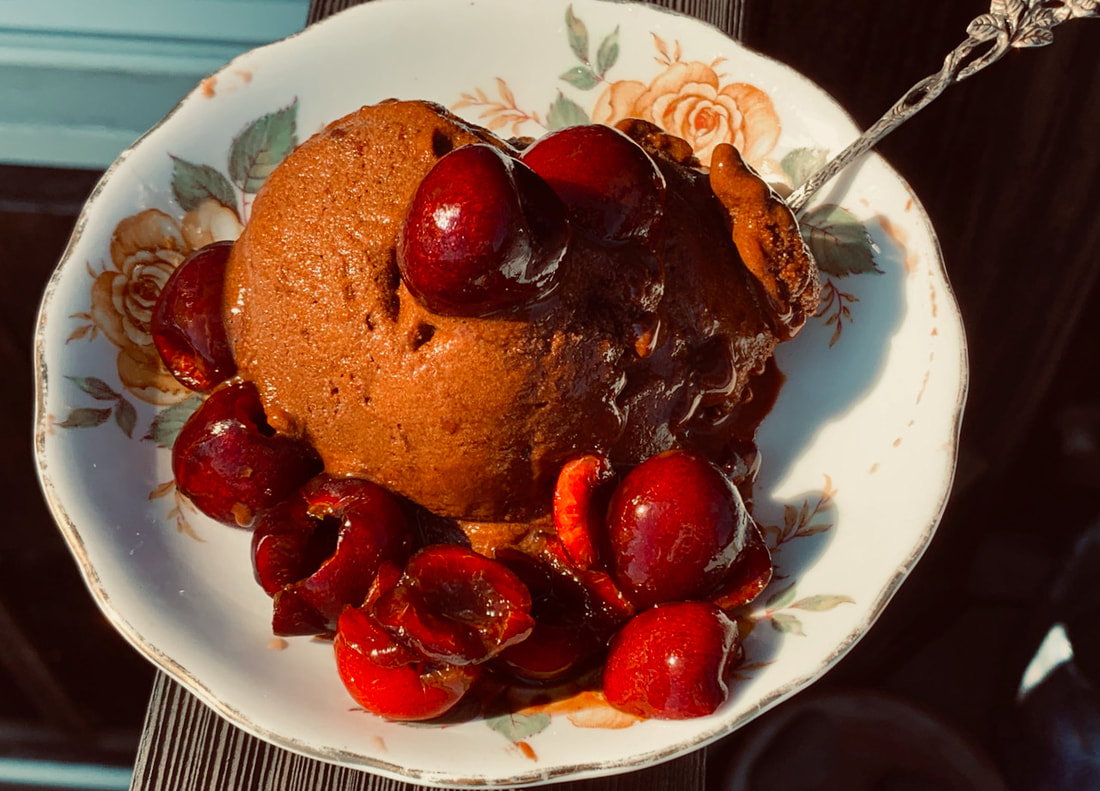
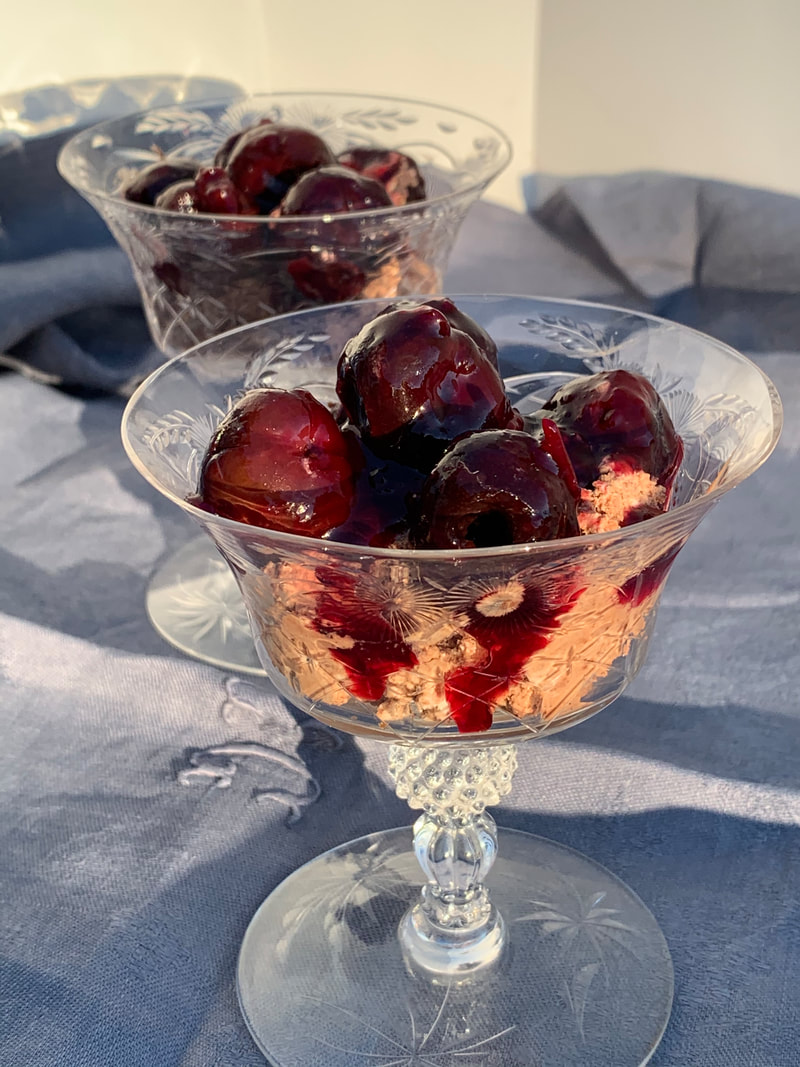
You will get about a pint of sorbet, enough for 6 smallish servings.
You will need an ice cream maker and a mixer
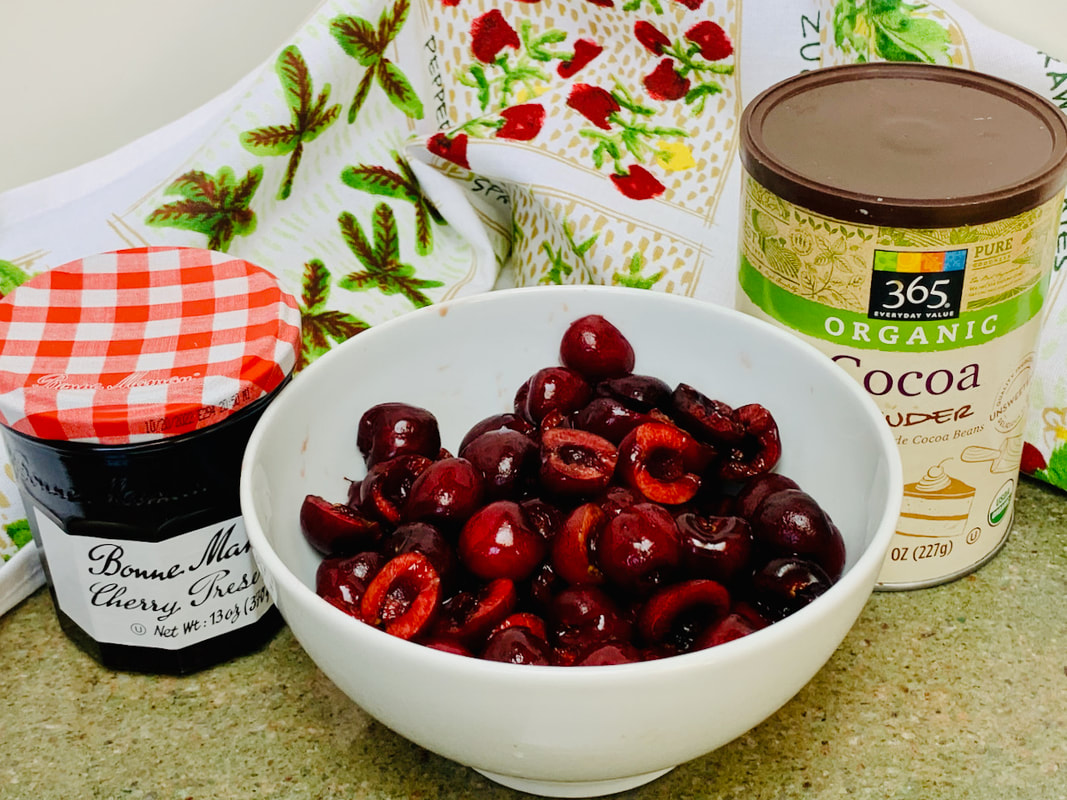
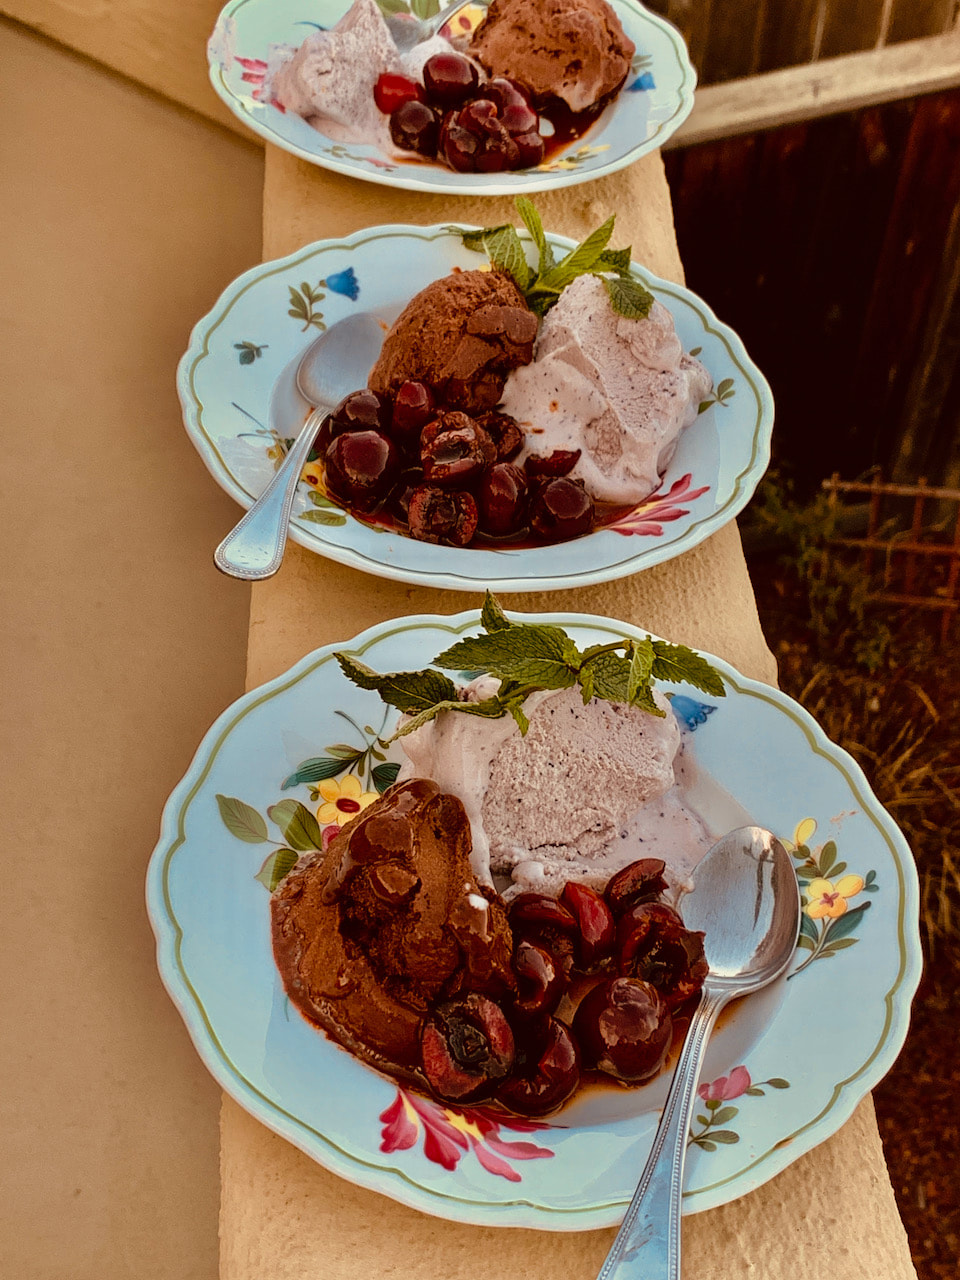
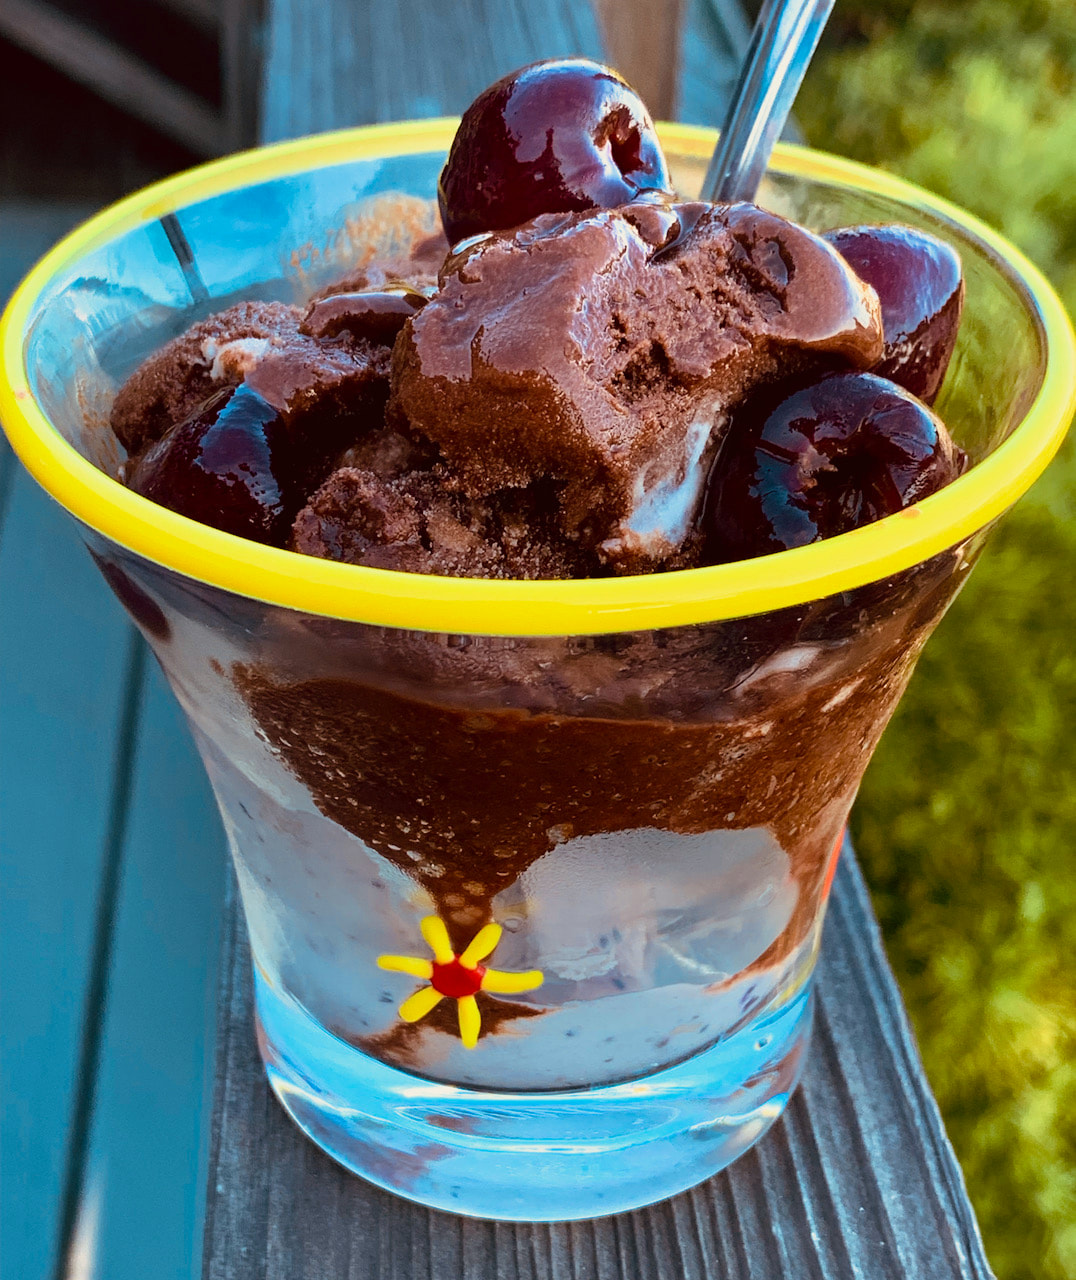
| Ingredients: Sorbet: ¾ cup red cherry jam ½ cup unsweetened Dutch cocoa ¼ cup of sugar a pinch of salt 2 cups water Compote: a pound of pitted cherries ¼ cup sugar 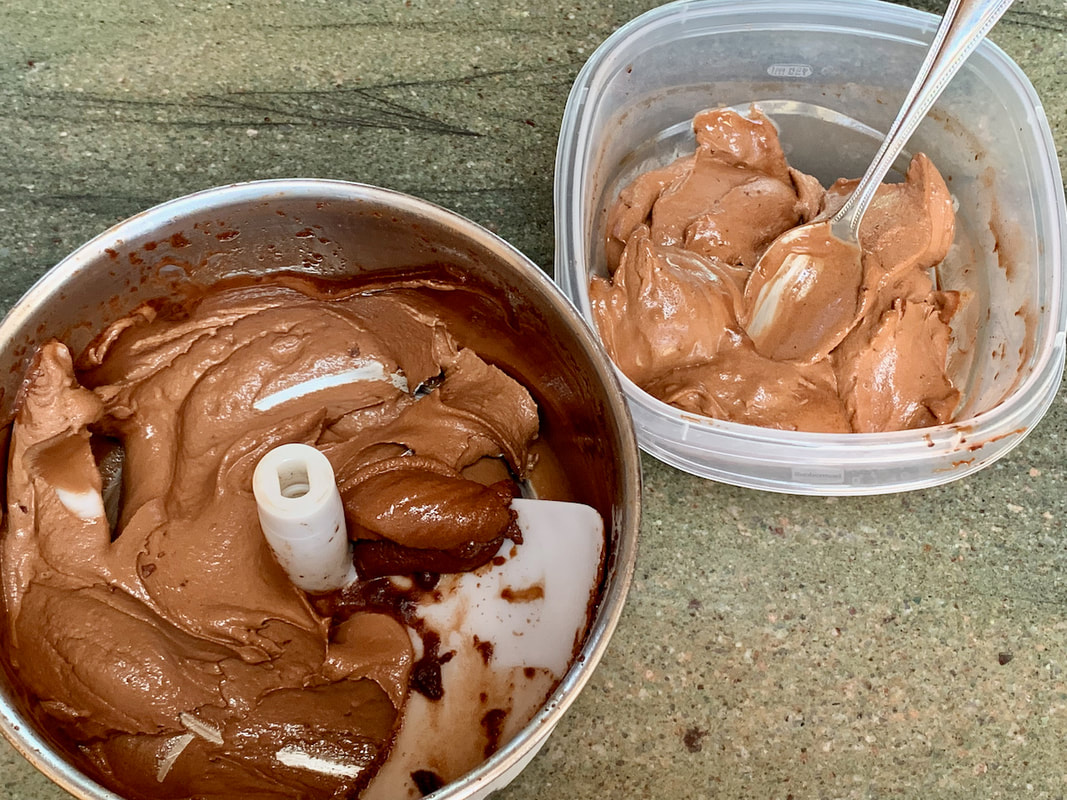 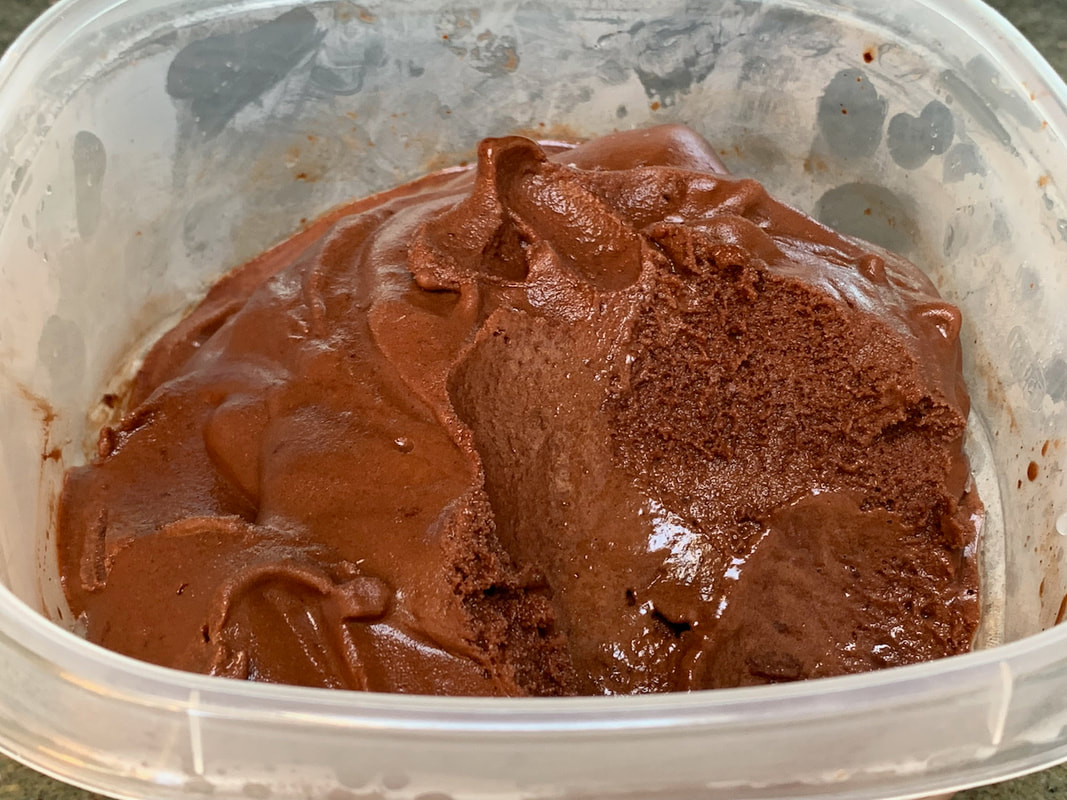 | Directions: Sorbet: Put the jam, cocoa, pinch of salt, and sugar in a heavy saucepan and mix with a whisk. Gradually add two cups water, stirring constantly. Bring the mixture to a boil and continue to stir with a whisk. Put the mixture in a bowl, cool to room temperature, cover and chill overnight. This is important as the flavors need to develop. The next day, pour the mixture in your ice cream maker and freeze according to manufacturer’s instructions. Mine took 40 minutes, but I have a very old and cranky ice cream maker. Spoon the sorbet into a container and freeze overnight. Compote: For the cherry compote, sprinkle some sugar over the pitted cherries and let it stand for a few hours at room temperature. When I made the sorbet the second time, I partially defrosted about a cup of pitted cherries, chopped them into small pieces and added them to the sorbet five minutes before it was finished in the ice cream maker. Guten Appetit! Recipe adapted from Cooking Light ©sunnycovechef.com |
 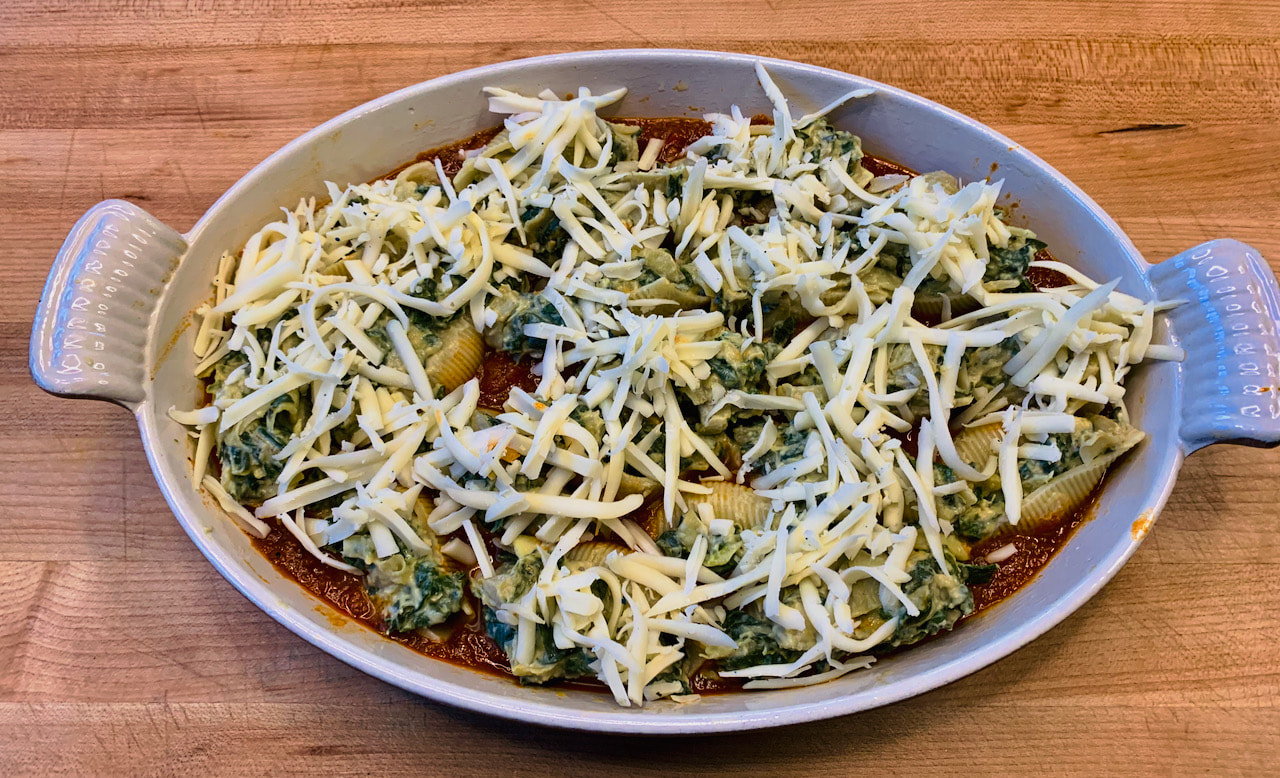 |   |
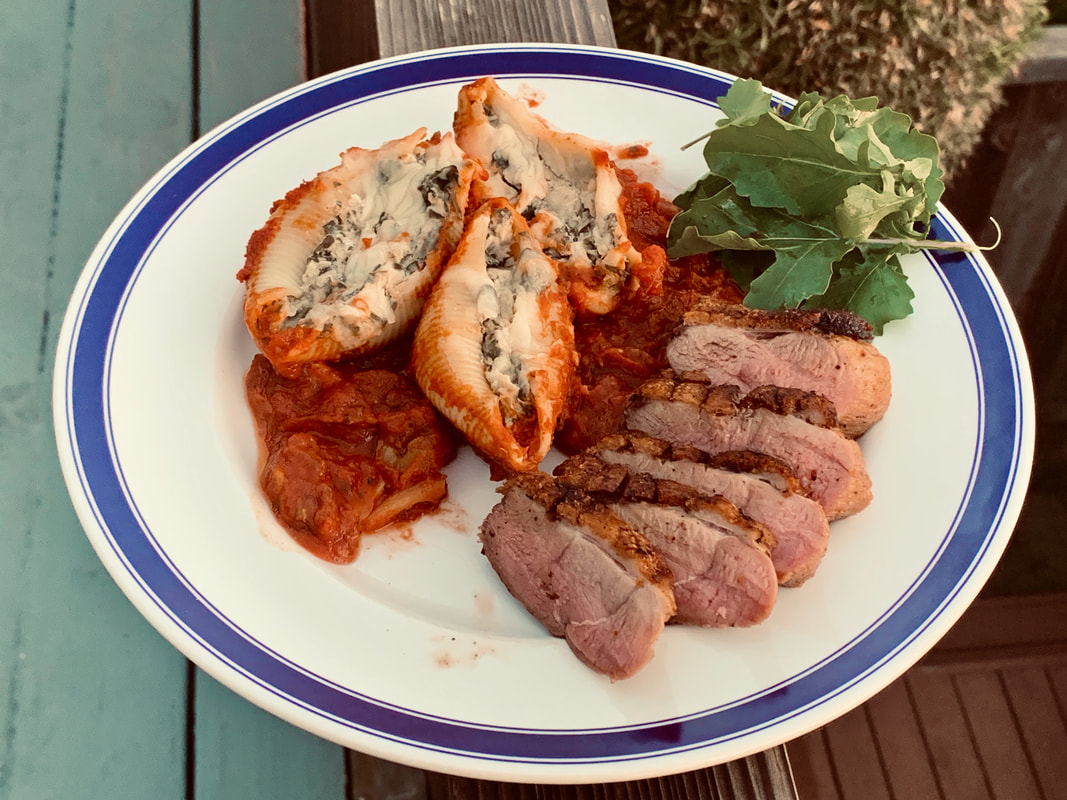
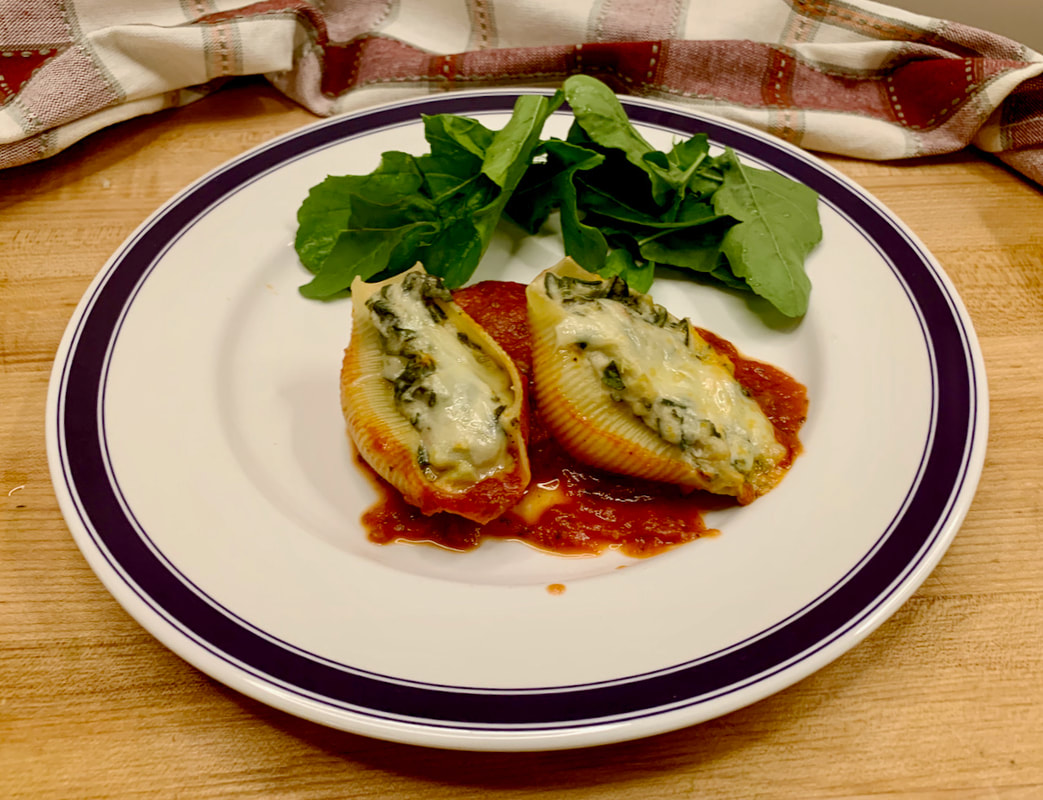
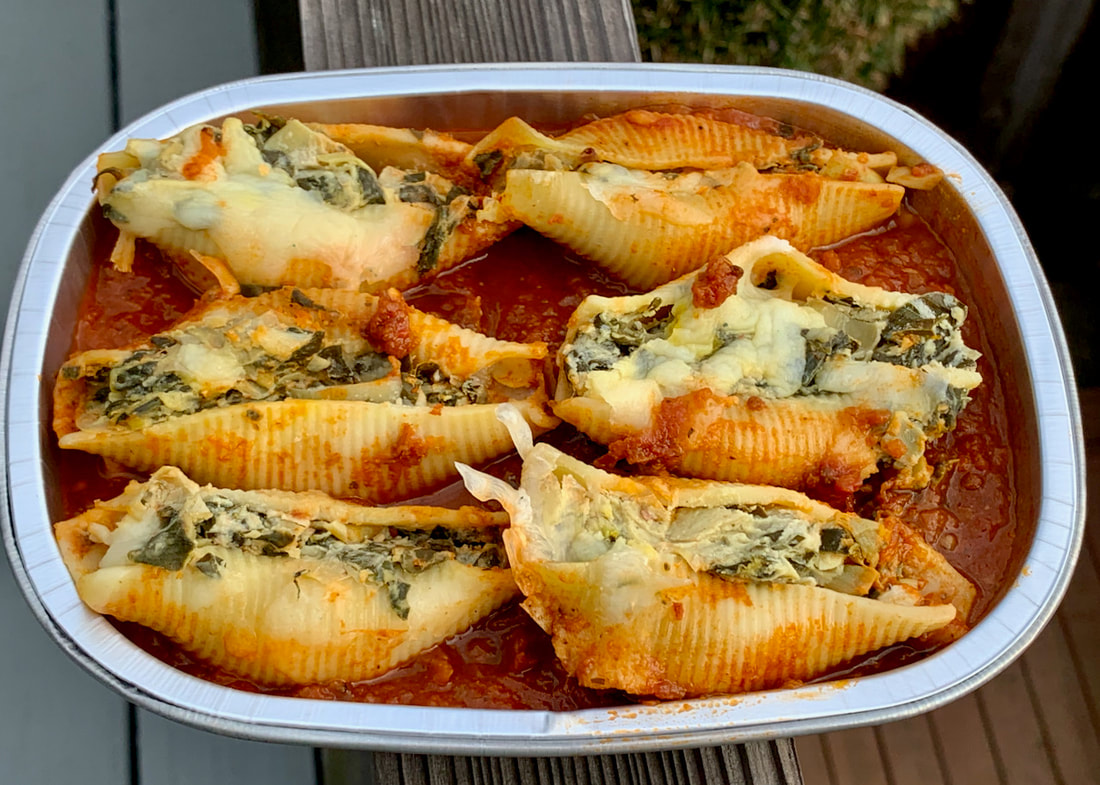
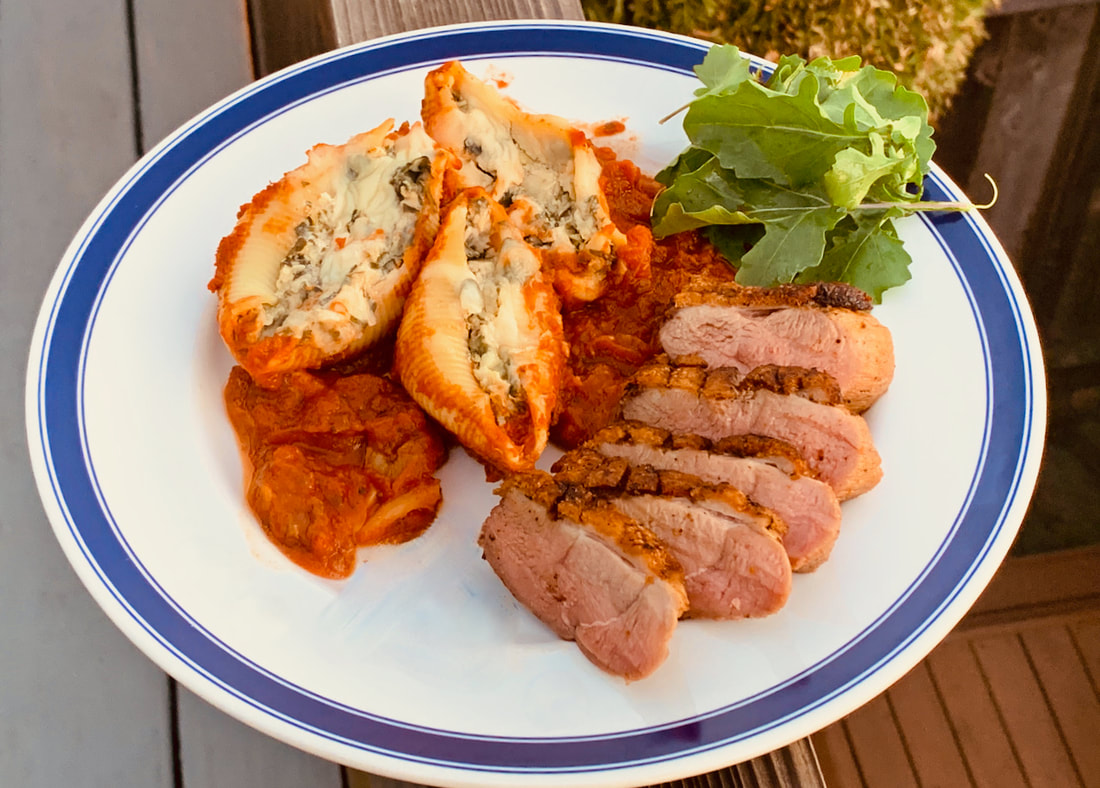
recipe for Jumbo shells stuffed with Swiss chard and Artichokes
This recipe makes about 8 servings
Use a 13 x 9-inch baking dish or two smaller ones
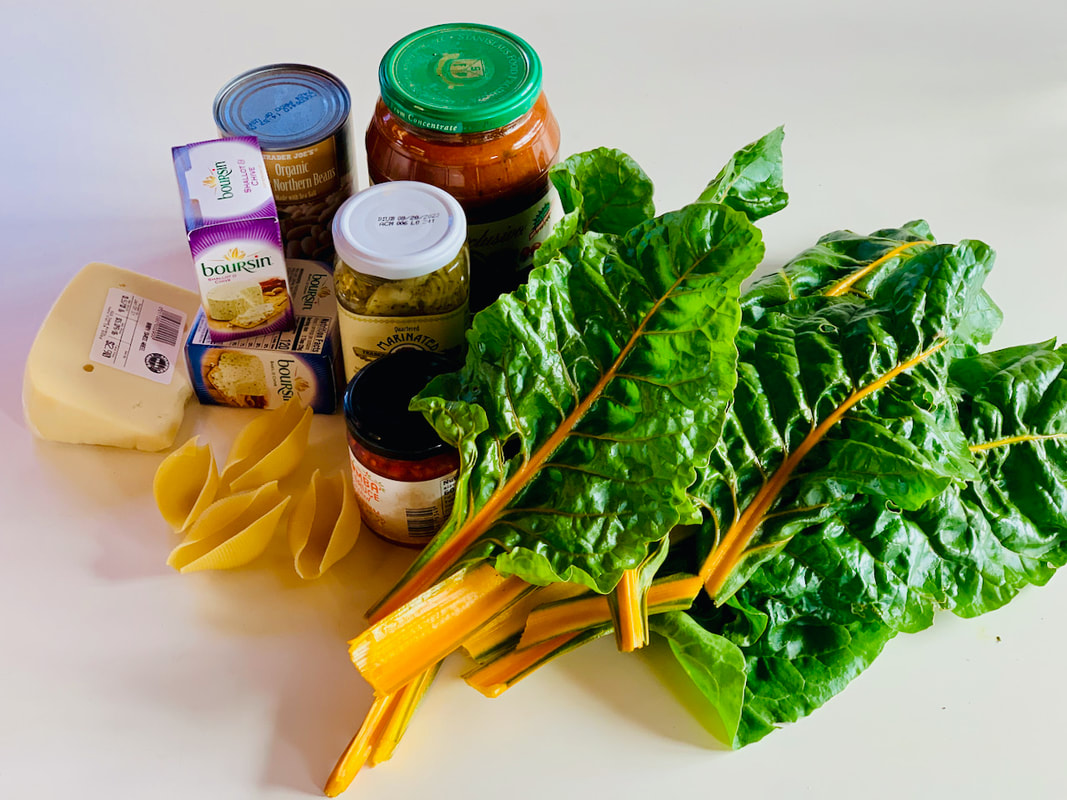
Ingredients :
16-20 uncooked jumbo shells (about 7 ounces)
2 cups or more of marinara sauce
1 tsp Calabrian Chile sauce or Sriracha sauce
1 tsp fennel seeds
cooking spray
¼ cup olive oil
4 cloves garlic
About 5-6 cups Swiss chard, kale, or spinach
1 (12-oz) marinated artichoke hearts
1 can (15.5 -oz) cannelloni beans
1 (5.2-oz.) Boursin cheese
4 oz. shredded provolone or Swiss cheese
Salt and pepper to taste
Instructions:
The Pasta
Heat a large kettle of water to boil, season with 3 TBS of salt. Pasta water has to taste like ocean water. Add the shells to the boiling water and cook for about 9 minutes, stirring occasionally. You don’t want the shells fully cooked because you will bake them once they are stuffed. Drain the shells and rinse them with cold water. Spread the shells on a paper towel to prevent them from sticking together. Then cool them.
The Sauce
Spray the baking dish with oil. Coarsely grind the fennel seeds with a mortar and pestle. Mix the marinara sauce with the fennel and hot sauce. Season with salt and pepper. Spread the sauce in the baking dish. I added more sauce than the original recipe called for.
Filling and finishing the dish
Preheat the oven to 375 degrees Fahrenheit.
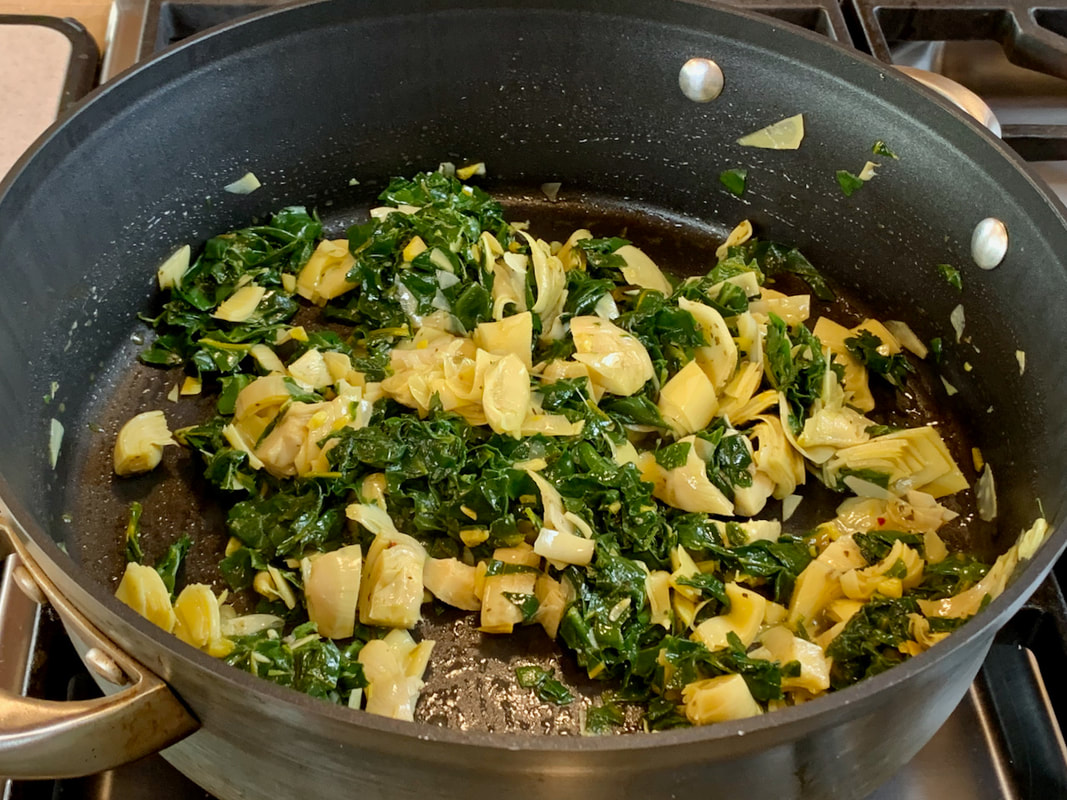
Chop the garlic very fine. Wash the chard, removing the stems, and chop it coarsely. Heat 2 tsp olive oil in a large frying pan with a lid. Add the garlic and sauté it for 30 seconds. Add the chard and stir, adding ¼ cup of water. Cover and cook for a few minutes until the chard is tender. Add the coarsely chopped artichoke hearts and heat uncovered for a couple of minutes. Remove from heat and cool the mixture.
Rinse and drain the beans, mix them with the Boursin cheese and 2 TBS of olive oil in a food processor and process until smooth. Stir the bean and vegetable mixture together until combined. Season with salt and pepper.
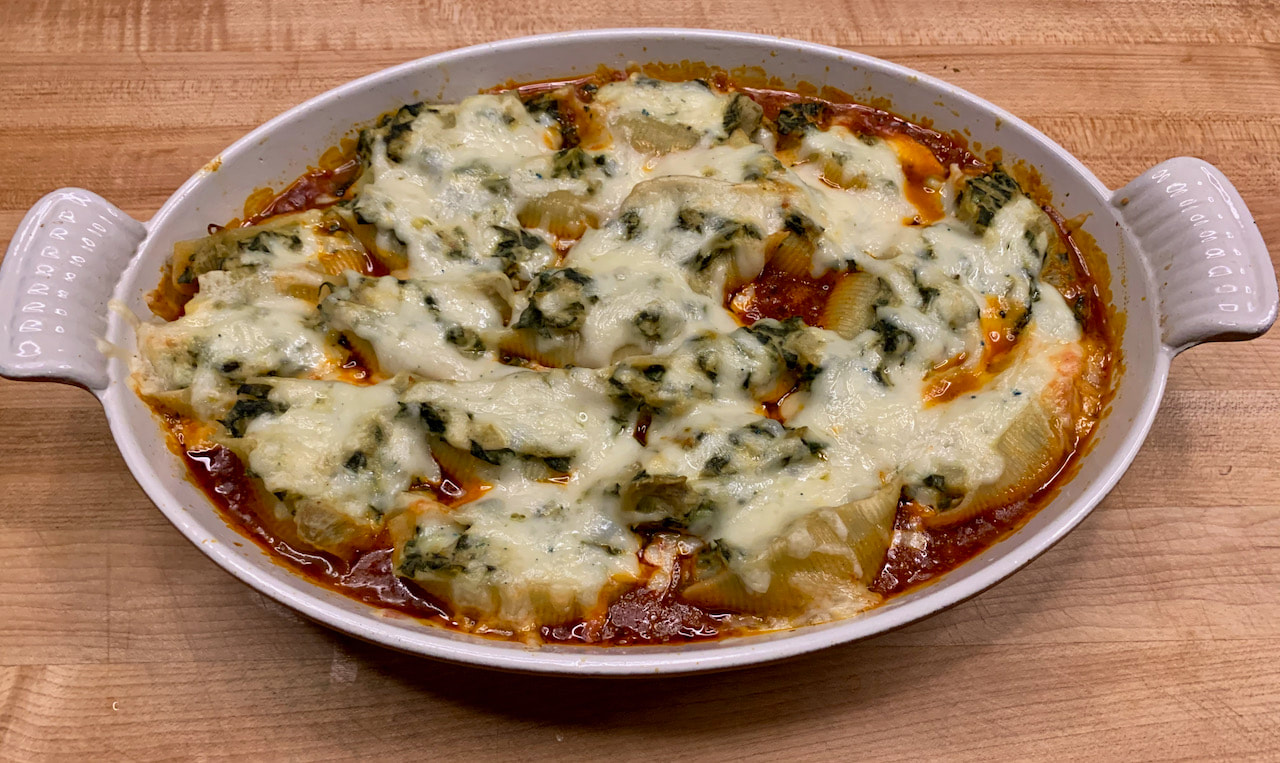
Carefully spoon the bean and cheese mixture into the shells and arrange them in the baking dish with the tomato sauce. Sprinkle the cheese over the shells and bake uncovered in a preheated oven for about 20 minutes. The cheese needs to melt and sauce should be bubbling. Increase the heat to a high broil, and broil until cheese begins to brown.
Guten Appetit!
Here is a link to the original recipe
Recipe by Ann Taylor Pittman in Food & Wine
Posted by ©Sunnycovechef.com
More Recipes
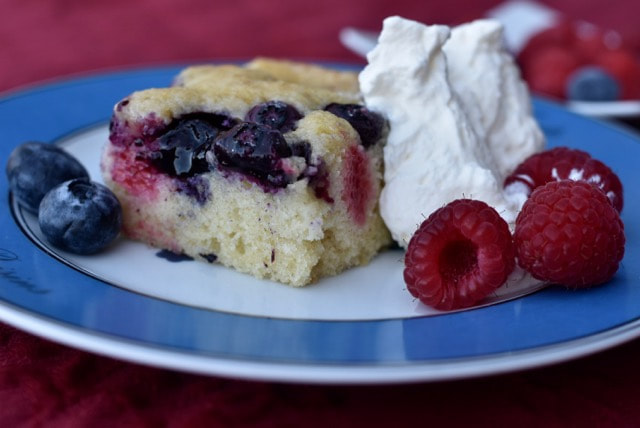
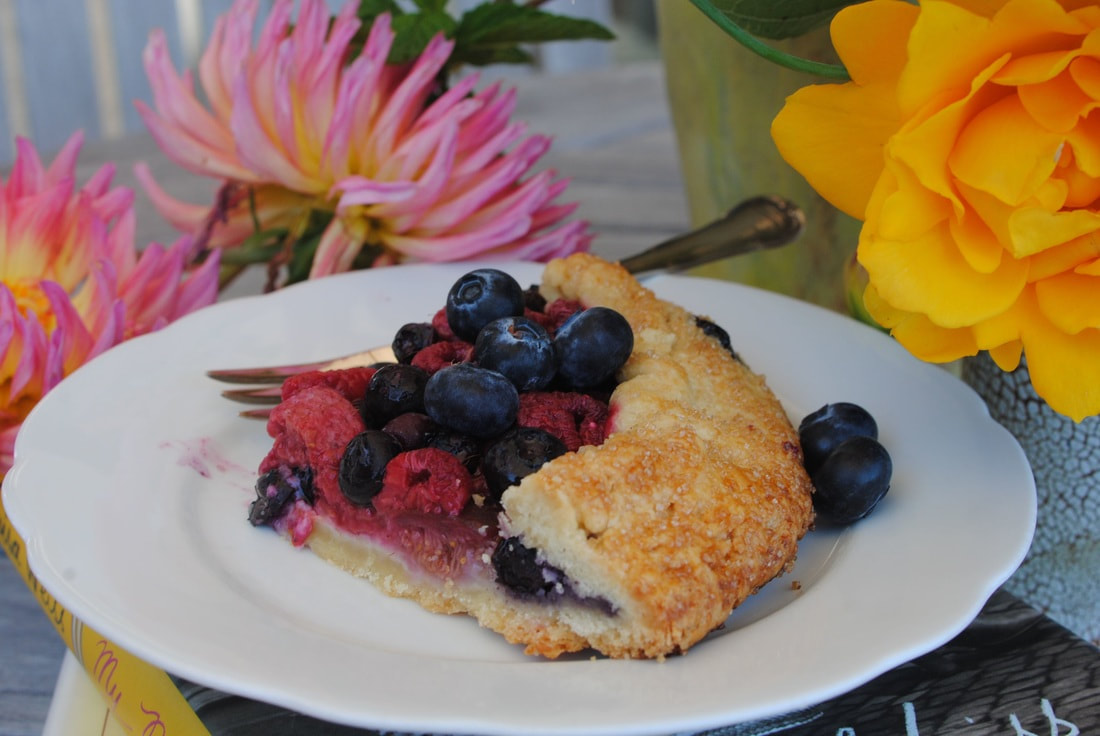
 Apricot, Raspberry, and Blueberry Cobbler | 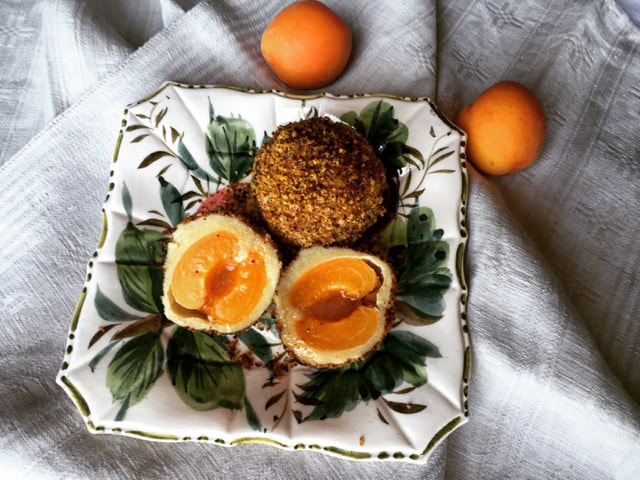 Apricot Dumplings |  German Apricot Cake |

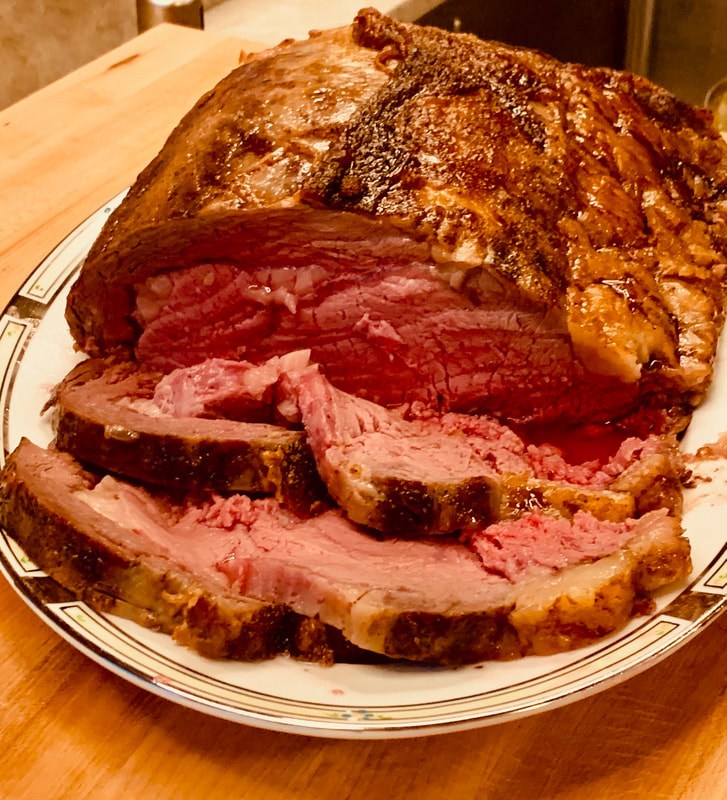
| The Recipe: Ingredients: 11 ½ lb USDA prime rib ( 4 ribs) 2-3 TBS kosher salt 2-3 TBS pepper 1-2 TBS garlic salt | Directions: I seasoned the meat with kosher salt, pepper, and garlic salt and put it in the fridge uncovered for 3 days. Do not skimp on the seasoning. The third day I let the roast come to room temperature for 4 hours. I then put the roast on the bottom rack in a cold oven and turned the heat to 250 degrees. The internal temperature of the roast was 118 degrees after 3 hours in the oven. I turned the oven off and let the roast sit in the oven for 3 hours. When I took the roast out the oven the internal temperature read 130 degrees. My husband cut the bones off which we reheated a couple days later in a 500 degree oven. The meat was perfect. I made gravy from the juices and some beef stock. I served the roast with mashed potatoes, red cabbage and horseradish sauce. My girlfriend Susanne made creamed pearled onions, and they were delicious and went nicely with the rest of the meal. Why am I posting this now? I will need a reference for the next time I make this roast. It took some research on my part to come up with this recipe. |


I am trying!
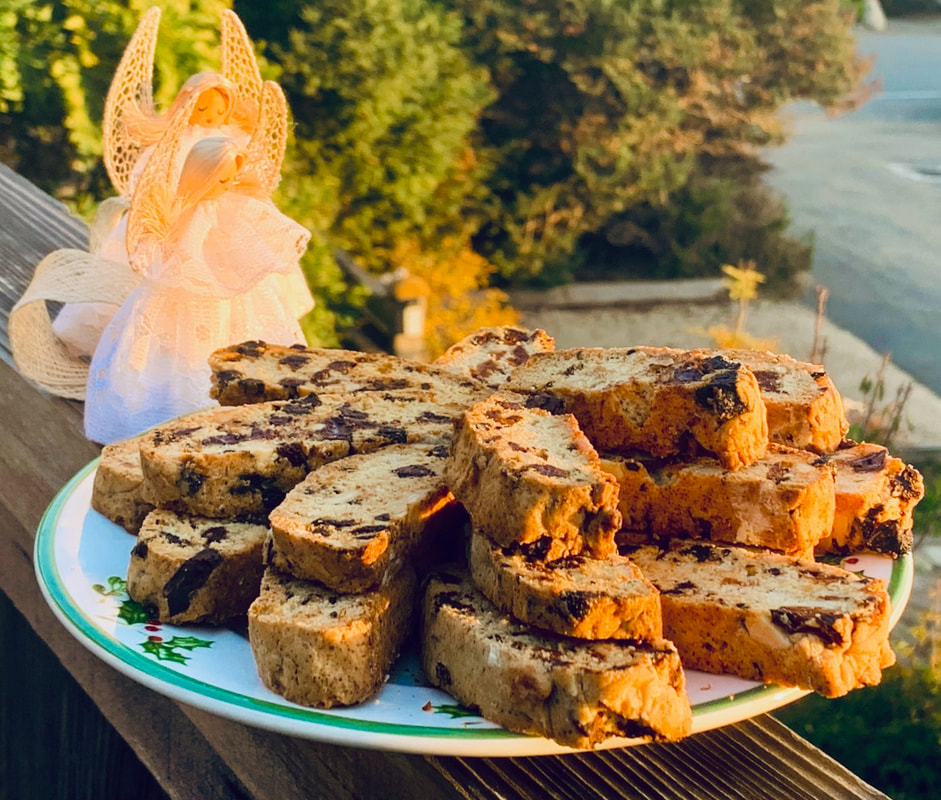


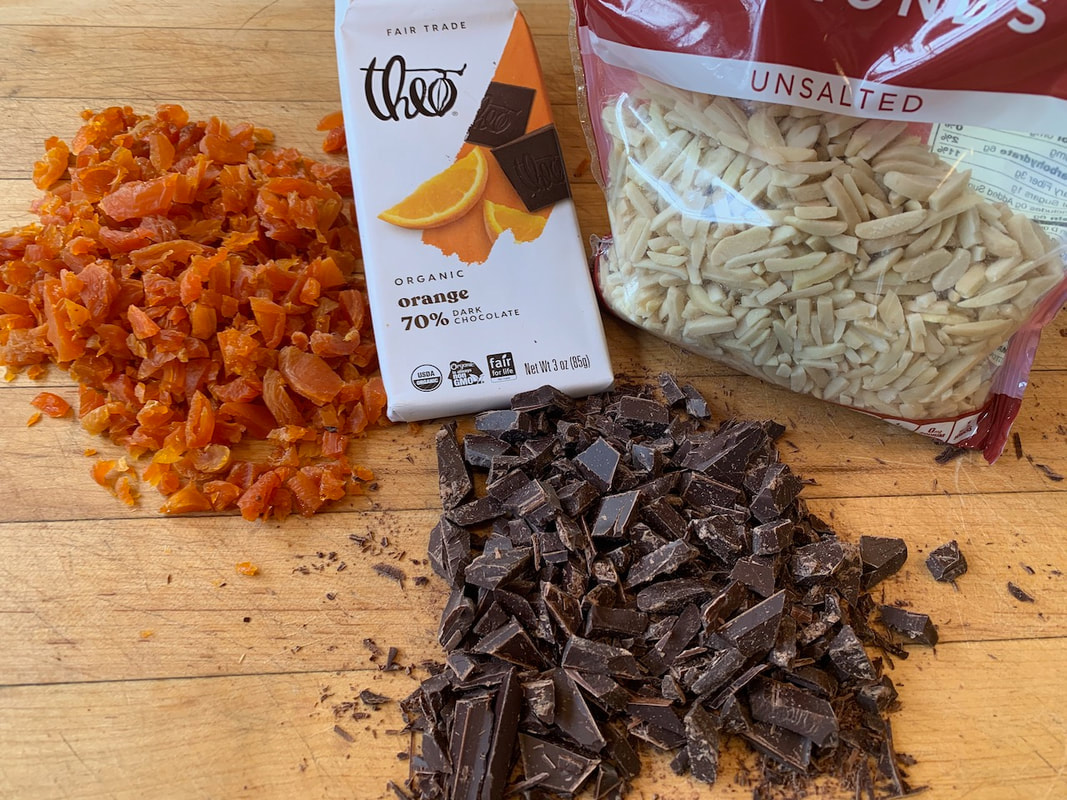


| Ingredients: This recipe makes about 45 biscotti 5 oz (1¼ cups) ( 125g) dried apricots 3.5 oz (100g) semisweet chocolate 9 ¾ oz (2 cups) (280g) unbleached white flour) 1 tsp baking powder ½ tsp cinnamon ¼ tsp salt 2 oz (4 TBS) (60) g soft butter 6 oz (¾ cup) 175 g sugar 2 eggs 1 tsp vanilla 3 oz (¾ cup) (100g) slivered dry roasted almonds | Directions: Cover a baking sheet with parchment paper. Preheat the oven to 350˙Fahrenheit Cut the apricots and chocolate into small pieces. Stir the flour, baking powder, cinnamon, and salt in a bowl. Cream the butter and sugar in a mixer until creamy. Add the eggs one after another. Add the vanilla. Add the flour mixture and stir with a wooden spoon until incorporated. Don’t over mix. Add the apricots, almonds and chocolate and mix them into the dough. Divide the dough into 2 equal parts and form 2 loaves (10 inches long and 3 inches wide) next to each other on the cookie sheet. Using floured hands will help with forming the loaves. Bake the loaves for twenty minutes, remove them from the oven and let them cool for 20 minutes. Reduce the heat to 325˙Fahrenheit. Cut the loaves with a serrated knife into ⅔ inch slices. Put biscottis on two baking sheets and back each for about 20 minutes at 325˙ Fahrenheit. Make sure they don’t brown too much. Some of mine had baked just a little bit too long. Cool the biscotti and put them in a tin. Guten Appetit! Translated from a German recipe (Lecker) By ©Sunnycovechef.com |

Click here for the recipe
Click here for the recipe.
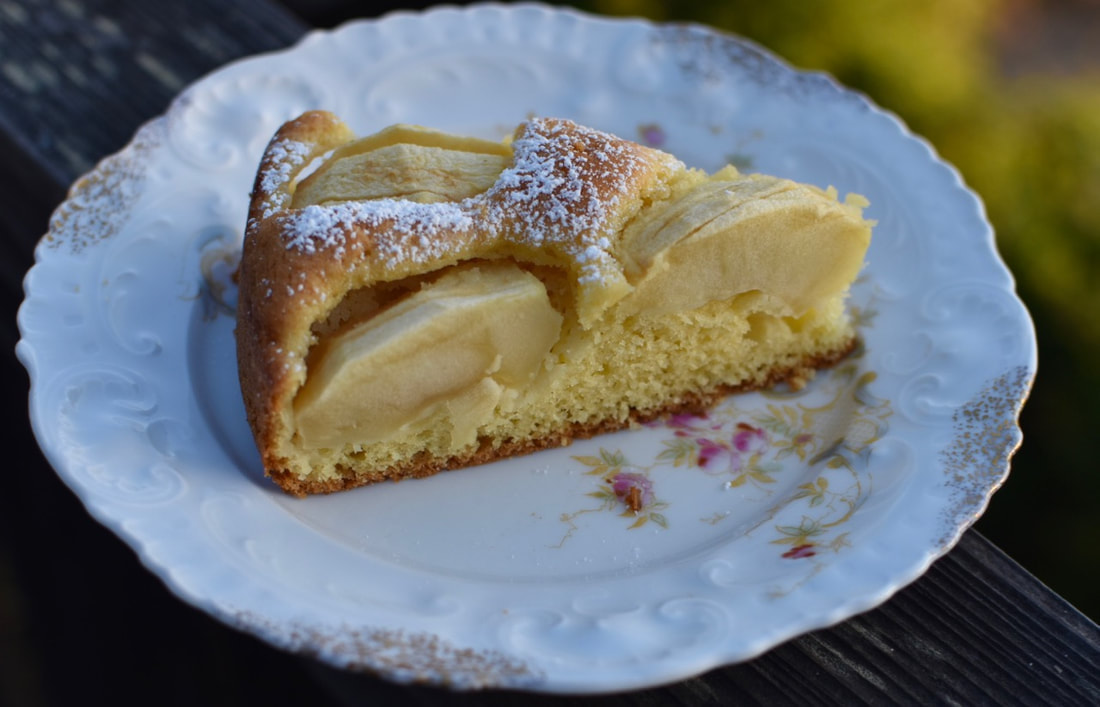


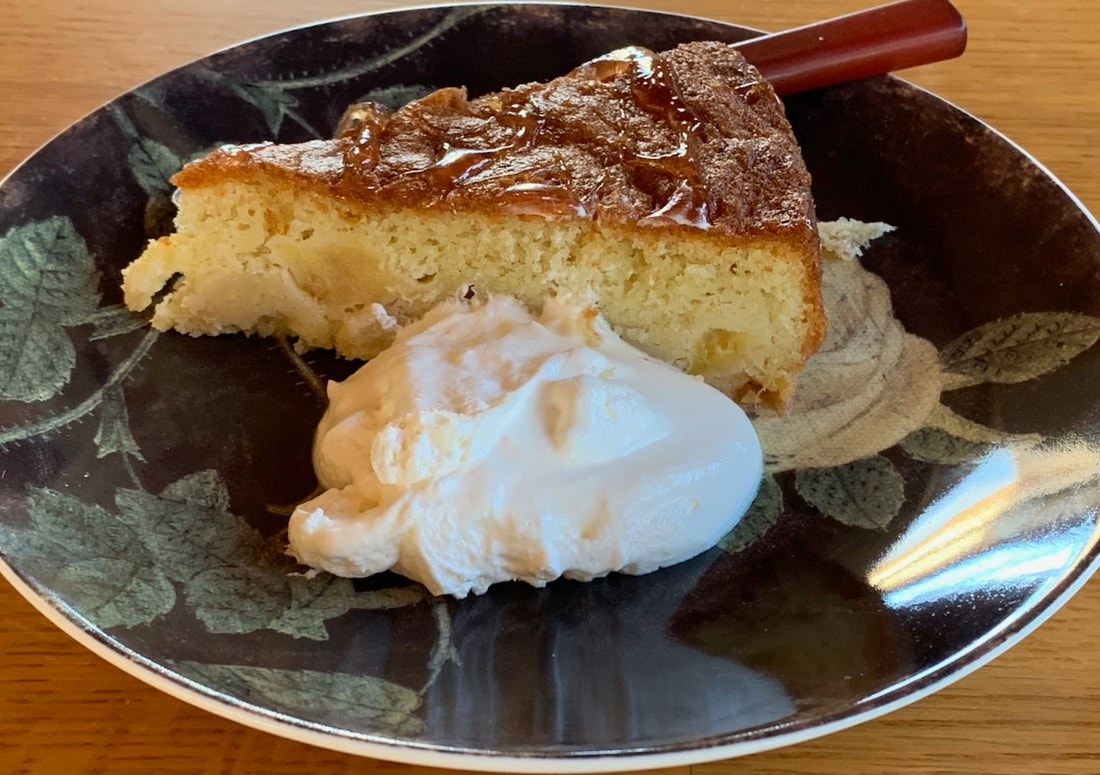
Recipe for French Apple cake
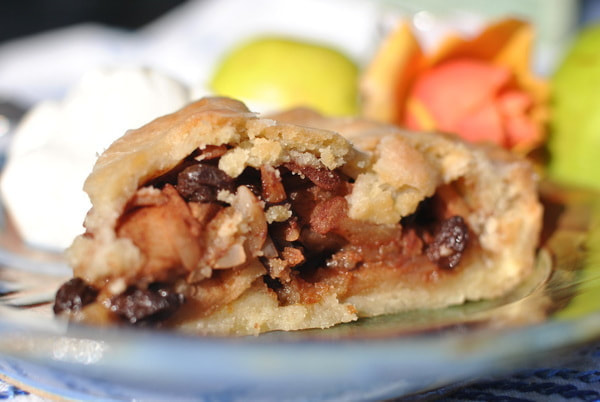
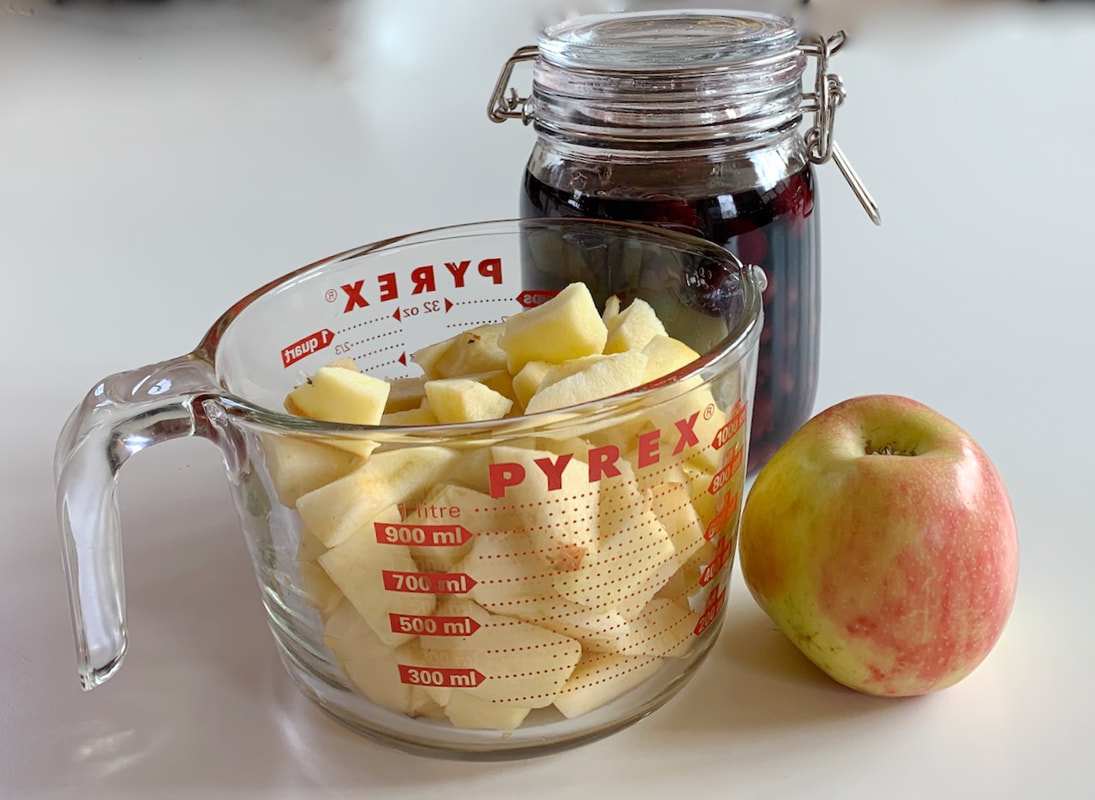
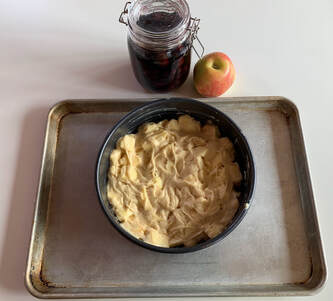
| Ingredients: A 9-inch Cake pan with a removable bottom. 3/4 cup (110g) flour 3/4 tsp baking powder pinch of salt 4 large different kind of apples (4-5 cups) 2 large eggs at room temperature 3/4 cup (150g) sugar 3 TBS dark rum ½ tsp vanilla extract 8 TBS (115g) butter, melted, then cooled 1 TBS lemon juice Apple Syrup (optional) peels from the apples ¼ cup sugar ½ cinnamon stick 2 cups of water | Directions: The cake: Melt the butter in the microwave and let it cool. Preheat the oven to 350˚ Fahrenheit (180˚ Celsius) and put your rack in the middle of the oven. Spray or butter a 9-inch (20-23cm ) baking pan with a removable bottom. Whisk together the flour, baking powder and salt. Peel and core the apples. Save the apple peels. Dice the apples into bite-size pieces and sprinkle with lemon juice. Beat the eggs with an electric mixer until foamy. Then add the sugar and beat until smooth. Add the rum and the vanilla and mix together. Stir in half the flour mixture, then half of the melted butter. Repeat with the rest of the flour and butter. Just stir enough to combine the ingredients. With a spatula, fold in the apple pieces, making sure they are well coated with the batter. Scrape the mixture into the baking pan. Smooth the top with your spatula. Put the pan on a baking sheet and bake for about 50 minutes (up to an hour) until a toothpick inserted in the middle comes out clean. Let the cake cool for about 5 minutes, run a knife around the edges to loosen the cake and carefully remove the sides of the cake pan. If you make the syrup with the apple peels, sprinkle it on top of the cake. Serve the cake with whipped cream. Ok, you can use ice cream if you prefer.. The syrup: 2 cups apple peels (packed in). ¼ cup sugar 2 cups water While the cake is baking, cook the apple peels for about 10-20 minutes. Strain the liquid through a sieve into a bowl. Put the syrup back into the pot and boil to reduce the liquid until it becomes a thick syrup. Spoon onto the the top of the cake. Cooking the apple peels in water and straining them also makes a great apple juice. Recipe by Dorie Greenspan adapted by David Lebovitz posted by ©Sunnycovechef.com |
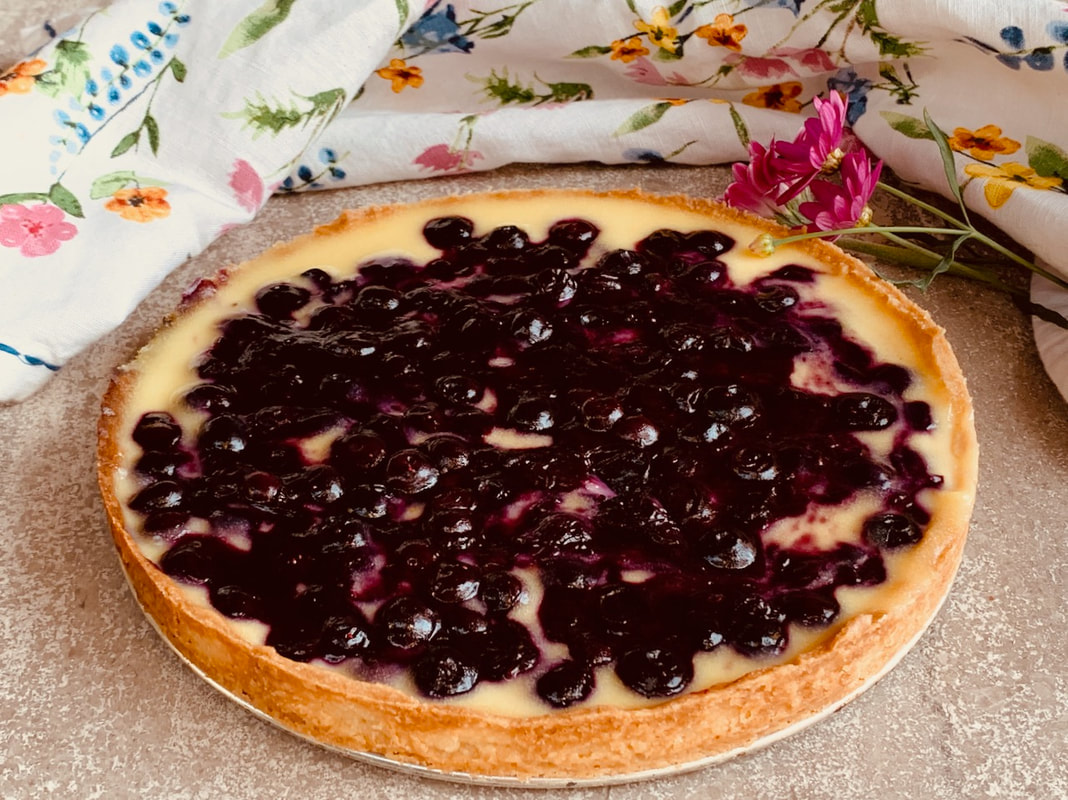
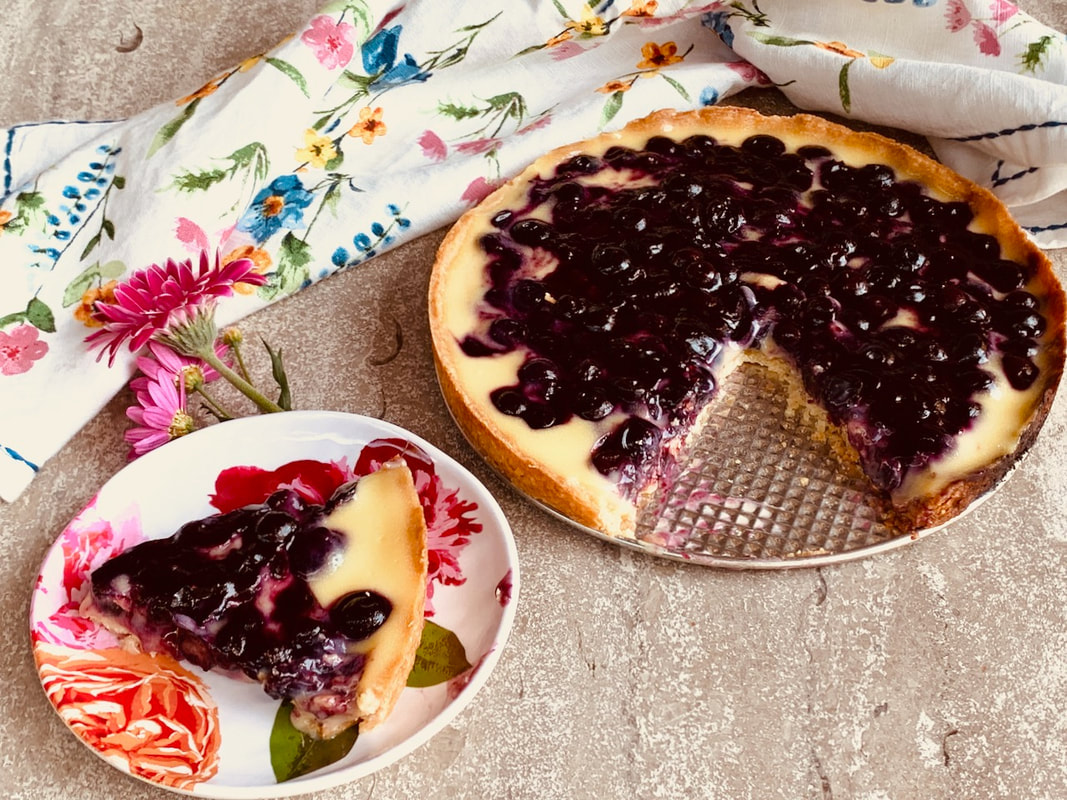


| Ingredients: The Páte Sucrée ¼ pound (113 grams) unsalted butter at room temperature ½ cup ( 100g) sugar ¼ tsp salt ¼ tsp vanilla extract 1 egg yolk 1 ¼ cup unbleached all-purpose flour The Lemon Curd grated zest of two lemons juice of two lemons (about 6 TBS ) 3 TBS water ½ cup (100 g ) sugar ¼ pound (1 stick ) (113 g) butter ¼ tsp salt 3 whole eggs 3 yolks The Blueberry Topping 3 cups blueberries (500g) ¼ cup sugar 2 TBS water | Directions: The Pâte Sucrée: With a mixer, beat the butter and sugar until creamy, about two to three minutes. Add the salt, vanilla and egg yolk and mix until combined. Add the flour and mix for a short time. Put the dough on a dry surface, and with the palm of your hand, push the dough away from you until you get a ball that holds together. Wrap the dough in plastic wrap and flatten it into a disk. Chill the dough for several hours or overnight. Take the dough out of he refrigerator and let it stand for a a few minutes to soften a little. Roll out a 13-inch disc of dough between two square pieces of floured parchment paper or two sheets of plastic wrap (which I prefer). Loosen the sheets while rolling it out, so it won’t stick to the paper. Flip the dough around while rolling it out and keep loosening the plastic wrap to prevent sticking. Roll out the 13-inch circle of dough that is 1/8 inch thick. Chill the dough with the wrap for a few minutes. Remove the plastic wrap and roll the dough around a pin to put it in the tart shell. Alice Waters gives instructions to only remove one sheet and flip the dough into the tart pan and then remove the second sheet. I think both methods will work. Use any dough scraps to patch any cracks. Chill the tart in the freezer for ten minutes before baking. Put the tart directly from the freezer into a preheated 350˙F oven and bake for about 15 minutes until slightly golden. Lemon Curd Slowly over a low heat, heat the lemon juice, water, sugar, and salt in a heavy bottomed saucepan until the butter is melted and the sugar is dissolved. Whisk the whole eggs and egg yolks in a bowl and very slowly drizzle the lemon mixture into the egg mixture stirring constantly. Pour the mixture back into the saucepan and cook over a low heat while stirring all the time, scraping the bottom of the pot until the curd thickens, about 5 minutes. Be careful with your heat so the mixture doesn’t curdle. Strain the curd through a fine sieve and pour it into the baked tart shell while still warm. Spread evenly. Blueberry Topping Divide the blueberries into 1½ cups each and put half of the three cups into a saucepan. Add the water and sugar and cook over a medium heat for about five minutes, smashing the blueberries with a wooden until they turn into a thick jam. Fold the remaining cup and a half of blueberries into the jam, and heat for about a minute to warm them. Spoon the blueberry topping evenly over the lemon curd. Cool until the curd has set. My tart tasted the best the following day. Guten Appetit! recipe by Alice Waters posted by ©Sunnycovechef.com |


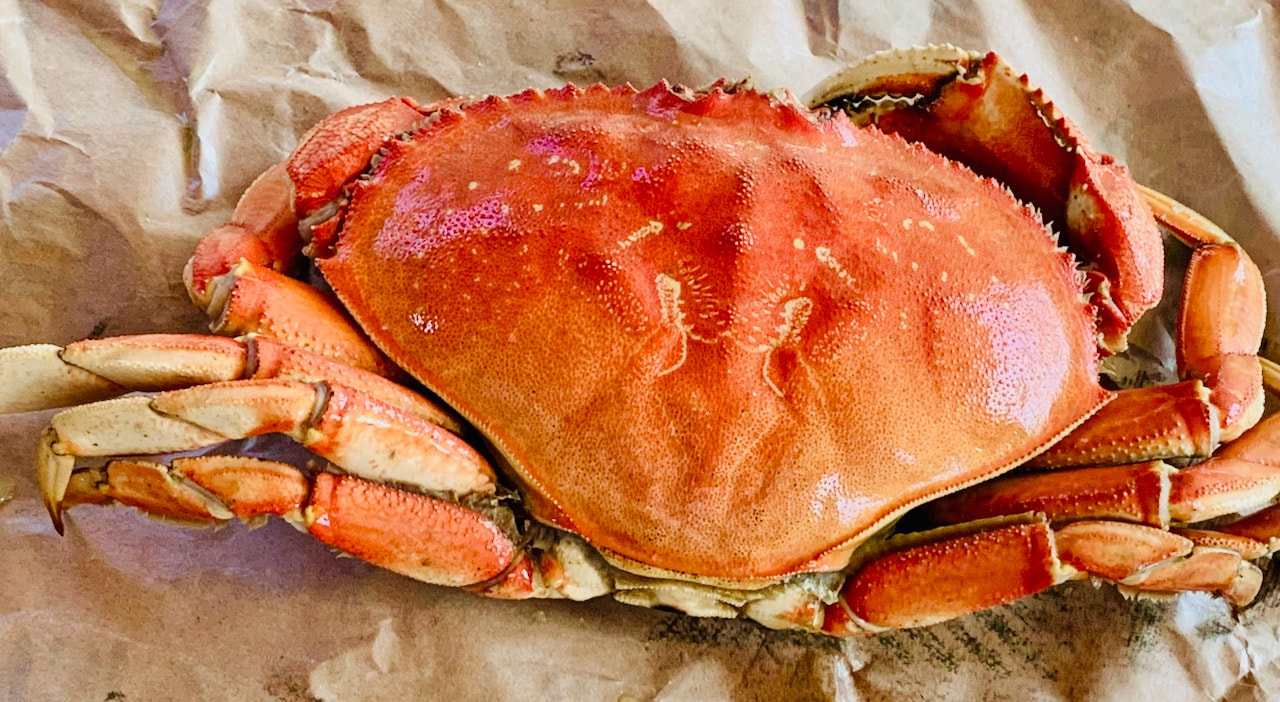
 Salmon Cakes |  Spicy Dungeoness Crab Cakes |

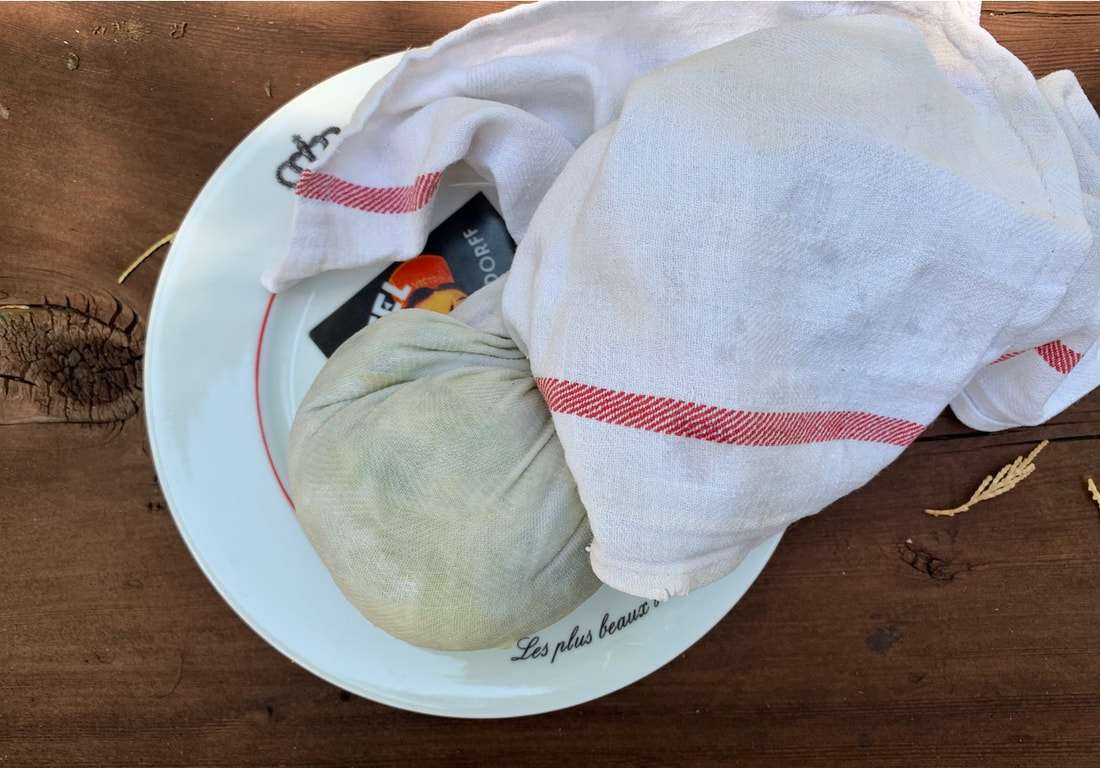
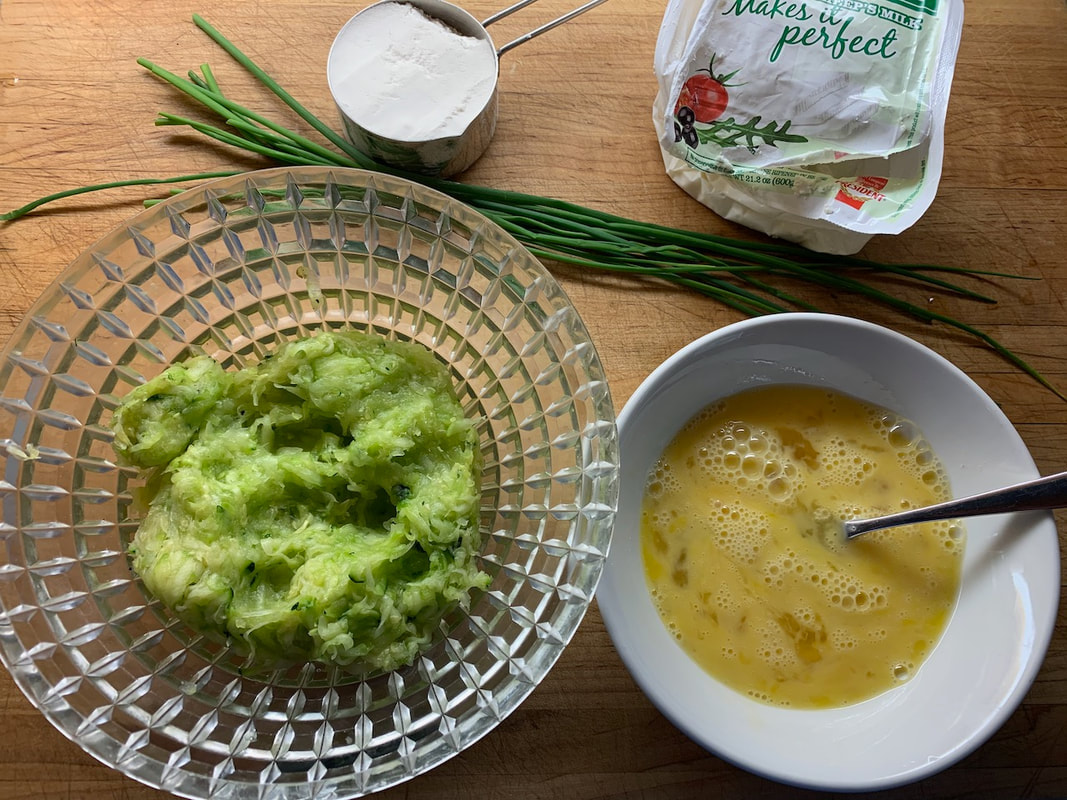

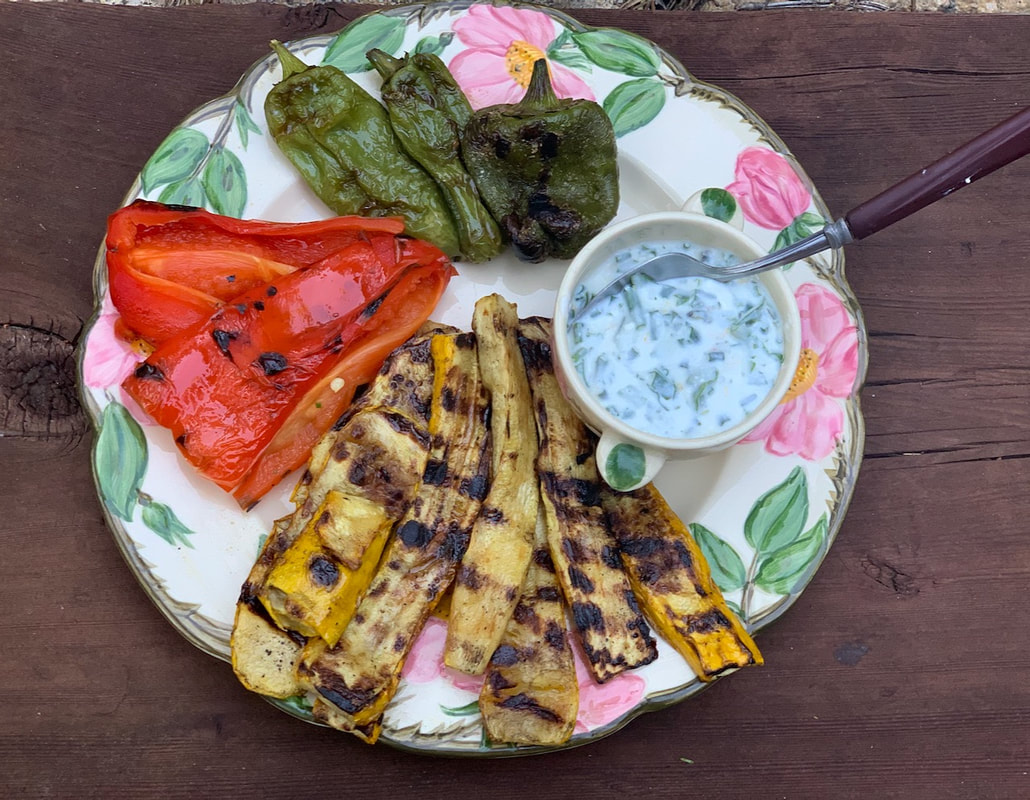
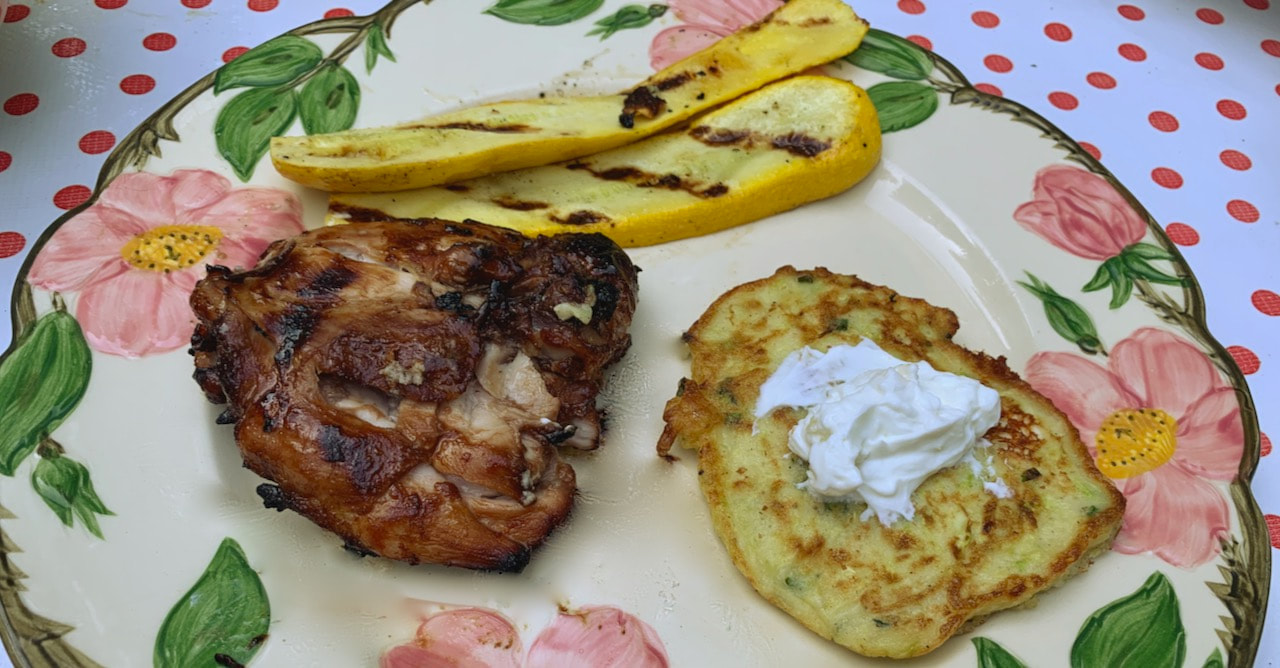
| Ingredients : (makes 10-12 pancakes) 1-1 ½ pound zucchinis (2 or 3 zucchinis depending on size) a generous amount of salt freshly ground pepper a smidge of ground nutmeg 3 smallish eggs, lightly beaten 1 cup crumbled feta cheese ½ cup flour ½ tsp baking powder 1/3 cup chopped chives or dill 2-4 TBS vegetable oil for frying, more if needed The Yogurt Sauce 1 cup Greek yogurt 2-3 cloves garlic, grated salt and lemon juice to taste | Directions: Trim the ends (but do not peel the zucchini) and grate them on the large holes in a grater. Put the grated zucchini in a colander over a bowl and generously sprinkle with salt. Let it drain for about 20-30 minutes and then squeeze out as much juice a possible with a kitchen towel. In the meantime, mix the flour with the baking powder. Put the drained zucchini in a bowl and add more salt to taste. Stir in the eggs, dill, nutmeg, pepper, and mix well. Add the feta and flour mixture. In a large skillet, heat the pan and the oil until it shimmers. Drop a heaping tablespoon of zucchini batter in frying pan several inches apart. Flatten them a little bit with a spatula and fry until golden brown on both sides, about 3-4 minutes each side. If they brown too quickly, turn your heat down to medium. Put them on a plate lined with a paper towel and keep them warm in a preheated oven (250 degrees) while you fry the rest. Add additional oil if needed. The Yogurt Sauce: Combine all the ingredients and serve with the pancakes. Guten Appetit! Recipe from NYT adapted by©Sunnycovechef.com |
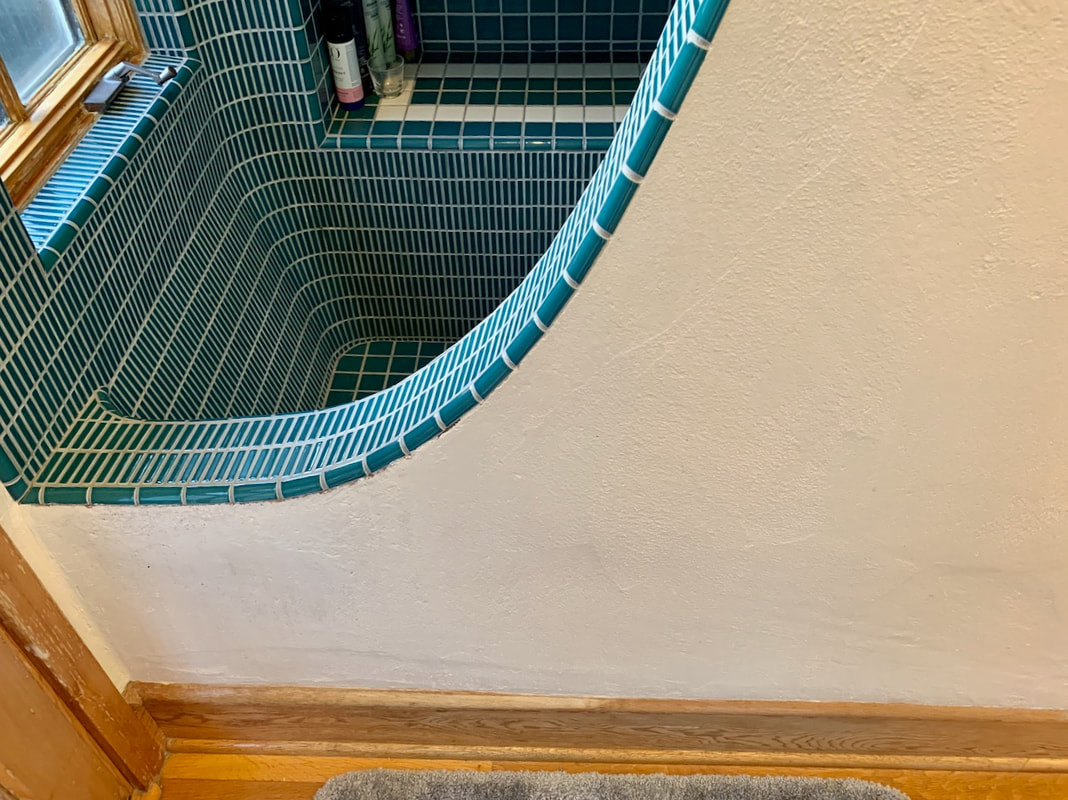 The old bathtub-shower |  my old countertop |
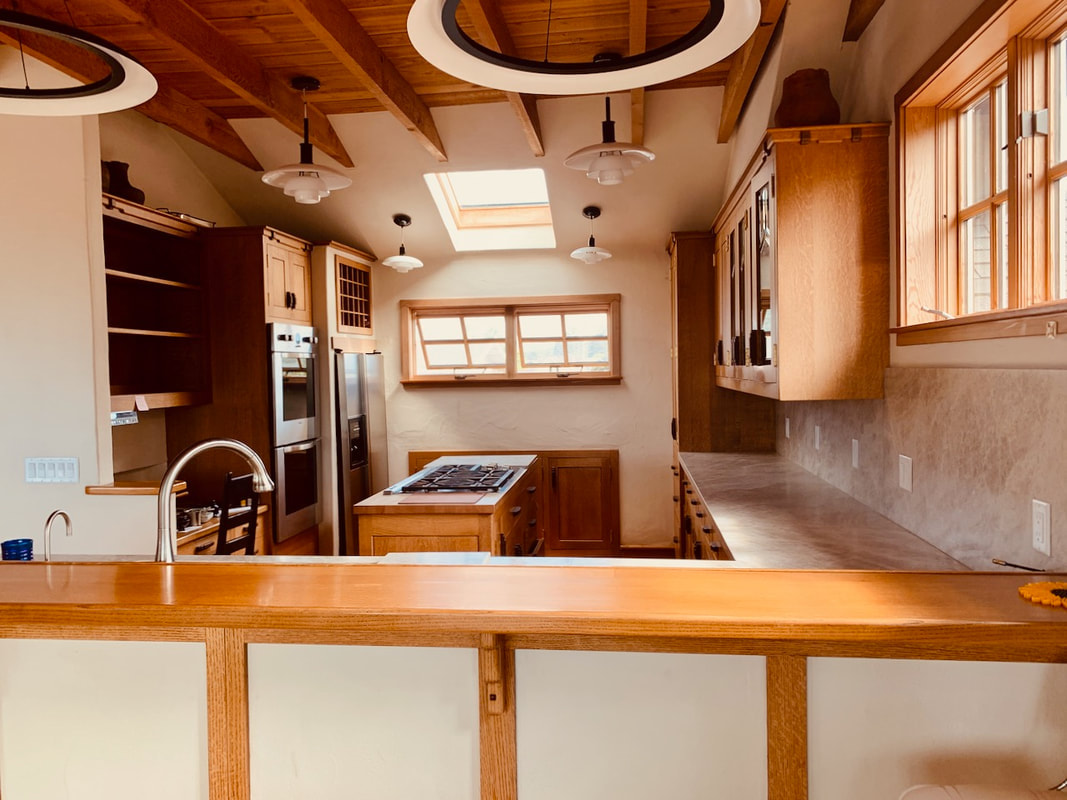
 My living quarters during our construction |  |


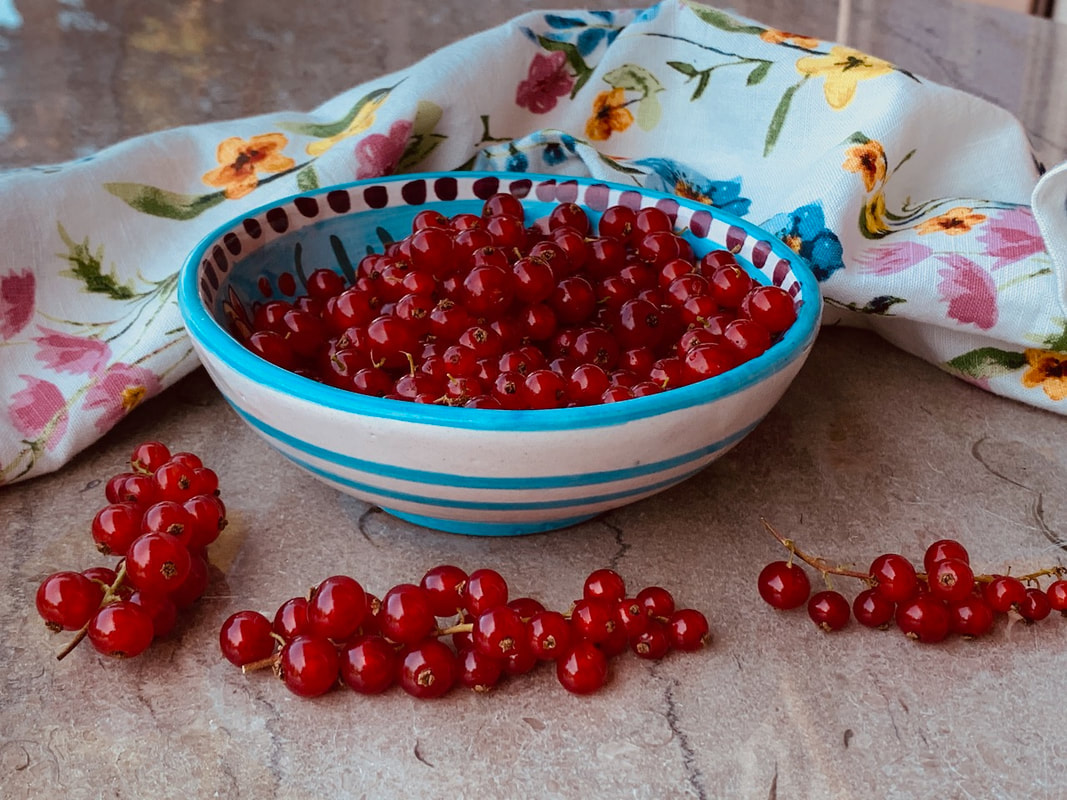
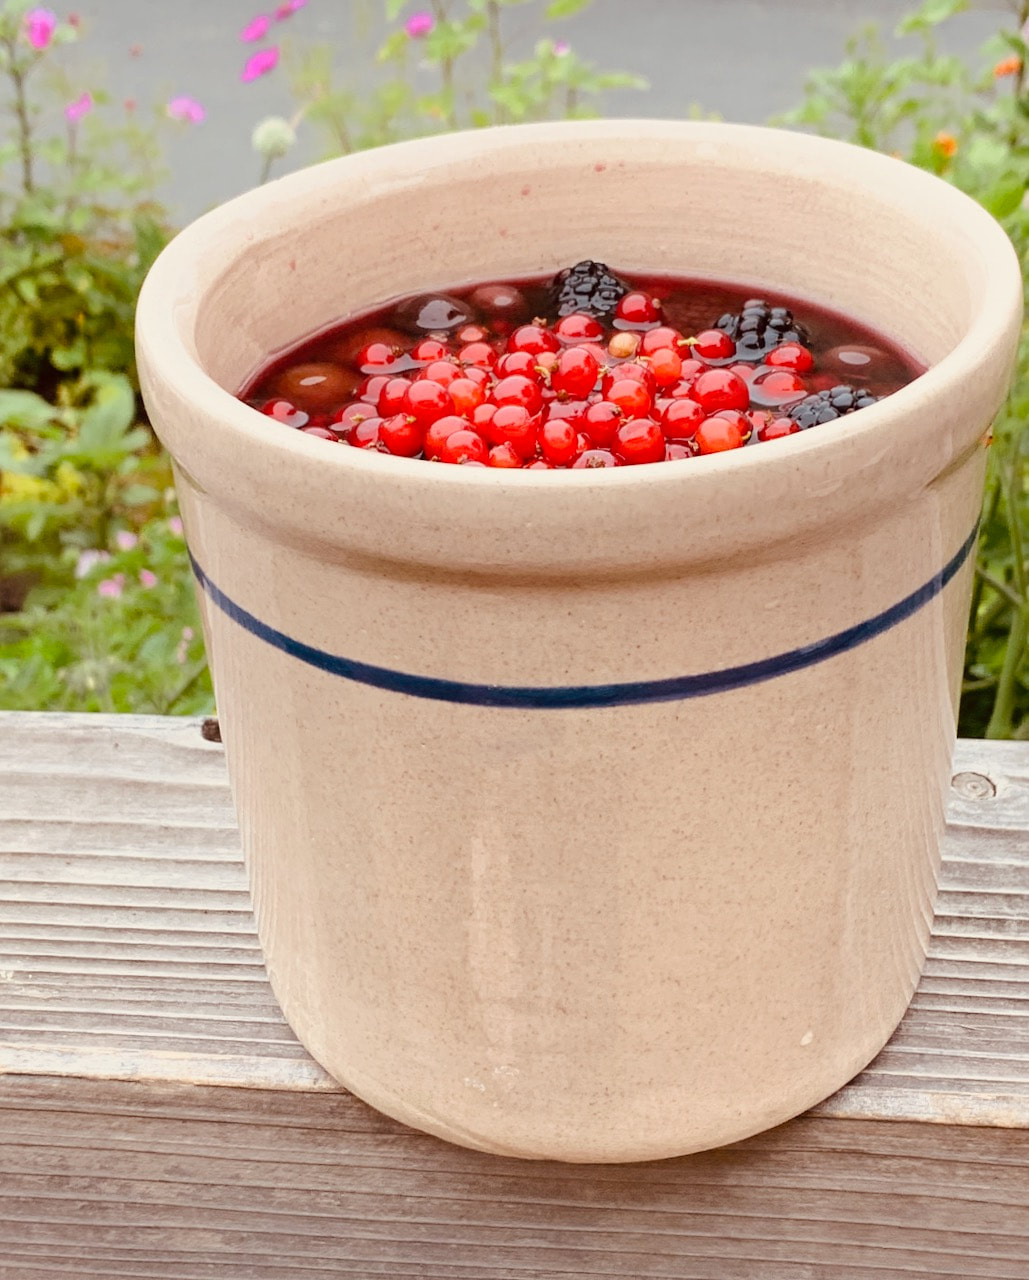
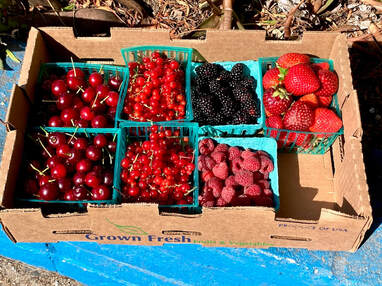
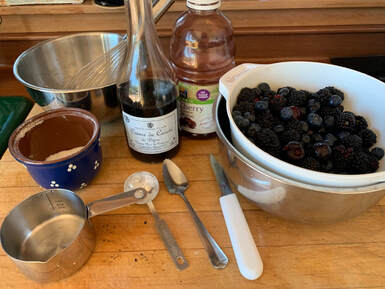
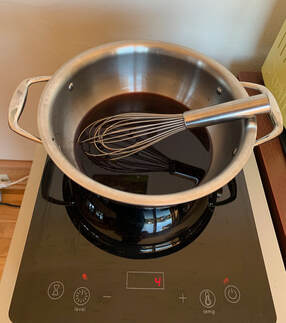
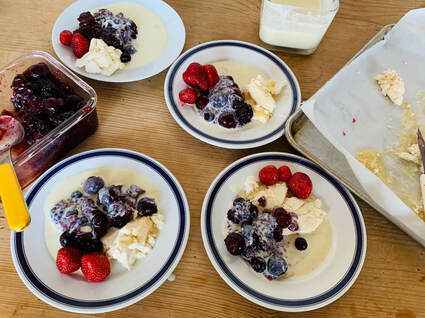
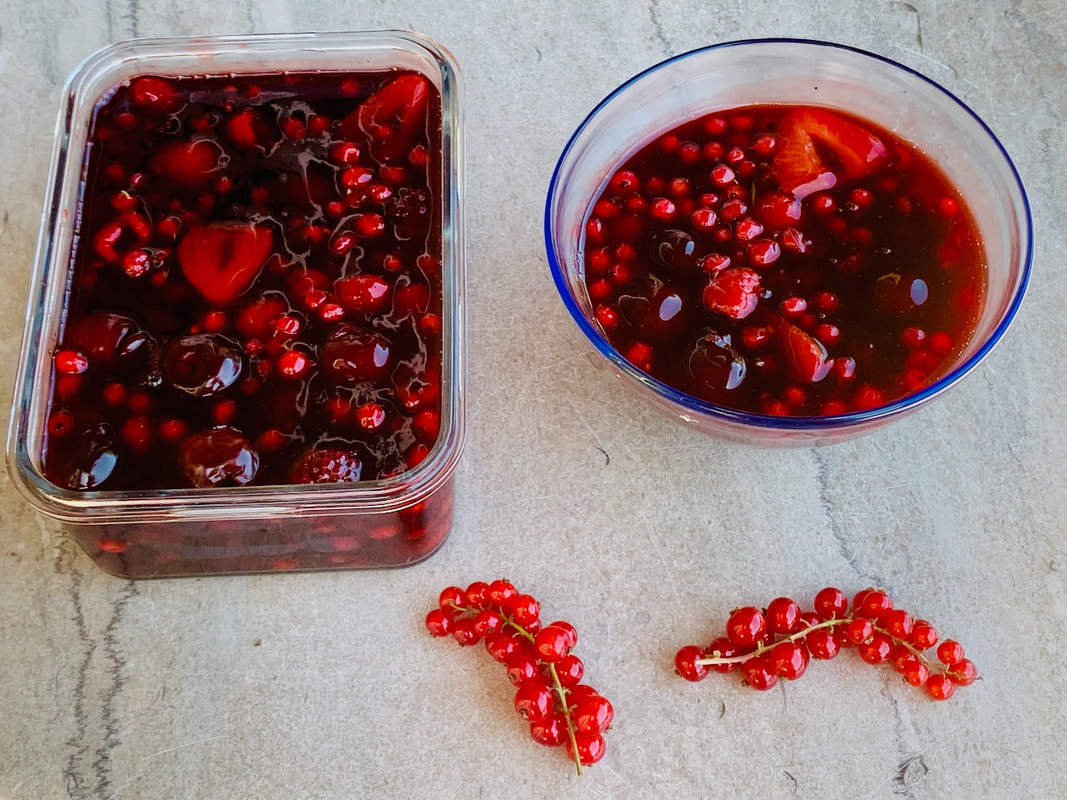
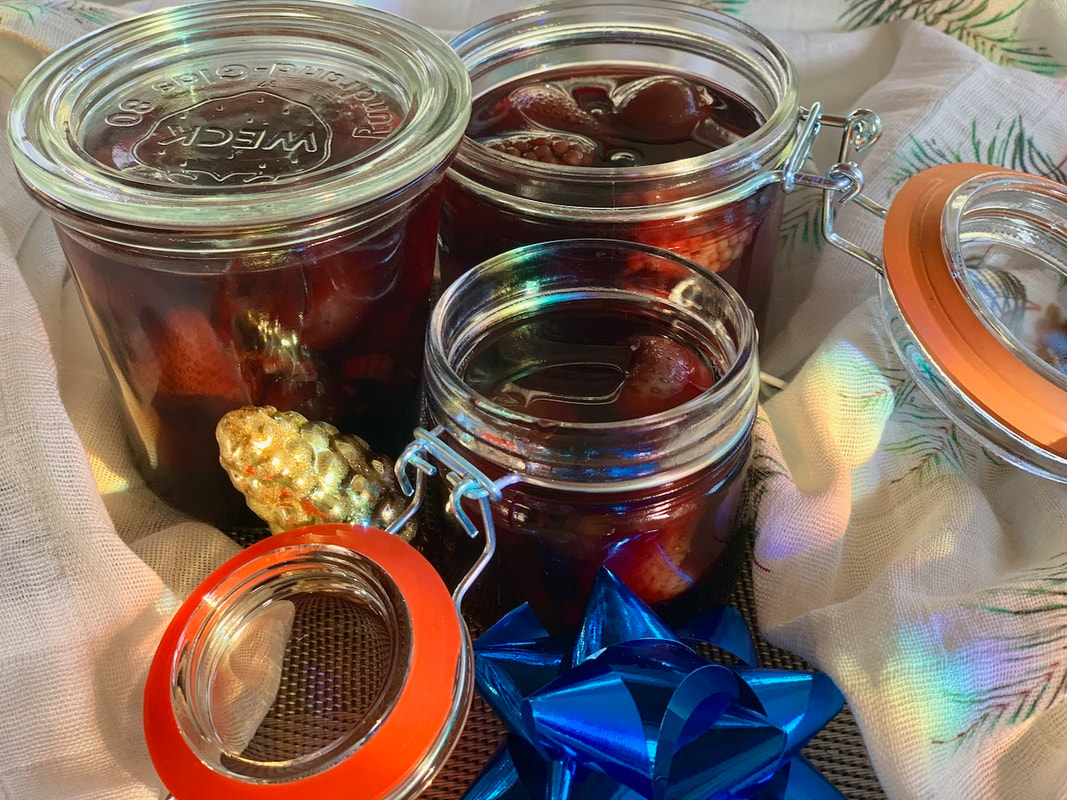
| Ingredients: This recipe makes approximately 4 cups (enough for 6 servings) 1 ½ Ib (680 g) mixed berries 2 cups (½ liter) cherry juice 3 TBS Creme Cassis 1 vanilla pod 4 TBS sugar 3 TBS cornstarch | Directions: Clean and wash all the fruit, take the pits out of the cherries. I have a cherry pitter that works well. Half the vanilla pod lengthwise and scrap out the beans. Add the sugar, vanilla beans and pod to the juice and bring to a boil. Mix the cornstarch in 3-4 tablespoons of cold water add to the boiling juice and cook for about two minutes, stirring constantly until the juice thickens and gets shiny. Add the fruit and Creme de Cassis and simmer for another 2 minutes. At this point you can add more sugar to sweetened the dish. I don’t add additional sugar but I have to have my homemade vanilla sauce with Rote Grütze. Guten Appetit! Translated from a German recipe by © Sunnycovechef.com |

Here are some more asparagus recipes, click on the photo for the recipe
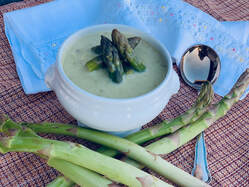 Creamy and easy to make asparagus soup | 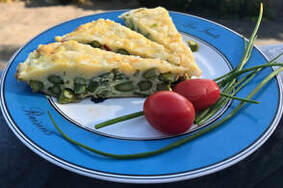 I make this frittata when asparagus is in season |

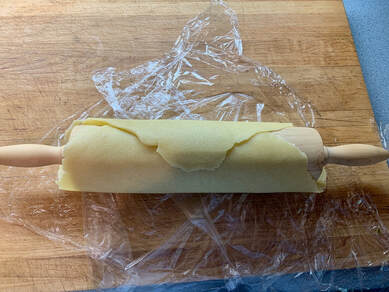
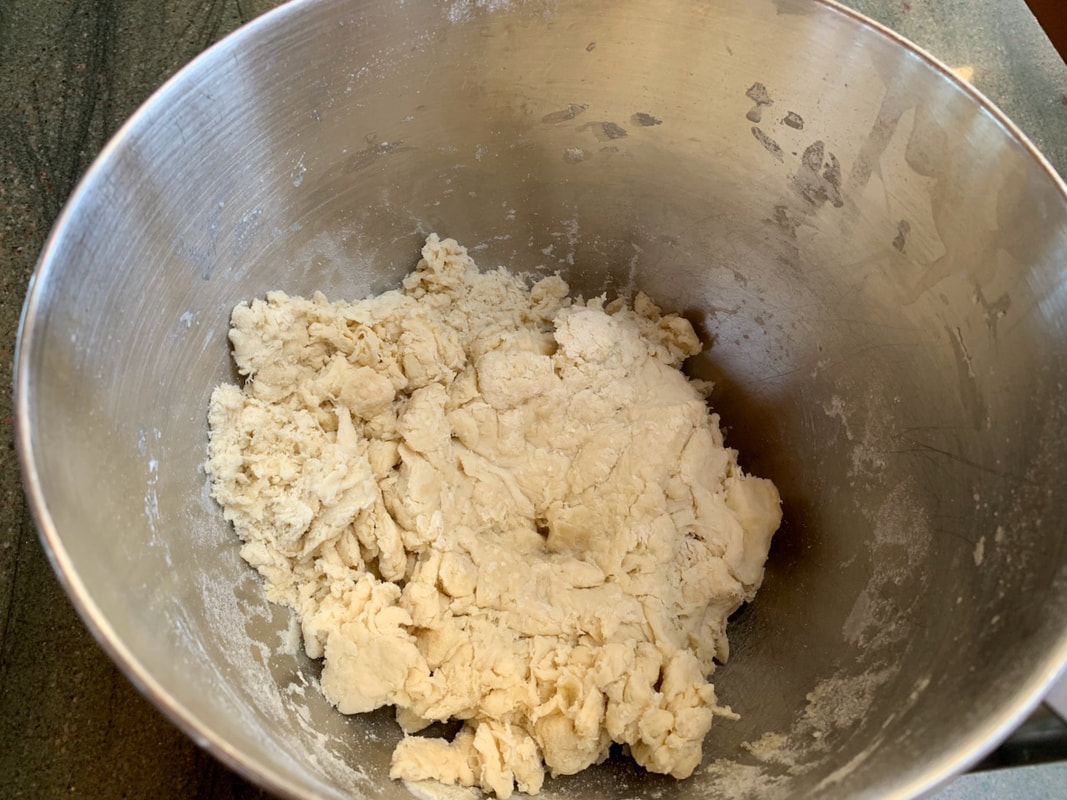 Mixing the ingredients |  Pulling and kneading the dough |
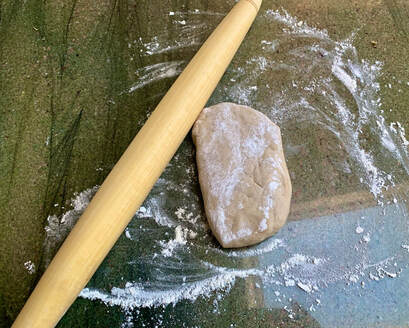 Rolling out the dough | 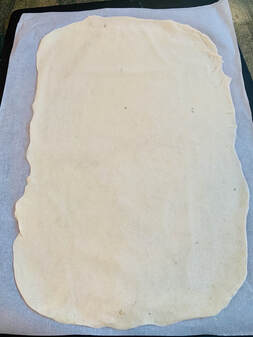 The rolled out dough 1mm thick |
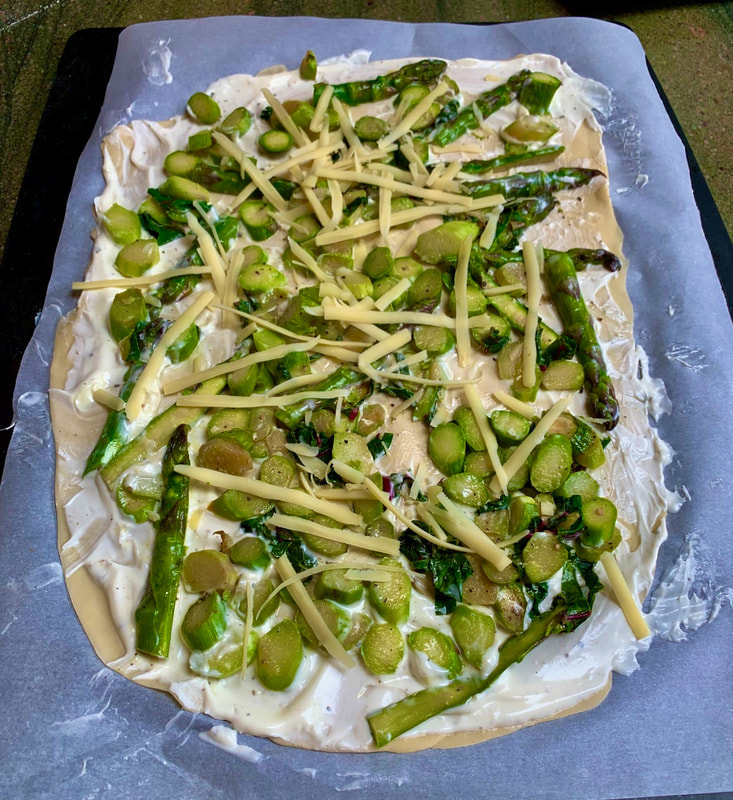
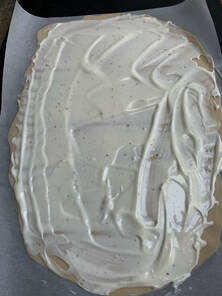 Covering the dough with the Crème Fraîche mixture | 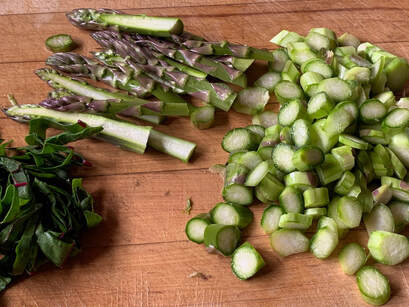 Cutting the Asparagus at an angle |

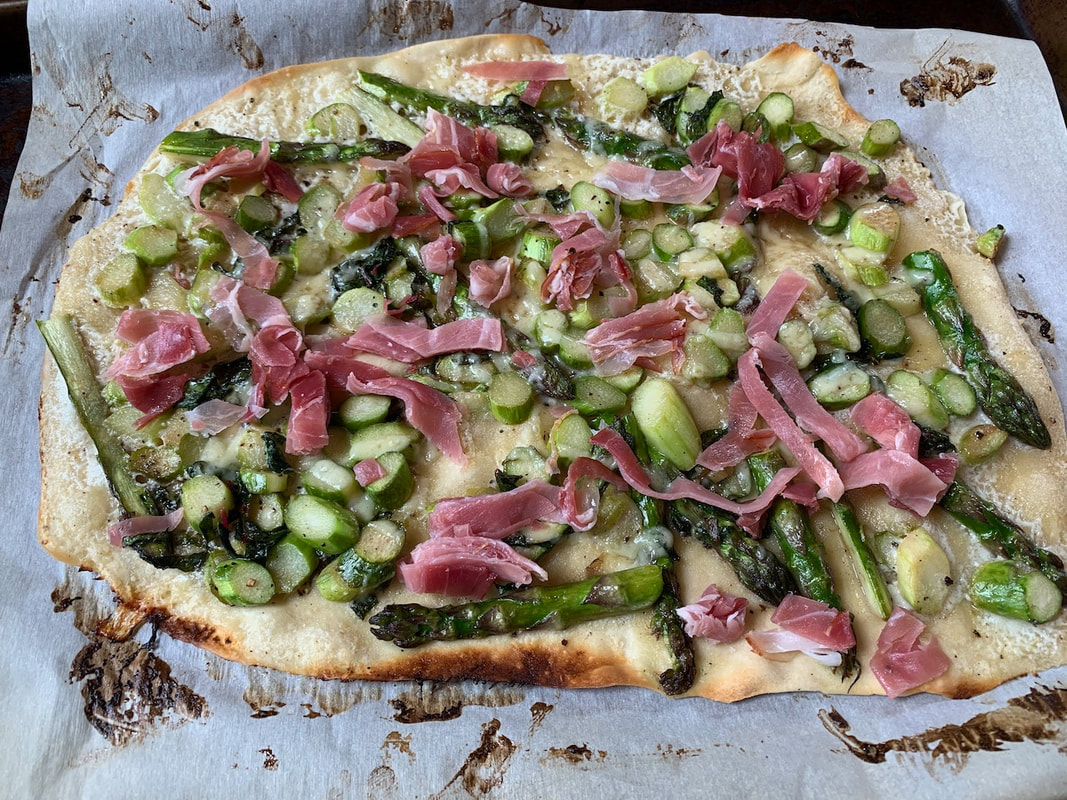
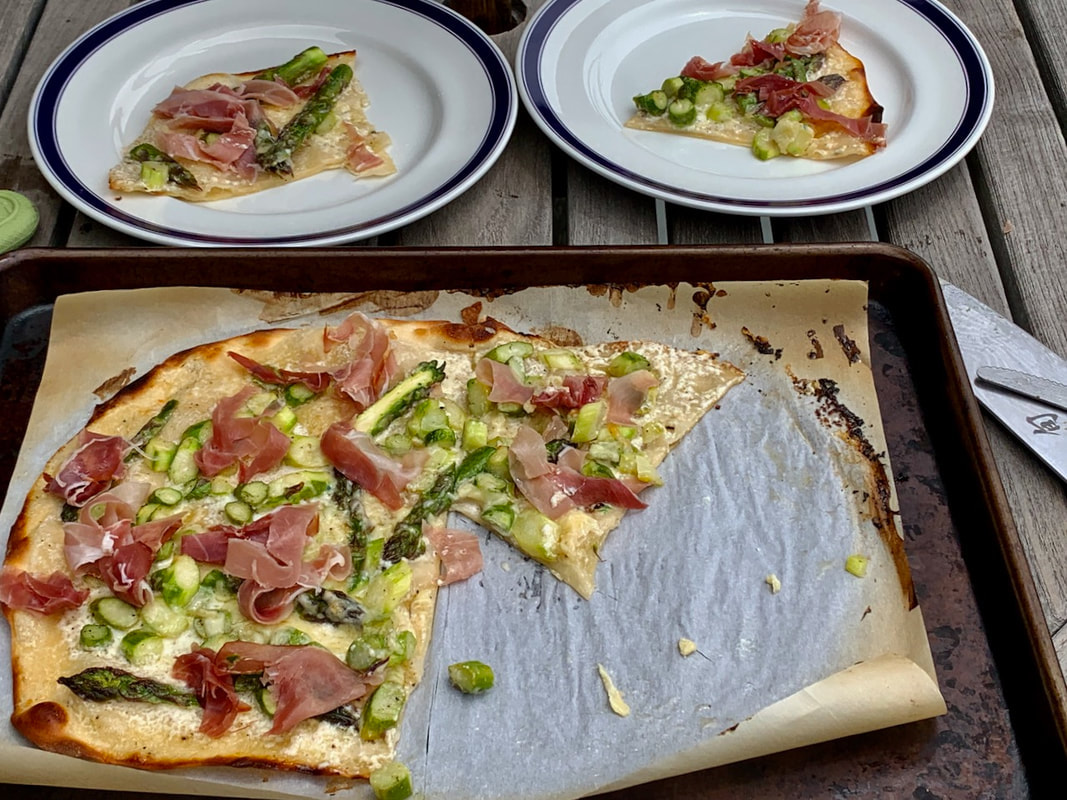
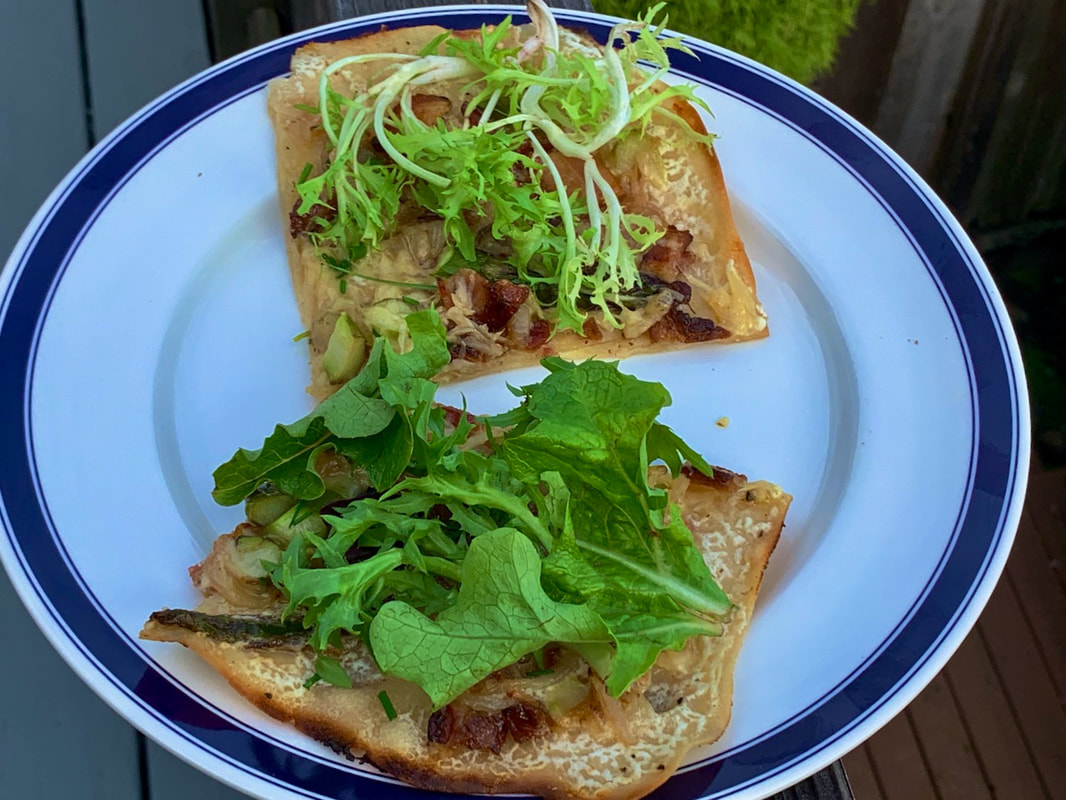
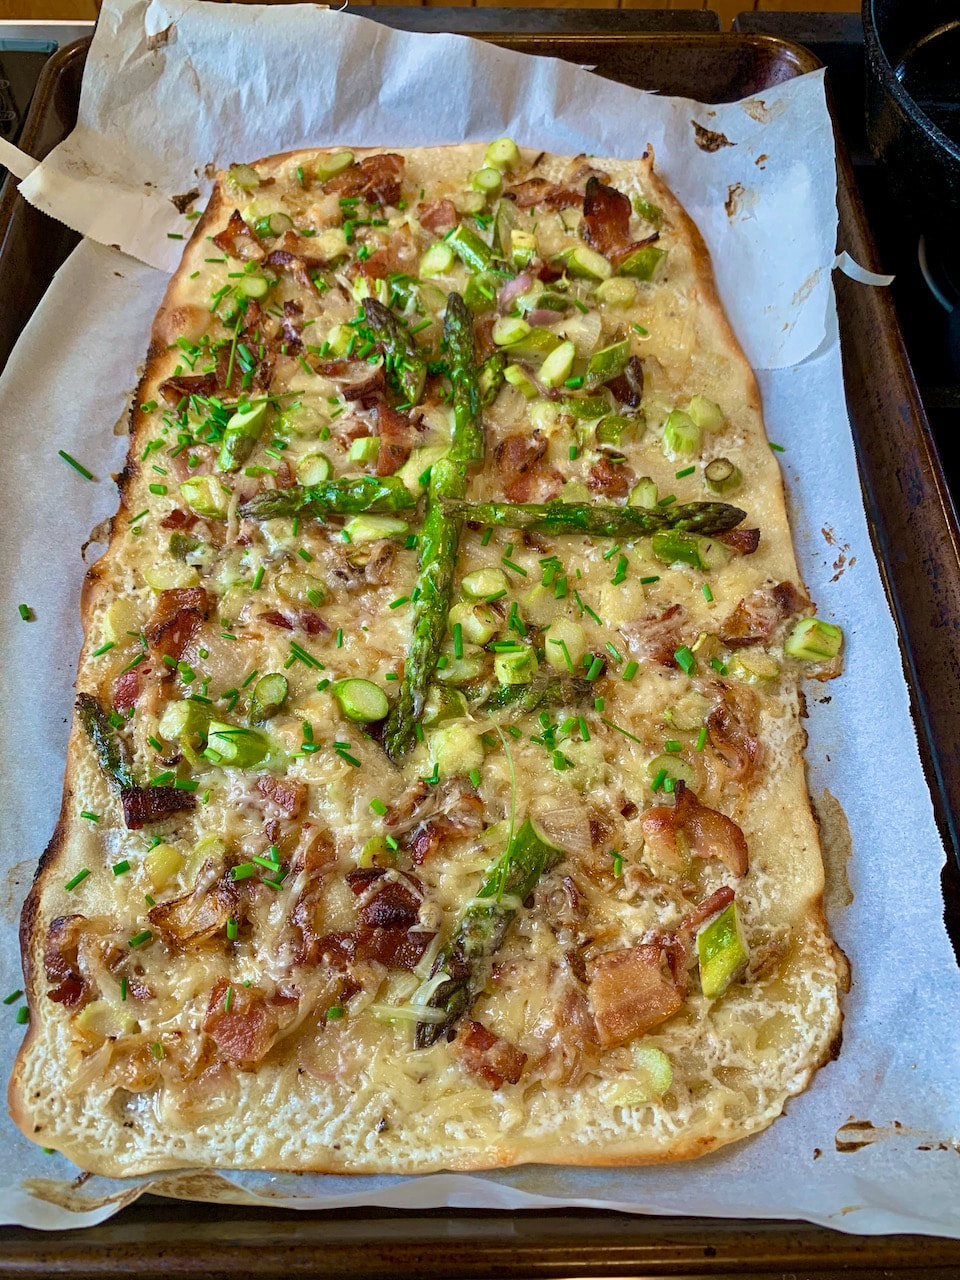
| Ingredients: The dough makes four large ( the size of a cookie sheet) pizzas. I made one at a time and that was plenty for my husband and me. The topping is enough for one Flammkuchen The dough: 3 3/4 cup (17oz ) (500g) all purpose flour 1 cup plus 6 TBS lukewarm water (250g) 4 TBS olive oil 1 TBS salt extra flour for rolling out the dough. The toppings: ½ lb. green asparagus 1 TBS olive oil 3/4 cup Crême Fraîche salt pepper a pinch of nutmeg A handful of grated cheese some slices of prosciutto torn apart | Directions: The Topping: Smooth the Crème Fraîche with salt pepper and a little nutmeg. Wash the asparagus and peel the lower ends. Cut off the woody ends and discard. Cut the asparagus on an angle into ½ inch slices leaving the tops intact. Slice the tops in half. Heat a frying pan, add the oil and then the asparagus, season with salt and pepper. Fry the asparagus for about two minutes until it turns dark green. Grate the cheese. The dough: Preheat the oven at 500 degree Fahrenheit for 30 minutes before baking the Flammkuchen with the cookie sheet at the the lowest shelf in the oven. If you are using a pizza stone preheat the oven and the stone one hour before. I used my convection-bake setting in my oven. Add the water, olive oil and water and then the flour to a large bowl. I used my KitchenAid to mix the ingredients until they came together, then I kneaded the dough for about 10 minutes by hand until is was shiny. While kneading I pulled the dough with one hand holding with the other hand. It takes some work and effort . Cover the dough in plastic wrap and rest in the refrigerator for at least 30 minutes. I found the dough better to work with after a couple of days. Roll out the dough on a flat surface sprinkled with flour. Every time you turn the dough brush off the extra flour on the upside of the dough and add more flour to the surface. Rolling out the dough takes awhile because you want the dough as thin as possible, about a millimeter thick. Turn the dough often and take your time. Cut parchment paper the size of your baking sheet, 12-16 inches. Put the parchment paper on a board from where you can transfer the Flammkuchen to the hot cookie sheet. Add the rolled out dough, spread the Créme Fraîche mixture evenly over the dough. Add the asparagus evenly over the crust. Sprinkle the cheese over the asparagus. Slide the Flammkuchen with the parchment paper onto the hot cookie sheet and bake in the lower half of the oven for 5-7 minutes. Turn the sheet around half way through. Its ok for the edges to burn, you want that crispy flamed taste . Make sure that the buttom has some brown spots. My last Flammkuchen turned out perfect. Remove the Flammkuchen from the oven by sliding it onto a board, cut it into serving portions and enjoy it as soon as possible. Watch the video even if you don't speak German. Click on the link below. Guten Appetit! Recipe and video by ThomasKocht translated by ©Sunnycovechef.com |
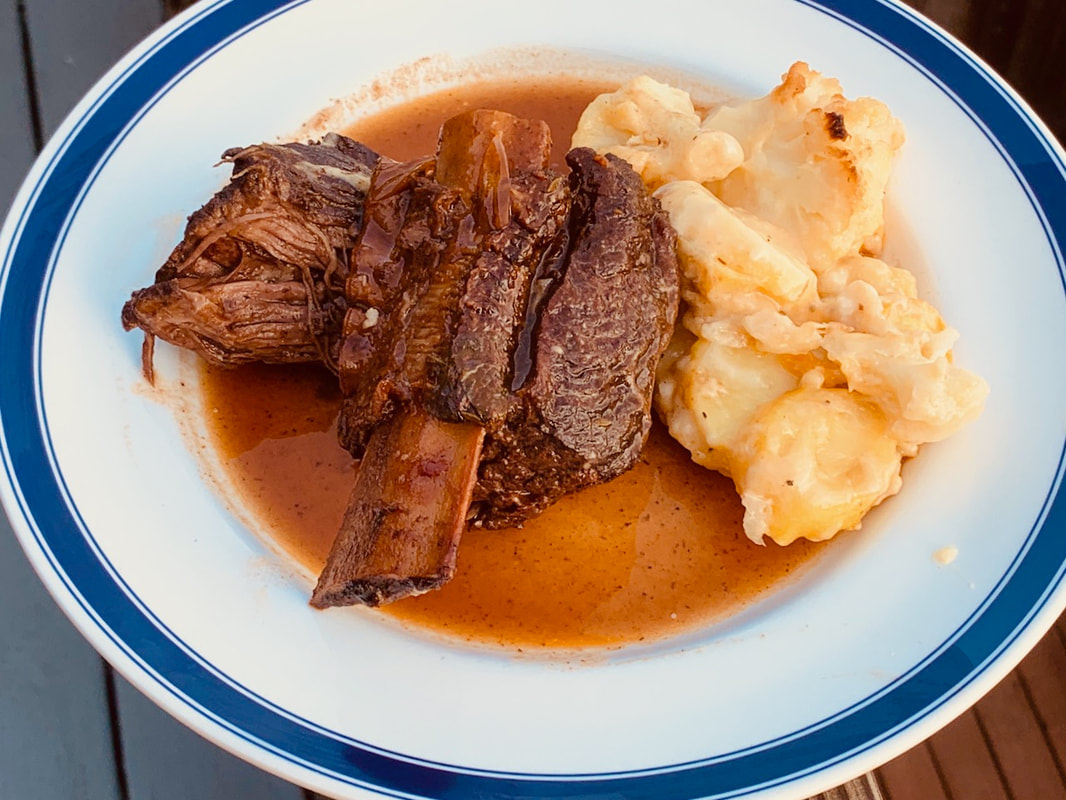
by Luke Barr from his book Provence 1970

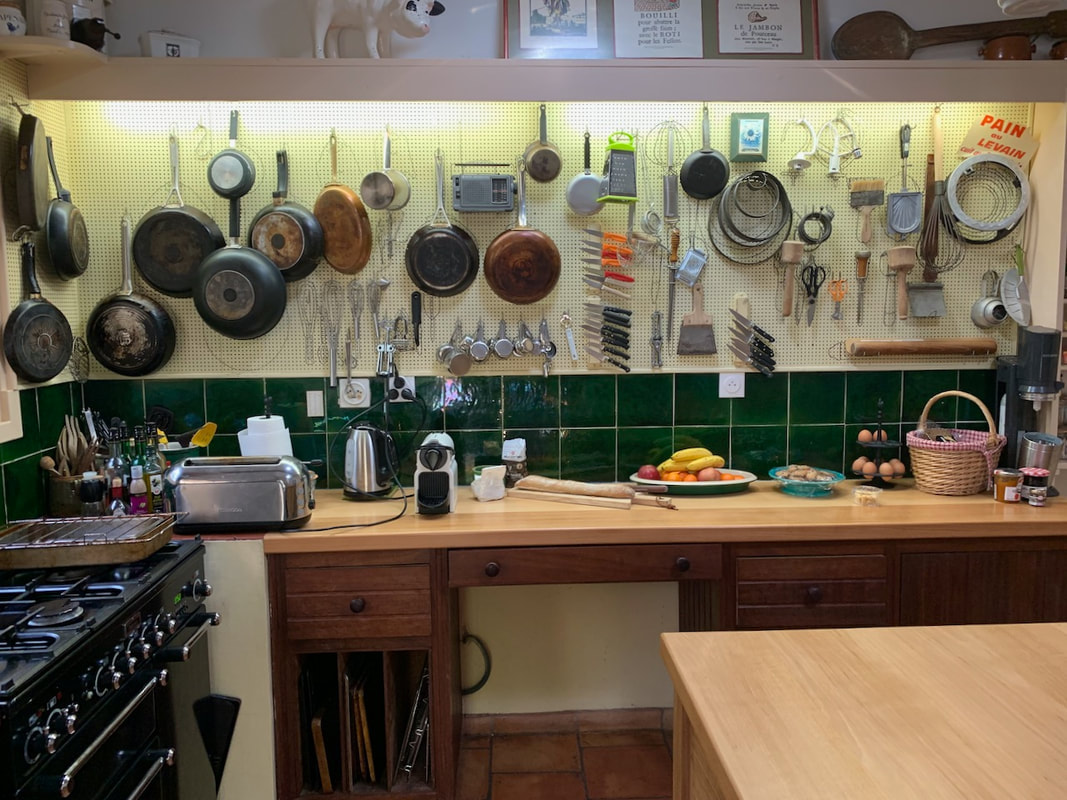
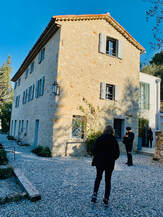 Mas Bramafan, our other home | 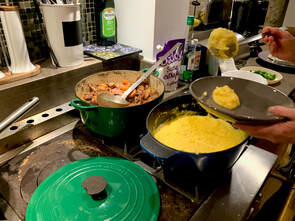 Our first dinner, Daube de Boeuf with Polenta |
 Mas Braham |  Dining at Mas Braham |
 Barbie Aknin , click on the photo for her website |  Fouad Zarrou, click on the photo for his website |
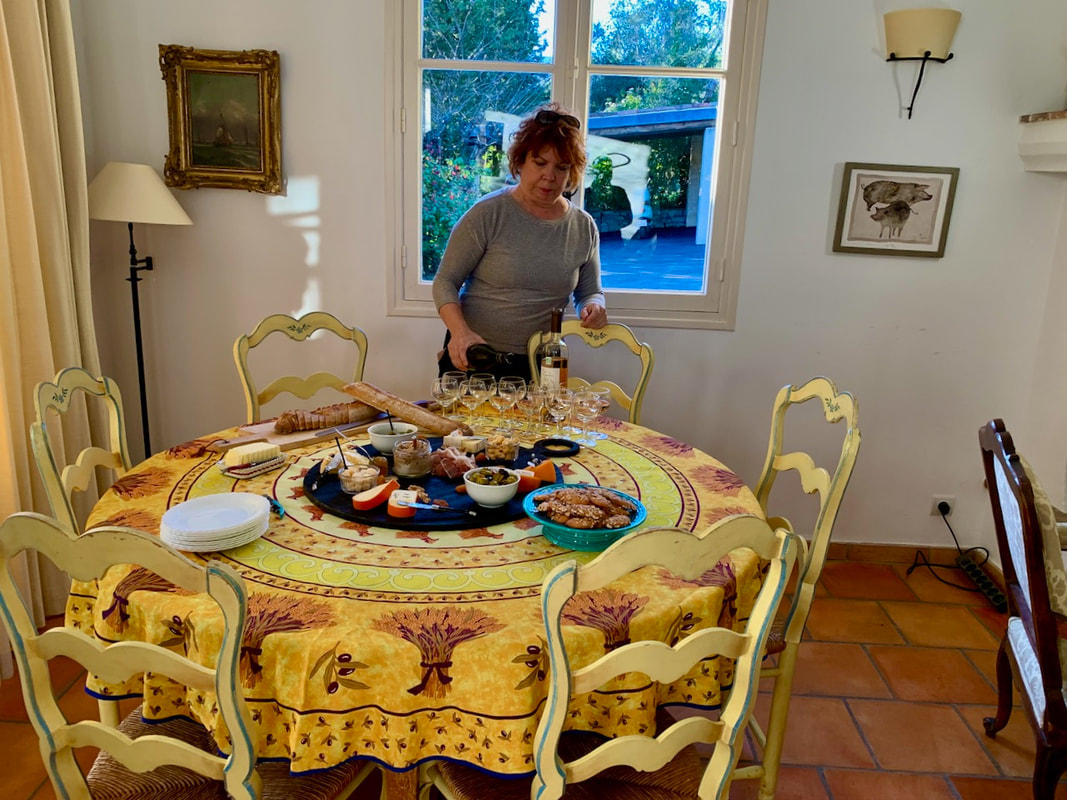
 The dining room at Mas Bramafan |  Daube de Boeuf |
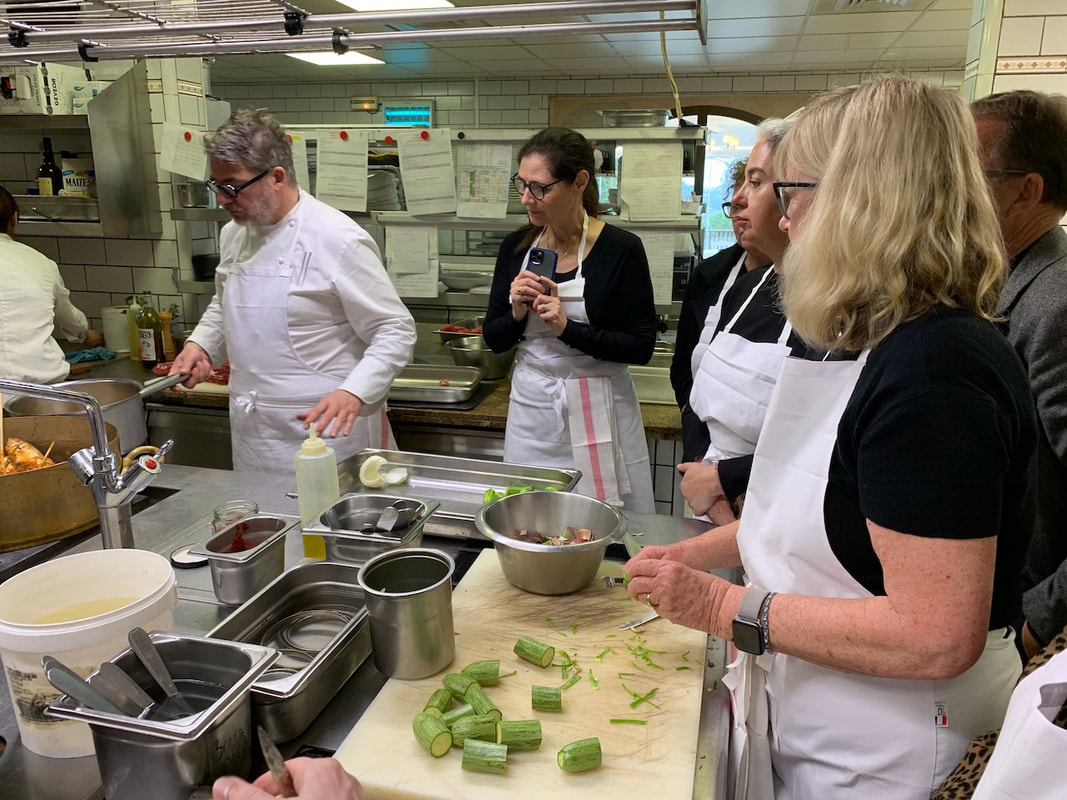
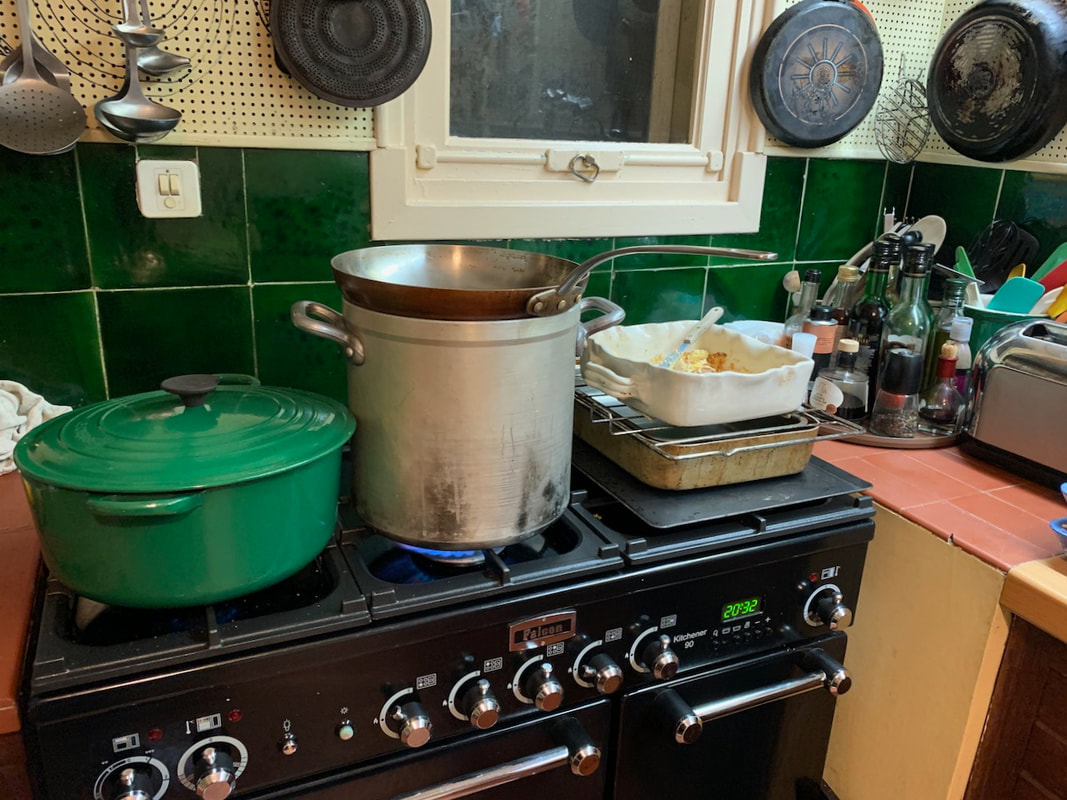
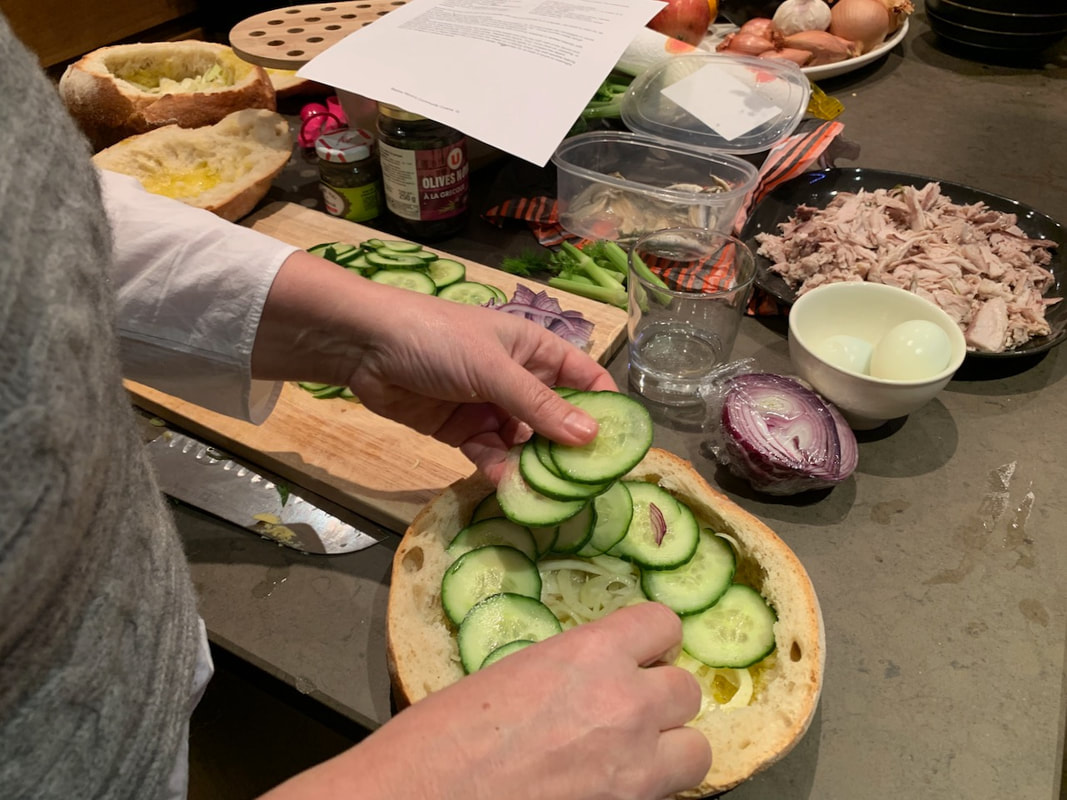 Preparing our lunch for the coming day | 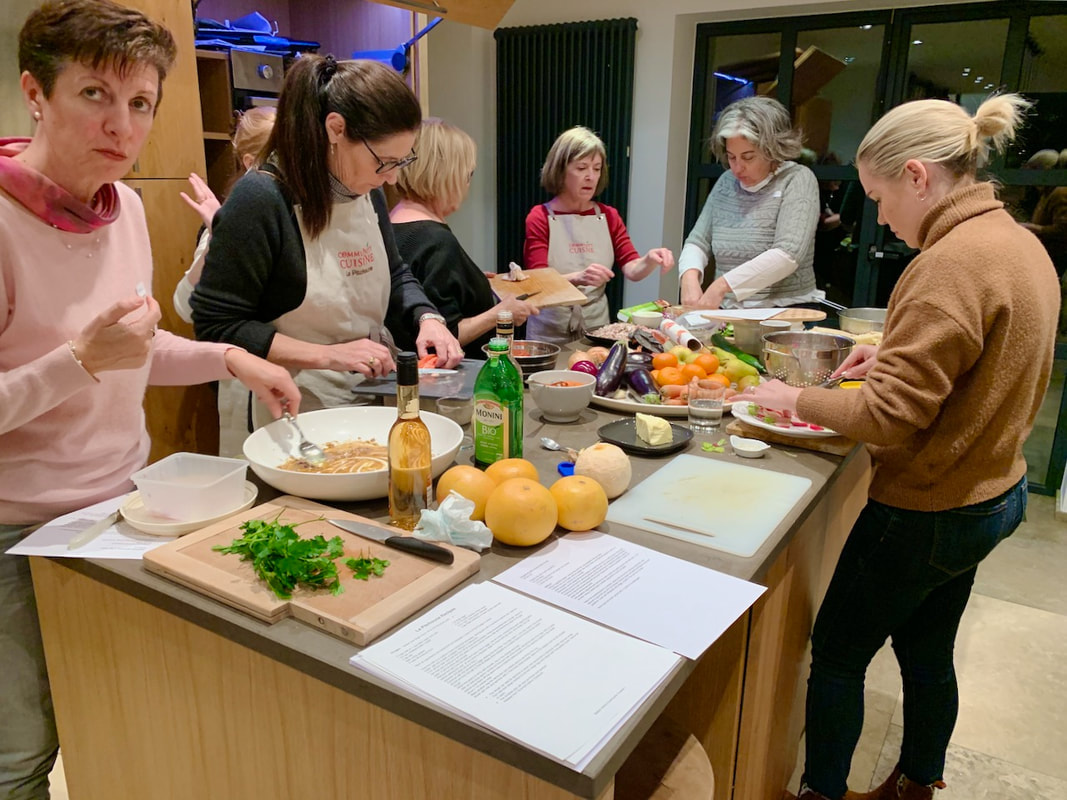 One of the many cooking lessons |


 |  |


 In the kitchen | 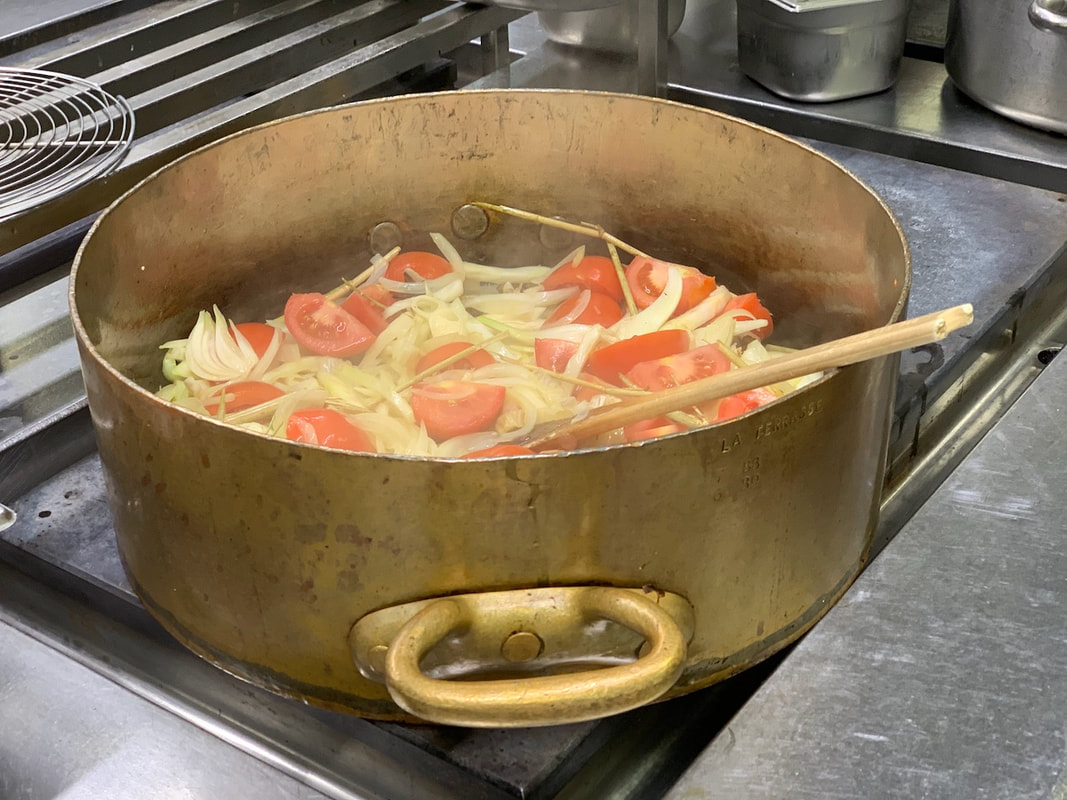 Making the Mediterranean fish terrine |
 The panoramic terrace | 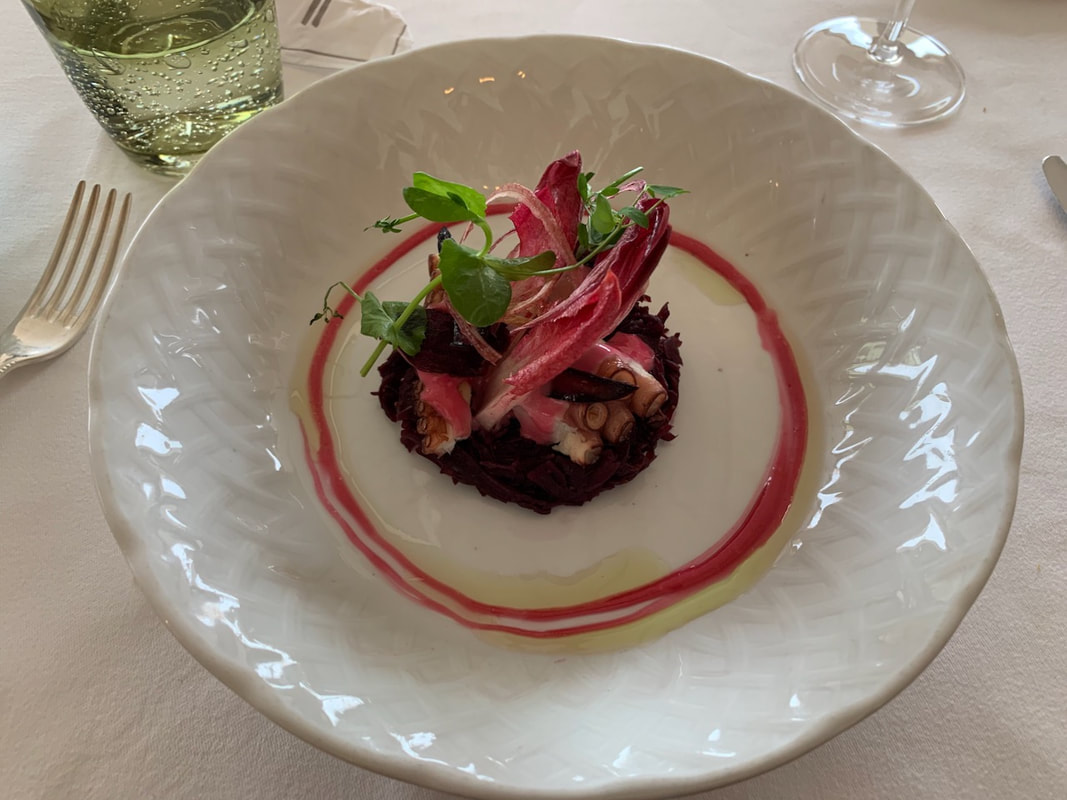 Beetroot with apples / avocado/haddock chips and mustard sorbet |
 Cooking in Julia's kitchen |  Our last dinner together |
 Monacco |  The view from the Villa Ephrussi de Rothschild oil Saint-Jean-Cap-Ferrat |


 |  |


 |  |


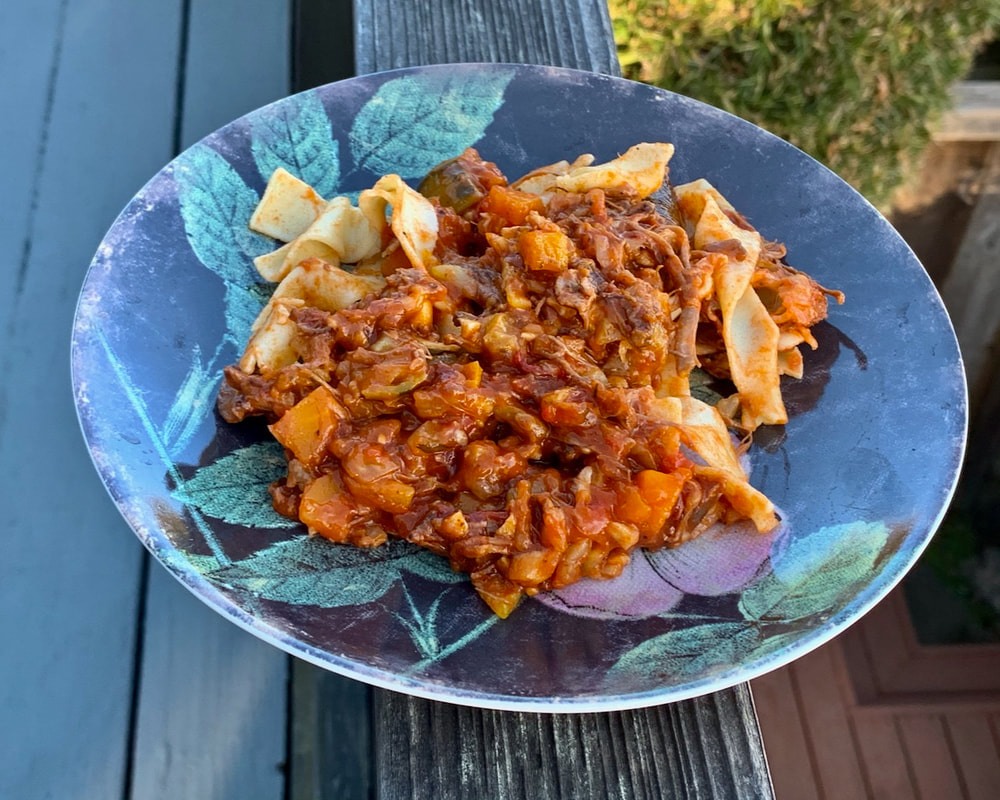
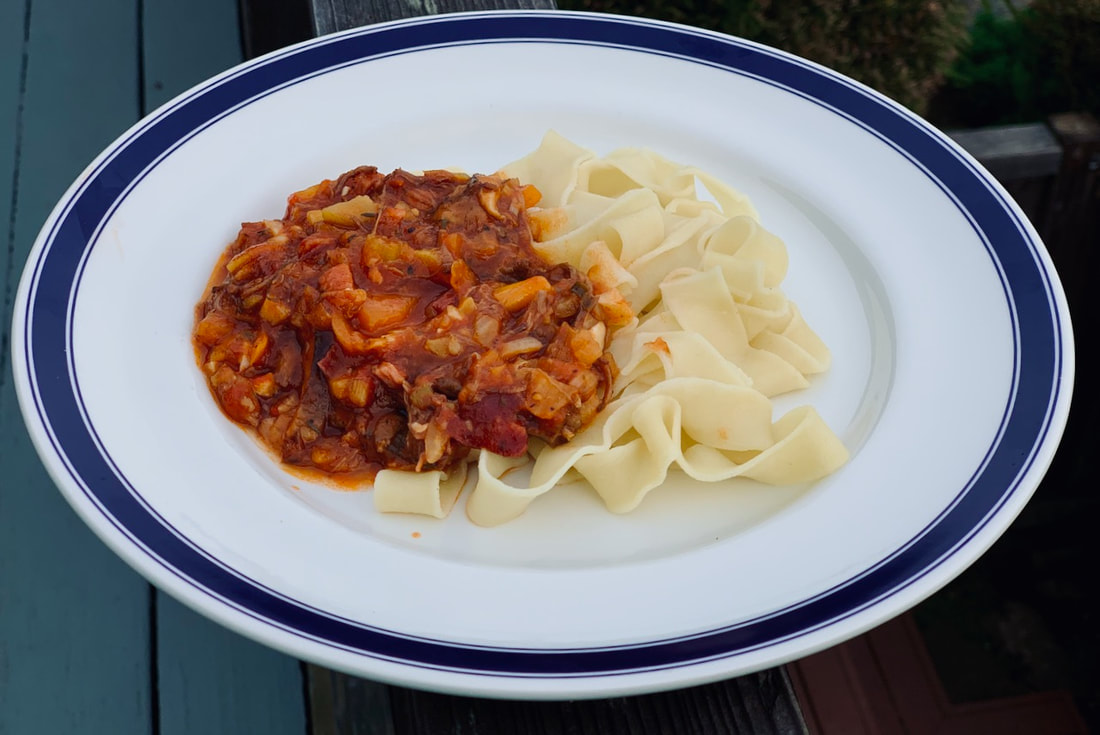
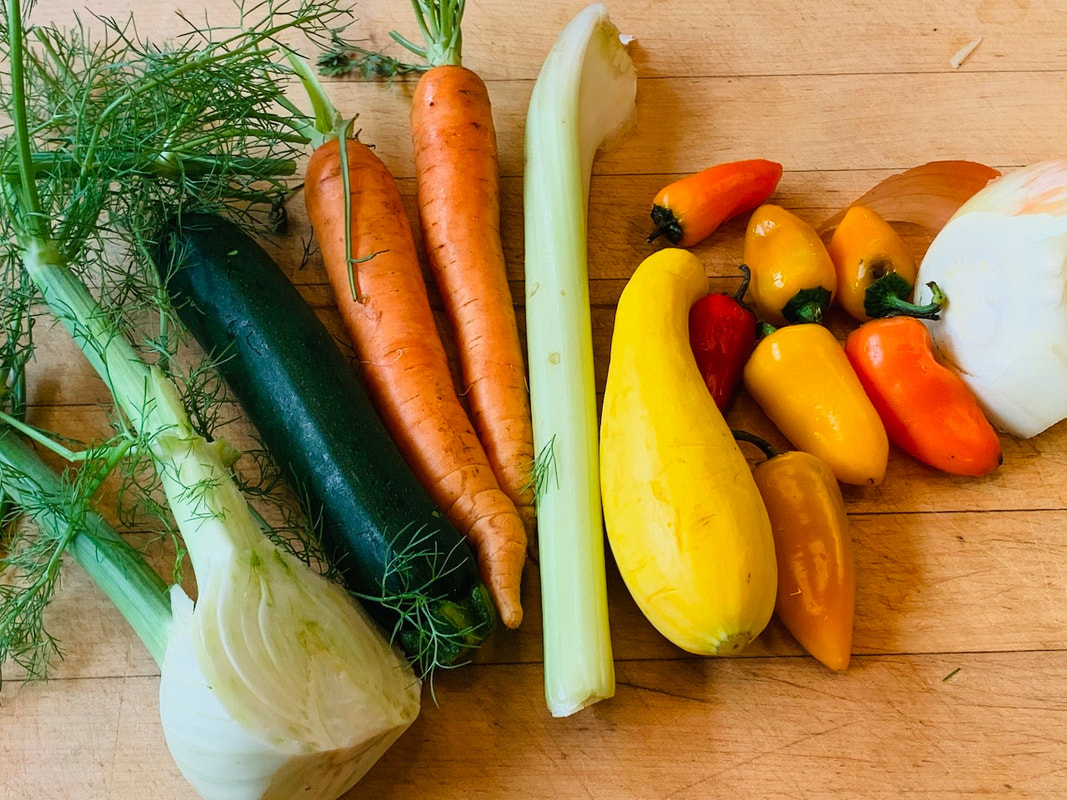
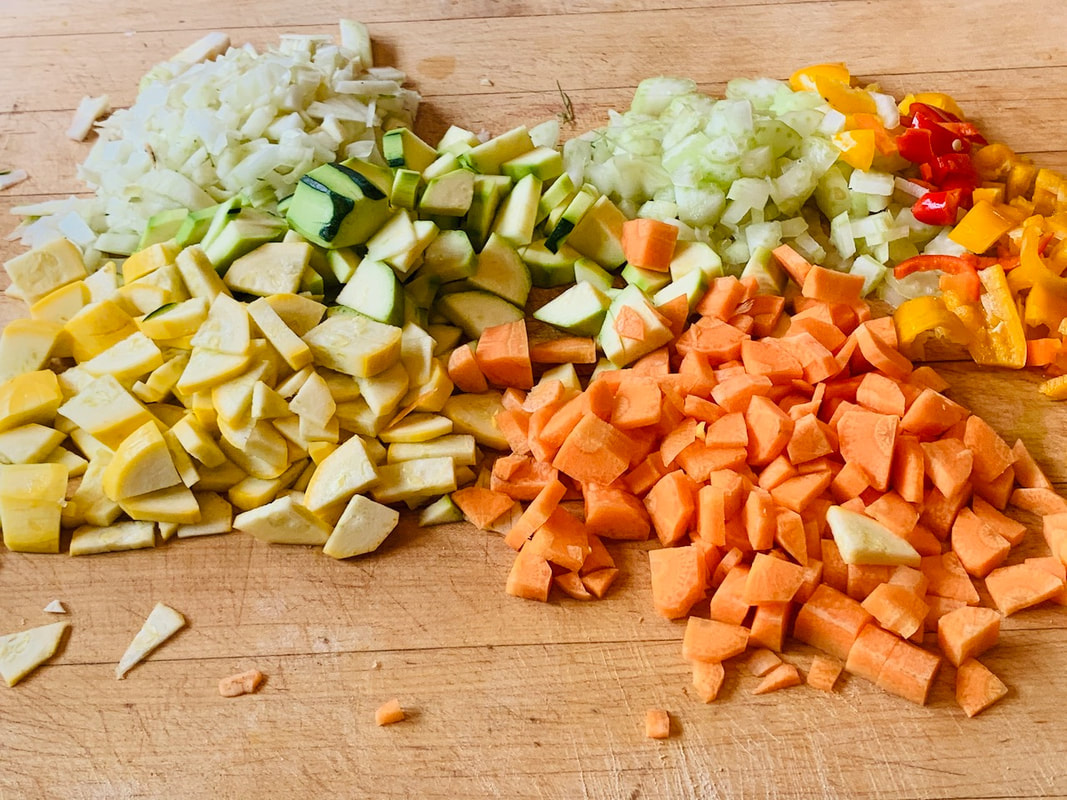
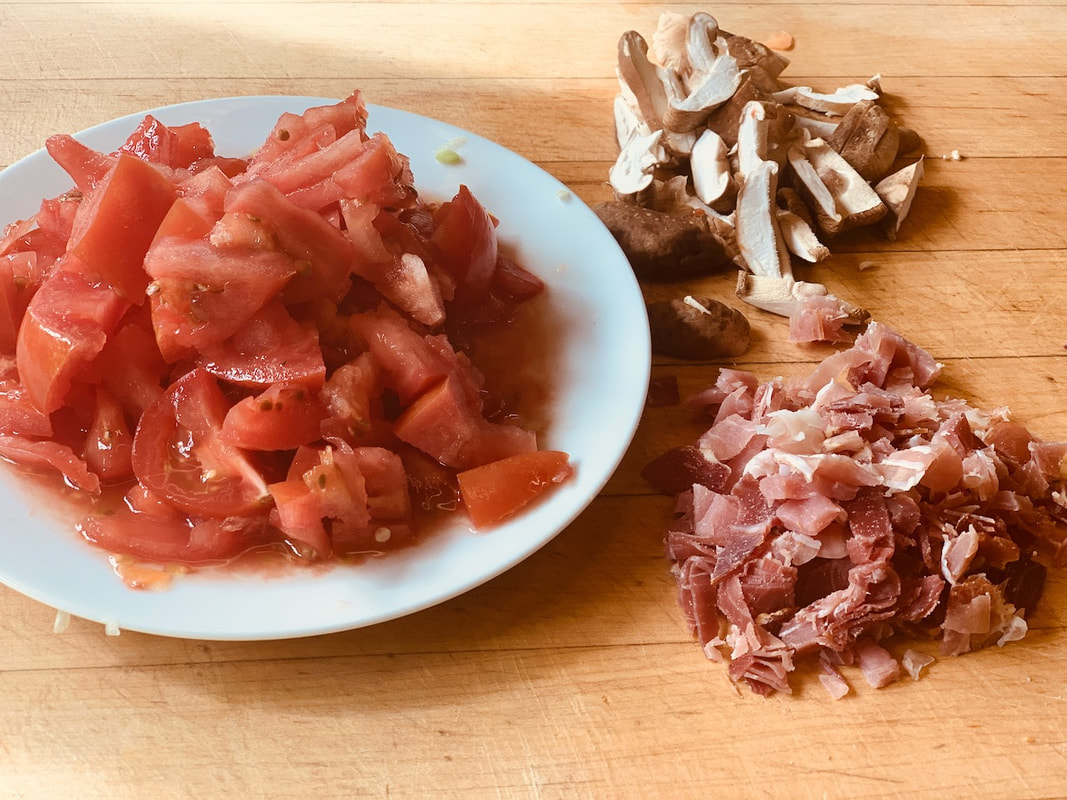
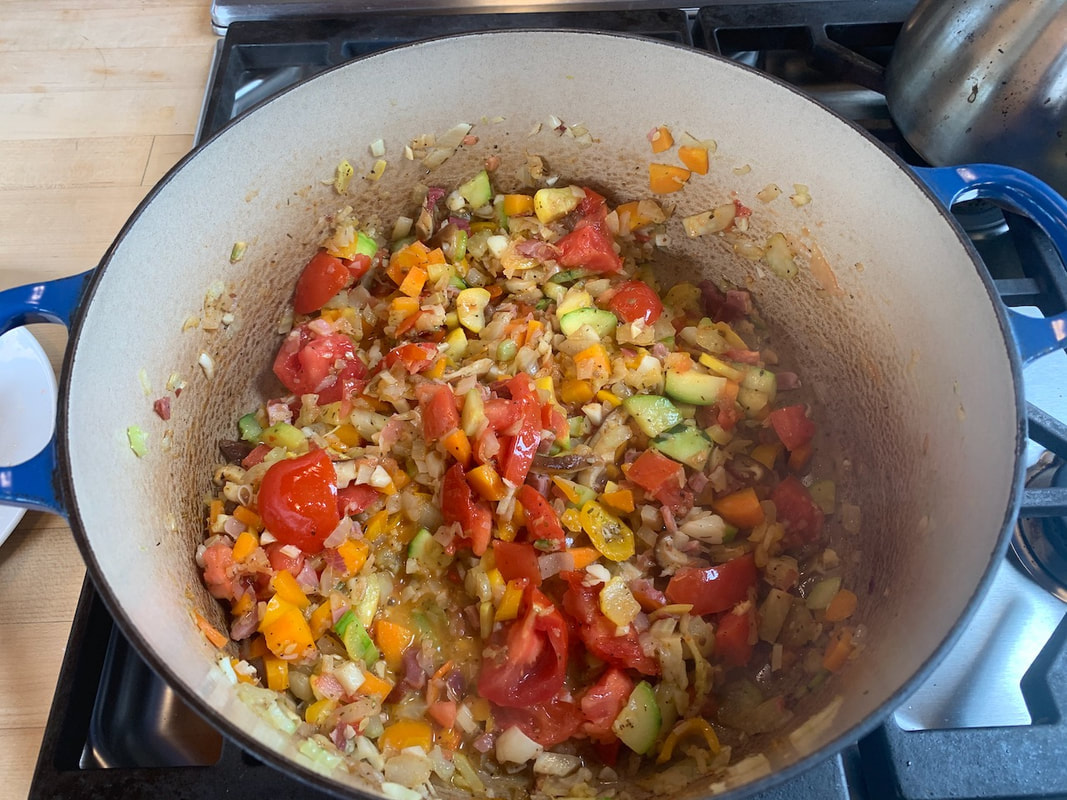
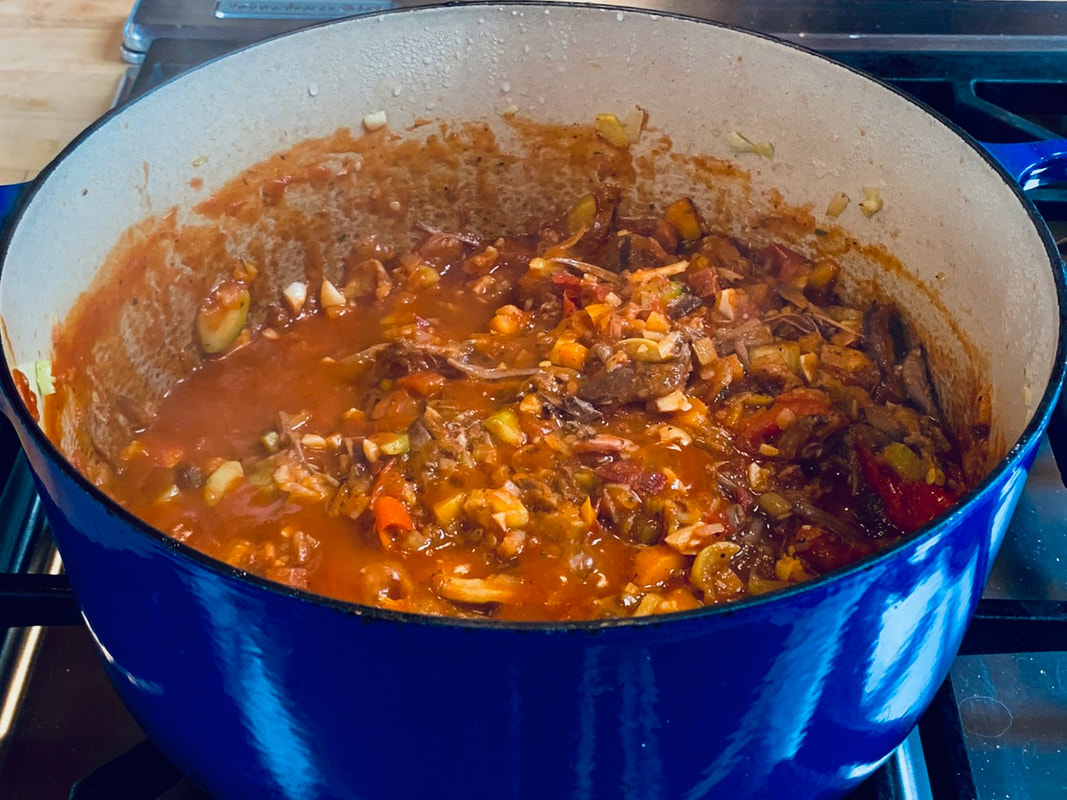
| Ingredients: 1- 1 ½ cup finely chopped white onions 2 finely chopped carrots 2 zucchinis, peeled and chopped ½ fennel bulb, finely chopped 1 piece of celery , finely chopped 4 mini peppers , thinly sliced 3 TBS finely chopped garlic a handful of shiitake mushrooms, thinly sliced 1-2 cups chopped tomatoes 4 slices of of chopped prosciutto 1½ -2 cups of leftover cooked beef 1 can ( 15 oz or 425 g ) tomato sauce 3 TBS olive oil 1 tsp. Italian seasoning 1 tsp. sugar 1 tsp. and more salt 1 tsp. and more pepper | Directions: Heat the olive oil and sauté the onions, carrots, celery, zucchini, and mini peppers for 10-15 minutes at low heat. You want the vegetables to be soft but not overly browned. Add the mushrooms and garlic and sauté another couple of minutes. Add the chopped tomatoes and prosciutto and continue to sauté for several minutes. Stir occasionally during this entire cooking time. Add the can of tomato sauce, rinse the can with water and add that to the sauce. Add the Italian seasoning, sugar, salt and pepper. Add the meat and and stir. Cook for about 20 minutes , make sure the sauce doesn’t stick to the bottom. Cook your pasta as directed on the package. Remember, always salt your pasta water. On my last trip I was told by a wonderful Italian chef that you want the pasta water to taste like the ocean. I like that! Make sure you save some of the pasta water to add to your sauce. Guten Appetit! Recipe by© Sunnycovechef.com |
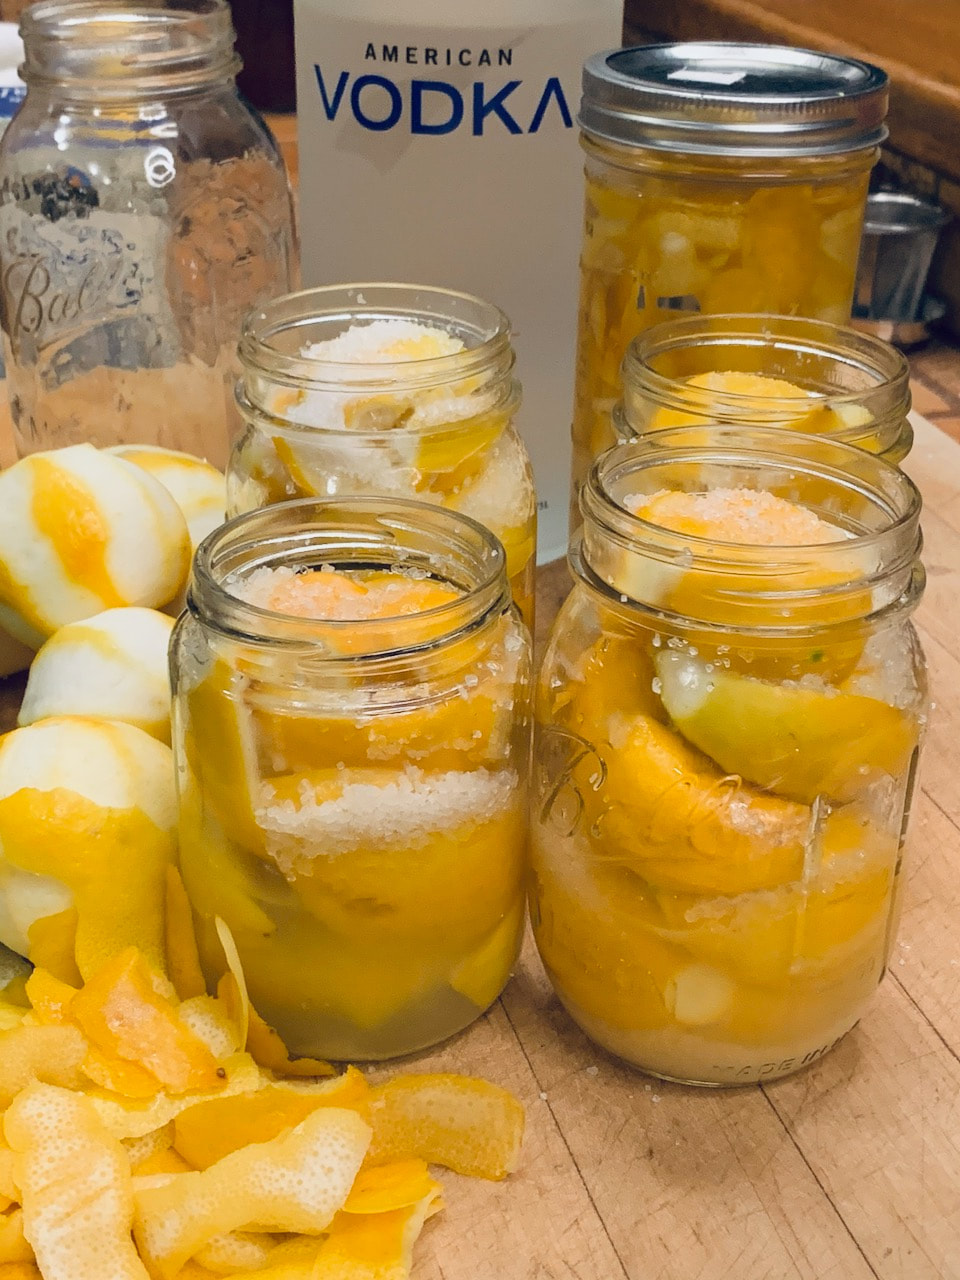
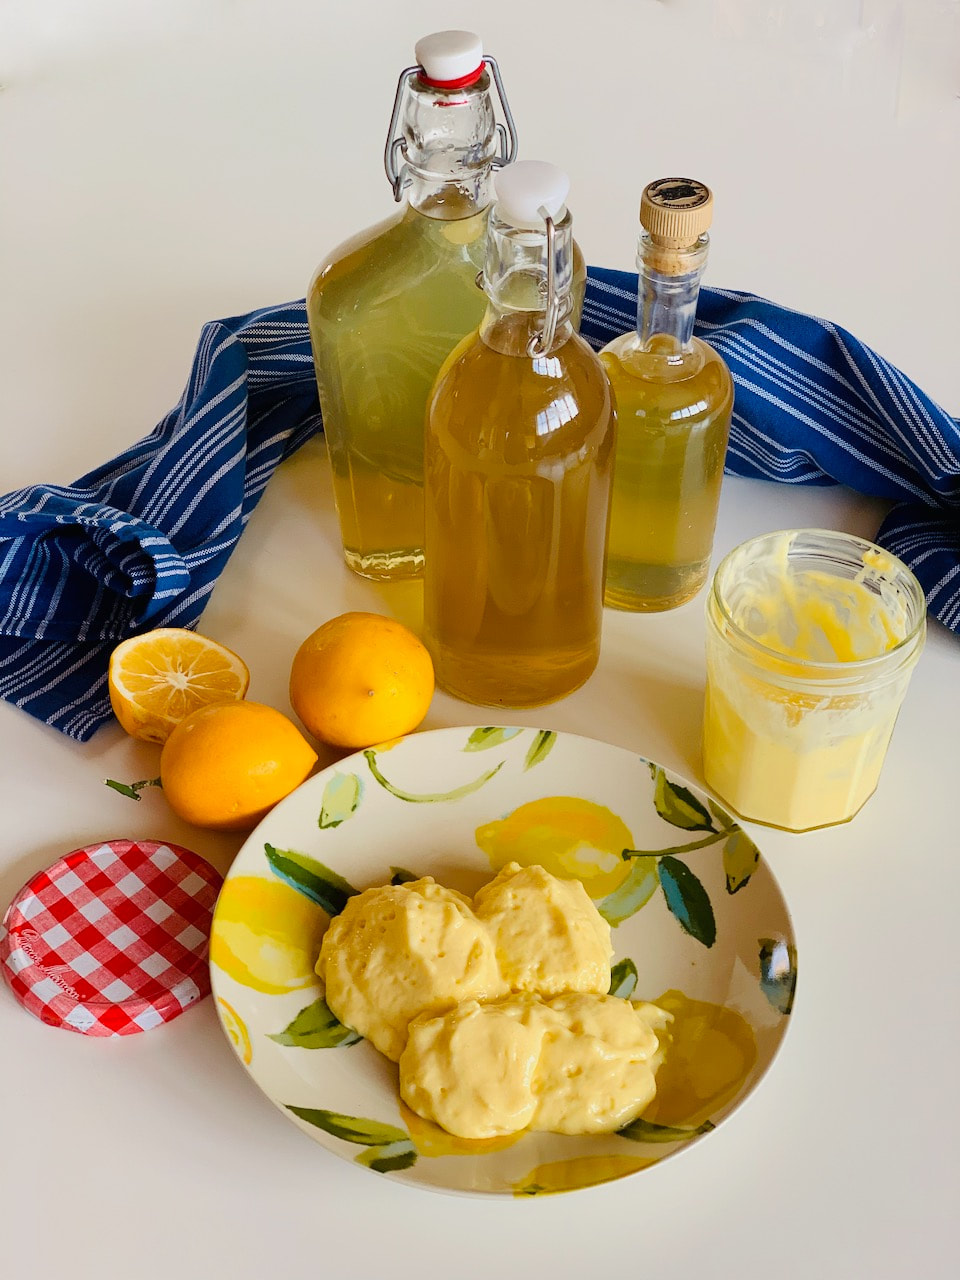
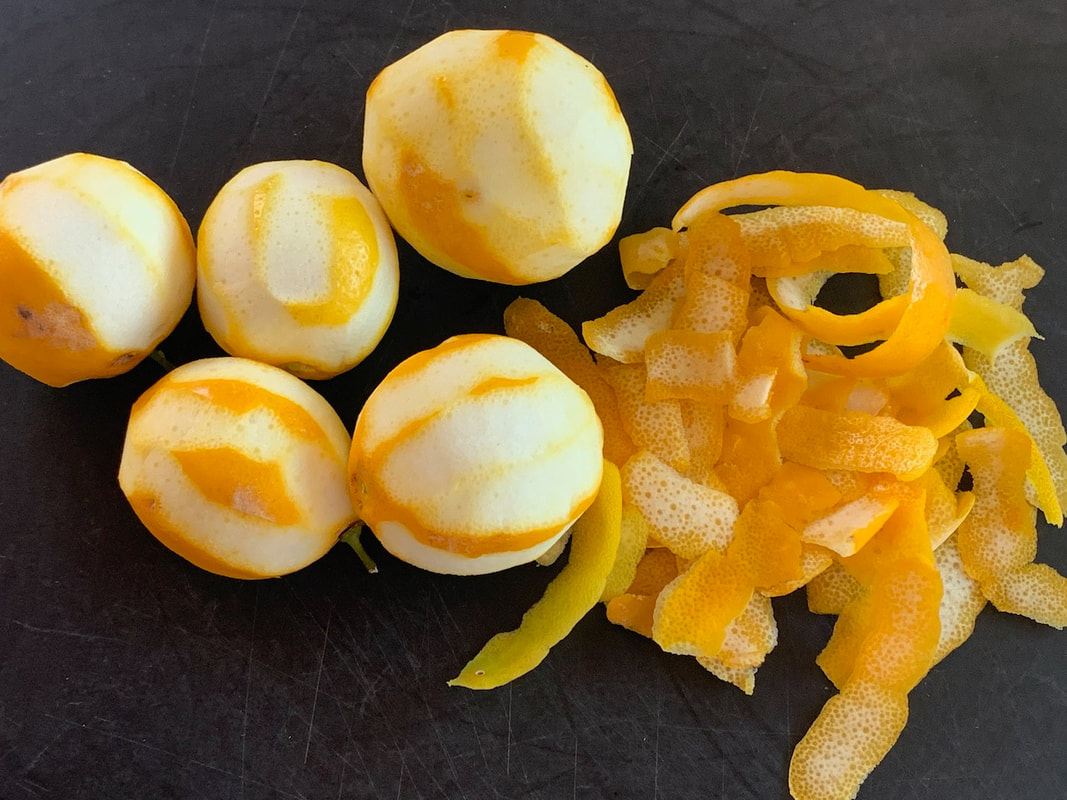
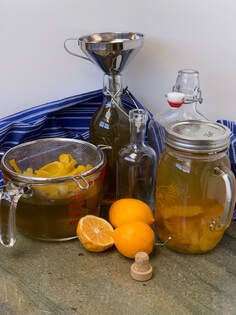
| Recipe for lemon curd made in the Vitamix It makes about three cups Ingredients: 6 small eggs at room temperature ½ cup fresh lemon juice 1 TBS lemon zest 1 cup sugar a pinch of salt ½ cup unsalted butter at room temperature cut into pieces Recipe for Limocello: I used Giada De Laurentil’s recipe for limoncello . I liked it but I don’t really have any comparison since I never have had limoncello before. I will make it again when I have more lemons and return from my trip. Any help for this recipe is greatly appreciated. When making the recipe make sure you remove as much of the pith from the lemon peel as possible. Click here for Giada's recipe Click here for Holly Baker's lemon curd recipe | Directions for the lemon curd: Put the first five ingredients in the Vitamix. Begin at Variable 1 and gradually increase to 10. Blend for about three minutes. When the mixture gets hot keep checking with a thermometer and continue to blend for another few minutes until the thermometer reads 160 degrees. Now your eggs are safe. Add the butter and blend until smooth for about 10 seconds. Pour the curd into some jars and cool overnight in the fridge. Recipe by Holly Baker from A Baker's House adapted by© Sunnycovechef.com |
 preserved lemons on avocado toast | Preserved lemons capture the heavenly perfume of the lemon and excite your palate. It brings out the best in my avocado toast and many other dishes. Click here for the recipe. |
| This is a nutty, chewy , nor-too-sweet cake which is made with whole lemons and ground almonds. Click here for the recipe | 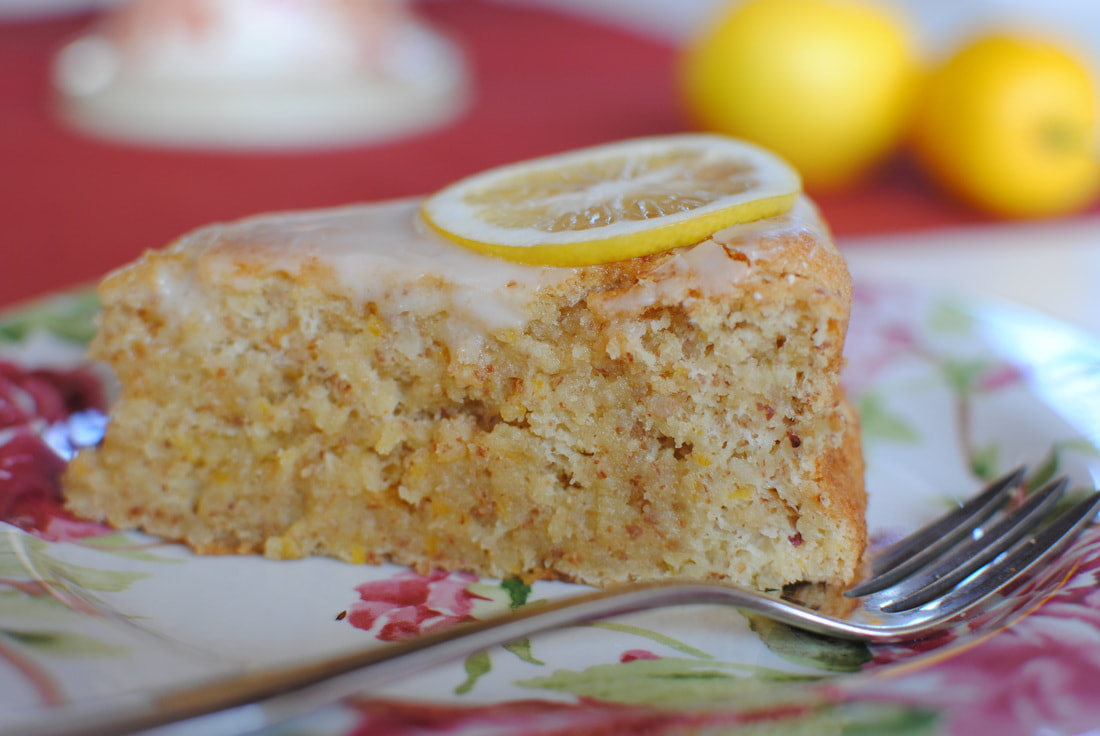 lemon cake |
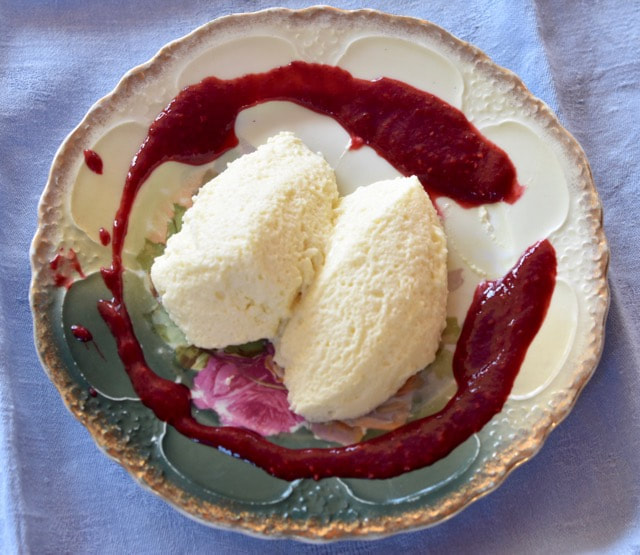 Zitronenspeise (lemon mousse) | You want a melt in your mouth lemony dessert, try my German lemon mousse or Zitronenspeise as we call it in Germany. Click here for the recipe |
| This tart lemon sorbet made with buttermilk has been an old friend of mine for years. Click here for the recipe. |  lemon sorbet |
 lemon bread | Perfect for an afternoon snack, this simple lemon tea bread is compact and infused with lemon juice. Click here for the recipe |
| A delicious lemon pudding cake that is light and makes a great ending to any meal. The recipe comes from the Greens Restaurant in Fort Mason in San Fransisco. Click here for the recipe | 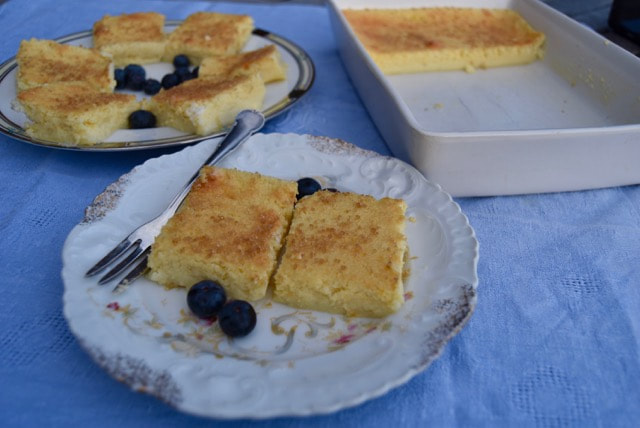 lemon pudding cake |
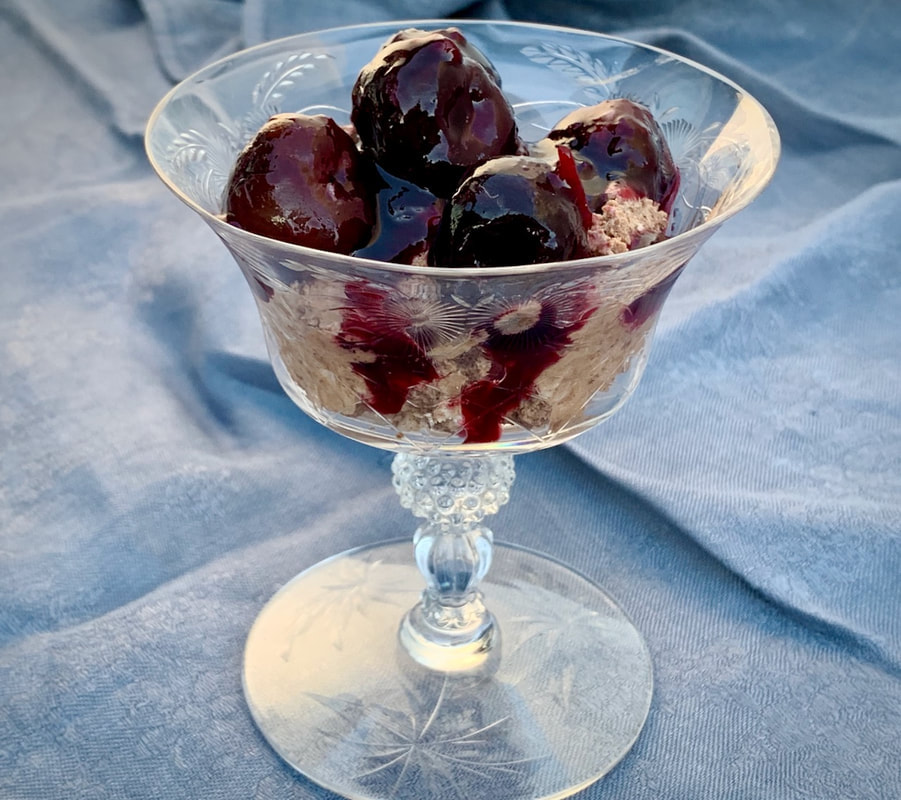
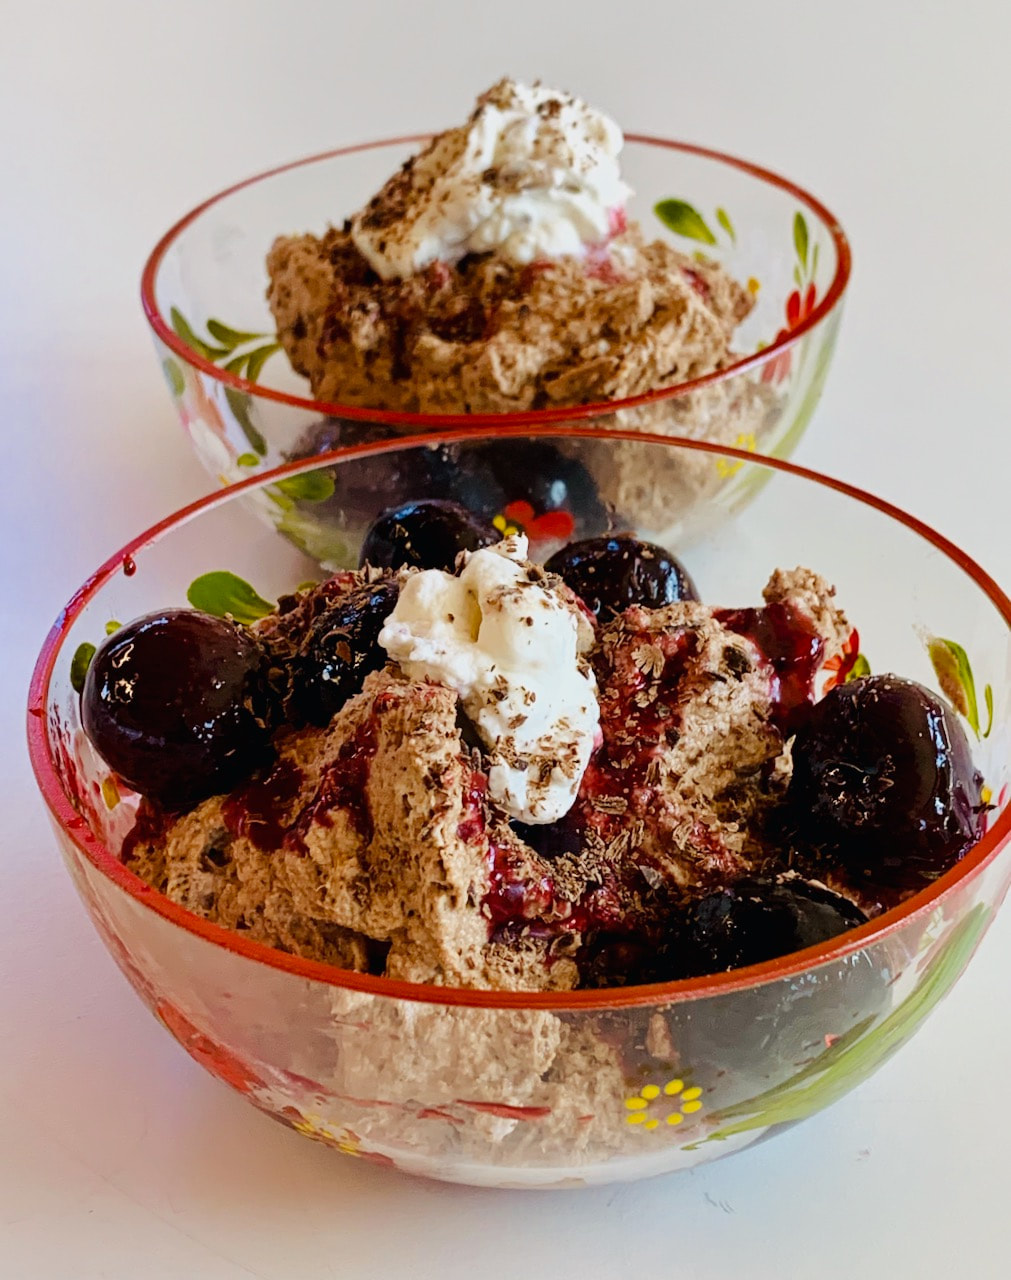

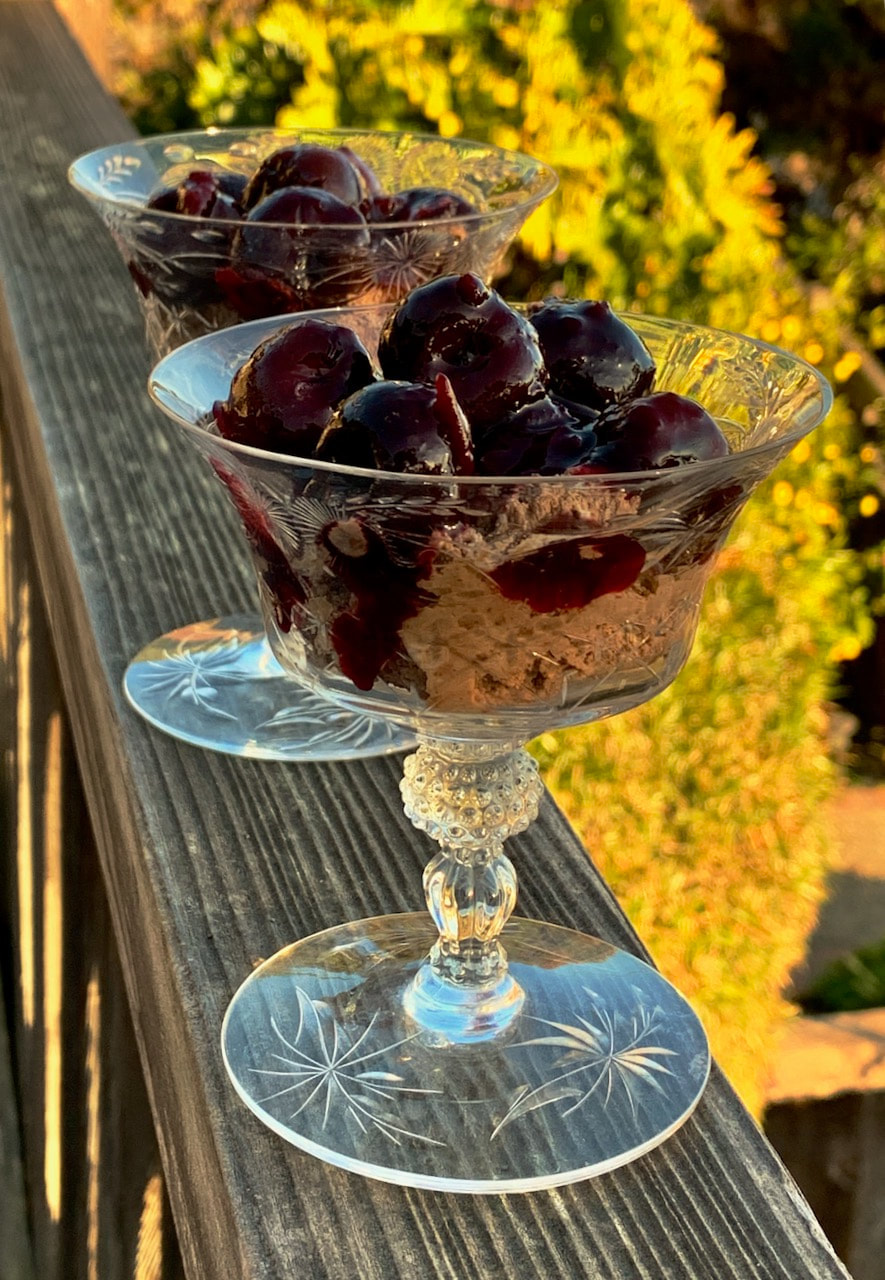
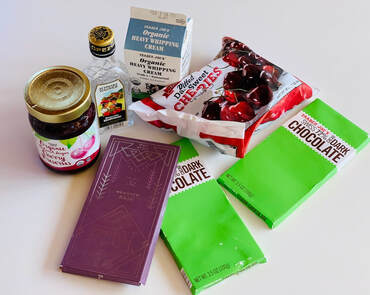

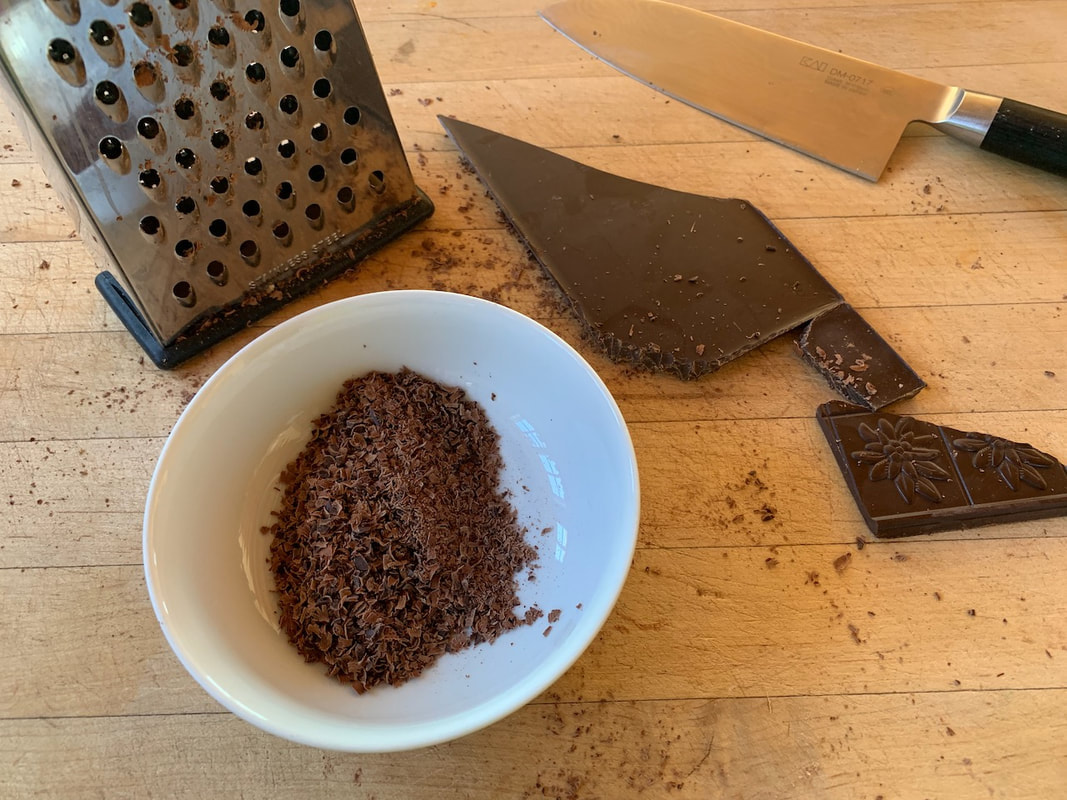

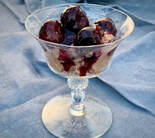
| Ingredients: 7 oz. ( 200g) good quality bittersweet chocolate 1 lb. ( 500g ) frozen dark sweet cherries ½ ( 100g) cup cherry marmelade 2 TBS Kirschwasser (optional) substitute water 2 ¼ cups ( 600g) heavy cream | Directions: Put the frozen cherries with the Kirschwasser into a pot, cover and simmer until the cherries reach the consistency you like. I like mine crunchy and just heated up the cherries until they where defrosted. Stir in the cherry marmalade and let it cool. Grind about a ¼ cup of the chocolate to sprinkle over the mousse when serving it. Set aside for later, chop the rest of the chocolate coarsely. Heat ½ cup of cream, take off the heat and stir in the chocolate. Whisk until all the chocolate is melted making it into a soft ganache. Whip the remaining cream to medium peaks. When you whip the cream you see the beaters leaving a trail, slow down the beating and watch. You do not want to over-whip the cream or you and up with a grainy mousse. Put some of the cream aside for decorating the mousse . Gently, with a big spatula, fold the cream into the chocolate in thirds. Divide the mousse into individual bowls or cocktail glasses. Add about four cherries with the sauce . Dollop with the reserved whip cream and sprinkle with the grated chocolate. You can make this ahead and chill in the refrigerator for several hours. Guten Appetit! Recipe from the German Magazine Lecker adapted by © Sunnycovechef.com |


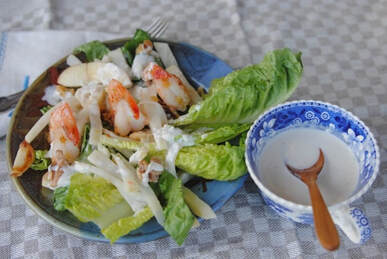 | This ginger shrimp celeriac root salad makes makes a great lunch or light dinner |
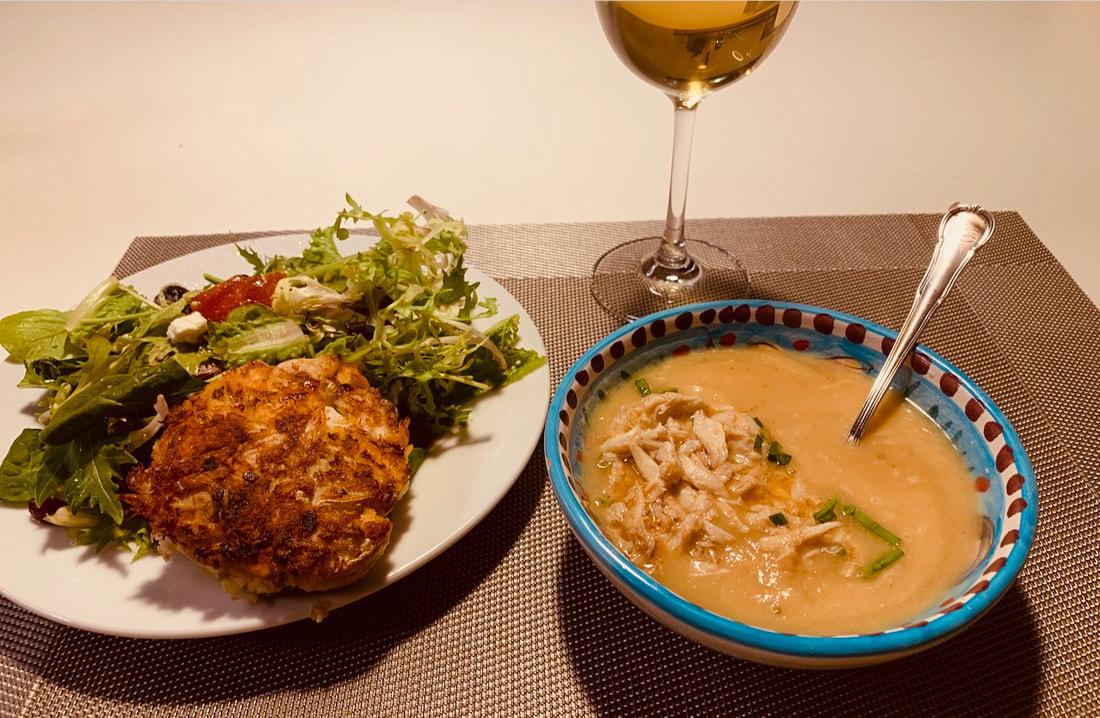
| A creamy vegetable soup made with carrots, celeriac root, leeks and potatoes and topped with bay shrimp. In Germany this soup is called Krabbensuppe . Krabben are tiny shrimp from the Nordsee. I make this soup all the time and everybody loves it. | 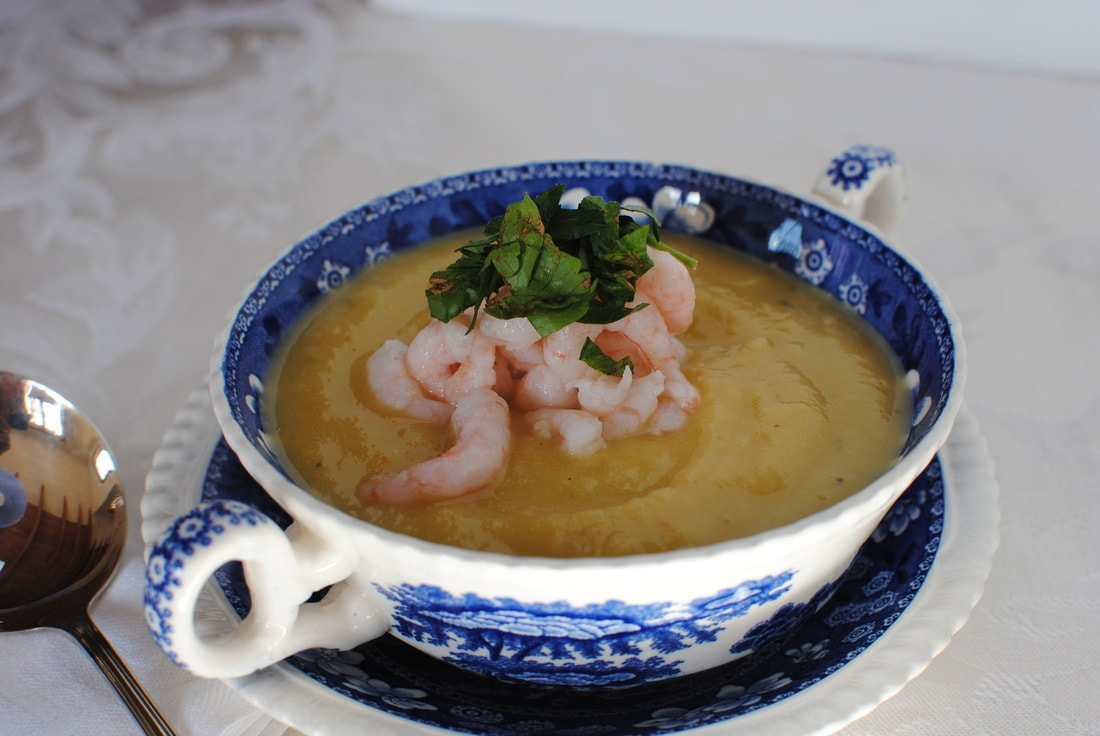 |
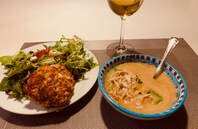

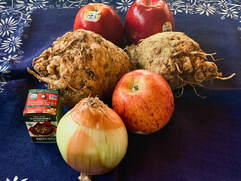


| Ingredients: serves 4 2 TBS olive oil 2 TBS butter 1 medium yellow onion, peeled and chopped 2 garlic cloves, peeled and chopped 5 + cups chicken broth 1 large celeriac root , peeled and sliced 3 medium sized apples, peeled and sliced 1 tsp. salt ¼ tsp. graham masala ¼ tsp. freshly ground pepper Crab Topping: 4 TBS butter ½-1 cup crab meat 2 tsp. chives, chopped | Directions: Heat the oil and the butter over medium heat in a large pot, add the onions and sauté them for about 5 minutes until they get soft. Add the garlic and masala and sauté for an additional minute. Add the chicken broth, the celery and the apples and the rest of the spices. Bring to a boil over high heat , then reduce the heat and simmer covered for about 20 minutes or until the celeriac root is soft. Put the pot in your kitchen sink and puree with an immersion stick until has a smooth and silky consistency . You can also puree in a blender if you don’t have an immersion stick. Keep the soup warm while you heat the butter in a frying pan over medium stirring it frequently until the butter turns into a warm brown, do not burn it. This process takes about 4-6 minutes. Add the crab to the butter to warm. Pour the hot soup into into serving bowls, spoon the crab and butter over the soup. Sprinkle with chives. Guten Appetit ! Recipe by Caroline Chambers in the winter addition of “edible Monterey” adapted by ©Sunnycovechef.com |

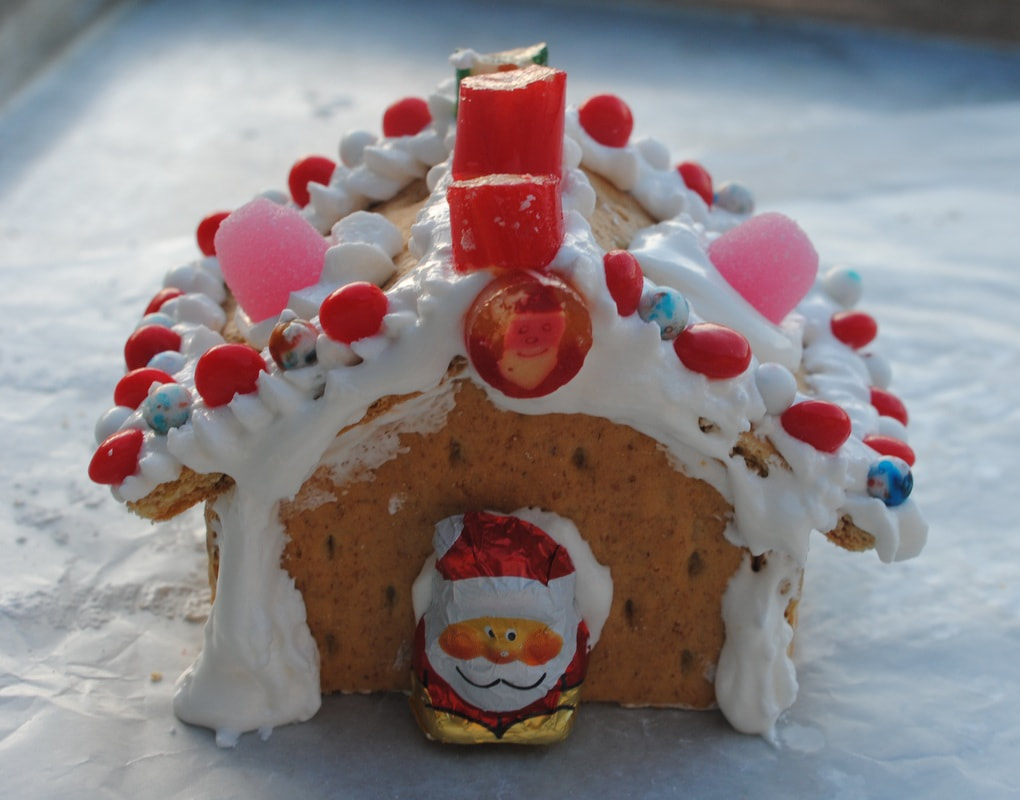
 |  My friend Monika sent me this photo from her Christmas dinner |
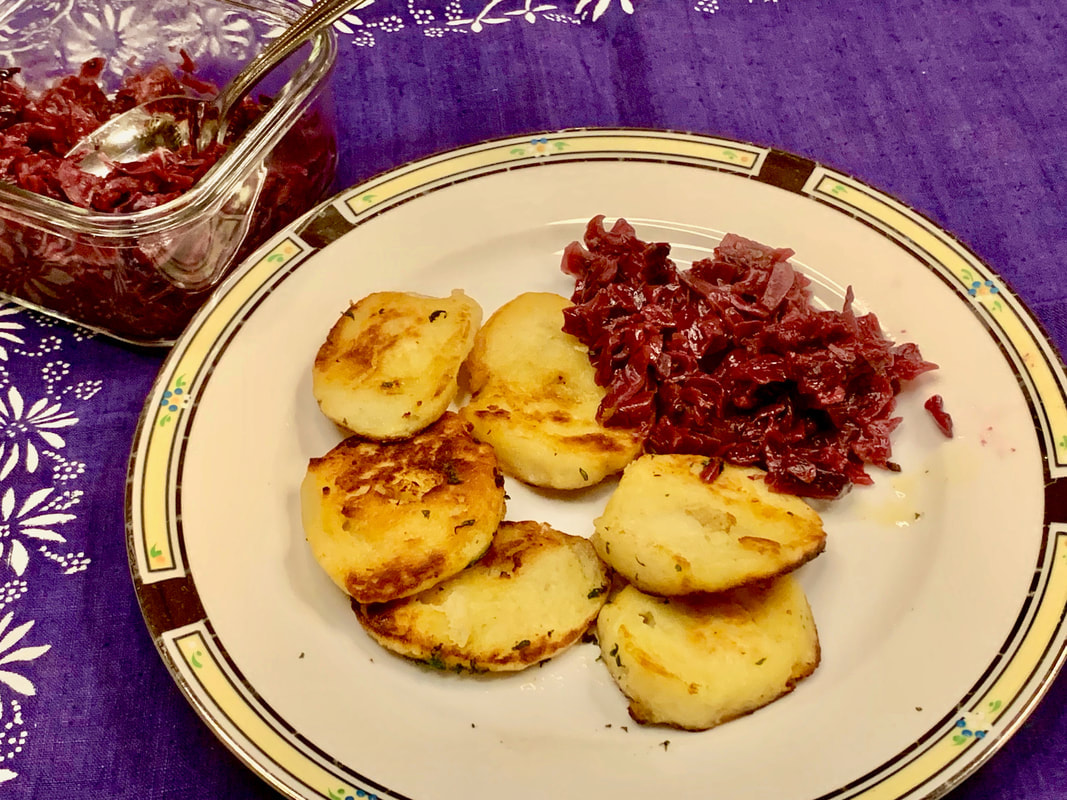
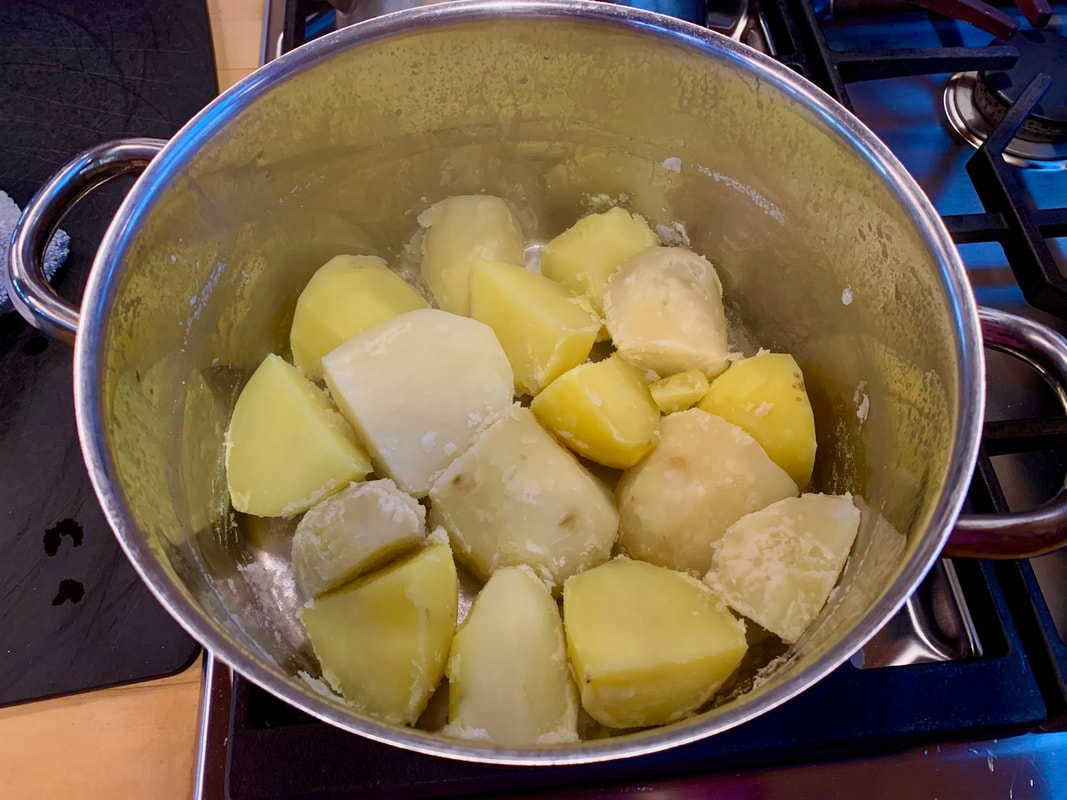
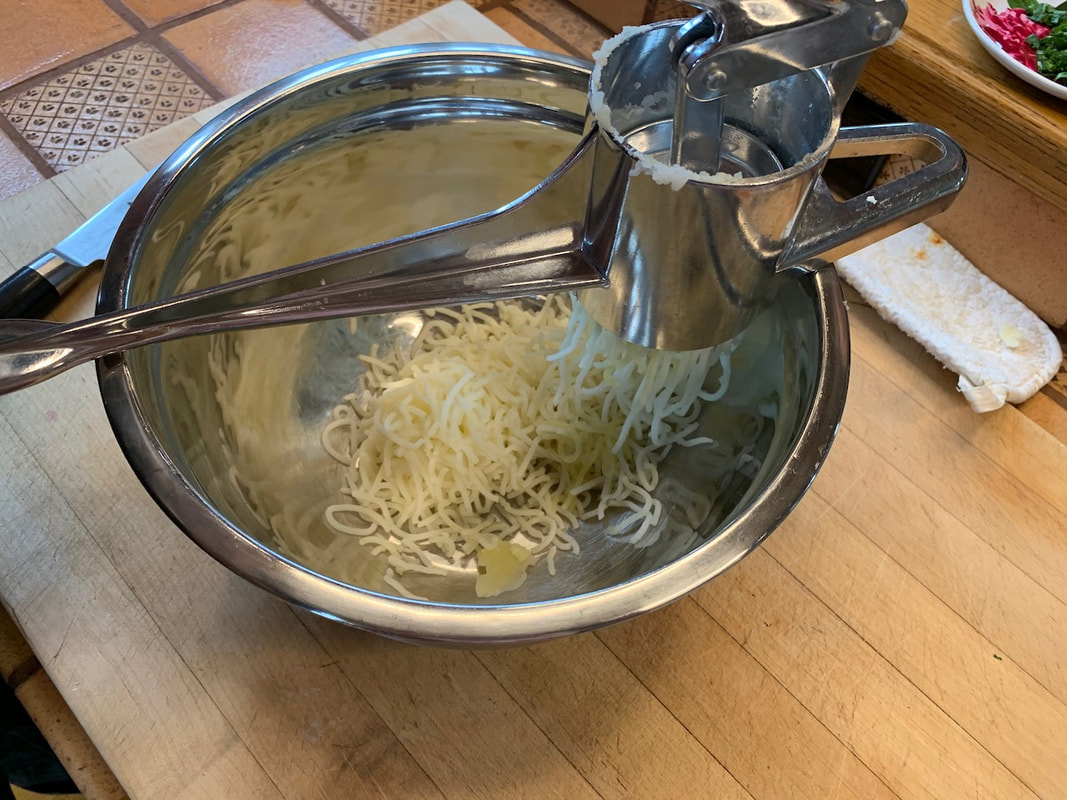
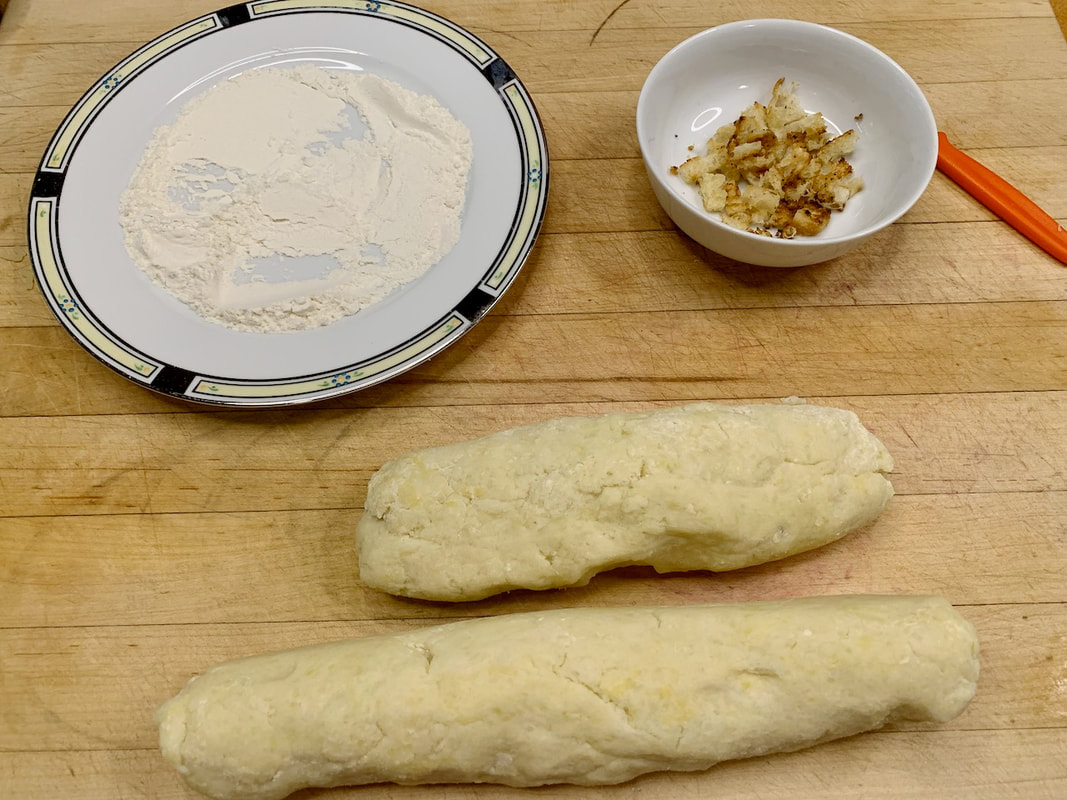
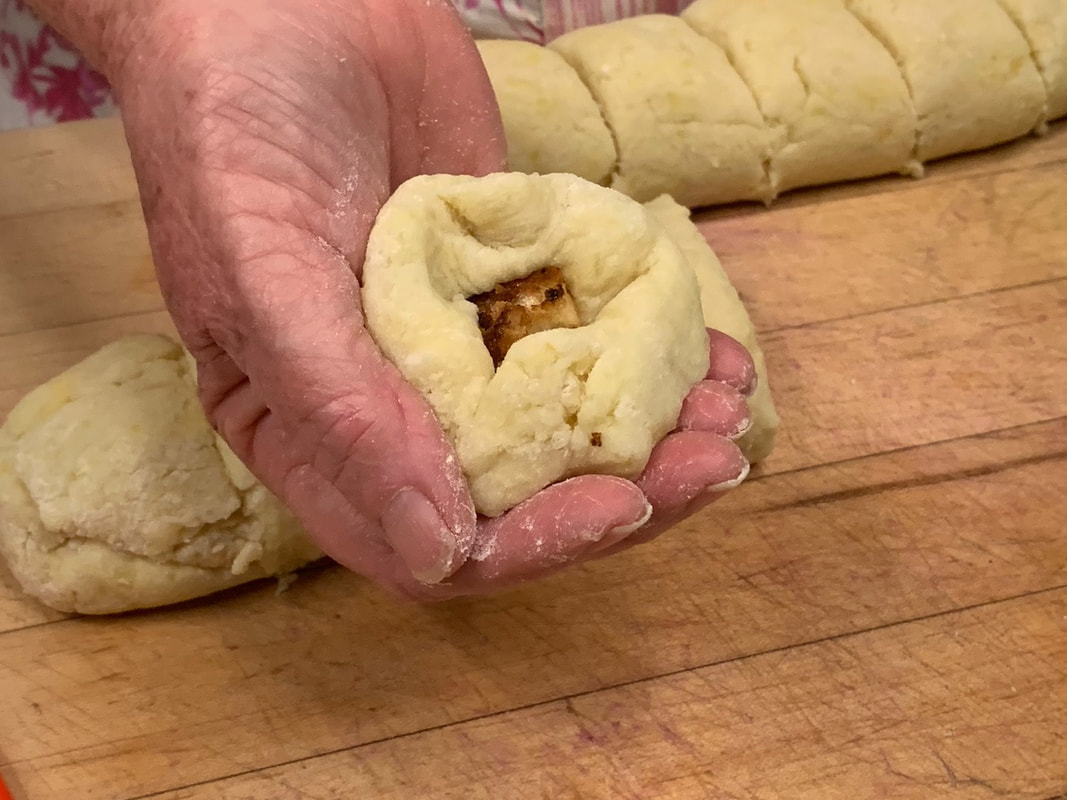
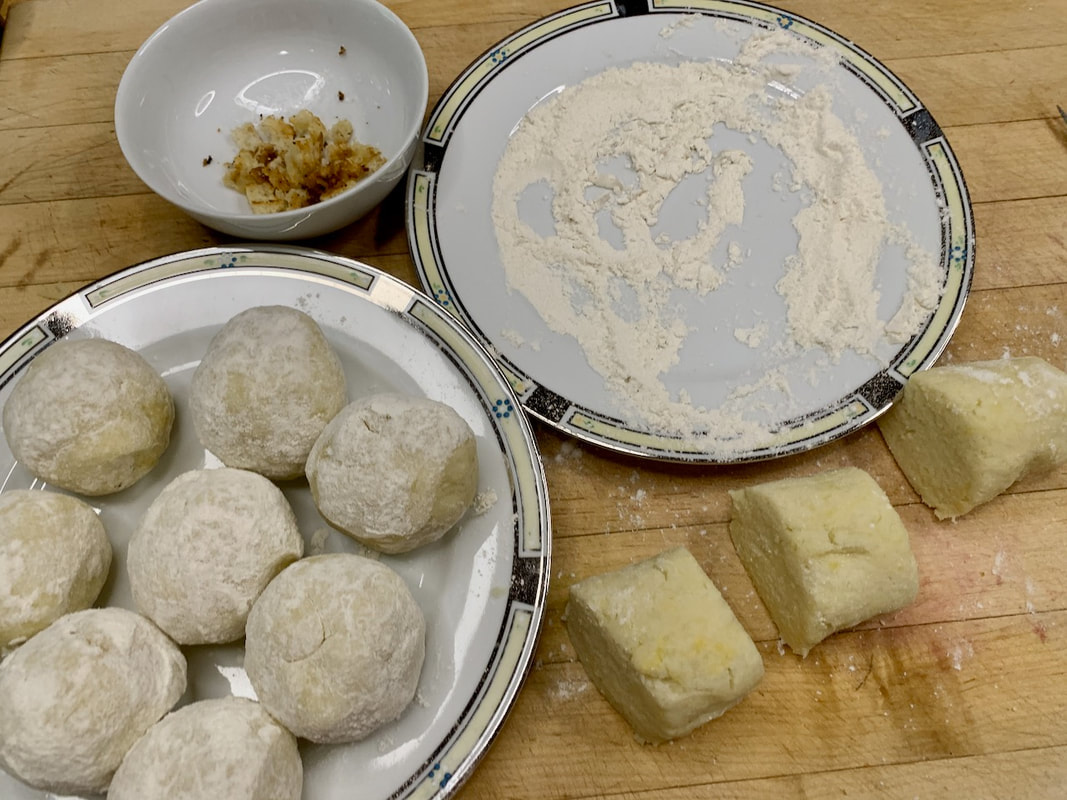
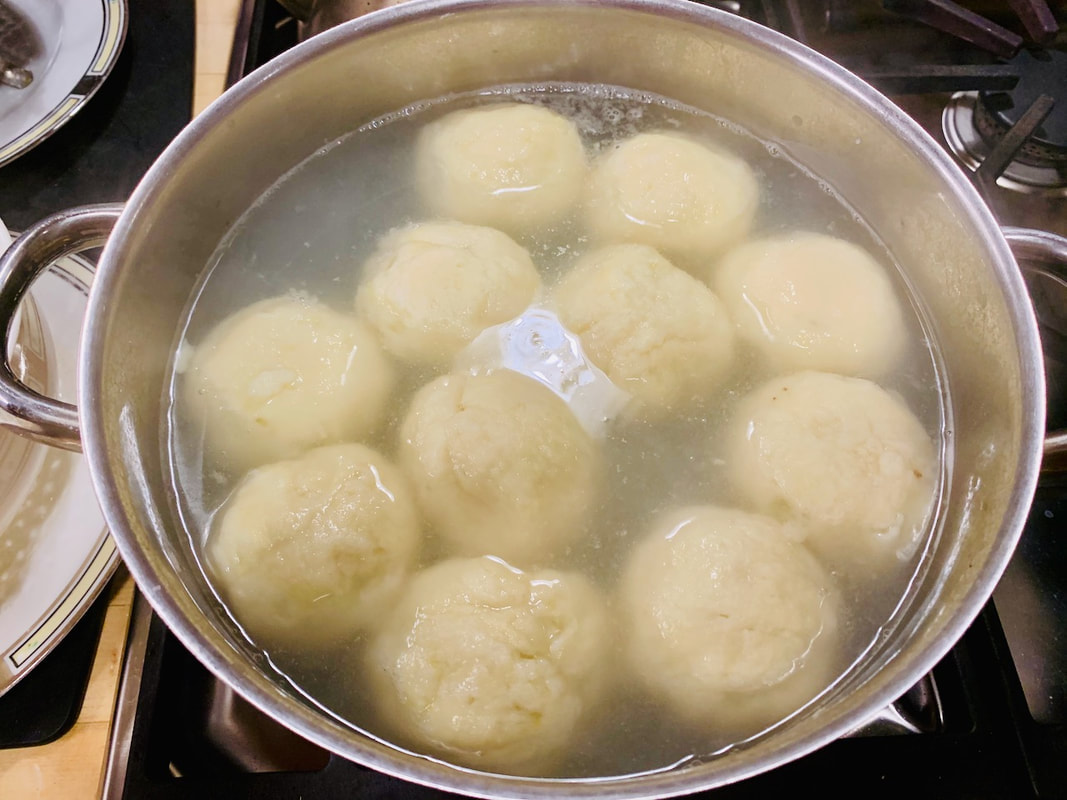
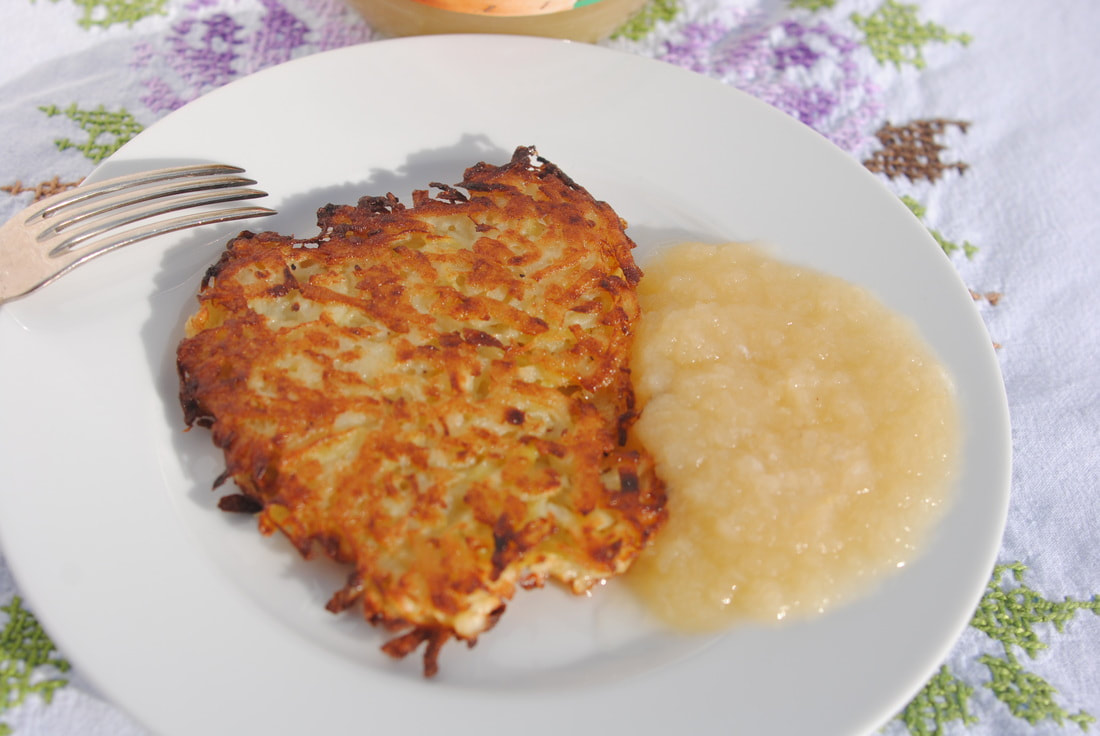
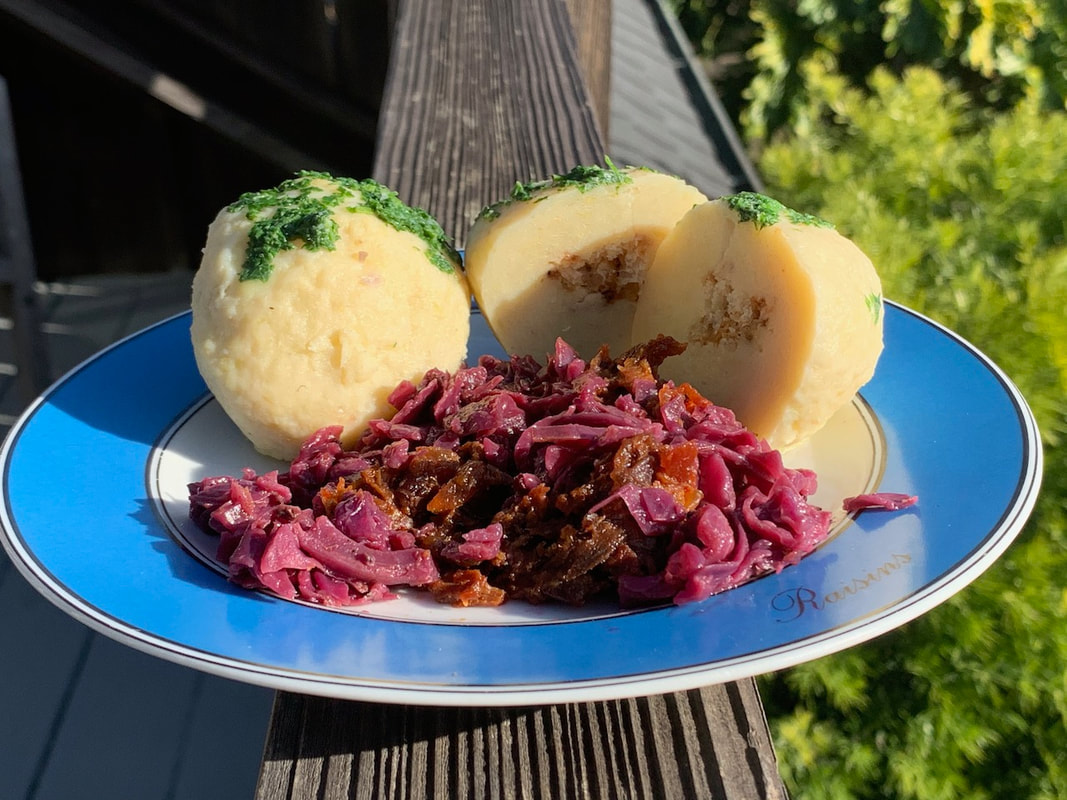
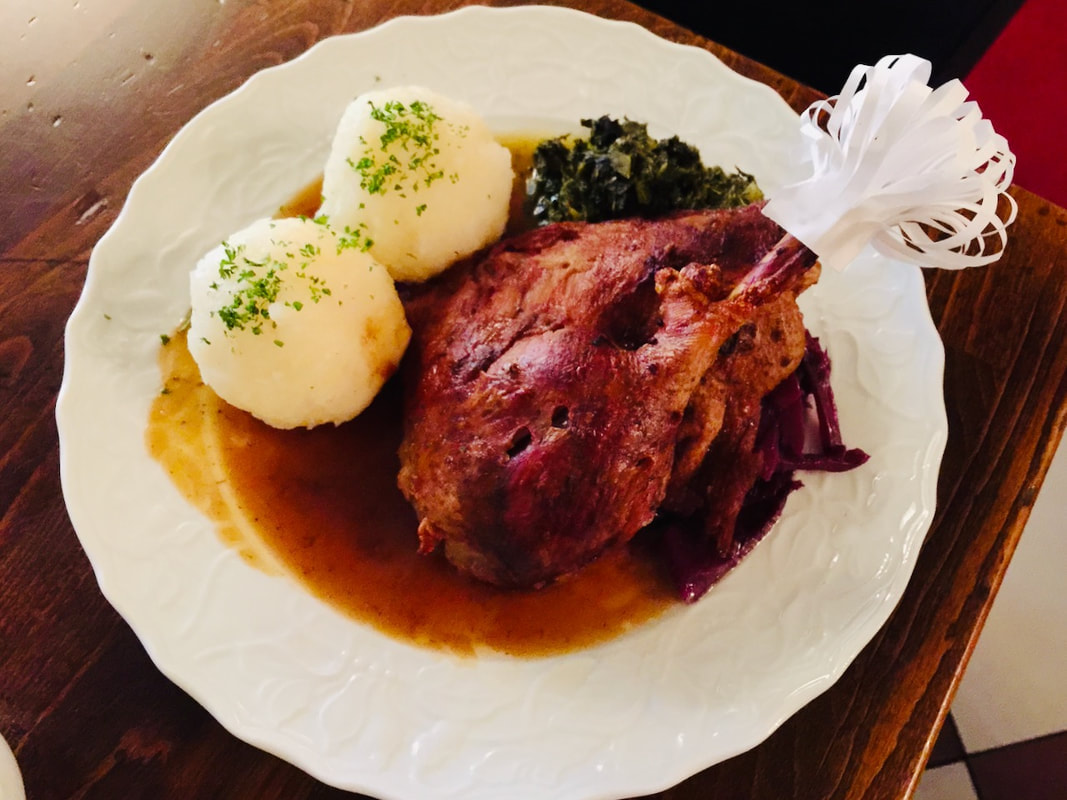
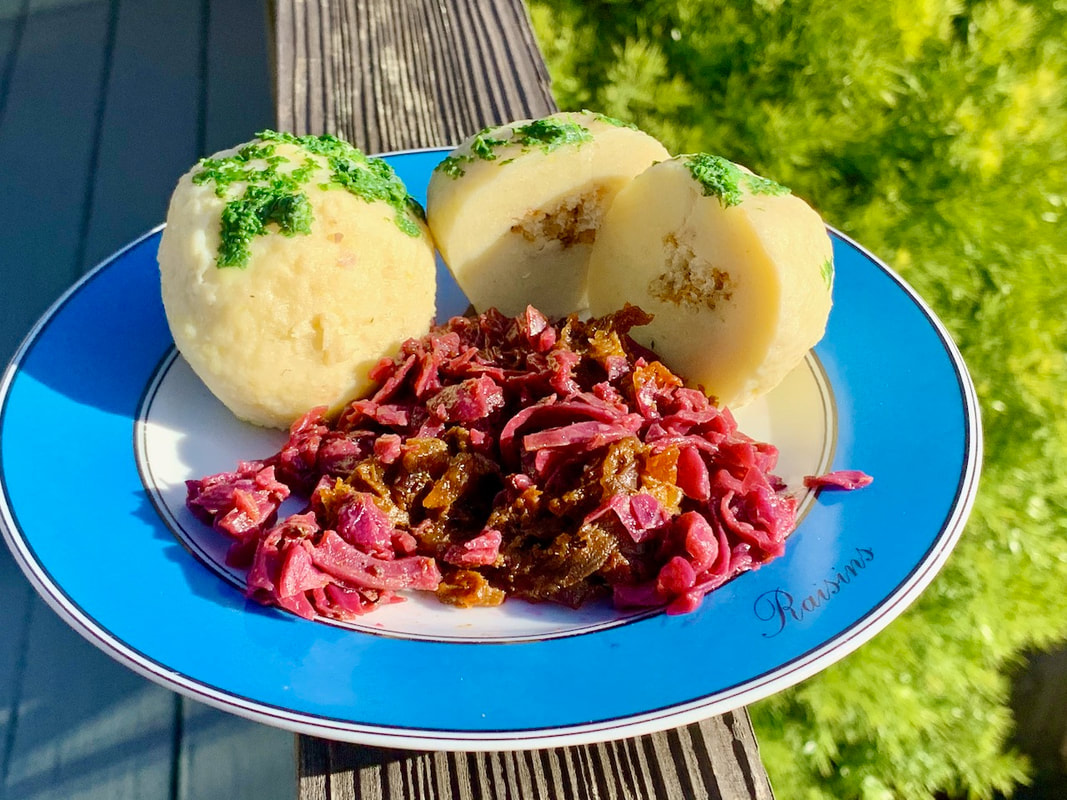
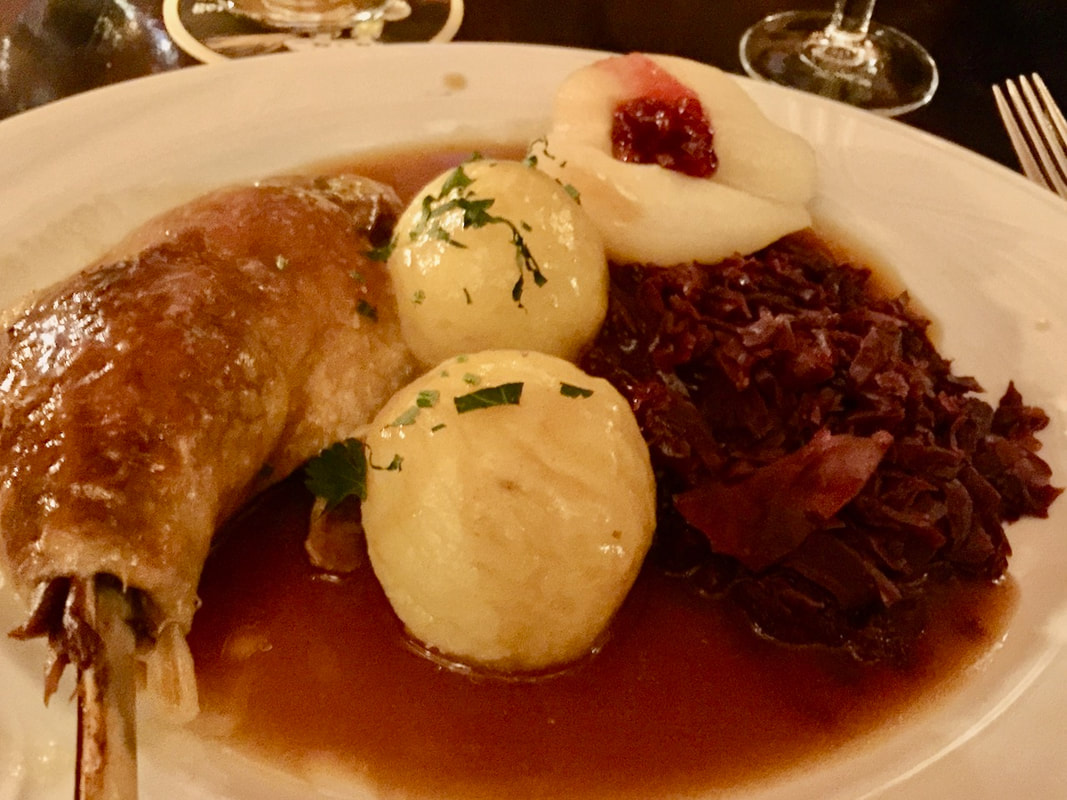
| Ingredients: (makes approximately 10-12 dumplings , depending on the size) 1 lb. (2) russet potatoes 1 lb. (2) yellow fin potatoes 2 scant cups of all purpose white flour (250g or a little less than 8 3/4 ounces) plus extra flour to roll in the dumplings before cooking 1 egg 1 tsp. salt to boil the potatoes 1 3/4 tsp. salt for the dough 2 tsp. salt for the water to boil the dumplings. Croutons: (optional) a cup of day-old bread cut into ½ inch pieces 2 TB olive oil garlic salt Parsley butter sauce: 4 TB butter 3 TB of finely chopped parsley | Directions: Peel the potatoes in halves or quarters (according to size). Cover them with cold water and add 1 tsp. salt, bring them to a boil and cook for 15-20 minutes. They are done when you poke them with a small paring knife and they are soft. It is better to undercook them, so you don’t turn them into a potato mush by overcooking them. When the potatoes are done, pour off the water and return the pot to the stove, shake the potatoes in the pot over low heat until all the moisture has evaporated. Cool the potatoes. While the potatoes are cooling, fill your largest pot with water and bring it to a boil. Add 1½ tsp. salt. When the potatoes are cool, press them through a potato press or use a potato masher. I used my potato press. Add the egg, 2 tsp. salt, and the flour. Mix with a fork and then with your hands, until you have a dough that isn’t sticky. According to the German recipe, you are supposed to add more flour when it is sticky. (I didn’t have to do it the two times I made the dumplings.) Do not over mix the dough. Form a small test dumpling and simmer it in the water for several minutes. If it doesn’t fall apart, you are in business. Otherwise, according to the book you are supposed to add more flour. Mine came out perfect both times, I did increase the amount of salt in my second batch. Form the dough into a 2-inch thick logs and cut into 10-12 pieces. Roll the pieces into round balls. If you add croutons, put the dough in your hand, then put the crouton in the middle and form it into a dumpling. Put a couple of tablespoons of flour onto a plate. Roll each dumplings in the flour and add them to the boiling water. Reduce the heat to a low simmer and cook the dumplings for about 18 minutes, uncovered. Make sure your dumplings don’t stick to the pot and make sure the water stays at a low simmer. Eventually, the dumplings will float to the top. The dumplings are at their best right after they are cooked. I talked to my girlfriend and she told me that she reheats the dumplings the next day by putting them back in simmering water for 10 minutes. She also told me that she freezes them. The only thing I have done with leftover dumplings is to slice and sauté them in butter. It is a special treat. Each time I made dumplings this year, I made a parsley butter sauce for them. I melted the butter in a frying pan and added the finely chopped parsley. Then I poured the sauce over the dumplings. Guten Appetit! recipe © Sunnycovechef |
WELCOME TO SUNNY COVE CHEF
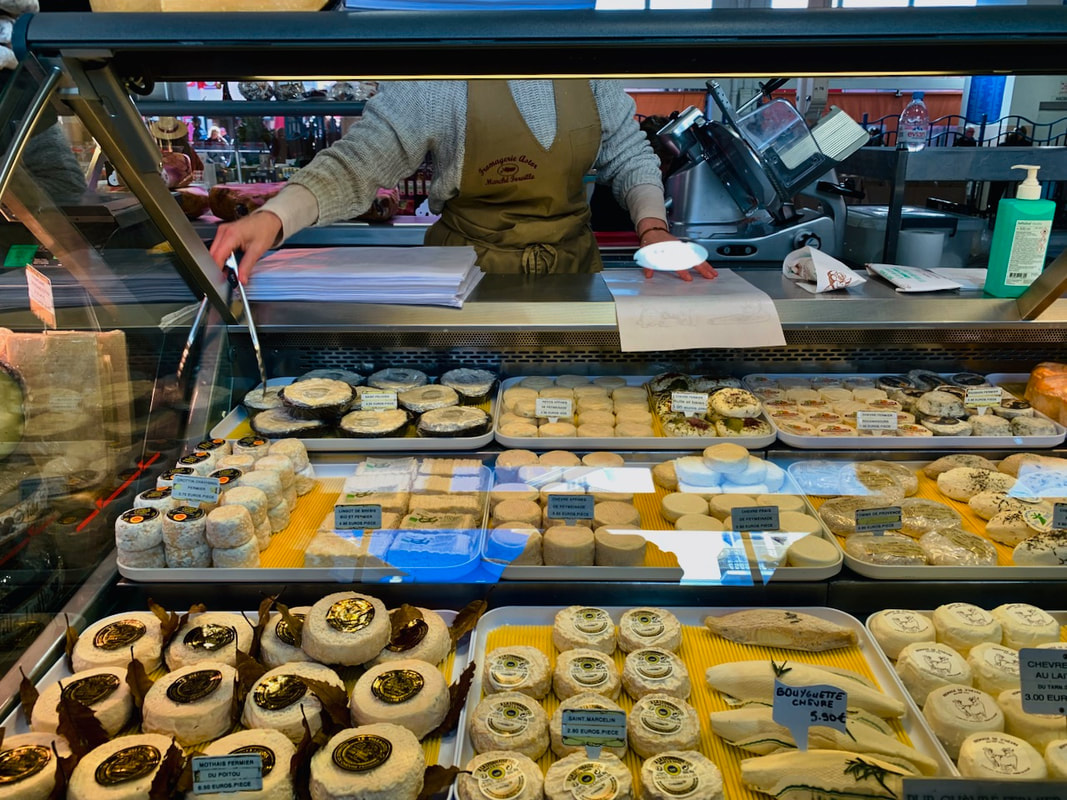
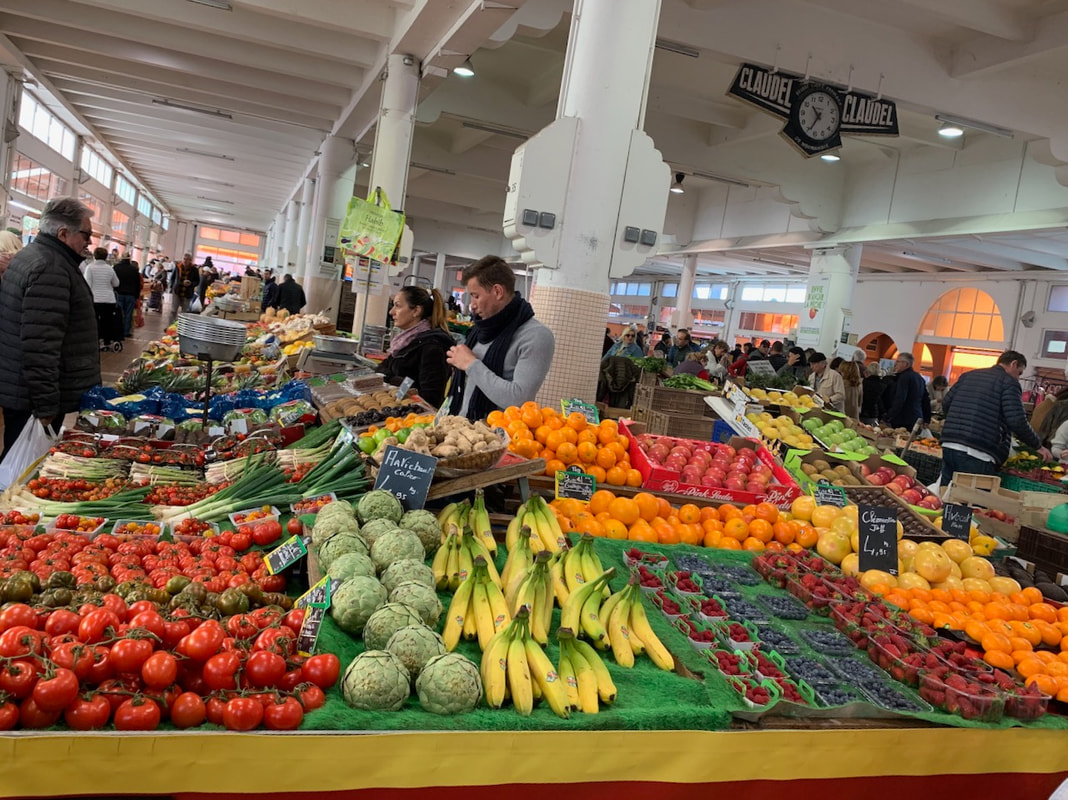
Thank you for visiting my blog. My two passions are cooking and traveling. Traveling exposes me to a wide variety of food and experiences. I walk around cities looking for markets, restaurants, bakeries, shops, you name it, and if it is related to food you will find me there, tasting, smelling, talking to vendors, and having a great time.
If you have tried any of my recipes, snap a photo and tag me @sunnycovechef I'd love to see your creations!
Categories
All
Appetizers
Australia
Austria
Cakes
Canada
Cookies
Cruising
Desserts
France
German Food
Germany
Holiday Cooking
Ice Cream
Italy
Jam
Main Dish
Miscellaneous
Morrocco
Party Favorites
Pasta
Salad
Sauces
Seafoods
Seasonal Cooking
Soup
Stories
Sweden
Switzerland
USA
Vegan
Vegetables
Vegetarian
Wanderlust
 RSS Feed
Archives
February 2024
January 2024
November 2023
October 2023
September 2023
August 2023
July 2023
June 2023
April 2023
March 2023
January 2023
December 2022
October 2022
September 2022
August 2022
July 2022
May 2022
April 2022
March 2022
February 2022
January 2022
December 2021
November 2021
September 2021
August 2021
July 2021
June 2021
January 2021
December 2020
October 2020
September 2020
August 2020
July 2020
May 2020
April 2020
March 2020
February 2020
January 2020
December 2019
November 2019
September 2019
August 2019
July 2019
June 2019
May 2019
March 2019
February 2019
January 2019
December 2018
November 2018
October 2018
September 2018
July 2018
June 2018
May 2018
April 2018
March 2018
February 2018
January 2018
December 2017
November 2017
October 2017
September 2017
August 2017
July 2017
June 2017
May 2017
April 2017
March 2017
February 2017
January 2017
December 2016
November 2016
October 2016
September 2016
August 2016
July 2016
June 2016
May 2016
April 2016
March 2016
February 2016
January 2016
December 2015
November 2015
October 2015
September 2015
August 2015
July 2015
June 2015
May 2015
April 2015
March 2015
February 2015
January 2015
December 2014
November 2014
October 2014
September 2014
August 2014
July 2014
June 2014
May 2014
April 2014
March 2014
February 2014
January 2014
December 2013
November 2013
October 2013
September 2013
August 2013
July 2013
April 2013