 When I first came to California I couldn’t stop eating all the fresh fruit that grows everywhere. My boyfriend (now husband) had an orange tree and every morning when the oranges were ripe, I had a glass of fresh-squeezed orange juice. Maybe that is why I married him 46 years ago. My favorite fruits to eat are peaches and nectarines. There is something about these sweet and juicy fruits that I can’t resist. I don’t want to cook with them, I just want to eat them with their juice dripping down my chin. Apricots, I prefer in cakes, ice cream, and especially marmalade.  I always know that summer has arrived when I see the first peaches and nectarines in the Farmers Market. And I eat them until the season is over. Several years ago, my niece gave me a cookbook called The Forest Feast Gathering, Simple Vegetarian Menus for Hosting Friends & Family by Erin Gleeson. The art work in this book is stunningly beautiful and invites you into the redwoods near where I live. The vegetarian recipes are simple but delicious. The Peach Panzanella salad I made was mouthwatering fantastic. My husband and I loved it.  A classic Tuscan bread salad is made with ripe tomatoes, dried Italian bread, and a simple tangy dressing. The best bread for this salad is a crusty loaf with a chewy center and a good crunchy crust. I used a baguette I already had, but might use ciabatta the next time. You want the bread to absorb the dressing without it becoming too soggy. It will help if you cut the bread into pieces and let it dry overnight. Salt your tomatoes first to draw out the juices. This intensifies the flavors in the tomatoes and gives you some juice for the dressing. This salad makes a perfect lunch or light dinner. We had it with oysters. Ingredients: ½ to 1 crusty baguette cut into 1-inch cubes 3 peaches or nectarines, cubed 3 tomatoes 8 oz (225) fresh mozzarella cubes, halved 15 basil leaves sliced ⅓ + 3 TBS olive oil 3 TBS red wine vinegar 1 clove garlic, minced salt and pepper to taste Directions: Dry the baguette cubes for a few hours if you have time. Preheat the oven at 350° (175 Celsius). Drizzle the bread with 3 TBS olive oil, sprinkle with salt and bake in the oven for about 15 minutes. Cut the tomatoes, sprinkle them with some salt and drain them in a sieve. Make the vinaigrette by mixing the olive oil with the vinegar and the garlic. Toss all the ingredients with the vinaigrette and tomato juice from the drained tomatoes. Let the salad sit for about 15 minutes, then serve. Guten Appetit! Recipe from the Forest Feast Gathering Adapted by © sunnycovechef.com I have been home and cooking up a storm. I love cooking. Apricots are in season and I made my apricot marmalade. It's a lot of work but worth every minute. Click here for the recipe  I have some Apricots left from my marmalade and I will bake my apricot, berry cobbler with them. This is a real summer treat. Don't forget the ice cream. Here is the recipe  This yummy apricot jicama shrimp salad will not expand your waistline. Here is the recipe  If you are interested in a recipe for roasted apricot sorbet, an apricot galette, a German apricot cake ( easy to make) and apricot dumplings click here.
16 Comments
 There are some days when you are tired, lazy, or whatever you want to call it. I had one of those days a few weeks ago watching cooking reels on my phone. I came across an Italian Chef named Luca Pontanarosa. He owns a restaurant called Ristorante Corleone in Point Saint Lucie, Florida. One of his recipes got my attention. He called it: paccheri with cream of asparagus and burrata cheese with crispy speck. Paccheri is a large rigatoni-like pasta. I used a smaller tube pasta and hickory-smoked bacon instead of Speck. I wish I had had Speck, but it’s not readily available.  It turned out to be a delicious creamy pasta that will have a permanent place on my table. The combination of asparagus with burrata, basil, and parmesan cheese is amazing. It is rich and full of flavor. The bacon adds a lot, so I wouldn’t skip it. My husband calls this the Italian version of macaroni and cheese. He suggests the following wine pairing: a crisp white Bordeaux and a tantalizing pinot from Burgundy. Sorry, he prefers French wines.  I used my Vitamix because I wanted a smooth sauce. I don’t like to have any stringy asparagus pieces in my sauce (a personal preference). A blender would do the same thing. The original sauce looked more chunky.
We invited some friends and my husband grilled his famous rack of lamb. I made my tomatoes stuffed with zucchini and button mushrooms. Most of the time, I use shiitake mushrooms with this recipe, but the button mushrooms were just as good. Here is a link to the recipe. It was a delicious meal.  This pasta dish is the perfect comfort food and vegetable haters will eat some of the green stuff. I am thrilled to have found this recipe. The amount of pasta is up to you. If you want more sauce, cook less noodles. Add pasta water if you want a thinner sauce. This dish feeds 4-6 people comfortably, depending on individual appetites or what it is served with it. Ingredients: ¾ lb. tube pasta 1 lb. green asparagus 1 large burrata cheese piece 1 cup freshly grated parmesan cheese ⅓ cup basil leaves , sliced 4 strips hickory-smoked bacon 3 TBS butter 2 TBS or more olive oil 1 cup or more hot pasta water Salt and pepper Directions: Put on some Big Night Italian music and heat up the pasta water. Add 1 TBS of salt to the pasta water. Cut off the tips of the asparagus and put them aside. Break up the woody end of the asparagus and discard. Slice the asparagus stems in 1-inch pieces. Heat the butter and oil in a frying pan with a lid. Add the asparagus and sauté for a few minutes. Add 1 cup pasta water and simmer covered for 20 minutes. Most of the liquid will evaporate after 20 minutes. While the asparagus is cooking, grate the parmesan cheese. I use a micro plane. Put the bacon in a cold frying pan and sauté until crispy. Discard most of the bacon fat and sauté the asparagus tips in the pan. Break the bacon into little pieces and restrain yourself from eating too many. Put the asparagus pieces, the burrata and parmesan cheese, the basil leaves, salt and pepper into a Vitamix or blender. Start with the lowest setting and then increase to more until the sauce is smooth. Taste the sauce, add salt and pepper, some more pasta water and a shot of olive oil. You want a thick and smooth sauce. In the meantime, cook the pasta according to the instructions on the bag. Taste for doneness. Mix the drained pasta with the sauce. Add the asparagus tips and bacon. Taste for seasoning and add more pasta water if necessary. Buon Appetito! Recipe by Luca Pontarosa Cooked by © Sunnycovechef Here are some more asparagus dishes  This soup has a permanent place in my kitchen. It is made in 20 minutes and so delicious. A nourishing healthy soup that I can wholeheartedly recommend. Here is the recipe.  A vegan asian salad that will please anyone's palate. Perfect for a picnic or party. Here is the recipe 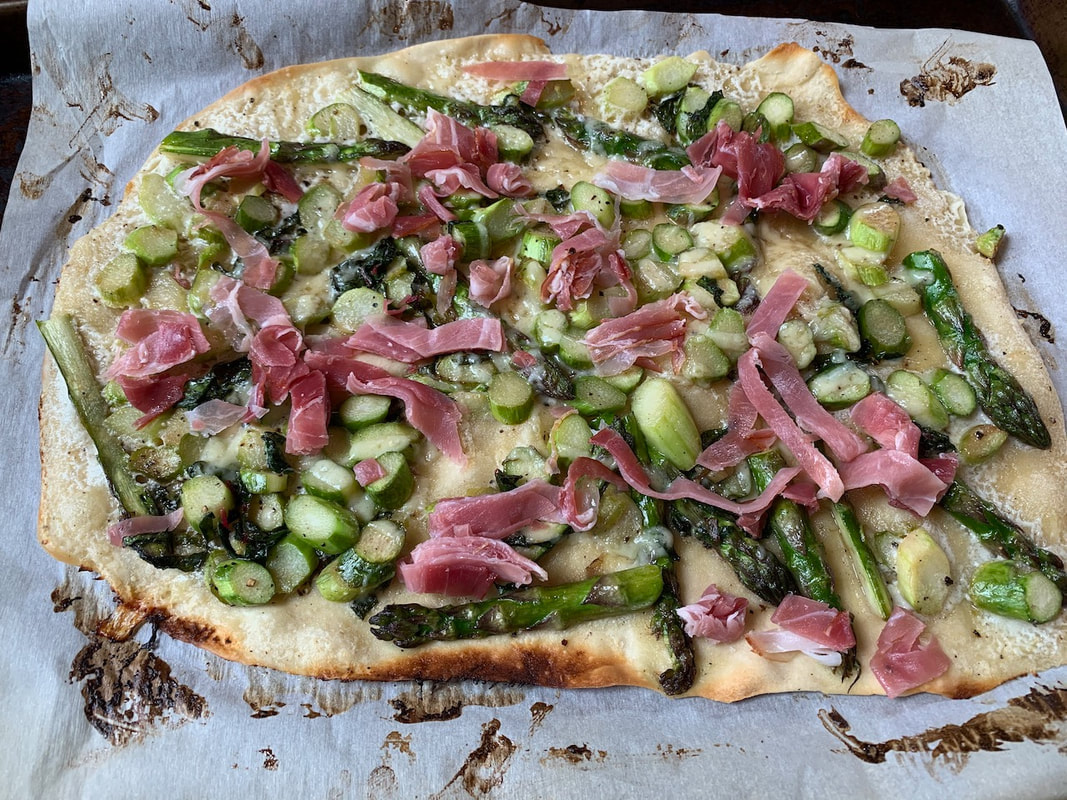 This tart flambé or Flammkuchen as we call it in Germany is a pizza-like delicacy for the young and not so young. Here is the recipe  This simple but tasty frittata is on the table in 20 minutes.
Here is the recipe 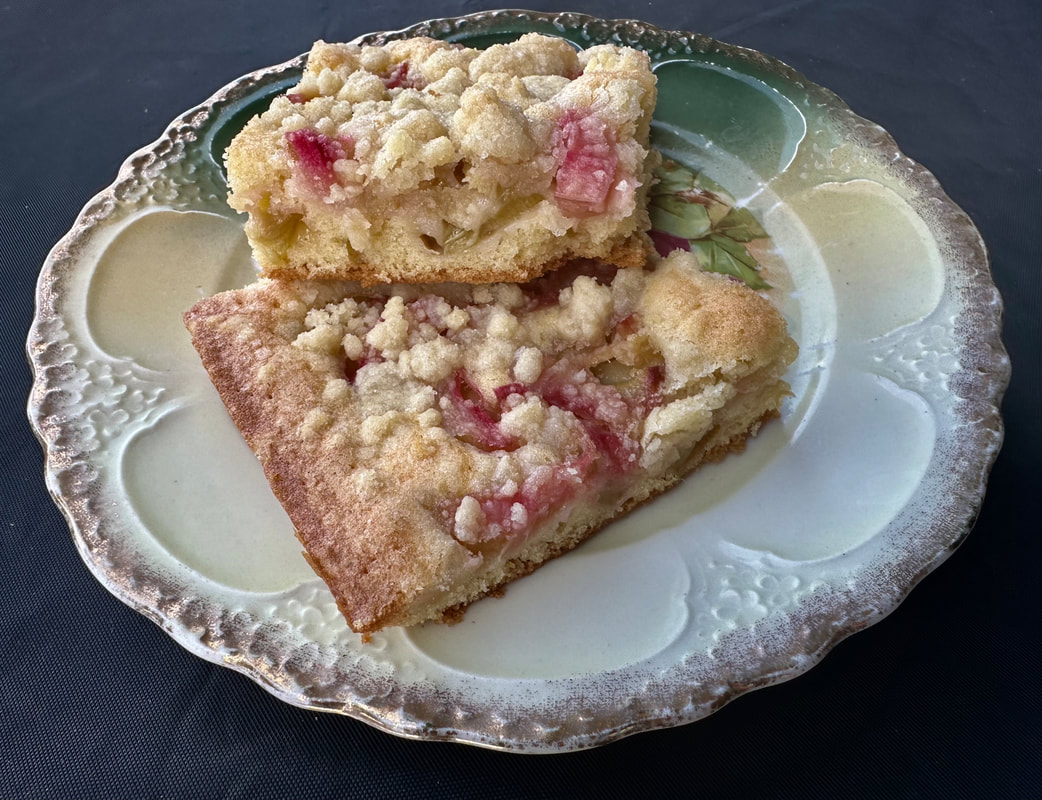 In the world of food you are either a rhubarb lover or hater. I love rhubarb and when I see it in the store I start baking and cooking with it. When I was a child in Germany rhubarb grew wild in the fields and I remember eating delicious rhubarb cakes. Raw rhubarb makes your mouth pucker but once you cook this vegetable and add sweetener, it turns into a culinary delight, at least for me. It tastes like a green apple with a tiny hint of celery. 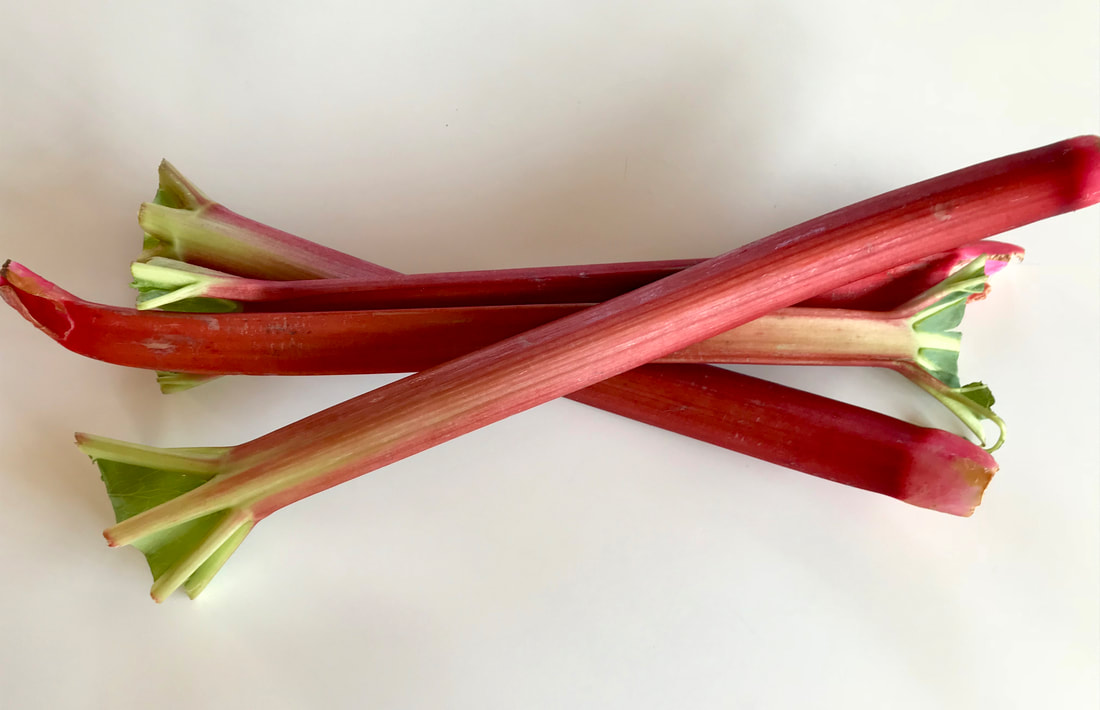 Red rhubarb stalks have a stronger sweeter flavor. The green stalks are fine if you can’t find the red ones. When you buy them in the store select the larger stalks that are not curled or limp. Tenderness is not related to size. Look for stems without visible blemishes. Rhubarb is a vegetable. It is a member of the buckwheat family. The ancient Chinese used it as a medicinal herb over 5000 years ago. Rhubarb is a native of Siberia and got its name from the Rha River which is now called the Volga. The English were the first to eat rhubarb in the 17th century but started eating the leaves which contain a toxic amount of oxalic acid. It took them 200 years to figure out that they could eat the stalks. American settlers brought the plant to the US. 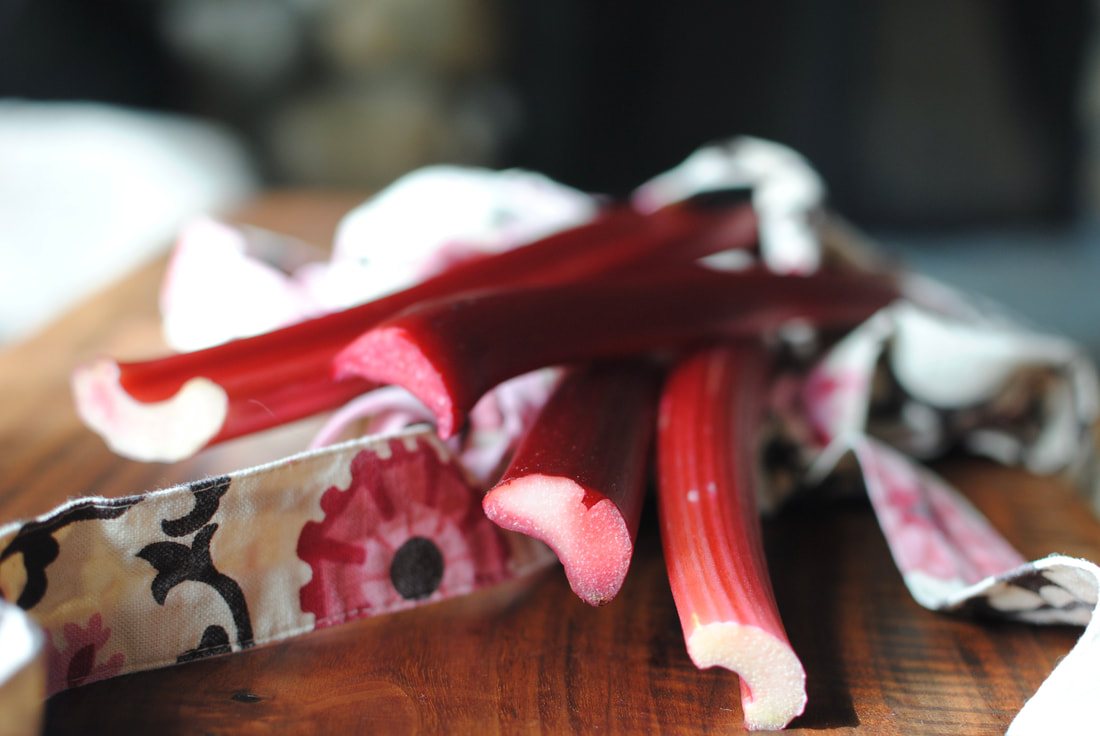 I planted three plants in my tiny garden, which have survived gopher attacks and neglect. Even though my plants are several years old they produce just a few thin stalks with giant toxic leaves. 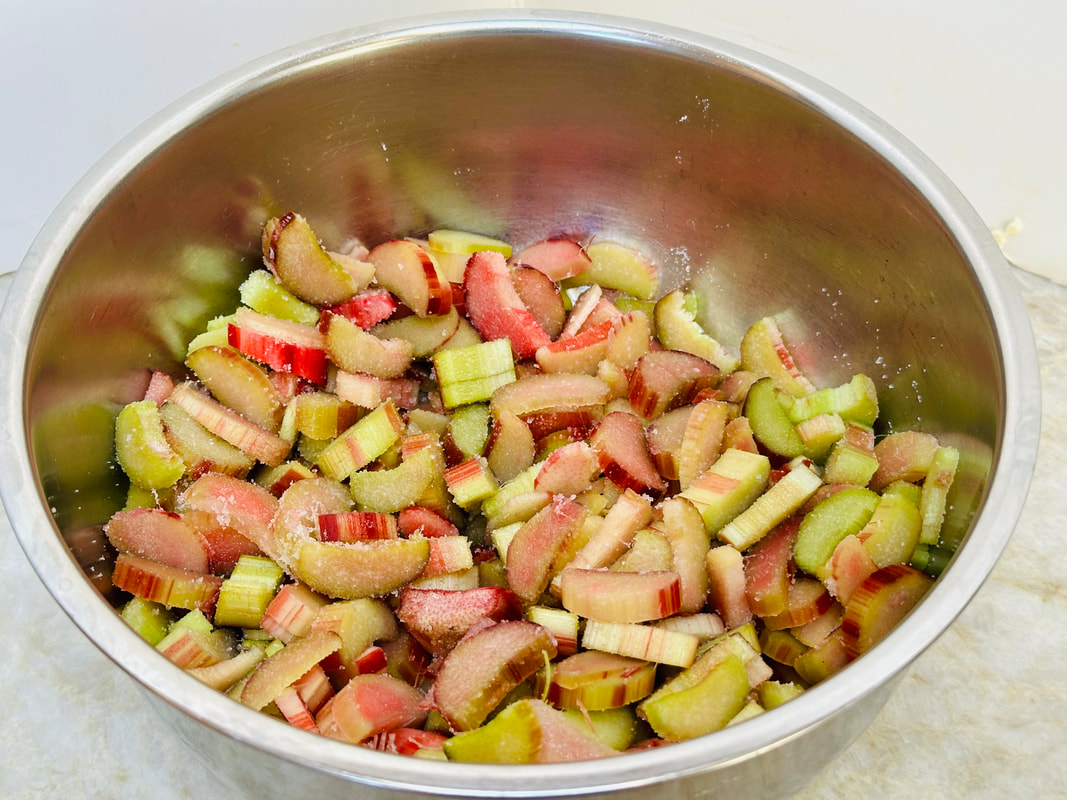 I use the peel from the rhubarb and some tiny stalks to make the most delicious juice. I added the peel to a pot of water (3 cups) with a few tablespoons of sugar and cook them for 20 minutes. I end up with a tasty juice to add to my sparkling water or plain water. It would be great for exotic cocktails. 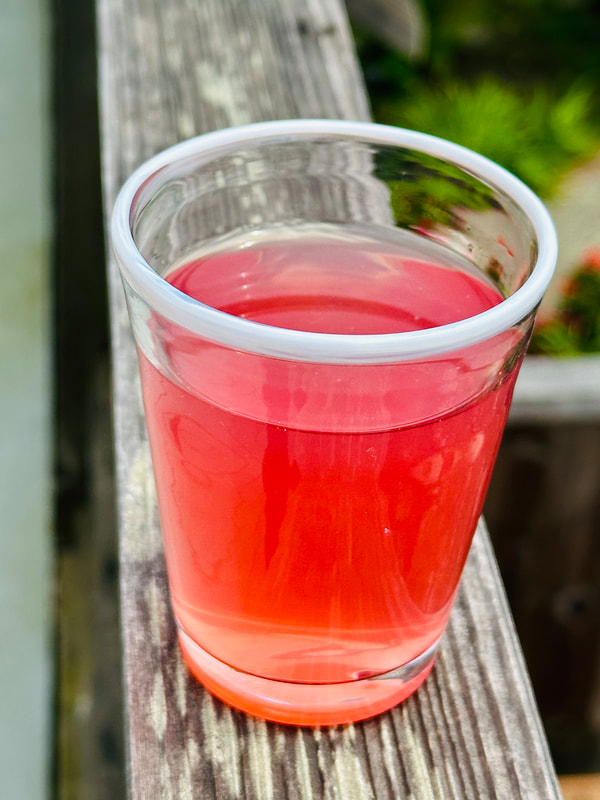 Soon after we returned from our trip I hosted our book club and made this cake for dessert. For a main dish I prepared my chicken fricassee with fresh green asparagus baked in a dish that was covered with puff pastry. It was delicious, I started from scratch by making my chicken broth. It does make a difference. I put all my vegetable and bone scraps in the freezer and use them for my broth when the time comes. Click on the photos for the recipe.
This cake is not rich and sweet, it’s like a coffee cake you can enjoy any time of the day. It is good for a couple of days and feeds a crowd. You determine the size of the pieces you want to cut. I served it with vanilla ice cream but prefer it with whipped cream. I used my Kitchen Aid for this recipe. Ingredients: The crust: (220g) Butter at room temperature 1 ¼ cup (200g) powdered sugar 4 eggs at room temperature a pinch of salt 1 ¾ cup (220g) all-purpose flour 1 tsp. baking powder The Streusel: 9 TBS ( 20g) butter 1 ⅓ cup (170g) all-purpose flour a pinch of salt 1 tsp. vanilla sugar 1 scant cup (150g) sugar The Rhubarb Filling: 1 ¼ pound rhubarb ¼ cup (30g) sugar ¼ cup (30g) flour Directions: Preheat the oven to 350˚ degrees Cover a baking sheet with parchment paper. The Streusel: Melt the butter and let it cool. I used my KitchenAid to mix the cooled butter, powdered sugar, salt, vanilla, and flour with the hook attachment until the dough turned into streusels. I put the streusels in a bowl and used my hand to make them even and loosen them before I refrigerated them. The Crust: Cream the soft butter and powdered sugar for about five minutes until the dough has doubled. Add one egg at a time. Mix and sift the flour with salt and baking powder and add to the dough. Mix the dough until the flour is incorporated. Spread the dough evenly onto the prepared baking sheet. Wash and peel the rhubarb. Slice the rhubarb into ¼ inch slices and mix with the flour and sugar. Spread them evenly over the cake. Sprinkle the streusel over the cake and bake for 45 to 50 minutes. Cool the cake before serving . Guten Appetit! recipe by from https://www.sweetsandlifestyle.com/rhabarberkuchen-mit-streusel/#google_vignette translated by Sunnycovechef.com Here are some of my other Rhubarb recipes I posted over the years 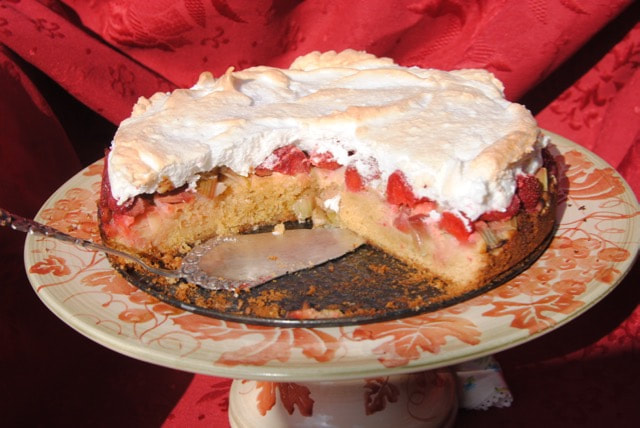 A stunning strawberry rhubarb cake topped with meringue . click here for the recipe 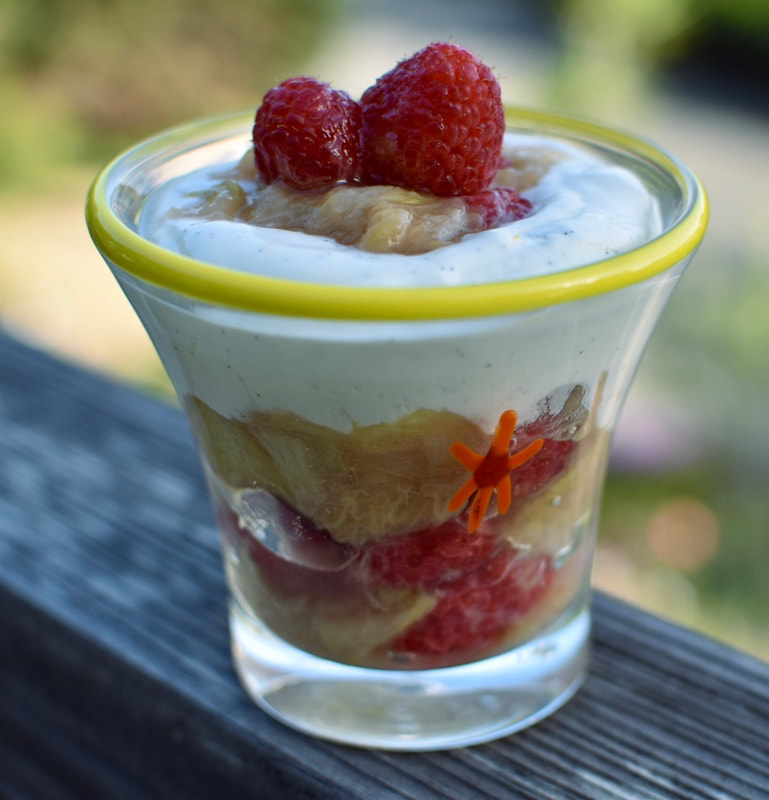 A healthy yogurt mousse with rhubarb compote click her for the recipe 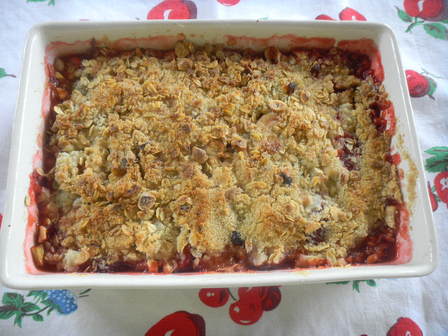 An easy to make rhubarb and strawberry crisp click here for the recipe  Roasted rhubarb and strawberry ice cream, a refreshing and tasty treat . click her for the recipe 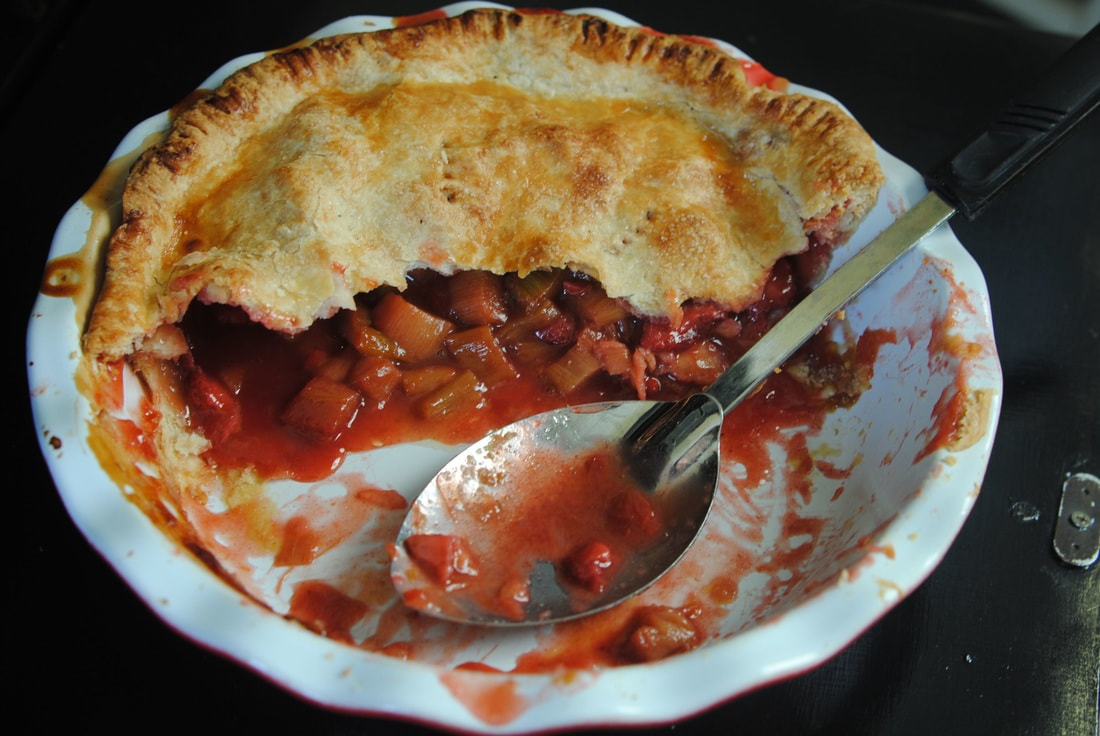 A recipe for rhubarb and strawberry pie from my friend Robert
click here is the recipe 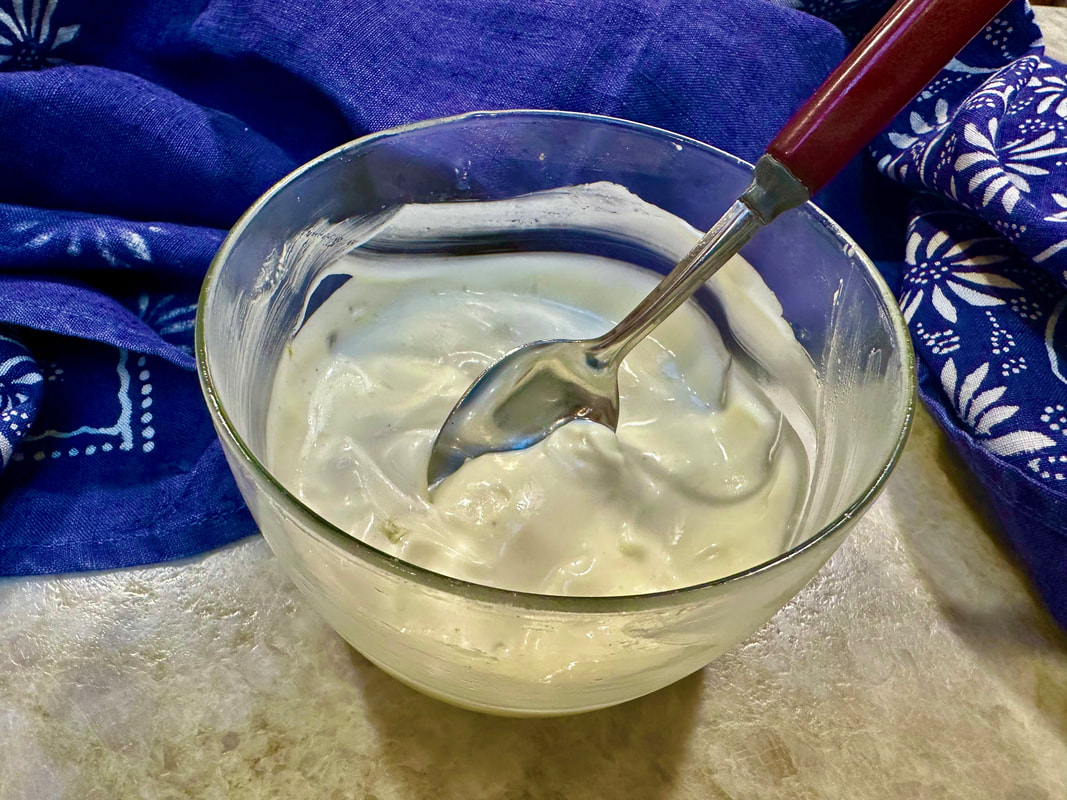 It is raining and storming her at my little cove on the Pacific Ocean. My suitcases are packed for another adventure. We are emptying our fridge, which included some bacon. So, my husband volunteered to make his famous BLT sandwich. What a wonderful guy I have! The day before, I made some homemade mayonnaise with just five ingredients. At first, I was skeptical because there was a most unusual ingredient in this recipe. This mayonnaise is made with the water from garbanzo beans and it has no eggs in it. Unbelievable but true, and it is delicious. It has a light and subtle tangy flavor, and tastes like real mayonnaise. I love it. The recipe comes from one of my favorite German YouTube channels, Thomas kocht. I posted his recipe for Flammkuchen (flatbread ) on my blog. I tried other recipes from him and they are all good. 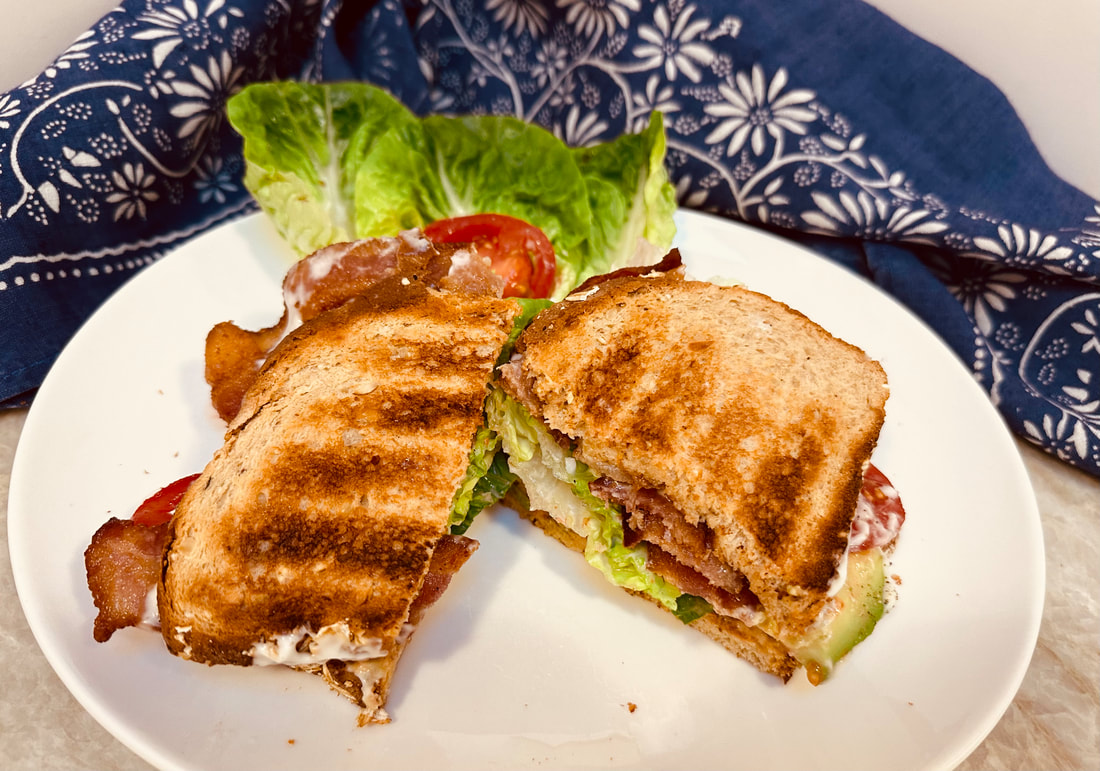 So far, I had the mayonnaise with my artichokes and on my sandwiches. The wonderful thing is that it is made in a few minutes with very few ingredients. The first time I made it, I used my mini food processor, because I couldn’t find the container for my immersion blender. It worked, but I preferred making it with my immersion blender after I found the container. This is really amazing and I hope you try it. 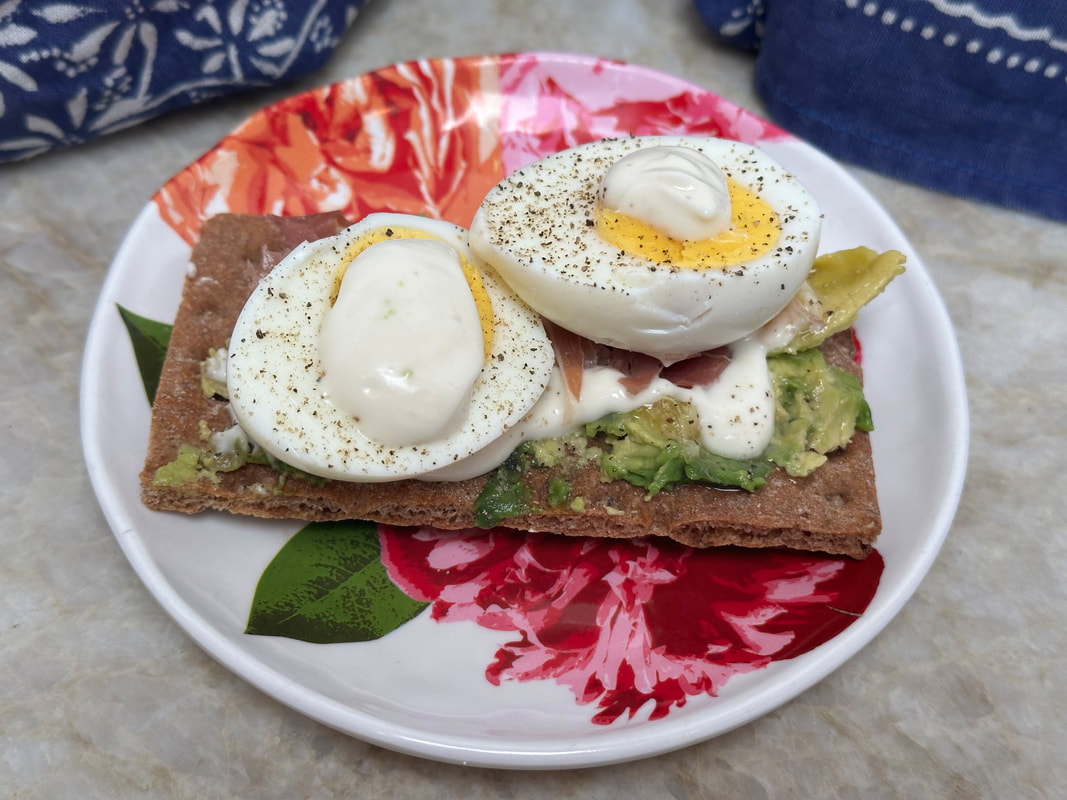 I have been tinkering with different sauces and herb butters, but the results have not been blog worthy. This recipe, however, was a winner the first time I made it. So, with no further ado, here is the recipe. All I can say, please try it the next time you open a can of garbanzo beans. You won’t believe how good it is.
Ingredients: This recipe yields a scant cup of mayonnaise. One 15-ounce can of garbanzo beans has enough juice for two batches of mayonnaise. ¼ cup (50g) liquid from a can of garbanzo beans ½ tsp salt ¾ tsp mustard A splash of lemon ⅔ cup and 4 TBS (200 ml) sunflower oil Directions: Put all the ingredients (except, the oil) in your immersion container. Mix to combine the ingredients. Now, slowly add the oil while moving the blender up and down. Stop when it becomes solid. Guten Appetit! The recipe is from Thomas kocht Posted by ©sunnycovechef.com What to do with the actual garbanzo beans? Make humus, put them in a salad, or roast them for a snack. Here is Melissa Clark’s recipe from the NYT for roasted chickpeas using Za’atar, a Middle Eastern spice mix made from dried thyme, sumac, and sesame seeds. This gives the chickpeas a tangy bite. I enjoy snacking on them.
Ingredients:
1 15 ½ ounce can of garbanzo beans ½ TBS olive oil 1 TBS. Za’atar ¼-½ tsp. salt Directions: Rinse the chickpeas, pat them dry and let them dry for an hour. Heat the oven to 400 degrees. Line a cookie sheet with parchment paper, spreading the beans evenly. Bake them in the center of the preheated oven for 30 minutes or until they are crunchy, shaking and rotating them every 10 minutes. Place the chickpeas in a bowl and drizzle with olive oil, za’atar and salt. Store them in an airtight container for up to a week. Recipe from Maureen Abood, written and adapted for the NYT by Melissa Clark Adapted again by Sunnycovechef.com The wind is blowing my hair all over my face while I am trying to write about my cruise on the Queen Elizabeth from San Francisco to Fort Lauderdale via the Panama Canal. I am sitting on a balcony in the middle of the Atlantic Ocean, sailing by the coastline of Colombia, passing the towns and cities of Cartagena, Barranquilla and Santa Marta before reaching the Guajira Peninsula. This peninsula is split between northern Colombia and northwestern Venezuela and is the northernmost peninsula in South America. Every day of our cruise, we get a ship program with information like this from our navigator. It is an adventure, but a comfortable one because I am on a beautiful ship with excellent food, exquisite surroundings, and British flair. Every night, I am entertained by different artists, or favorite music and can dance the night away. The day is filled with dance classes, exercise, reading a book from the 3000-book library, or relaxing on a deck chair. I am ten days into my 15-day journey and it has been wonderful. There are people on this ship who have gone around the world. Unfortunately, I didn't do much writing. I just had too much fun while cruising. Now, several months later, I have to rely on my memory. The highlight of this cruise was going through the Panama Canal, which was on my bucket list. Our speaker was Richard Wainio, who was extremely knowledgeable about the history of the canal and anything else you want to know about Panama. He had many personal stories to tell because he lived and worked as the director of the canal board during the transition from the American to the Panamanian government, which took many years. It was a privilege to transit the Panama Canal after a lifetime of hearing about it. We embarked in Puntarenas, Costa Rica for a day. Even though I only saw it for one day, I got a feeling for the island. We hiked through the jungle and I had a great conversation with an American who had lived in Costa Rica many years and owned a botanical garden.
An earlier stop on our journey was Cabo San Lucas in Mexico. While, there we took a small boat ride through Lovers Beach and Los Arcos, a natural archway.
How can I describe the Queen Elizabeth. It is sassy, elegant and relaxing. I loved the talks, the food, the dress standards, the shows, and the service. I enjoyed mingling with different people from all around the world. I rarely, if ever get to dress for special events at home and on this ship I finally had the opportunity. It was so much fun. I only wish I was a better dancer. I apologize to all the people that I stepped on. However, if you want to relax and unwind, this is the perfect place. I fell in love with cruising, and I am fortunate that I am about to embark on another cruise on this beautiful boat. Stay tuned.   Last week, my girlfriend Diane surprised me with a bag of chanterelles she found on her mountain in Corralitos. Corralitos is in Santa Cruz County’s southern region. It is an idyllic area known for its orchards and redwood-covered hillsides, a tranquil place to enjoy the countryside. 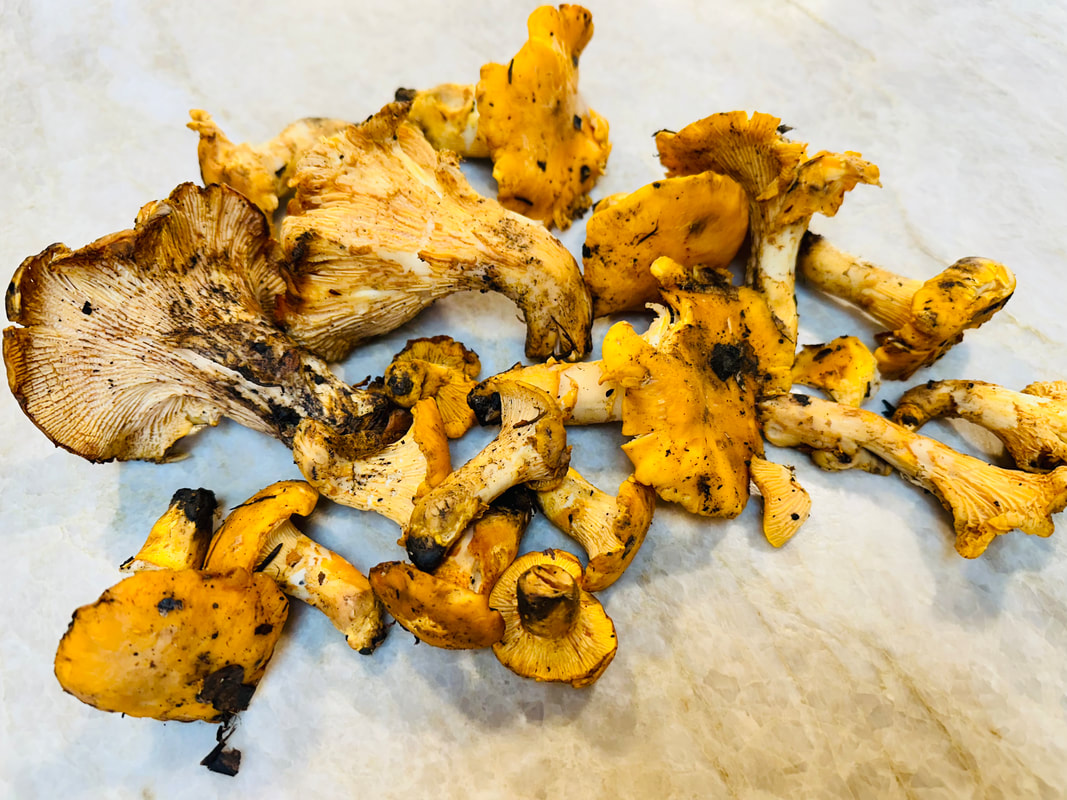 I was in cook’s heaven when I saw these freshly picked chanterelles. I thought about sautéeing them in a little butter with shallots and cream, and have them with a crusty sourdough bread. What a treat! Chanterelles are great in a creamy pasta dish or in an omelet for breakfast. There are so many possibilities to create a dish with these beautiful and delicious mushrooms. I chose a galette from Dorie Greenspan’s cookbook Everyday Dorie. I have used this book for several recipes and have not been disappointed yet. 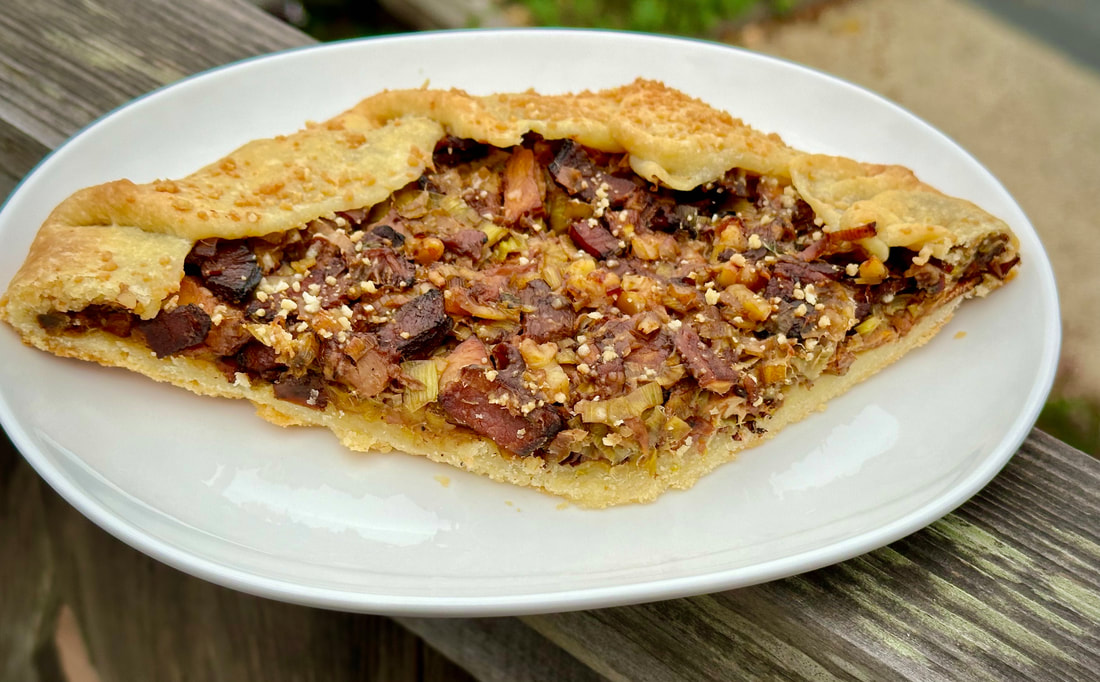 The galette was a culinary treat with the filling full of different flavors complemented by a flaky crust. It is an all-butter crust which I like and comes together quickly in a food processor. Of course, it can also be made by hand. I put the butter in the freezer for about 25 minutes. Instead of chanterelles, you can substitute other mushrooms. When the chanterelles are no longer available, I might try a mixture of shiitake and button mushrooms. The galette is delicious warm or at room temperature. Serve it with a salad and you have delicious lunch, dinner or snack. 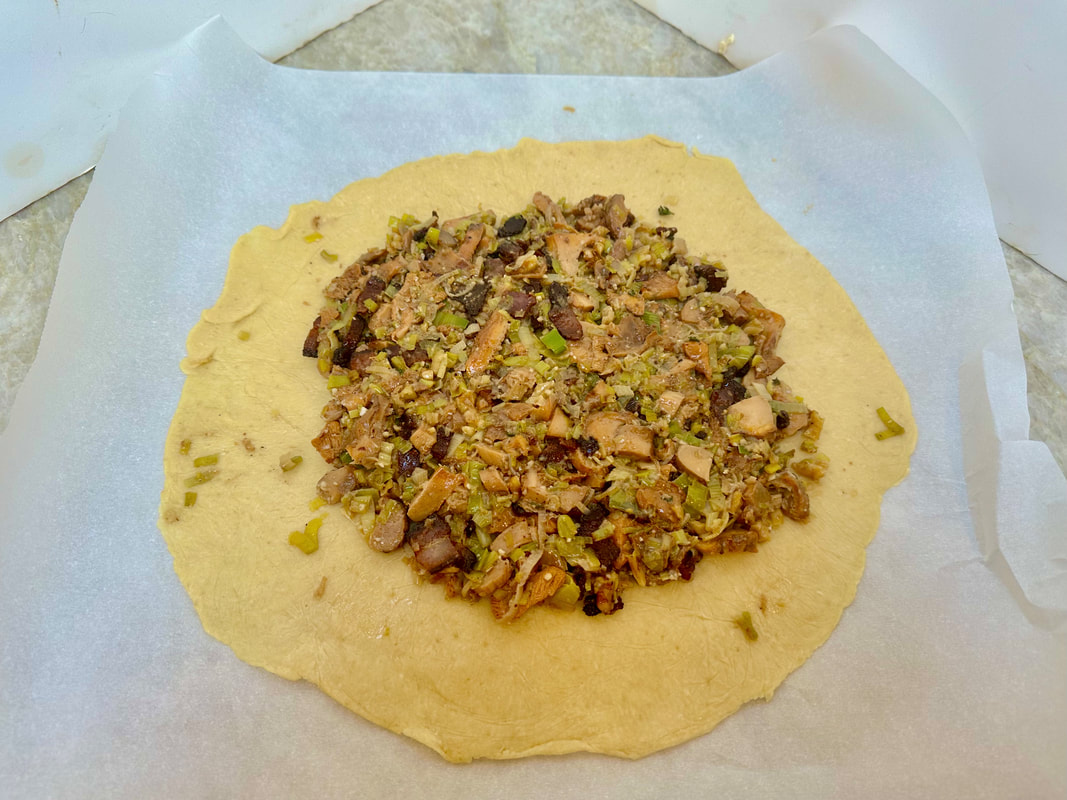 Life on Sunny Cove has been good. We have been busy with visitors and enjoyed reminiscing about old times and contemplating whatever future we have left. It has been raining on and off, so it's time to curl up in front of a fire and slow down.
Don't omit any of the ingredients, Dorie Greenspan did a wonderful job creating this dish. The walnuts add an extra crunch to the galette. Ingredients: The crust: 1 ½ cup ( 240 grams ) all-purpose flour ½ tsp. fine sea salt 2 TBS sugar 8 TBS (4 ounces, 113 grams ) cold (almost frozen) butter, cut into 16 pieces ¼ cup (60ml) ice water Directions for the crust: Put flour, salt and sugar in a food processor and pulse a few times to blend the ingredients. Scatter the pieces of butter over the mixture and pulse until you have small-sized pieces with some larger ones. Add more of the water and pulse again, continuing with more water scraping down the sides of the food processor. Pulse until the dough comes together. Turn the dough onto a piece of plastic food wrap, flatten it to a disc and roll the dough into a 12-inch circle between two pieces plastic food wrap. Refrigerate for at least two hours. The filling: 1 TBS olive oil ½ pound (227 grams) mushrooms 4 slices bacon 2 leeks, white and light green part only 1 garlic clove finely chopped fine sea salt 3 TBS dry white wine 2 TBS heavy cream 3 TBS walnuts ¼ cup (24 grams) finely grated parmesan 1 tsp. fresh thyme leaves Freshly ground pepper Directions: Preheat the oven to 400 degrees Fahrenheit. Center the oven rack in the middle. Roast the walnuts for about 10 minutes. Cut the leeks in half and thinly slice them. Wash them and let them drip dry in a sieve. My chanterelles were very dirty, so I rinsed them quickly under cold running water and patted them dry with a paper towel. Cut off the bottom of the stem and slice the rest of the chanterelles into bite-sized pieces. Cut the bacon into ¾-inch slices and sauté over medium heat until crisp. Transfer the bacon to a platter covered with a paper towel. Pour off all but 1 TBS of bacon fat from the pan. Pour the olive oil into the frying pan with the bacon fat. Heat on medium, toss in the leeks and fry for a few minutes. Add the mushrooms and garlic and cook for about five minutes, or until the vegetables are softened. The mushrooms will release water but it will evaporate as you continue to cook. Season with salt and add the wine, stirring and scraping the pan until the wine has evaporated, about two minutes. Pour in the cream and cook until it is mostly absorbed. Remove the pan from the heat and add the bacon, walnuts, 2 TBS parmesan, thyme and pepper. Taste for seasoning. You can make the filling ahead and keep it in the fridge for a couple of days. Take the dough out of the fridge and let it sit for a few minutes. Peel off the plastic wrap and put the dough on a piece of wax paper on a cookie sheet. Scrape the filling into the middle of the dough, and spread into a 9-inch circle. Fold the bare border over the filling. As you fold the dough it will pleat on itself. Bake the galette for about 30 minutes until golden brown. Sprinkle the remaining parmesan over the galette and enjoy this special treat. Guten Appetit! Recipe from Dorie Greenspan’s cookbook Everyday Dorie Posted by the ©Sunnycovechef 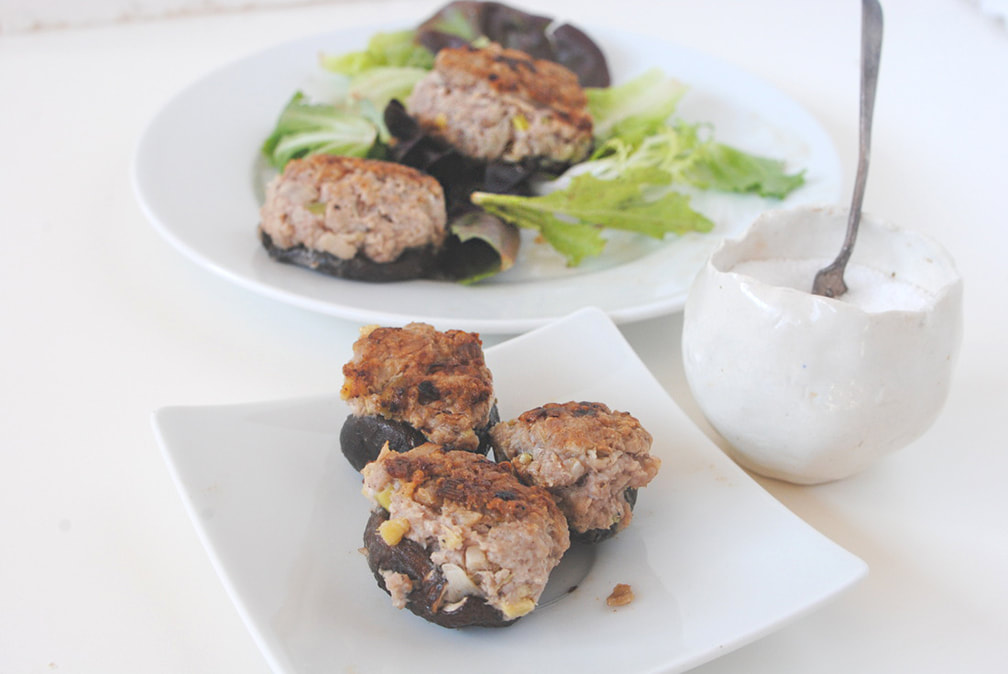 Think stuffed mushrooms with an Asian twist. The shiitake mushrooms are stuffed with ground pork, water, chestnuts and ginger. Your football fans might like these little morsels. Click here for the recipe. 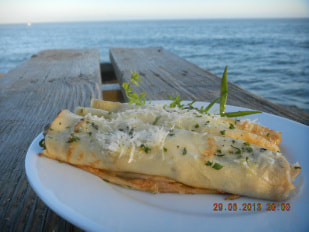 This is one of the first recipes I posted on my blog. It could be a special treat for Valentine's Day if you have a vegetarian sweetie. The crepes are filled with shiitake mushrooms and goat cheese. Click here for the recipe. 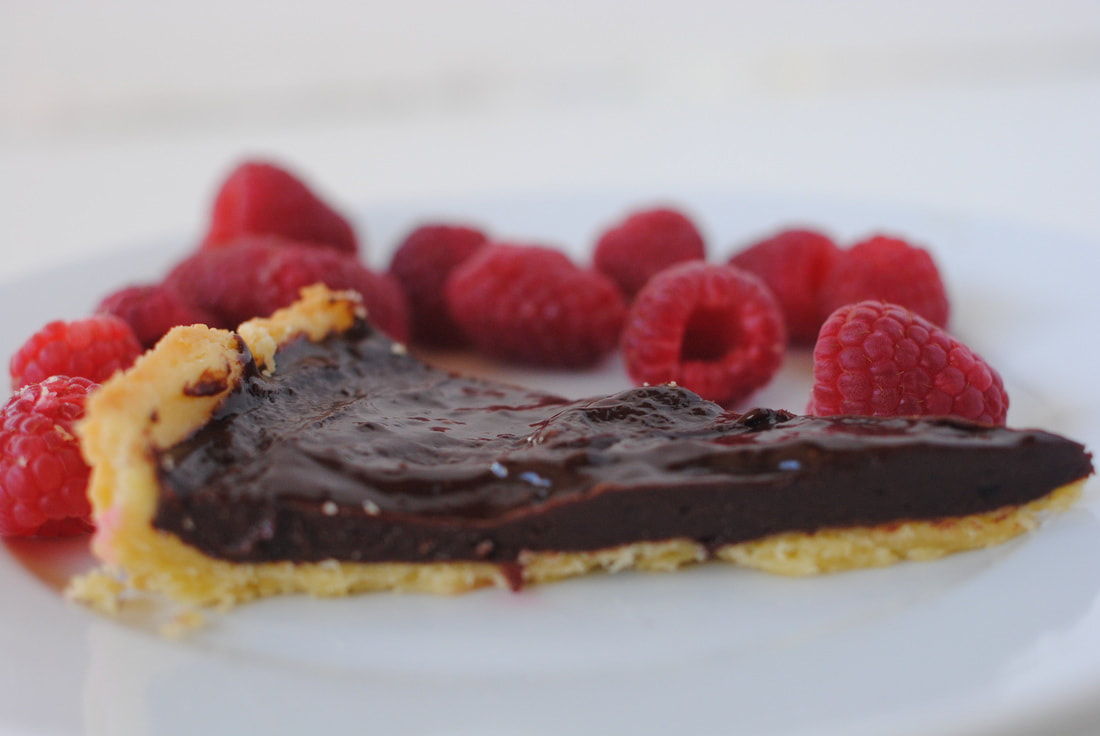 I have always loved this chocolate tart. It doesn't have a lot of sugar and the chocolate and crust complement each other nicely. Click here for the recipe
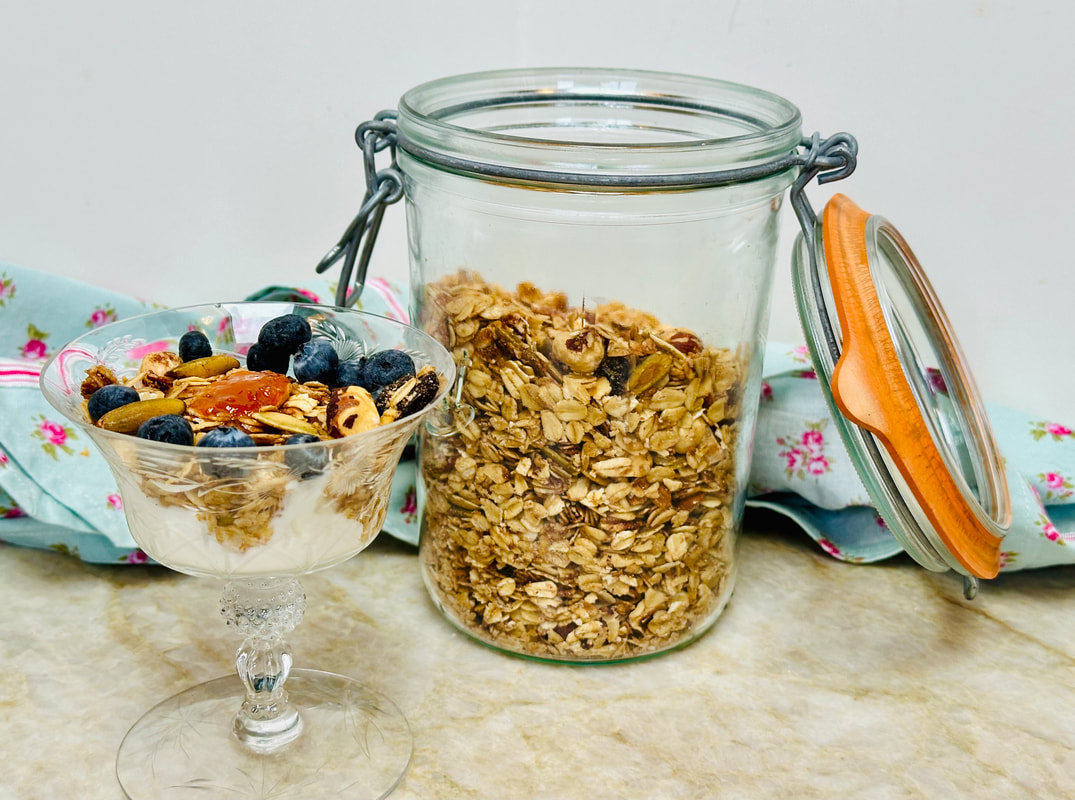 I am not a big breakfast person. Give me a glass of water, a nice cup of coffee, a piece of toast and I am satisfied. But lately I discovered homemade granola and it has become a game changer. It is my go-to breakfast. Trust me, homemade granola is so much better than the store bought kind. For me, the store bought ones are too sweet and often have things added that I don’t like. With homemade granola, you can choose your own nuts, seeds, dried fruit, sweetener and flavoring. You are able to control whatever you want to add. Once you make it, it lasts for weeks in the pantry. I have been playing with various ingredients for a couple of months. Every homemade granola recipe I have come across uses coconut flakes. But I don’t like coconut.I recommend adding them if you like them. If you have the Smitten Kitchen Cookbook by Deb Perlman, check out her granola recipe. She likes her granola in clusters and adds a whipped egg white to the granola mixture before she spreads it out on the baking sheet. I have not done that. Whatever you do, you will end up with a jar of crunchy, chewy, and lightly sweetened granola. This is also a wonderful project to do with children, that way they can create their own breakfast.  Life at Sunny Cove has had its ups and downs. I find solace in the kitchen as long as my husband cleans up my mess. I have slowed down tremendously. I need breaks now, so no more multi-tasking. I am fortunate that I have family and friends who support me.
Be creative and design your own granola: add your favorite nuts and seeds, but remember that they need to be roasted before adding them. Use a sweetener if you like, and however much you like. My preferred choice for sweeteners are honey and maple syrup. For dried fruits I use raisins, cranberries, cherries or a mixture of all. Deb Perlman from Smitten Kitchen adds roasted wheat germ. For fats, I use sunflower oil but you may also use olive oil, coconut-, or canola oil. Some recipes call for melted butter. Ingredients: This recipe makes about 4-5 cups of granola 3 ½ cups old fashioned oats 1 cup toasted hazelnuts ¼ cup ground flax seeds 1 tsp. cinnamon 1 tsp.salt ½ cup pumpkin or sunflower seeds ⅓ cup sunflower oil ⅓ cup honey 2 TBS maple syrup ½ tsp. vanilla extract 1 cup (or more) dried cranberries, raisins, cherries, or other fruit Directions: Preheat the to 300˚ F (150˚C) Cover the baking sheet with waxed paper Combine the oats, hazelnuts, and flax seeds in a large bowl. Combine the wet ingredients and spices in another bowl. Mix the wet ingredients with the dry ones. Spread them out on the cookie sheet covered with wax paper and bake until golden, approximately 40-45 minutes, tossing occasionally. Add the dried fruits and store in an airtight container. Guten Appetit! Recipe from the sunnycovechef.com Here are some more recipes for breakfast or brunch.  These healthy savory muffins will give you energy for a long time. Click here for the recipe 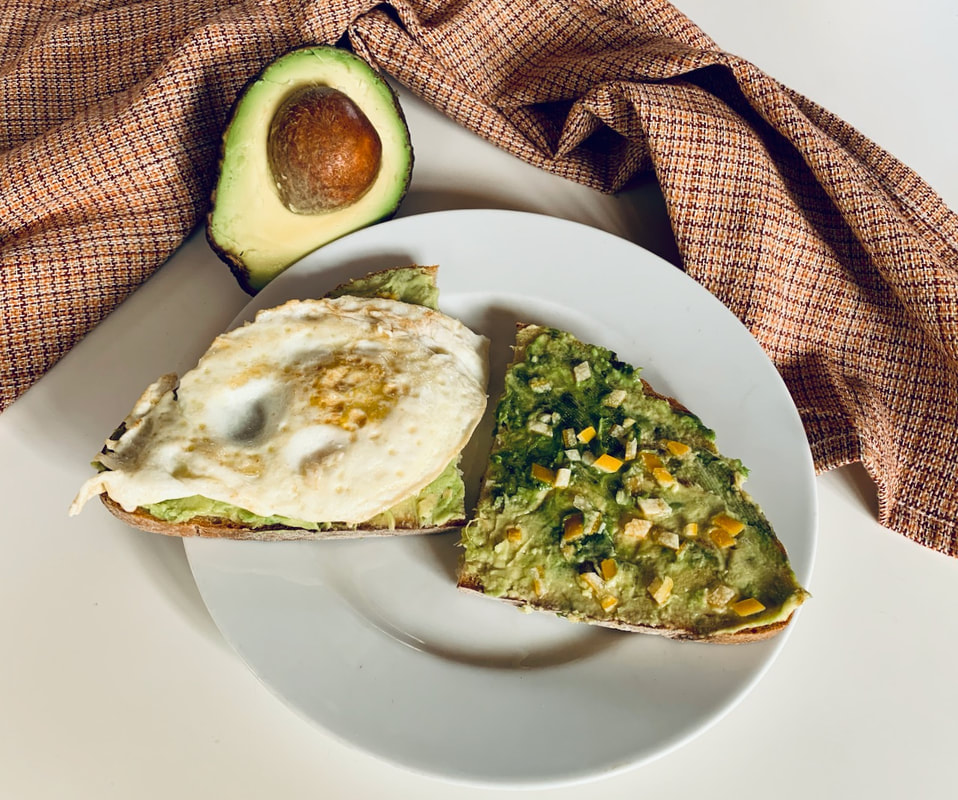 Avocado toast with homemade preserved lemons. Click here for the recipe  Healthy banana pancakes
Click here for the recipe. Faux Red Currant Jam that comes very close to the Real Thing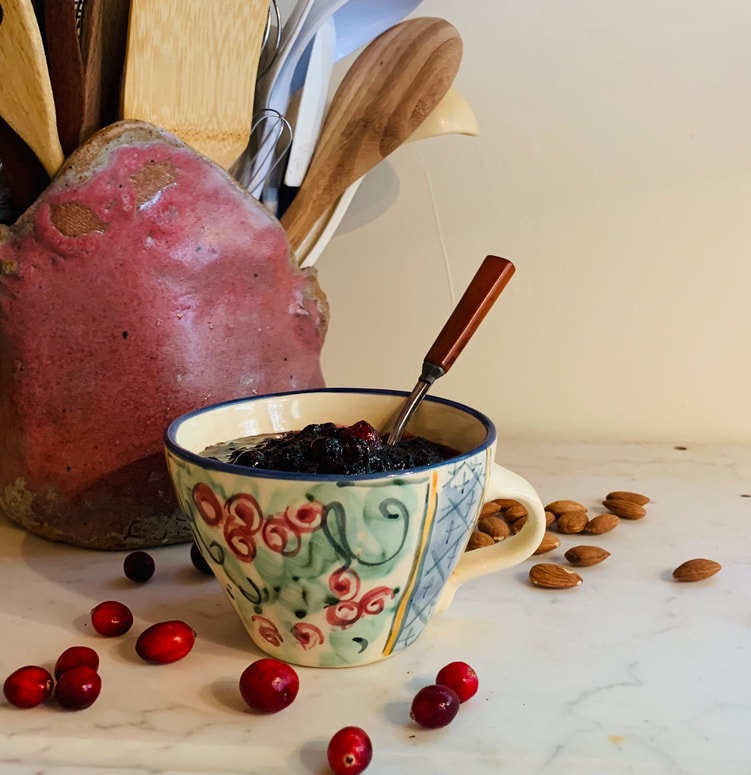 It has been a while since my last blog post. Time seems to just run away from me. I spent two wonderful weeks in Germany for a family event. I am always happy when I see my family and friends and reconnect with them, even if it is only for a short time. What a privilege. After five days at my village, I drove with my niece to Lüneburg which is my favorite town in Germany. I ended my trip In Berlin with my niece and her family. We had a great time at the Berlin Zoo and Aquarium with my two-year-old grand niece. I returned severals weeks ago, and have I to say that this time, I had a bad case of jet lag for a week. Age may have something to do with it. A couple of years ago, I bought this wonderful cookbook called Baking At the 20th Century Cafe by Michelle Polzine. The author specializes in baked goods from across the former Austro-Hungarian empire. I cannot resist these delicious delicacies. What I especially like is that she substitutes domestic ingredients for the often hard to find European ingredients. I love this and I find her recipes exquisite. I posted her recipe for roasted strawberry ice cream in September. Two of my favorite jams are sour cherry and red currant. Both fruits are rarely available here in California, and if you find them they are expensive. This faux red currant jam is made from cranberries and pomegranate juice and comes very close to the real thing. I have made it for three years now and and everyone seems to like it, and it is perfect on baked brie or pears. And it is delicious with duck or on any cake or cookie, like Linzer torte. It also makes a great gift for the holidays. I have doubled and tripled this recipe. I learned a new way to prepare the jars for the jam by putting the clean jars in a warm oven.
Ingredients: This recipe makes about three 8 ounce jars 3 cups (300 grams) fresh cranberries 2 cups (390 grams) sugar 2 cups pomegranate juice Directions: Put a small plate in the freezer Preheat the oven to 250˚ F (120 Celsius). Put the clean canning jars on a sheet pan, lined with a damp towel, and transfer it to the oven. Put the jar lids, funnel, and tongs in simmering water on the stove. Wash the cranberries and discard any squishy ones. Put them in a large pot with the juice and sugar, and bring to a boil over medium-high heat, skimming off the foam that rises to the top. Reduce the heat so that the mixture simmers until the berries pop. Stir with a whisk to break up the berries. I use a masher to smash the berries. Continue cooking until the mixture has thickened and registers 221˚F (105˚Celsius) on an instant-read-thermometer. It will take about 10 to 15 minutes. To test, drop a spoonful on the chilled plate and see if it has thickened. Remove the jars from the oven and ladle the jam into them, filling each one within a millimeter of the top. Wipe the rims of the jars with a wet paper towel, and seal the jars with the lids and rings. Invert the jars and let them cool . After a few hours, test the jars to make sure they have sealed. And tighten the rings. If they are not sealed, put them in a water bath for 10 to 15 minutes and boil them until the tops pop. You know your jars are sealed when the lid doesn't move when you press on it. To be totally safe, follow the manufacturer's instructions that come with the jars. Guten Appetit! Recipe by Michelle Polzine from her book Baking At The 20 Century Cafe Posted by the Sunnycovechef.com 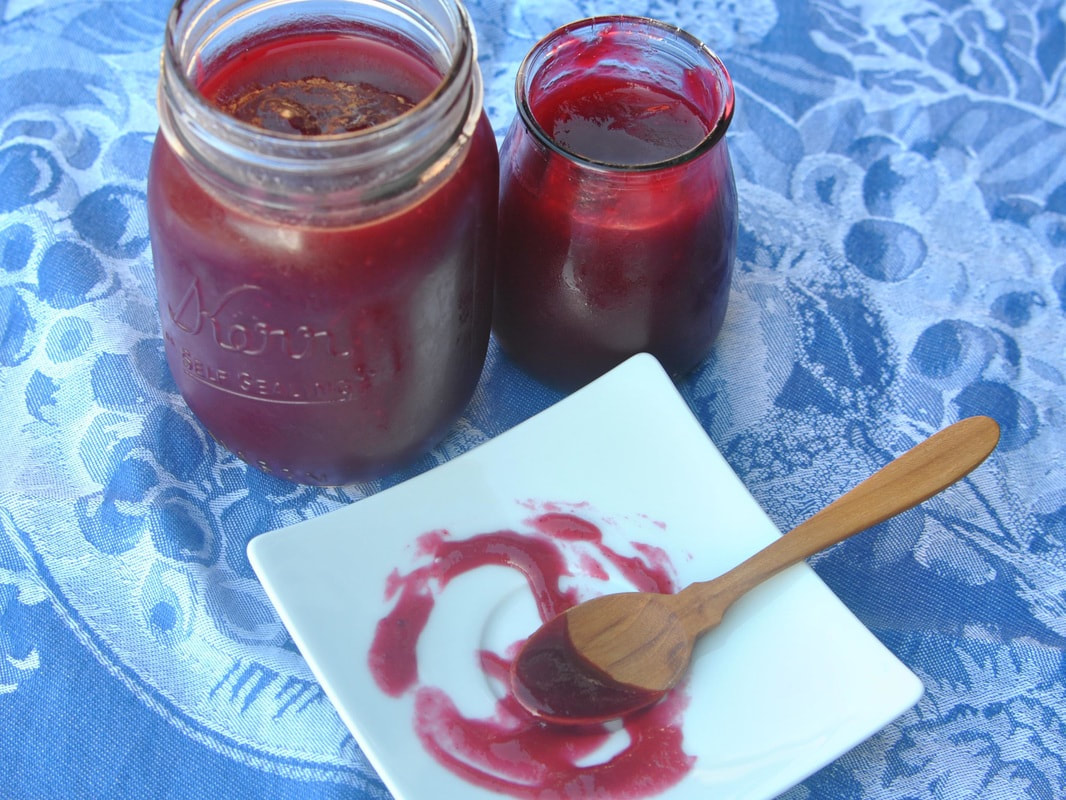 My cranberry ketchup is perfect on any sandwich, but will elevate a turkey sandwich to a different level. Click here for the recipe. 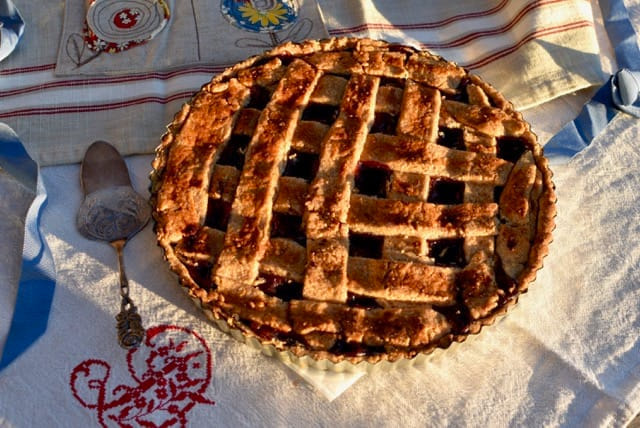 In 2016, I posted this recipe for Linzer Torte. The cranberry-pomegranate jam will be perfect for it. Click here for Linzer Torte recipe  Whenever I visit Germany, I have to have Matjes herring. It is a northern German dish that I absolutely love. I have discovered a way to make here at home. Click here for the recipe 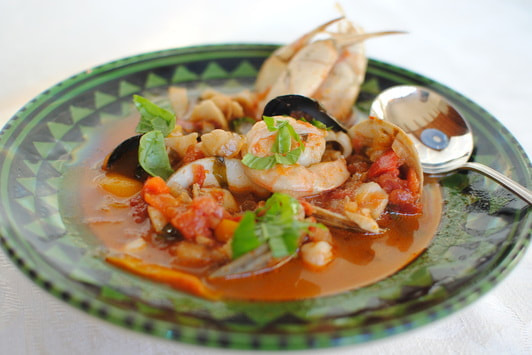 Next week it is my turn to host our bookclub. Because it's the holiday season, I am treating them to a cioppino dinne . Cioppino is a medley of fresh seafood in a rich wine and tomato broth. This has been my go-to dish for many years when entertaining during the winter months.
Click here for the recipe. A Luscious Chicken Dish full of flavor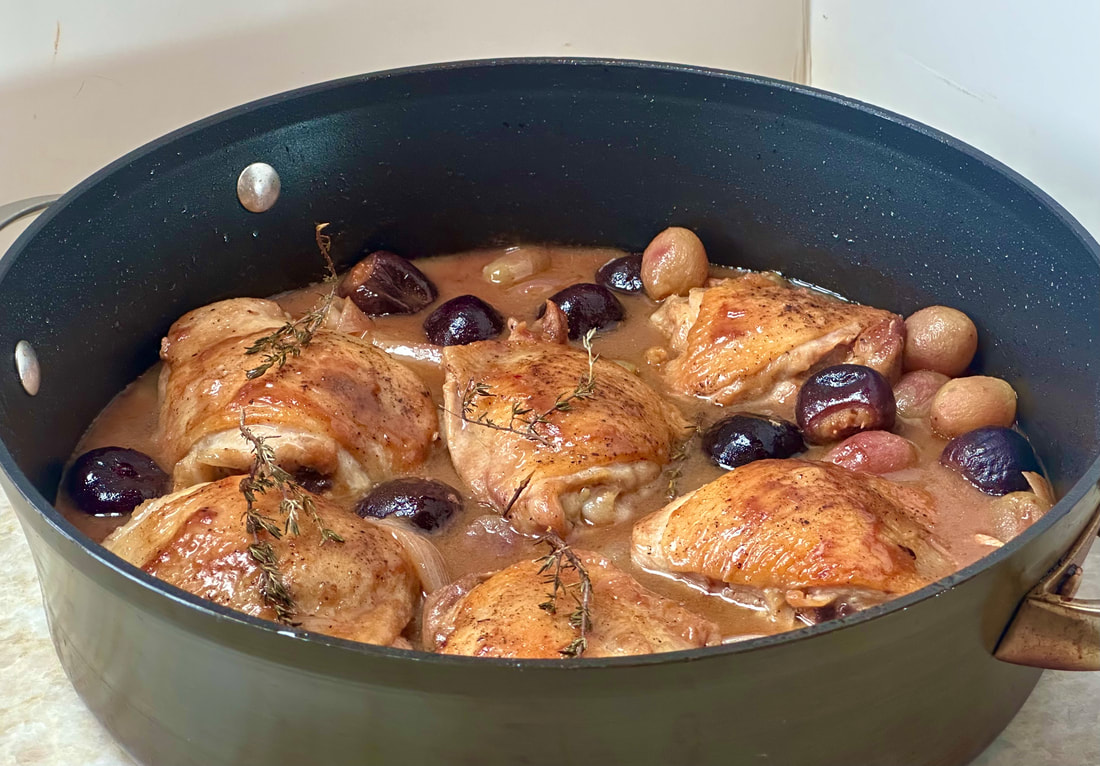 Several weeks ago, I came across this recipe in the Wall Street Journal. I knew right away that I had to try it and I am so glad I did. It turned out to be winner. My hubby, who prefers steak over chicken, loved it and ate it with gusto. This recipe has a sweetness with a lot of added flavor. Let’s face it, chicken can get boring, but this recipe livens it up with the sauce. The figs and grapes add a luscious taste. You could omit the frui,t but I wouldn’t. I might add prunes instead of figs or use just grapes. I made this for my Sunday dinner with rice and spinach. What a treat! 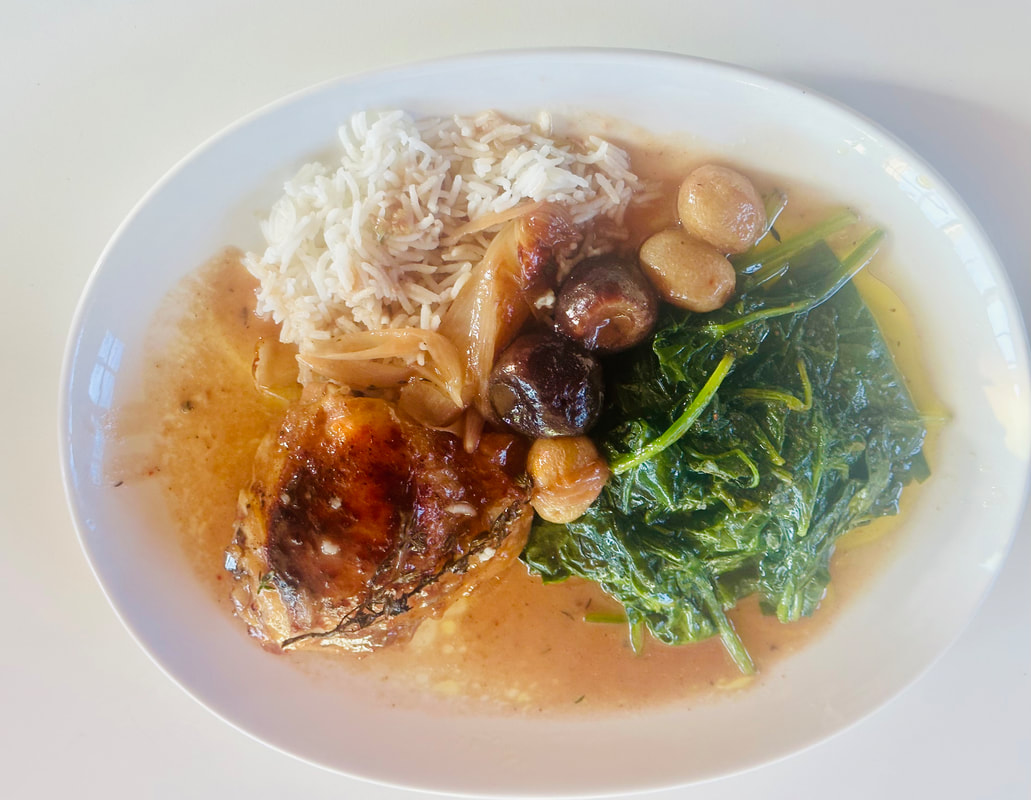 Life has been very good here at Sunny Cove. The weather is perfect, except for a 3 -day heatwave that brought over crowds from the Bay Area wanting to cool off in the ocean. I was busy in my kitchen making Königsberger Klopse, a yearly event for my German girlfriends. I also prepared a salmon dinner for five of my Swiss friends. My husband got a special treat when I made him my herring recipe. I have been experimenting with different recipes, some of them ended up not being blog worthy. There are some other great recipes I can’t wait to post. However, I might be running out of time, because I am leaving for Germany for a family event: my grandniece is being baptized. It’s a joyful event and I will see all my relatives.
This chicken dish will be on my table often. When figs are no longer in season, I will experiment with different fruits, although I think grapes add a wow factor to this dish. The sauce is definitely a winner. I have frozen a couple of the thighs for my husband to eat when I am gone. However,I made a few minor changes, I poured off most of the chicken fat before frying the onions, leaving about 3 tablespoons in the pan. In the original recipe, the dish is baked at a high temperature for 15 minutes. I reduced my cooking time to 10 minutes or less. I prepared the dish in the morning and reheated it at dinner time with the high heat. I didn’t cover my dish with foil, but instead used the lid for my pan. I used regular Dijon mustard instead of grainy mustard. I bought my date syrup at Trader Joe’s. Ingredients :
This recipe serves 6 ¼ cup chicken stock 2 TBS date syrup 1 TBS honey 1 TBS fresh lemon juice 1 tsp. salt plus more for seasoning ½ tsp. freshly ground pepper ¼ tsp. chili flakes 6 bone-in, skin-on chicken thighs (2½ pounds) 2 TBS olive oil 2 red onions cut into small wedges ¼ cup white wine 8 medium figs ½ pound red grapes 6 thyme sprigs, plus chopped thyme for garnish Directions: Set the rack 8 inches from the broiler. Preheat oven 400˚degrees F. In a bowl whisk, together broth and cornstarch until dissolved. Add in honey, mustard, date juice, salt, pepper, and chili flakes. Generously season the chicken thighs with salt and pepper. Wash and cut the stems off the figs. Heat oil in a large skillet over medium-high heat. Fry the chicken skin-side down for 5 minutes or more until the skin is crisp and golden. Flip and cook one more minute. Transfer the chicken to a platter and cover with foil. Discard most of the chicken fat, leaving about 3 tablespoons. Add onions to the skillet, and cook until slightly browned, 3-4 minutes. Put the cooked onions on the platter. Add the wine to the skillet, stirring and scraping up bits from the pan until reduced by half, about 2 minutes. Add the broth mixture, bring it to a boil, reduce the heat to medium and cook until thickened slightly for 2-3 minutes. Return the chicken and onions to the pan with the accumulated juices. Nestle the figs and the grapes among chicken pieces and scatter the thyme sprigs around. Spoon some of the sauce over the chicken. Cover the pan with foil (or a lid) and bake the dish for 20 minutes or until the grapes and figs begin to soften. When you are ready to serve this dish, spoon some more sauce over the chicken and bake at in a preheated oven at 425˙ Fahrenheit for another 10 minutes. Sprinkle with chopped thyme. Guten Appetit! The Wall Street Journal adapted the recipe from a cookbook called Shabbat: Recipes and Rituals from My Table to Yours by Adeena Sussmann. Posted by sunnycovechef.com We are still getting the sweetest strawberries here in Santa Cruz. I have been buying them from Ron, my Dutch buddy, at the farmers market for many years. He grows and sells them only at local farmers markets. Sometimes I buy too many and they start looking sad in my fridge. What am I to do? I hate throwing good food away. Several years ago, I bought a great cookbook called Baking At The 20th Century Cafe by Michelle Polzine who used to own a cafe in San Francisco that made Austrian-Hungarian delicacies. The cafe has since closed, but her book has been one of my favorite cookbooks. She substitutes local ingredients in her baking. I made several of her recipes and they are all very good—and you can’t tell the difference from the original Austrian recipe. I know, because I had both. She was nominated for the James Beard pastry chef award. 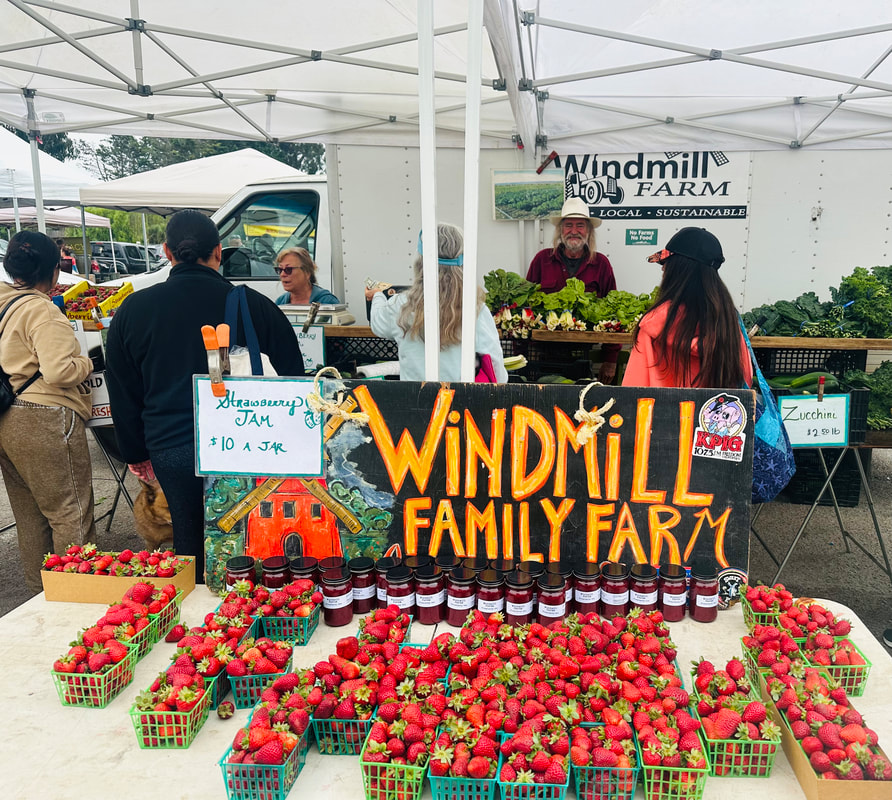 In her book, she makes cream puffs filled with strawberry ice cream and chocolate sauce. I made the strawberry ice cream.. The roasted strawberries are out of this world. I kept some for my morning yogurt, and just thinking about them makes me hungry.  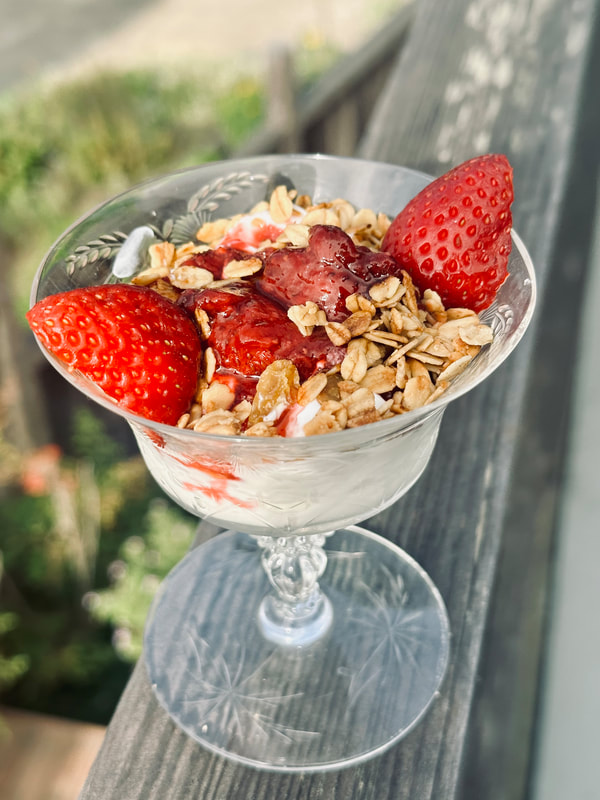 The amount of sugar you will need depends on the sweetness of the strawberries. Her recipe calls for ⅓ cup, but I reduced mine to 3 TBS of sugar. I cut her recipe in half and ended up with a generous cup of roasted strawberries and 4 cups of ice cream. My tasters approved of the richly flavored ice cream, even though my 40-year-old ice cream machine is having issues and I think I need to replace it with a new one. I liked the ice cream best when it was soft, after just a few hours in the freezer. However, most of it was eaten when it had been in the freezer for days. I made my own version of a banana split with it for some Swiss friends. I hope you enjoy this recipe as much as I did.
Ingredients for roasted strawberries: This amount make a little more than 1 cup . 1 pound strawberries 3 TBS sugar Preheat oven to 300˚F Fahrenheit (150˚Celsius) Directions for the roasted strawberries : Arrange the strawberries in a single layer in a glass dish or baking dish and sprinkle the sugar over it. Roast the strawberries for about 3 hours, stirring every hour, until the juice has been reduced to a syrup. After the berries have cooled, transfer them with their juices to an airtight container. They will last in the fridge for several days. Ingredients for the ice cream: 2 cups strawberries 1 cup heavy cream 4 egg yolks ¼ cup granulated sugar ¾ -1 cup roasted strawberries Directions for the ice cream: Wash and hull the strawberries. Puree them in a blender or food processor. You should have about a cup and a half. Heat the cream in a heavy saucepan until it begins to bubble at the edges of the pan. Whisk together the egg yolks and sugar in a bowl. Gradually whisk some (about ⅓) of the hot mixture into the egg yolk mixture. Be careful or the mixture will curdle and you will have to start all over again. Pour the mixture back into the pan with the remaining cream and cook, stirring often, until it registers 170˚F (200 Celsius) on an instant-read thermometer. Pour the mixture through a sieve, stir in the strawberry puree, cover and refrigerate overnight. Process the mixture in an ice cream maker. Follow the instructions for your machine. When the ice cream is completely frozen, add the roasted strawberries with some of the syrup and continue churning it for a few minutes. Transfer the ice cream to a container and freeze. Guten Appetit! Recipe from Baking at the 20th Century Cafe By Michelle Polzine Posted by the Sunnycovechef We are having a Pinot Noir wine tasting at our house next week . I am thinking of serving the following recipes.  These salmon miso rillettes make a great snack or appetizer. Click here for the recipe Flammkuchen or flat bread makes a great snack with a glass of wine. Click here for the recipe 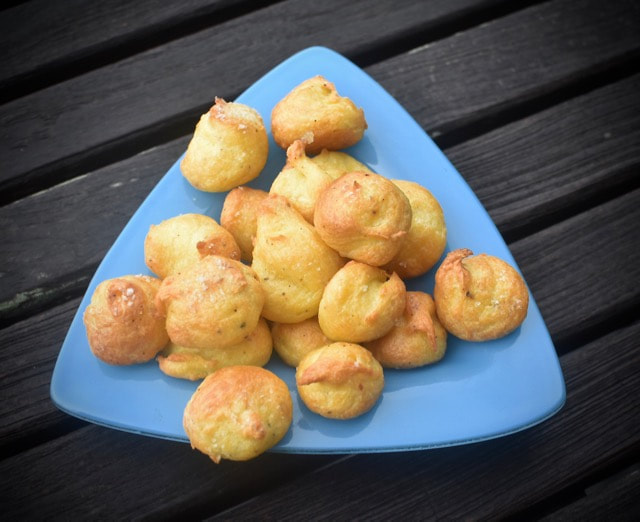 I think that these little cheddar cheese puffs will taste good with a glass of wine.
Click here for the recipe This cake is the quintessential German sheet cake. When the Zwetschgen are in season, you will find this cake in every bakery. It is always made with Italian plums, or Zwetschgen, as we call them in Germany. Read more about the Zwetschgen here where I posted a delicious cake recipe for them. For this recipe, I decided to try a different dough using yeast, which is the traditional way in Germany when baking Zwetschgenkuchen. It is customary to bake the Kuchen on large baking sheets. The dough is drier and uses only 3 tablespoons of sugar. Think of pizza dough. My husband says this is not a Safeway cake (which is his favorite), it is dense and heavy, but tasty. He approved after all. (He has to.) There are many different recipes, but I decided to use Luisa Weiss’s recipe from her Classic German Baking book. She did all the homework for me adapting the sheet cake to American ingredients. Thank you Luisa! By the way, if you enjoy German sweets, this book is fantastic.  Luisa’s recipe only uses one half-sheet which will make enough for 10-12 pieces. That’s great, because this sheet cake is best when freshly baked and still okay on the second day. It tastes twice a good with whipped cream. Don’t skimp on the plums (you barely want to see the base of the cake). The next time I bake this cake, I will use more plums and maybe a little more sugar and butter. The streusel adds sweetness and richness. My godmother, a gifted baker, would often bake the cake with a custard on top. I loved that. Try omitting the streusel and sprinkle some sugar over the plums before baking it. Then you could call it a plum pizza. Please, try this cake with whipped cream. It makes all the difference and elevates this cake to a different level.
Ingredients: The Dough: 7 ounces (200 g) all purpose flour, more for kneading 3 TBS sugar 1 tsp. Instant yeast ½ tsp. lemon zest pinch of salt 3 TBS (40g) unsalted European butter 1 egg yolk The Plums: 2 -2 ½ pounds Italian plums The Streusel: 4.2 ounces (120 g) all-purpose flour (about a cup) ⅓ cup (70 g) sugar ½ tsp. cinnamon pinch of salt 5 TBS. (70 g) unsalted European style butter, softened Directions: Melt the butter and let it cool. Bring the milk and egg yolk to room temperature. (Milk should be warm to the touch). Line a 9 x 13-inch metal baking sheet with parchment paper, letting the sides hang over the edges. In a large bowl, stir together the flour, sugar, yeast, lemon peel, and salt. Mix in the butter, milk, and egg yolk. Once the dough is formed, dump it on a floured work surface and knead it for 5 minutes. It should be silky smooth. Add a little bit more flour, but not too much. The dough should still be soft and slightly floppy. Form the dough into a ball and place in a buttered bowl. Cover the bowl with a dishcloth and place in a warm, draft-free location for about an hour, or until the dough has doubled in bulk. Preheat the oven to 350˙ Fahrenheit (180˙C ) Prepare the topping, halve and pit the plums, then quarter them. For the streusel, mix together the flour, sugar, cinnamon and salt in a bowl. Cut the butter in cubes and add to the flour mixture. Using your fingers, rub the butter into the flour mixture until you have bean-sized streusels. Cover and refrigerate the streusel mixture until ready to use. Gently deflate the dough with your fingers and push it evenly to fit the pan, creating a 1-inch edge. The rest of the dough should be about 1/8 inch thick. Starting at the edges, push the plums skin-side down into the dough. The plums should be snug together so that no dough is showing. Sprinkle the streusel evenly over the cake. Bake the cake on the middle rack of the oven for 40-45 minutes or until the crust is golden brown and the edges of the streusel are turning colors. Cut this cake into serving pieces. It is best served the same day or the next. It tastes great when it is still warm, smothered with whipped cream. Guten Appetit! Recipe by Luisa Weiss Posted by Sunnycovechef.com Here are some more of my plum recipes. This plum tart has a buttery crust . Click here for the recipe. 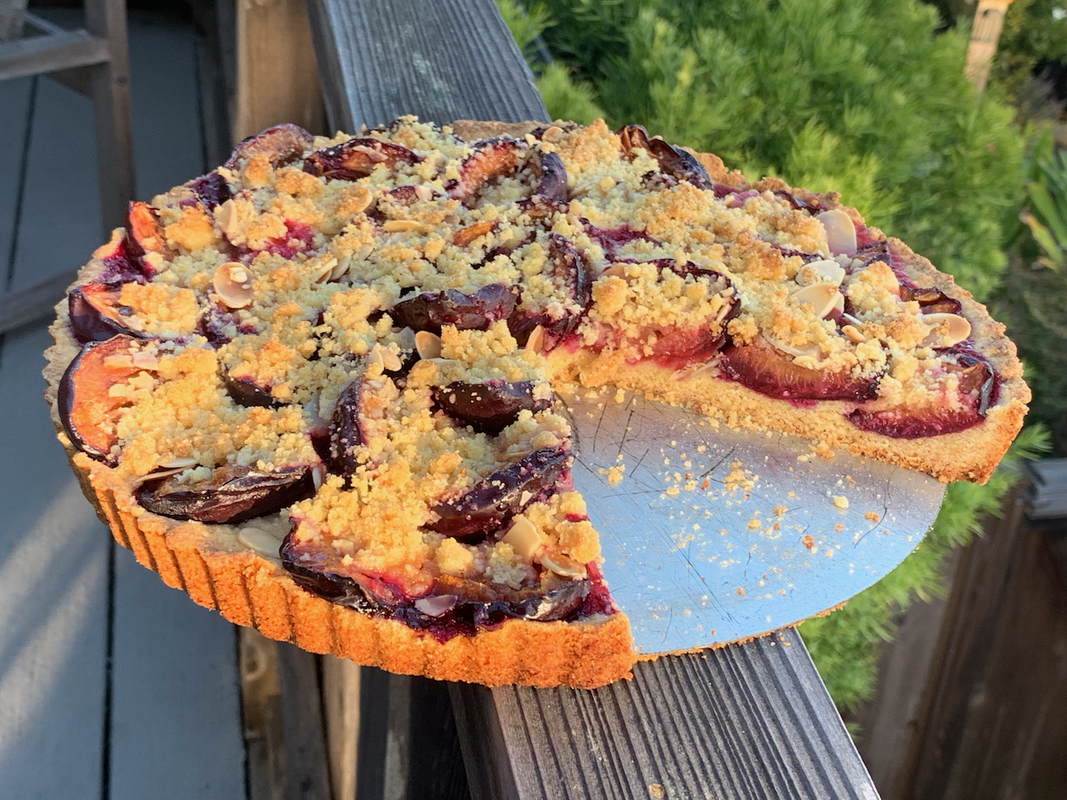 Marian Burro's recipe for plum cake was printed in the New York Times for years. Click here for the recipe  MY favorite recipe for spiced plum butter. We call it Zwetschgenmus in Germany. Click here for the recipe  Whenever I arrive in Germany I seek out one of my favorite meals. It is Matjes herring with fried or boiled potatoes. Matjes herring is a young female herring with silvery skin that has not yet laid eggs. They are caught in the North Sea at the end of May and beginning of June while they still have some of their winter fat. The word Matjeshering is borrowed from the Dutch word maatjesharing and from the middle Dutch word medykenshering, which translates to “maiden herring” . 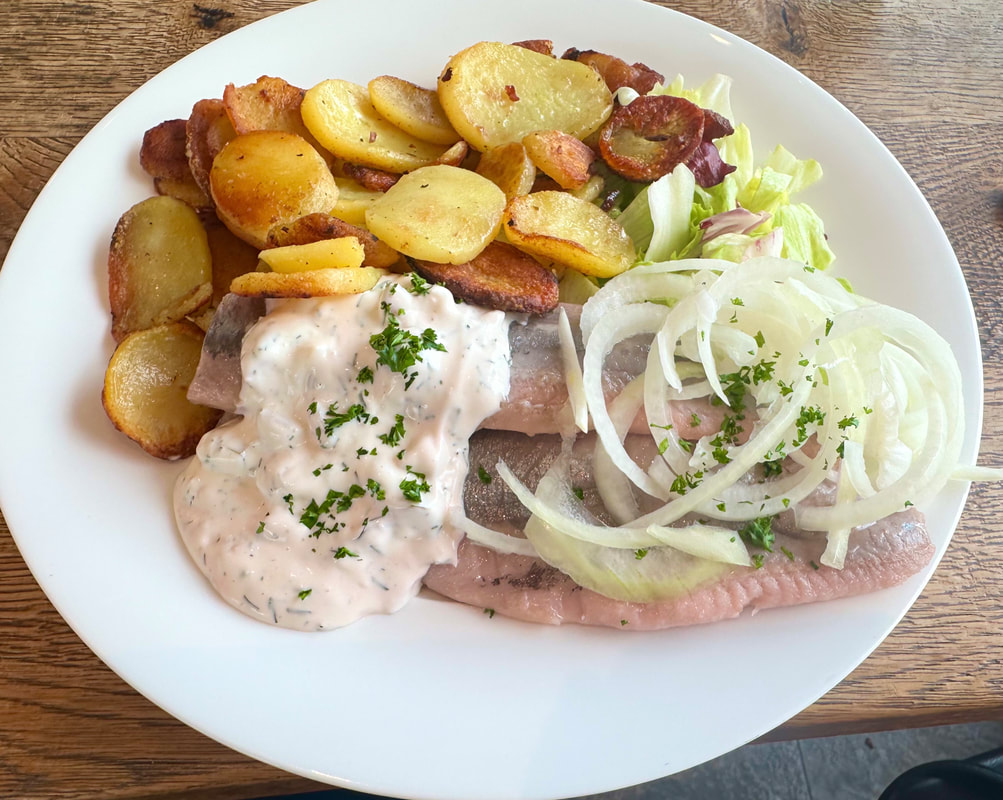 Matjes Herring with fried potatoes in Germany During the pandemic when I wasn’t able to travel, I recreated my favorite dish at home, and to my surprise, my husband loved it. I have been making it ever since. In the beginning, I ordered Matjeshering, but is was very expensive for just a few pieces of herring. It had to be shipped cold, which means a lot of packaging. Honestly, I love the Matjes herring I get in Germany, but I couldn’t tell that much difference from the pickled herring that you can buy in jars everywhere here in California. I buy two 12-ounce jars of herring in wine sauce. Make sure you get large pieces of good quality herring. My husband bought a jar that had tiny little pieces of herring, which was not very good. 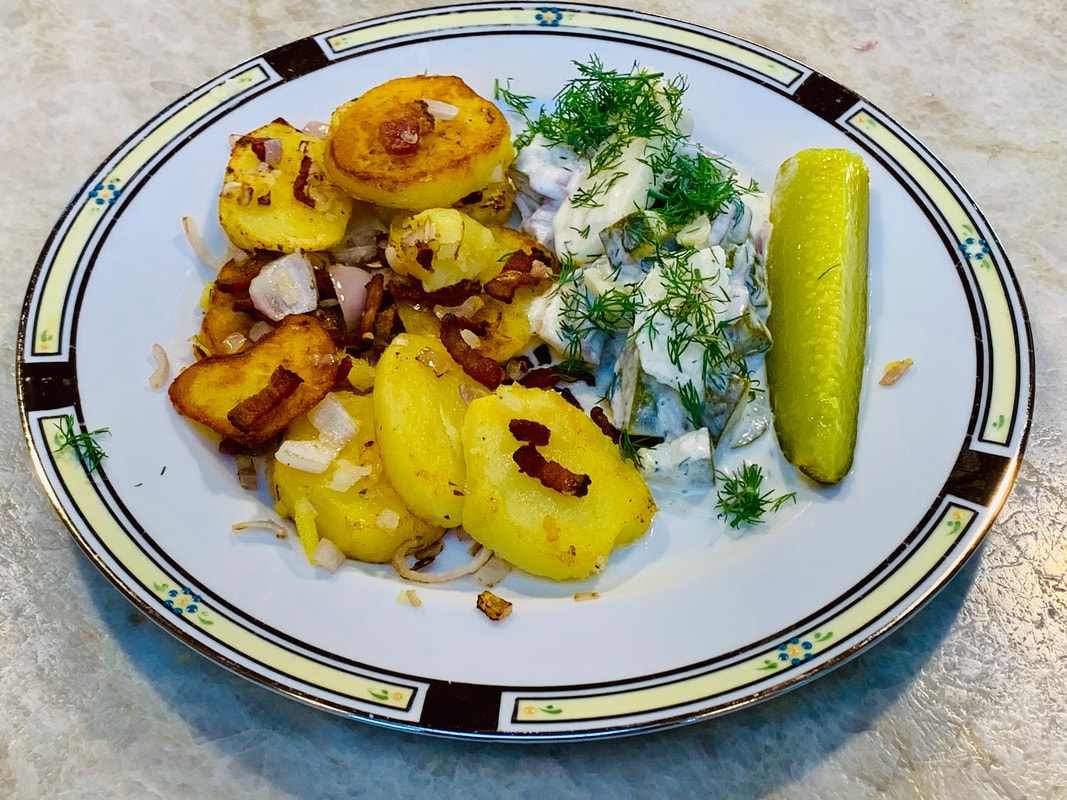 My version of Matjes Herring On a personal note, for quite a few months I lost interest in my blog. It was like I lost an old friend when I had my blog redone. But slowly, I am getting back into posting more recipes. The recipes in my blog are still there. Family and friends enjoy them and occasionally I get a notice that my niece or some other person has used one of my recipes. This keeps me going and it gives me something else to think about other than dealing with age-related illnesses, family problems, and the political situation in Europe and elsewhere in the world.
Let’s return to my Matjes herring. The last few times I made it I bought a large jar of herring in wine sauce at Costco and used it for this recipe. If you are a purist, go ahead and order the Matjes herring from Amazon or other sources. I was told that IKEA sometimes has it. I found a store in Brooklyn that also has it and will ship. Let Mr. Google help you find a source, but watch the quantity of the actual herring. 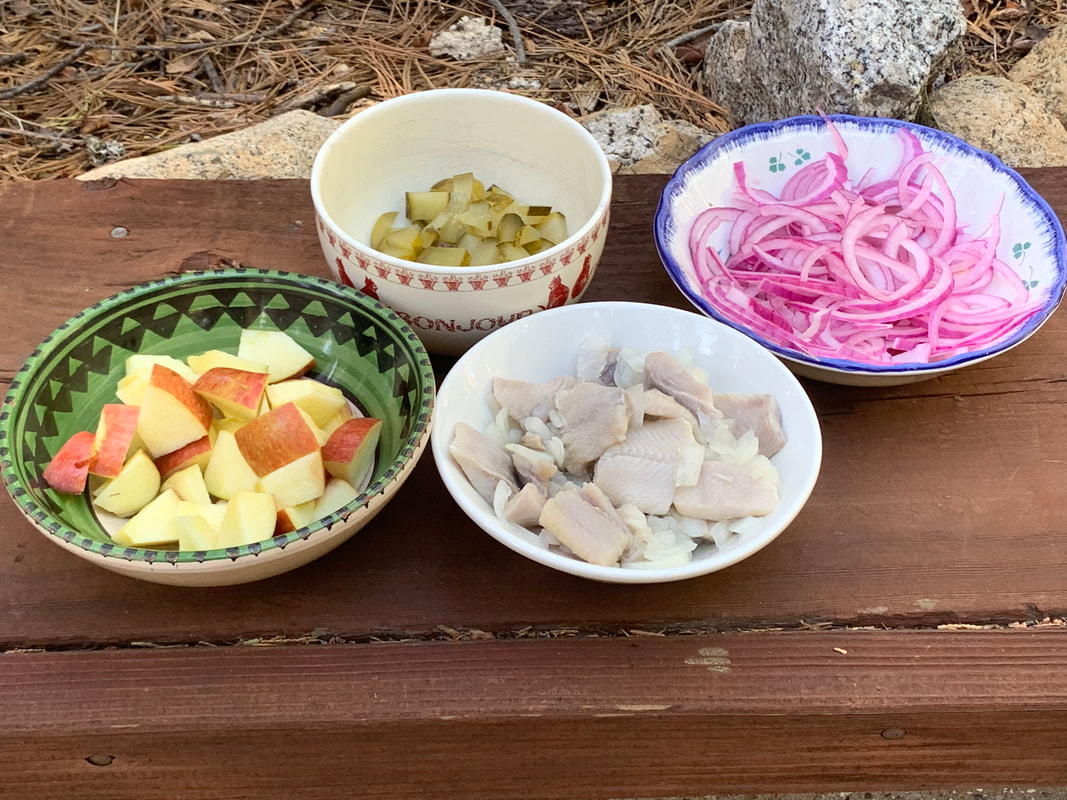 There are different recipes for serving Matjes herring. My favorite is the one I am posting here. The herring is served in a cream sauce with onions, apples, and pickles. I like to serve my herring with fried potatoes but boiled potatoes are just as good. 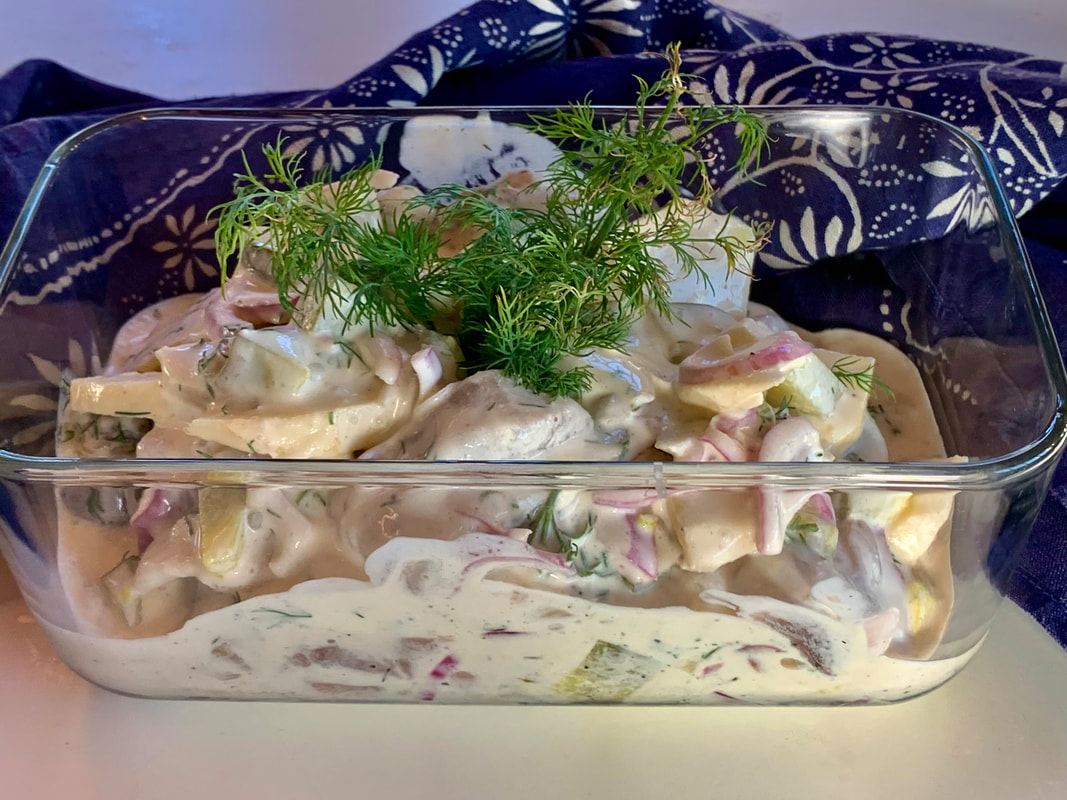 Recipe For Matjes Herring The Herring needs to be refrigerated for a few hours for all the flavors to blend. This recipe makes 4 generous servings. Ingredients : 1 lb. (500g) herring in wine sauce 1 medium-sized crunchy apple 1 cup thinly sliced onion 1 cup chopped dill pickles ½ cup (150g) crème fraîche 4 TBS heavy cream 1 TBS champagne vinegar ½ tsp sugar ½ -1 tsp salt ½ tsp pepper 2 juniper berry kernels 2 allspice kernels 1 TBS mineral water 1 TBS fresh lemon juice Directions: Rinse the herring and let it drip through a sieve. Only use the herring and discard the rest. Cut the onion in half and thinly slice it, soaking it in a bowl with lemon juice while you prepare the sauce. Mix the créme fraîche, cream, vinegar, sugar, salt, pepper, juniper berries, allspice kernels and mineral water into a smooth sauce. Core and cut the the apples into bite-sized pieces. You can peel them if you wish. Chop the pickles into bite sized pieces. Add everything into the sauce and taste for seasoning. Add additional salt, pepper, and sugar as needed. Keep the dish covered in the fridge for about three hours, which will improve the flavor. Guten Appetit! Recipe from the Sunnycovechef.com If you are not in the mood for Matjes Herring try some of my other seafood dishes 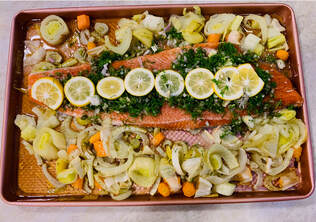 Here is a French version of a salmon sheet pan dish with vermouth and fennel. Click here for the recipe.  Here is an easy to make but delicious baked shrimp dish with Quinoa and peas. Click here for the recipe.  It has been over a month since I blogged. There is a reason for that. I visited my family in Germany and took my computer thinking that I would find time to write and blog. I was wrong, I never turned on the computer. Being with my family was more important. The sun didn’t set until 10:00 pm and those long evenings were spent visiting with each other. There were the family problems, the political situation, and so much more to talk about. Here is an update on my brother’s Ukrainian women. Last year my brother hosted a grandmother, mother, and 14 year old daughter. The girl is going to school, the mother is working in a factory nearby and the grandmother returned to Kharkiv to her apartment and dacha. There is some damage to the dacha but her apartment is still standing. The mother and daughter are now speaking some German and studying German at night. They do not know how long they will have to stay. They are adjusting. Both of them would like nothing more than to return home. I understand why the mother is keeping her daughter safe in Germany. They prepared a meal of borscht and dumplings for the entire family. Let’s wish them the best.
While in the village my girlfriend took me on a little outing to the historical town of Hann Münden. Here the rivers Fulda and Werra meet to form the Weser, one of the larger rivers in Germany. The town is famous for its half-timbered houses, some over 600 years old. I spent time here as a young girl visiting distant cousins and I have some fond memories. After a few days in the village staying at the tiny house I visited my niece and her family in Lüneburg
I spent some time with my grand niece. She is going to a wonderful day care. Her father brings her with a bicycle which has an attached wagon. She loves the ride. One day when my niece and I picked her up we stopped at an Italian ice cream cafe and had a treat. Almost all ice cream cafes in Germany are operated by Italian families and you get the best cappuccinos and homemade ice cream and gelato. Occasionally they will sell a German cake. 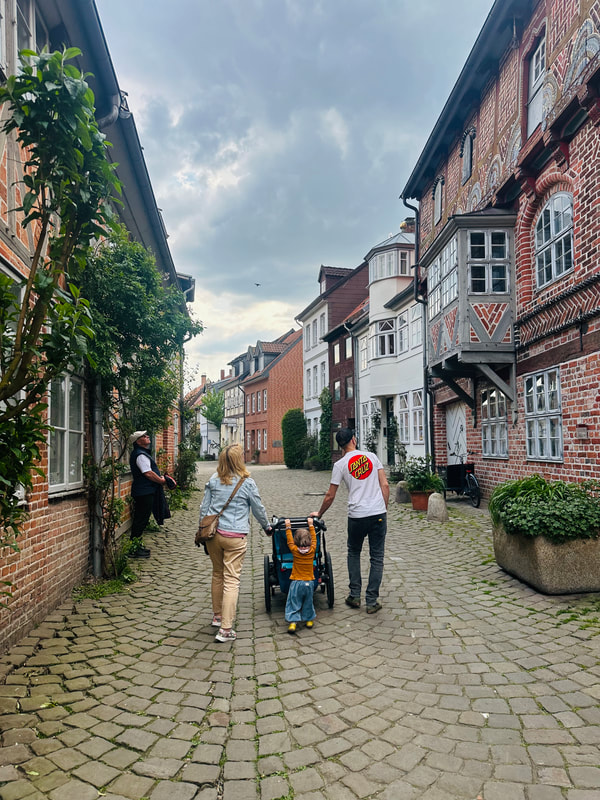 Taking a walk with my grand niece After a few days in Lüneburg my niece’s family and I rented an apartment on the Eastern Sea near Wismar. My grand niece was happy to play in the sand all day. One day we visited Wismar and got a great tour from my niece’s former professor. t Another day we visited a castle that is now used as an art gallery. My niece had done some of her work there as a student. It is a beautiful place with a nice garden cafe nearby. After our relaxing stay at the beach it was time to return to Lüneburg and I returned to the village. One day I visited an old friend in Kassel. On another day my girlfriend Monika and I visited her daughter‘s new family and home. It was here that I had the best herring meal on the trip. We went to a linen factory that makes the most beautiful linen. I bought way too much and had trouble getting it all on the train. Talking about German trains. Don’t count on them being on time. Twice my train was canceled and I had to wait at the station for an hour. My girlfriend Monika and I were going to visit Leipzig for a weekend but there was the possibility of a strike by the Bahn. We canceled our trip. So much for German punctuality.
I had some good and some not so good food while visiting Germany. It was asparagus season and I had the most wonderful salad and soup with my niece’s in-laws. They had an asparagus pizza and it was quite good. My niece had never been a cook before she became a mom. She made delicious spinach and bread dumplings in a creamy tomato sauce in a thermo mix. This machine is currently the rave in Germany.
My last meal was at the Pauliner Restaurant at the Frankfurt airport. I had the white asparagus salad with a grilled chicken breast. It was the perfect meal to say goodbye to Germany. After returning to Santa Cruz I was glad to be back cooking in my kitchen. I made a German rhubarb sheet cake that was ok but not good enough to put on my blog. Here are some of my recipes for the month of July. Click on the photos for the recipes. You will find more recipes if you type whatever you are looking for into the search bottom of my blog which is located above my photo.  This is a traditional German Strawberry Cake. 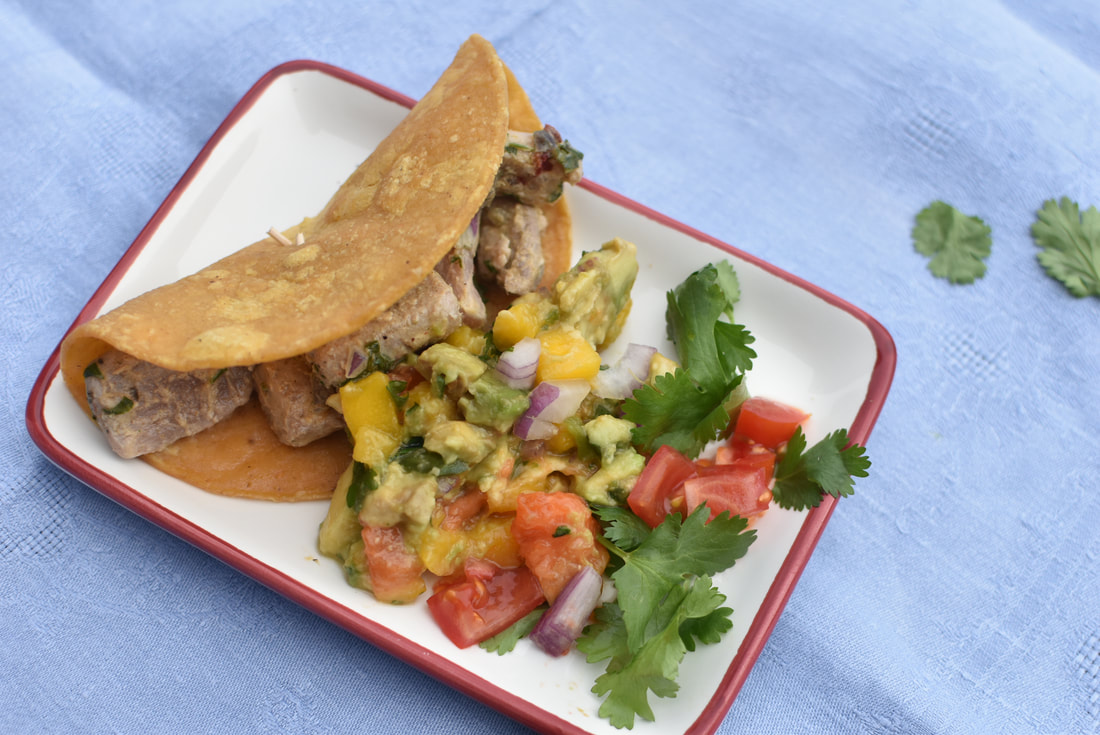 These ahi tacos with a tropical salsa are the perfect summer dish. 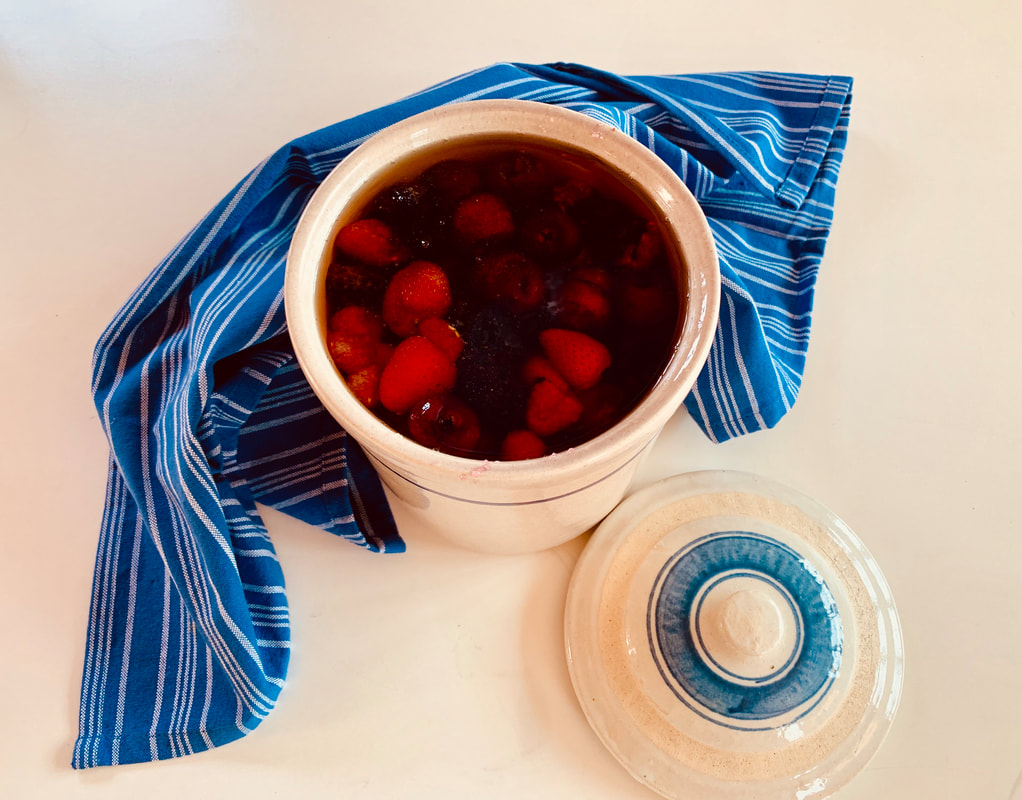 Preserve the taste of summer with fresh fruit soaked in rum. An old German tradition. 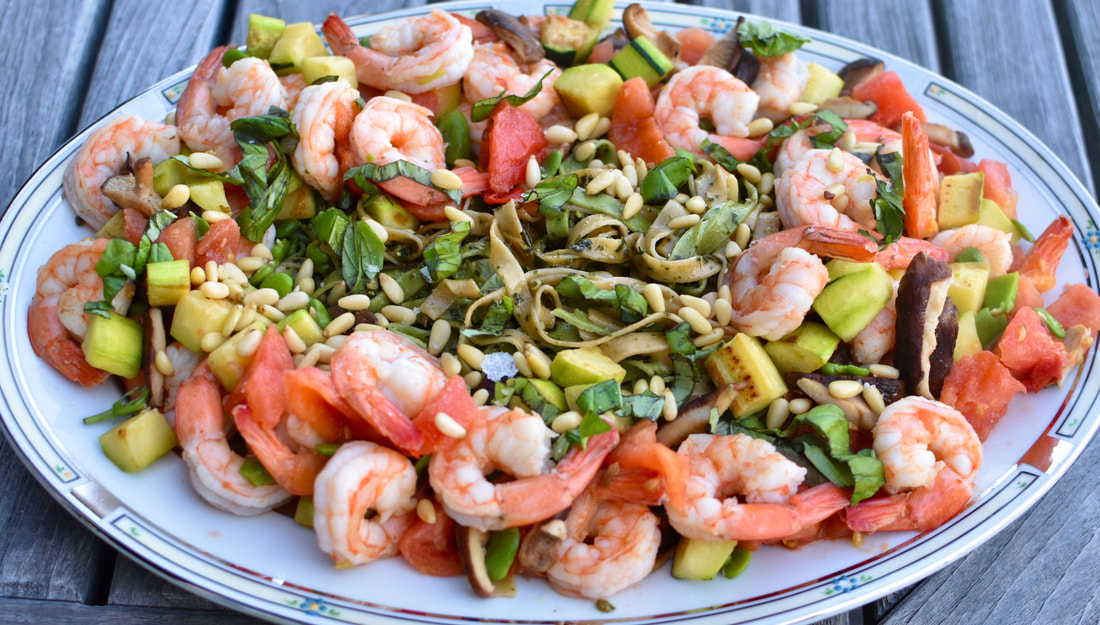 I have prepared this seafood pasta dish many times and it is always a winner. Has it really been 10 years since I started my little blog? Wasn’t it just yesterday that my girlfriend suggested that I organize my many recipes into a blog to share them with friends and family. This blog has become my baby, my creative outlet. It challenges me to expand my knowledge and keep on learning. I do have issues with the technical part of it. Like everything in life , nothing is perfect. Even I use this blog myself quite often, as the recipes are like my old and most trusted friends. The most enjoyable part has been connecting with other bloggers and people around the world. This community has given me support and positive input and I thank you for being part of it. I hope that I can blog for a little while longer, and find some new and interesting stories and recipes to share. I appreciate your loyalty and taking time from your busy life to read my blog. The recipe for duck confit quesadillas is one of my older recipes. If you click here you will not only find the recipe but a write-up of one of my favorite restaurants in Capitola called Shadowbrook. 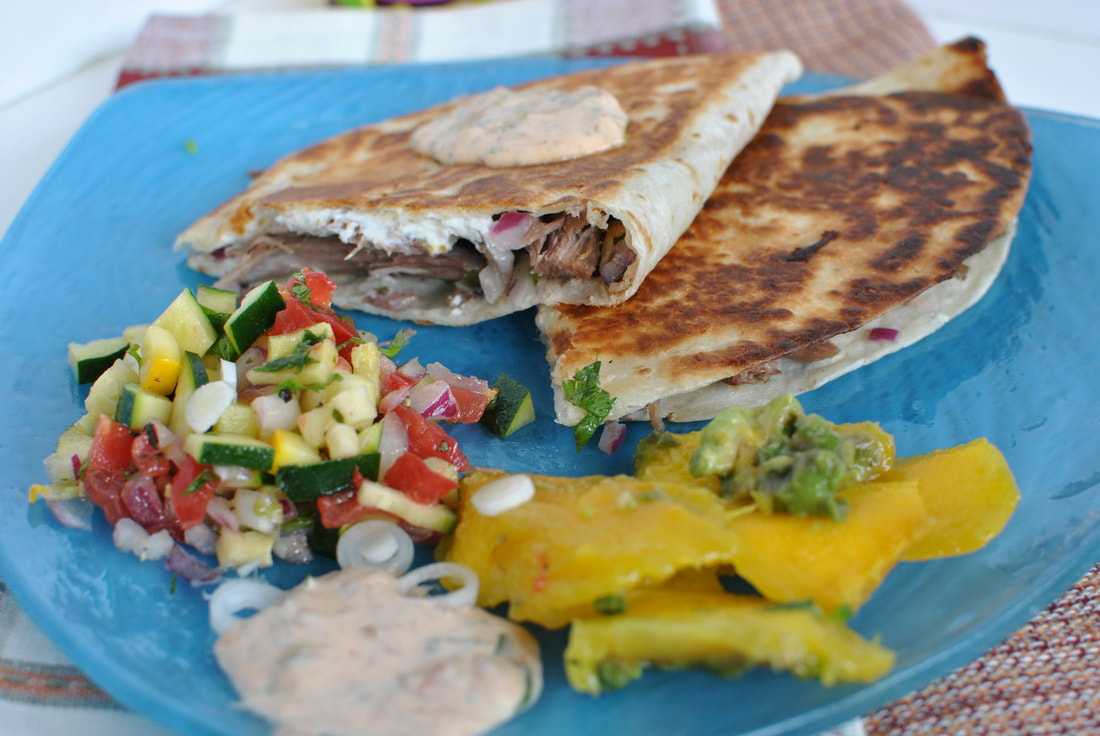 Duck Confit Quesadillas In a few days I will be flying to Germany to visit my family and friends. I have my railroad pass (read about the German railroad system here) and will be traveling by train. I will be staying in my nephew’s tiny house while at our farm since my brother still has 2 Ukrainian women and a teenager living in my niece’s apartment where I usually stay. Then I will take the train to go to Lüneburg, a beautiful historical old salt town near Hamburg, where my niece and her family are living (click on this link to read about my previous visits). I will also take a short vacation to the Eastern Sea near Wismar. I have never been there and I am looking forward seeing something new. Before I know it, my three weeks will be over and I will be back home with my husband. 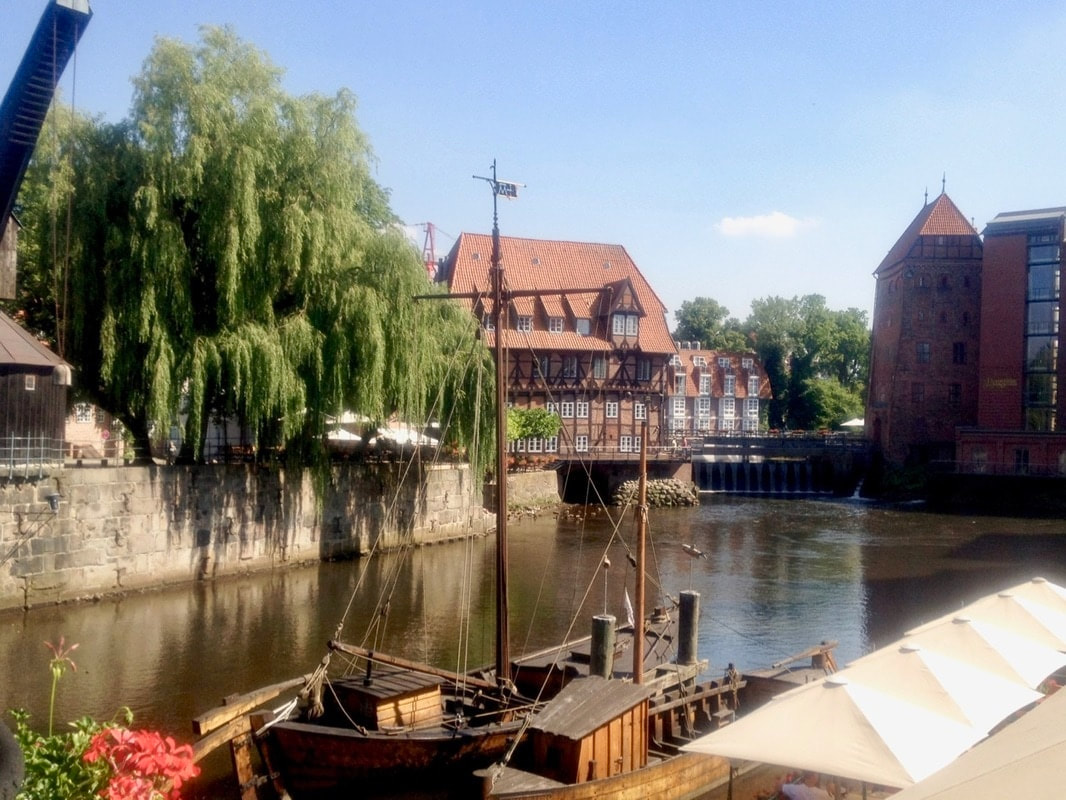 Lüneburg 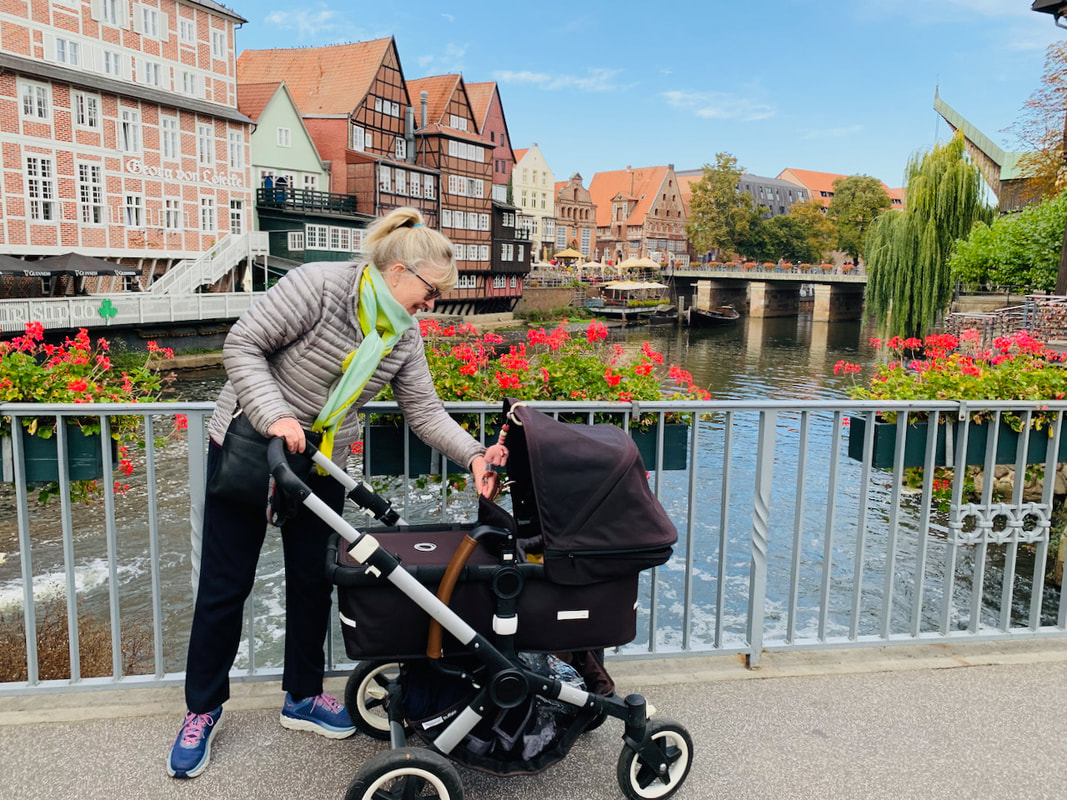 A photo from my last visit to Lüneburg, loving my grand niece Here are some of the recipes I have made in the last couple of months. My seafood pasta is a dish I have made for years. It comes together quickly, I freeze my pesto when basil is plentiful. I like to serve this dish with asparagus, steamed or roasted. My husband likes it steamed, but I prefer it roasted with some walnut or hazelnut oil, sprinkled with garlic salt and pepper. I roast the asparagus for about 10 minutes at 400 degrees. Last time I omitted the scallops and used only shrimp. which was just fine. I like to serve this dish on a large platter., which makes a lovely presentation. Click her for the recipe. I have to say, I love my banana bread, especially when it is freshly baked. I made my last batch using frozen bananas. Once I defrosted them I got rid of all the juices that had accumulated. Click here for the recipe. 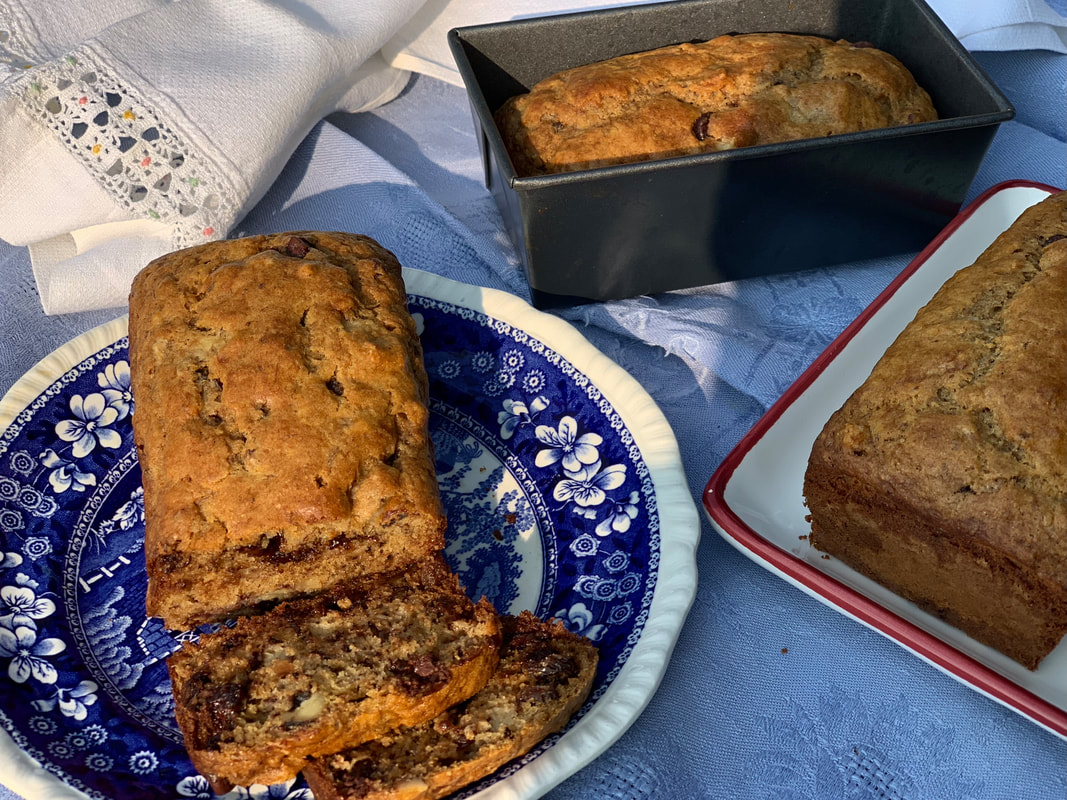 My husband and I are at an age where we gain weight easily, so I try to make some dishes that are light and not loaded with extra calories. My lentil salad fits that bill. Especially since I can eat it for several days. I had some leftover homemade duck confit that I added as a protein. This recipe I have for duck confit is great. Thank you Bon Appétit. It is a great weekend project with little effort; it just takes time to bake slowly in the oven. I did some much-needed gardening while it was cooking. Click here for the lentil salad recipe. Click here for the duck confit recipe 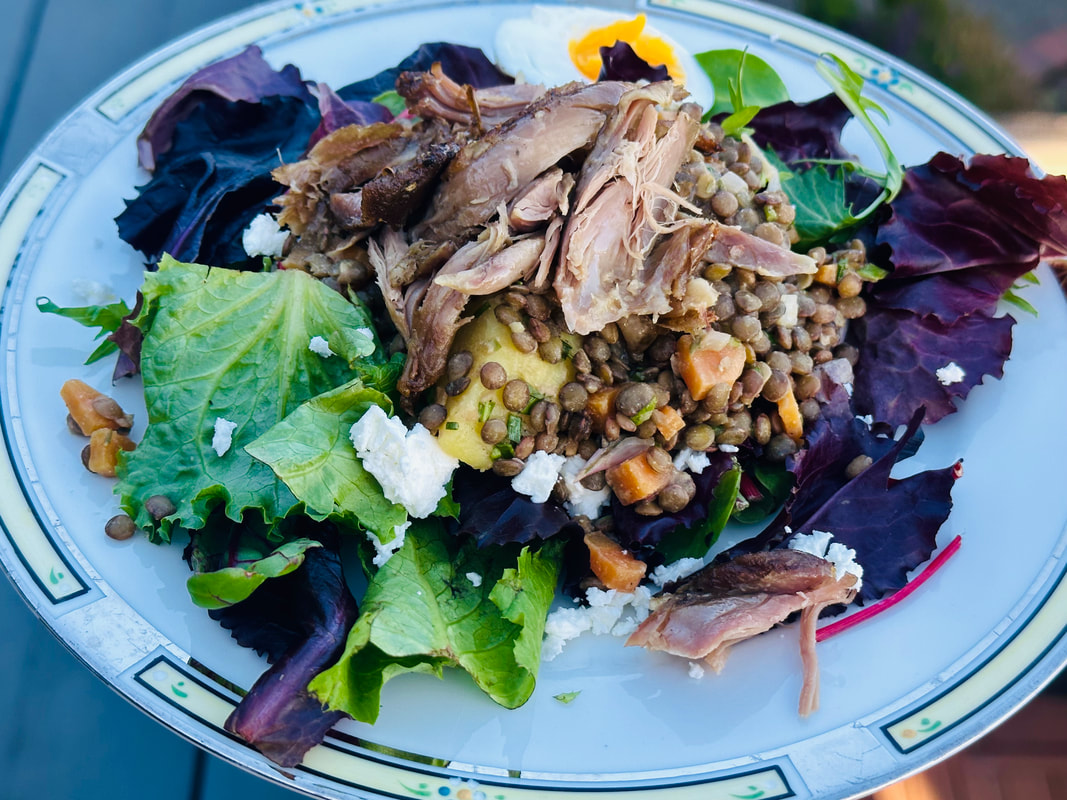 Let’s return to eating healthy. For a quick , tasty and healthy dinner this fish dish baked in parchment is a winner. You can use any white fish and spruce up the flavors by adding anchovies, tomatoes, and capers, giving this dish a Mediterranean twist. The last time I added some sliced cooked leftover potatoes. It was super delicious. Click here for the recipe. 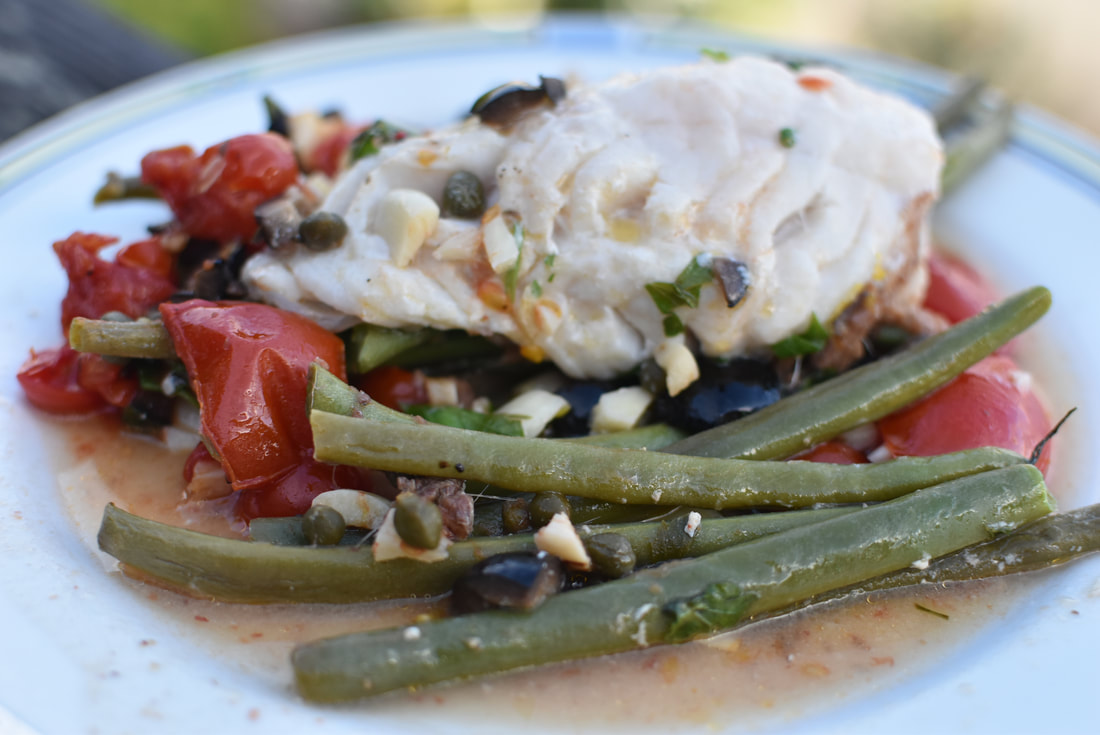 Thank you again my dear blogger friends for all your support and loyalty. Stay healthy and well.
I have always wanted to go on a cruise. I had visions of floating down a staircase in a fancy dress with an elegant gentleman by my side. Think of the Titanic or imagine crossing the Atlantic on the Queen Mary. Over the decades nothing like this ever happened for many reasons, one of them was my husband being afraid of getting seasick and not liking the idea of cruising, and my wanting to visit friends and family in Germany on my vacations.  Our friends finally talked us into joining them on a cruise from Sydney Australia to Auckland New Zealand. I had my doubts when I checked in and saw what would be my new home for 12 days. The first day I felt a little wobbly being on a moving vessel. All my doubts, fears, and wobbliness were gone by the second day. I woke up in the morning having slept like a baby with pleasant dreams ( very unusual for me.) I watched the sun rise over the ocean and explored the ship. For the rest of the trip I felt well taken care of, everything was done for me. All I had to do was to enjoy the journey.There were incredible sunrises and sunsets, and then there was the beautiful sky in the middle of the Tasmanian Sea. My favorite cruising day was the day we spent at Milford Sound. The weather was great, which is very unusual.We missed two ports in New Zealand because of the Cyclone Gabriela and stayed at sea for 5 days, which was just fine with me. So now I have become a cruiser and hope to be able to do a few more of them. 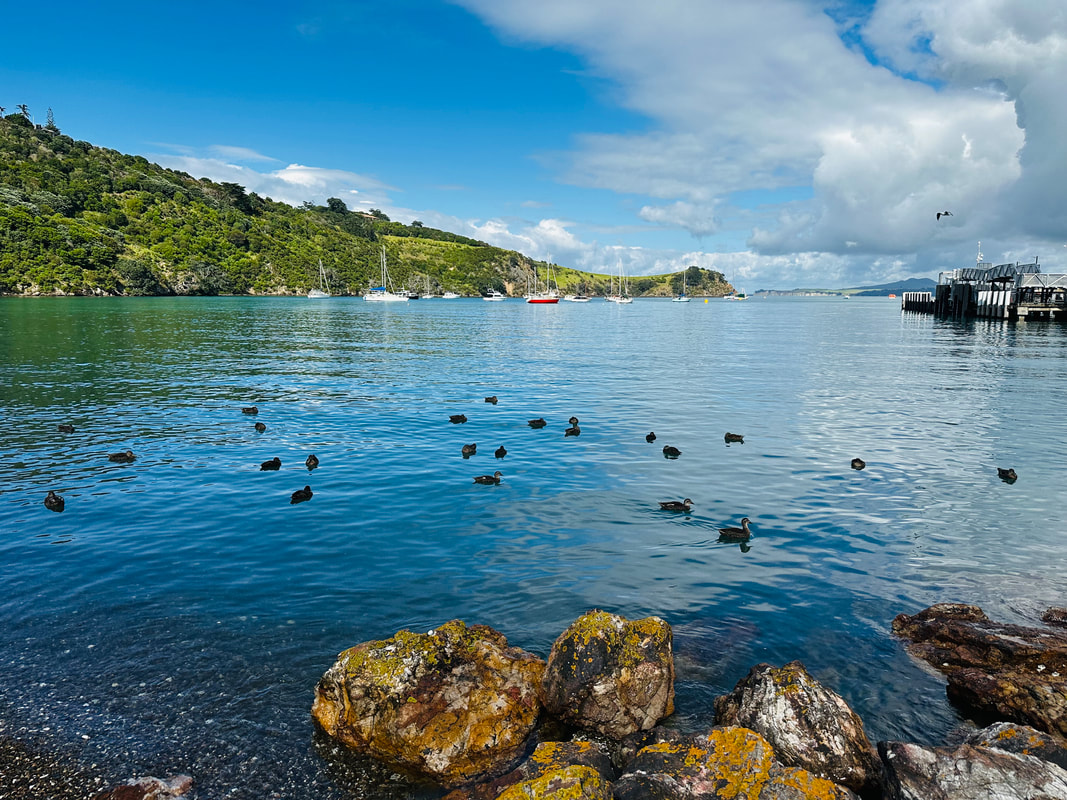 The Island of Waiheke
After the cruise we stayed 4 days in Auckland. We had a good time eating and exploring the city and surrounding area. My favorite was the Island of Waiheke, a beautiful island with many wineries and beaches. The 40 minute ferry ride took us past Auckland’s stunning coastlines and beautiful islands.
In Auckland my favorite bar was Churchill on the top floor of the "Sheraton Four Points". The view is great, the drinks are out of this world and the food is good. We ate twice at the Bistro“Oyster and Chop” at the harbor.  I took this photo in Melbourne I would love to go back end explore Australia and New Zealand a little bit more. Who knows, maybe one day, but in the meantime I am thankful that I was able to experience this beautiful part of the world.
For Easter this year my girlfriend asked me to make my lemon pudding cake. This farro salad is great for potlucks and barbecues.
Guten Tag my blogger friends. It has been a while since I posted. My life has been very busy for the last three months and I took a little break from blogging. There were some sad things I do not want to share with the world but there were also some happy times. My niece and her family came in January and we had a great time together. It was such a treat to be with my little grandniece. In February we embarked on an adventurous trip to Australia and New Zealand. When March came around I had some health problems but I am fine now and ready to rejoin the the blogging world. 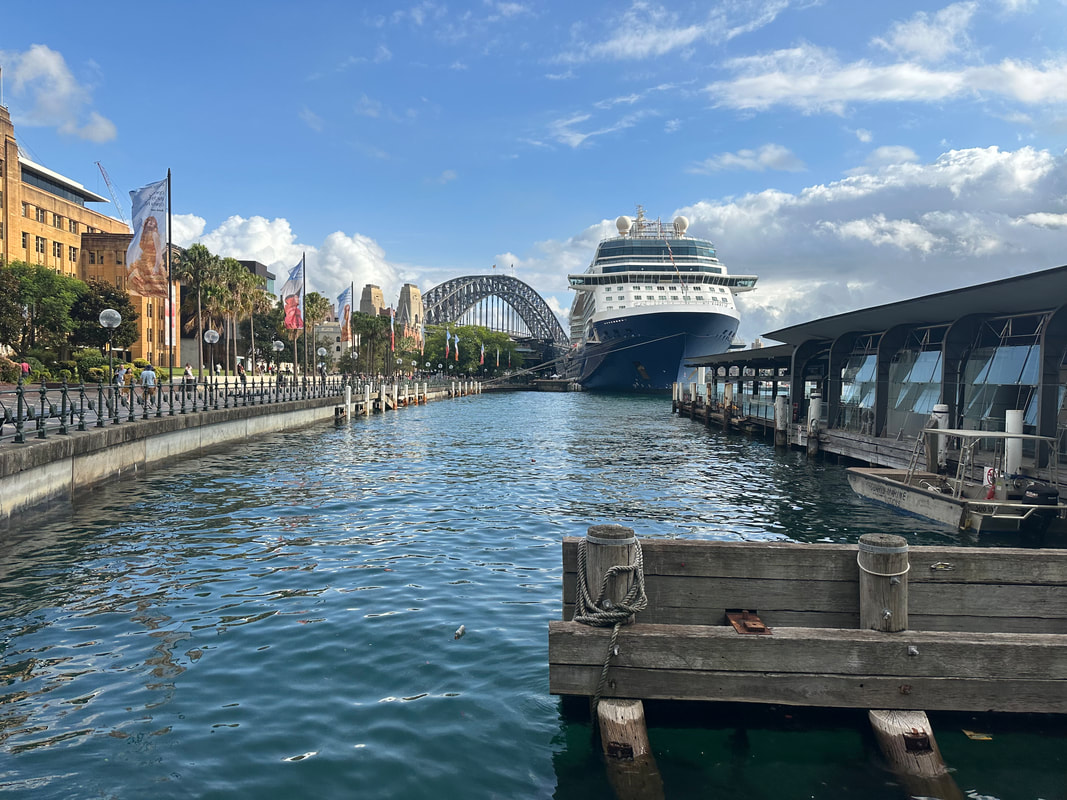 Sydney Harbor I finally had two dear friends convince me to go on a cruise with them. I have always wanted to go on a cruise but not my husband. Earlier, we had signed up for a cruise to the Scandinavian Fjords but when my husband found out he had to wear formal attire, he cancelled, which was good because the pandemic hit one month later.  We signed up for our cruise in November. It would take us from Sydney to Auckland in February on a 12 day journey. Since neither my husband nor I had been in Australia or New Zealand we decided to stay in Sydney for 4 days before sailing. It was a good decision.We loved Sydney with its brilliant beaches, unusual vegetation, exotic animals, and urban comfort. February means summertime in Australia and it brings everybody out. The locals were friendly and courteous, they seem to be content and well taken care of from what I saw. I think it would be a great place to live. It is ranked the 5th most livable city in the world with so much to offer.  Manly Beach Sydney has an array of beautiful beaches. Our favorite was Manly beach. You can reach Manly by taking a public ferry. I talked to a scuba diver who said this was his favorite beach for diving and he had been all over the world.  Bondi Beach The other beach we saw was Bondi Beach which we visited when when we were on the Hop On Hop Off bus.  Sydney Harbor And then of course there is the iconic Opera House that dominates the beautiful Sydney harbor with its towering sail structure. The Opera House is across from the Sydney Harbor Bridge, another iconic landmark of Sydney
My favorite place to eat was the Harbourfront Seafood Restaurant, where we had the seafood tower. This was a great introduction to local seafood. My husband’s favorite food was a pig knuckle in a German restaurant.
One afternoon we explored the Royal Botanical Garden. I was fascinated by the different species of plants and trees. I wish I could have stayed in Sydney longer because there is so much more to see and do.  Sydney Harbor Once I returned to Santa Cruz I was happy to be back in my kitchen. The first thing I made was a loaded chicken broth that I used for my chicken fricassee. We had so much rain and bad weather that I cooked warming dishes like short ribs and lamb shanks. The recipe for the short ribs is from the NYT and the lamb shanks from Bon Appetite. I will post the recipe for lamb shanks one of these days. Asparagus arrived in the grocery stores and I made my Asparagus soup and my salmon crepes. I am working on a recipe for asparagus quiche. For dessert I chose this simple but oh so tasty Italian shortbread tart called Fregolotta.
It’s raining cats and dogs here in northern California. After several years of drought, we really need the rain. But we are not used to staying inside—it’s California after all where the sun always shines. I enjoy the rain, but I don’t like the wind. Being forced to stay inside, I cleaned out some old drawers and sorted through old cards and photos. It was easy to throw away most of them. Just as it was easy to say goodbye to 2022. My guest room is almost ready for my niece and her family from Germany. I can’t wait to see them, especially my 18-month-old little grandniece. She is pure sunshine and has a special place in my heart. 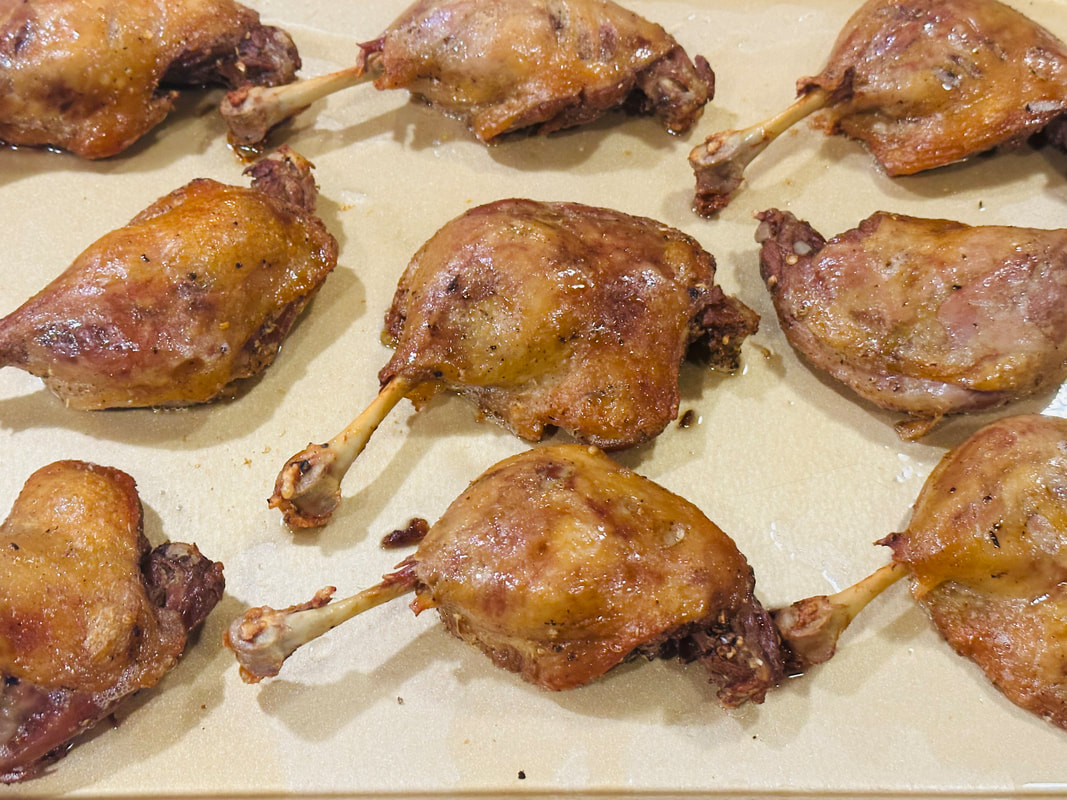 Click on the photo for the recipe for duck confit It was my turn this month to host our book club meeting, and since it was also my girlfriend’s birthday, she asked me if I would make duck confit. I was happy to oblige, especially as we have known each other for over 30 years. I doubled the recipe, so I and had four duck legs left the next day. I decided to make one of my favorite old standby recipes. It turns the duck legs into a rustic country peasant dish, hardy and--perfect for a rainy day and a country girl like me. The only thing I don’t like about this recipe is the smell of cooking cabbage. 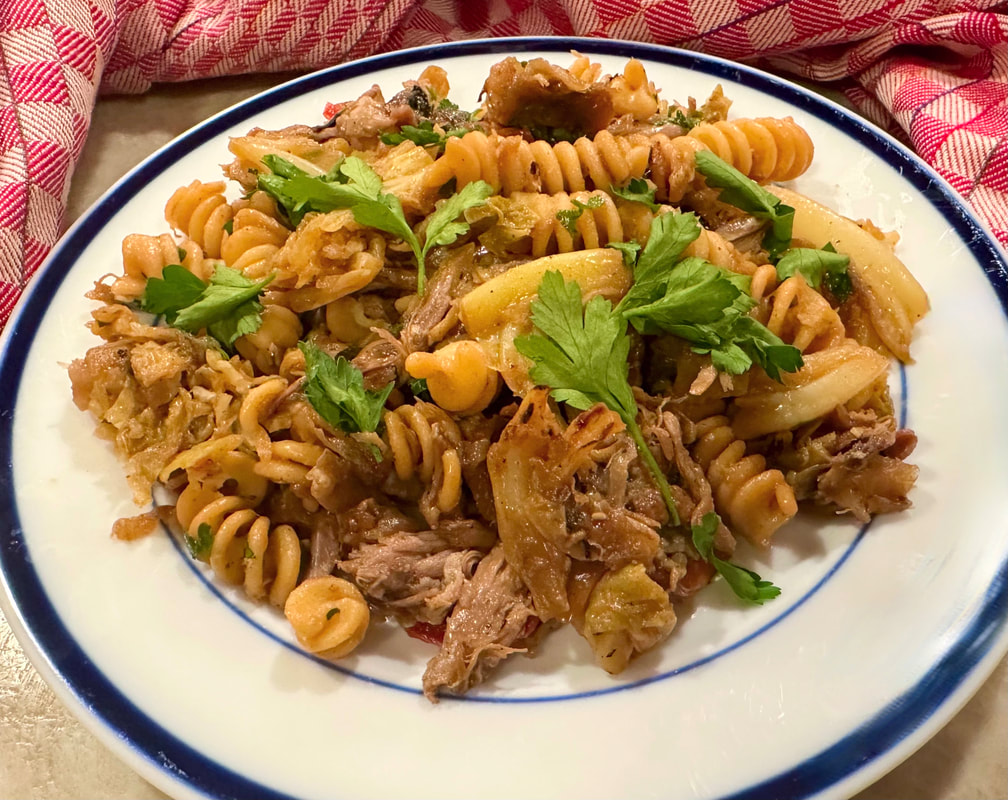 Like so many of my recipes, this is an old one from Gourmet magazine. You do not need to follow the recipe exactly, so you can use less or more cabbage or duck legs. I added some red peppers that I had in my fridge. I also added some jellied duck stock from cooking the legs. I cut the amount of noodles to 9 ounces, even though the original recipe called for one pound. For the pasta, I used fusilli noodles. The original recipe called for campanelle (bell shaped pasta) or garganelli. And please, do not skip turning the skin into cracklings. It’s ten times better than bacon, trust me. You can also buy confit duck legs if they are available. Recipe for Pasta with Duck Confit and CabbbageIngredients:
4 confit duck legs (about 8 ounces) 2 large white onions (about four cups) 1 tsp.salt 1 (1 ½ -lb) savory cabbage (about 8 cups) 1 red pepper (optional) ¼ cup dry white wine 9 ounces fusilli pasta 1 TBS butter 2 TBS chopped fresh flat-leaf parsley Directions: Heat oil in a large frying pan and sear the duck legs skin down until some of the fat is rendered and the skin is golden (6-8) minutes. When the duck legs are cool enough to handle, remove the skin and scrape off any visible fat. Return the skin to the frying pan and cook over moderate heat, occasionally pressing down on the skin until the fat is rendered and the skin has turned into golden crisp cracklings (about 5 minutes). Drain the cracklings on a paper towel and tear into small pieces. Pull duck meat from the legs into roughly ¼-inch-thick pieces. Reserve 2-3 TBS of duck fat in the frying pan. Peel and halve the onions, then cut them into ¼ inch thick slices (about 4 cups). Sauté them in the duck fat, stirring occasionally until they are golden brown, 15-20 minutes. Clean and chop the red pepper into 2-inch pieces, and then add it to the onion, cooking the mixture for several minutes. In the meantime, clean and core the cabbage and cut it into 2-inch pieces. Add the cabbage and ½ tsp salt to the onions, stirring and turning for about 5 minutes, until it begins to wilt. Add the wine and cook until evaporated for about 2 minutes. Add the chicken broth and simmer (covered) for about 25-30 minutes, stirring occasionally. The cabbage should be very tender. While the cabbage simmers, cook the pasta. Drain the pasta, reserving 2 cups of pasta water. Stir the cabbage mixture with the pasta either in the pasta pot or frying pan (depending on the size of your frying pan). Add the butter and shredded duck with the cracklings, and some pasta water if the pasta looks dry. Season with salt and pepper and sprinkle with the parsley. This dish tastes just as good the next day. Guten Appetit! Recipe from Gourmet magazine Prepared by the Sunnycovechef.com I treasure my cookbooks and old cooking magazines. I hang on to them, not like my other books which I have no problem getting rid of. One of my favorite cookbook authors is Dorie Greenspan. She makes everything look so easy and she gives her readers the confidence to go ahead and try new recipes. 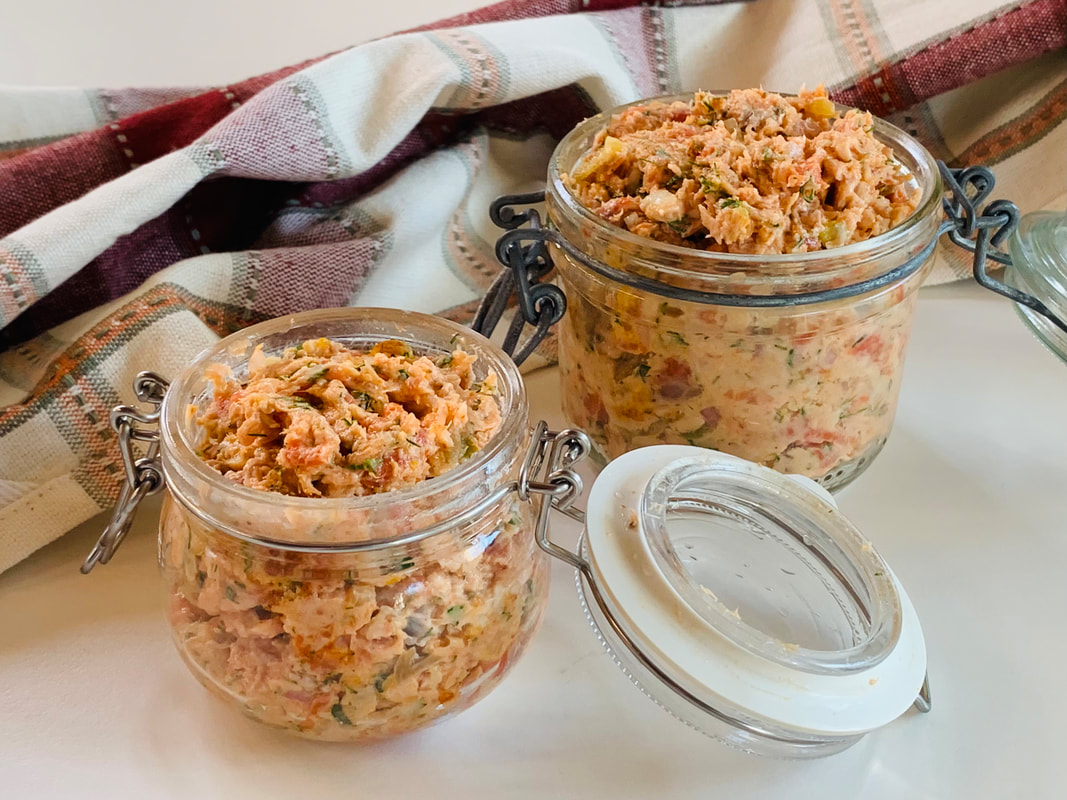 Normally, rillettes are made with pork or duck, similar to duck confit. The meat is seasoned and then slow-cooked in fat. I enjoy eating them, but Dorie offers a healthier version using salmon and miso. I have made her miso-salmon rillettes from her cookbook, Everyday Dorie, many times. I like eating it on a cracker for a quick lunch or snack. It makes a great appetizer and goes well with some bubbly beverage or white wine. Imagine sitting with some friends on your patio or balcony snacking on these rillettes on toasted rye bread with a glass of white wine or champagne. The rillettes make a great gift in a pretty jar. I am making them as an appetizer for this years Christmas dinner. 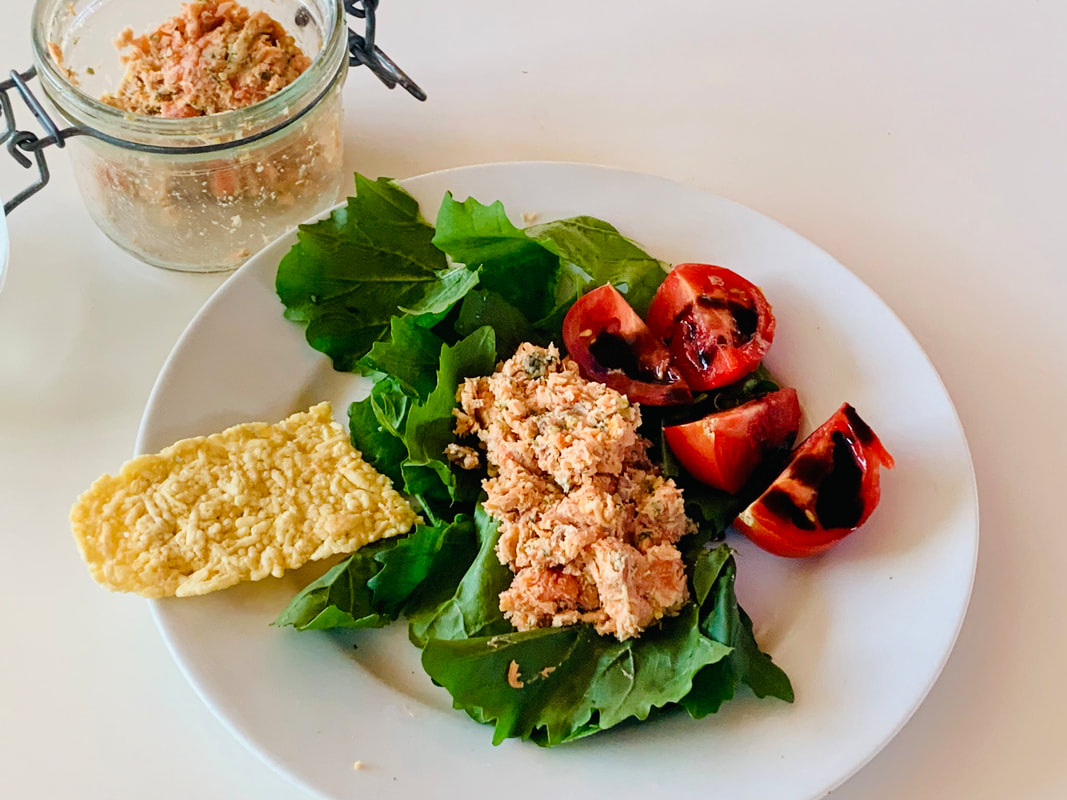 You don’t need to make this dish with the most expensive salmon or smoked salmon. Dorie says you can make them with smoked salmon bits but I have never tried this. So far, I have used Costco’s wild lox. For the salmon, I have used Trader Joe’s frozen wild salmon or leftover salmon from a meal. In her book, she also has a recipe for two other kind of salmon rillettes. I have not made them because I love the miso rillettes. I get some special white miso at the farmers market, but any other white miso will be just fine.
You want to make the rillettes at least six hours ahead so the flavors have time to blend. Tightly covered, the rillettes will keep up to a week in the fridge. But mine are usually gone long before that. For the mixed herbs, I used dill, parsley, and some chives. Or Dorie said you can use just cilantro. Recipe for Miso Salmon RilletttesIngredients: 6-8 ounces (170 to 227 grams) fresh or frozen salmon ¼ pound (113 grams) smoked salmon 2 scallions 1 lemon zest of one lemon juice of ½ lemon ½ cup (120ml) white wine ½ cup (120ml) water salt and pepper for seasoning 3 TBS softened butter 3 TBS white miso 1 small shallot (about 1 tsp.) 3 TBS mixed herbs (or cilantro) a squirt of sriracha Directions: If you use frozen salmon, bring the wine, water, the green parts of the scallions, a lemon slice, a pinch of salt to a boil in a small pan. Add the salmon, lower the heat and simmer for three minutes. If you use fresh salmon, simmer it only for one minute. Remove the pan and let it sit for ten minutes. Drain the salmon and refrigerate for 20 minutes. Discard the cooking liquid. You can prepare the salmon the day before. Mince the shallots, rinse them in water and pat them dry. Remove the skin and bones from the cooked salmon and tear it into bite-sized pieces. Also cut the lox into bite-sized pieces. Beat the softened butter until it is spreadable. Mix with the white miso, the grated lemon zest, and the lemon juice. Add the minced shallots, minced scallions, stir and then add both kinds of salmons, three tablespoons herbs, and the sriracha. Season with salt and pepper and put in a container with a lid. It will last for a few days. Guten Appetit! and Happy Holidays Recipe from Dorie Greenspan’s Everyday Dorie cookbook Adapted by sunnycovechef.com German Frikadellen, a flavorful meat patty that is a cross between a meatball and a burger. 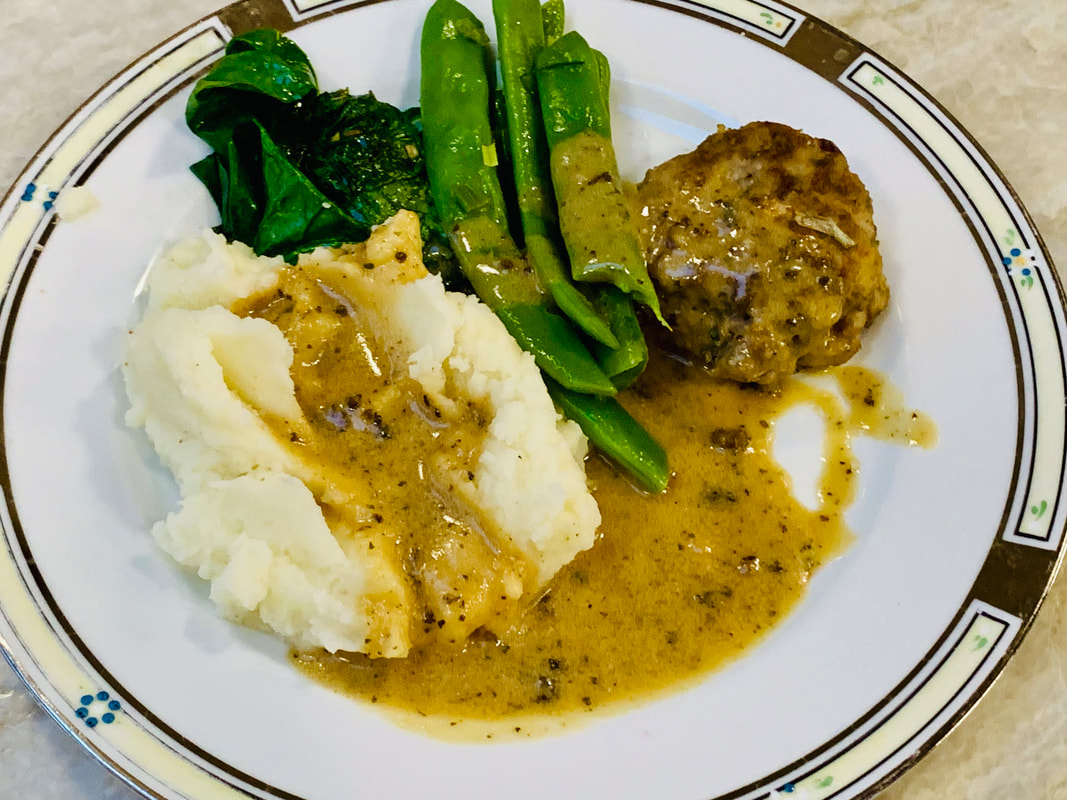 Frikadellen are German meat patties made from ground beef and pork, seasoned with different spices. Eggs, onions, day-old soaked bread or breadcrumbs are added too. The ingredients and spices vary from region to region, and so does the name for these tasty morsels. In Berlin, they are called Buletten, and in other parts of Germany they are called Klopse, Fleischküchel, or Fleischpflanzerl. It used to be a poor man’s delicacy that has been around for centuries. In 1790, the German author Theodor Fontane’s mother wrote a recipe for Frikadellen that is basically the same as the ones used today. There is a rumor that the Frikadellle was the inspiration for the Hamburger. Apparently, some immigrants from Hamburg made their Frikadellen in the New World and just put it between two buns. 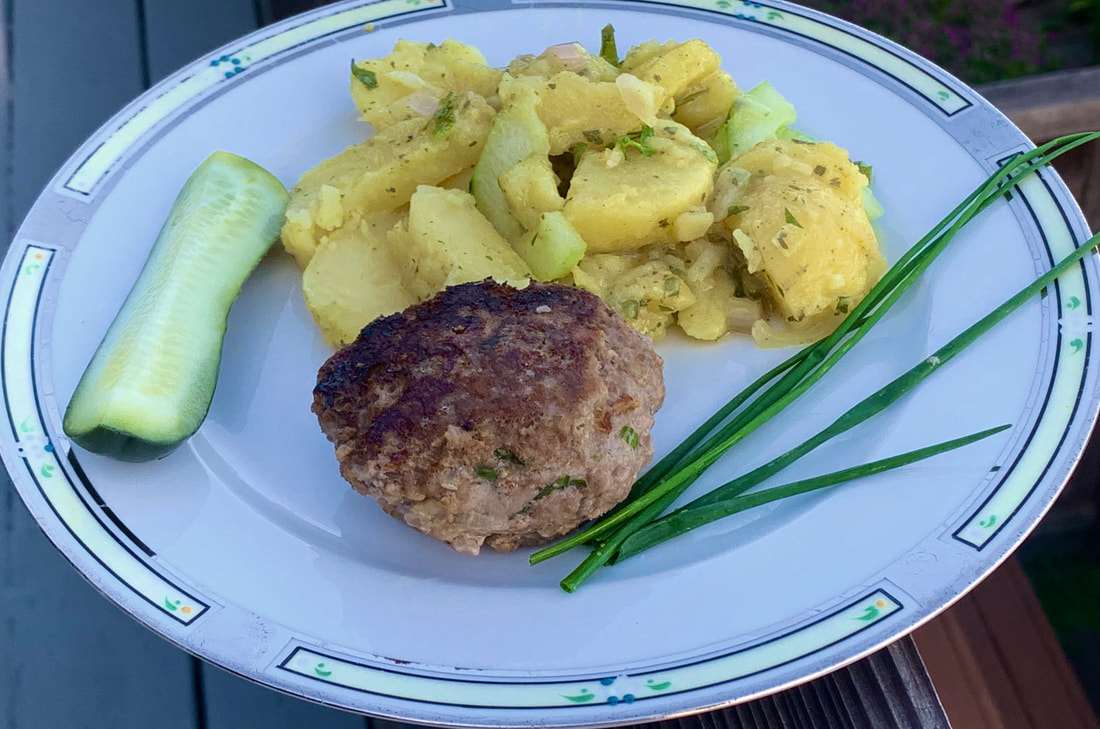 I love Frikadellen--they are the perfect comfort food. I especially like them cold on a sandwich slathered with mustard. Traditionally, they are served with potato salad, but they are great with any veggie of your liking. 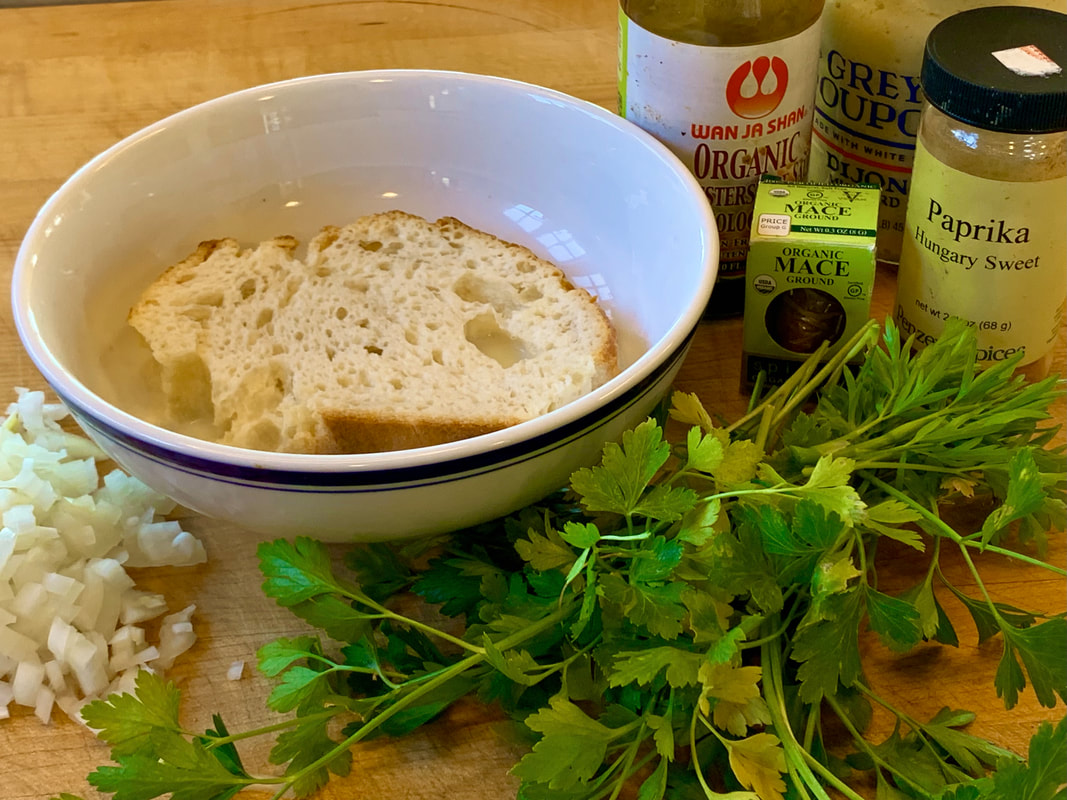 When I talked to my German friends and checked recipes in cookbooks and online, everybody seems to have a different twist to the recipe. The meat and the soaked bread are the same, although in some recipes the bread is soaked in milk instead of water. Sometimes, the onions are sautéed with some parsley. I found recipes with different spices added like mace and cardamon. My girlfriend, Susanne (who is an excellent cook) adds Worcestershire sauce.
Tips for making a good Frikadelle: Select a ground meat with a good ratio of fat. If you use extra lean meat, the Frikadellen will lose a lot of water and become dry. Use your hands and thoroughly knead the mixture; the more you knead the better the results. Moistening your hands with water before forming the patties will prevent the meat mixture from sticking to your hands. If you want to test for the correct seasoning, sauté a little patty and taste. Keep the patties in the fridge for at least 15 minutes before sautéing them. Traditionally the Frikadellen are fried in clarified butter. And they freeze well. Recipe for Frikadelllen Ingredients: This recipe makes between 5 and 7 Frikadellen depending on the size. This recipe can be easily doubled. ½ pound ground beef ½ pound ground pork 1 slice white bread or bun (preferably 1-2 days old) 2 tsp German or Dijon mustard 2 TBS finally chopped parsley 1 small onion finely chopped 1 tsp paprika 1 tsp salt ½ tsp mace a squeeze of Worcestershire sauce 2 TBS olive oil +1TBS butter Directions: Soak the bun in cold water for about 15 minutes. Finely chop or grate the onion. Finely chop the parsley. Squeeze all the water out of the bun. Add all the ingredients to a large bowl. Mix them with your hands for a while until everything is well combined. Use wet hands to make the patties. I formed six patties, but you can make them smaller. Shape each part into a ball and flatten them with your hands. All patties should be the same size. Heat the oil and butter in a frying pan and sauté the patties on medium heat until they are browned on both sides (6-7) minutes. If you have a meat thermometer, check the temperature. It should read 165° F in the center of the Frikadellen. Transfer to a plate with paper towels and rest them for a few minutes before serving. Guten Appetit! Recipe from sunnycovechef.com (and many cooks before me ) Are you in the mood for some more German Recipes? The Rouladen are braised meat, flavored with mustard, pickles , prosciutto and a rich gravy. Königsberger Klopse are German meatballs in tangy white sauce with capers.
I am always looking for new ways to cook chicken. This pretzel crusted chicken breast is perfect for salads or on sandwiches. Let’s admit it, chicken breast by itself its bland and flavorless. So, we need to give it all the love we can. If I just want a plain “no fuss” chicken breast, I marinate it and bake it in the oven. This particular recipe for chicken breast is crispy and tasty, almost but not quite like a southern deep fried chicken. It’s really not, but we can pretend it is and tell our tastebuds to enjoy it. 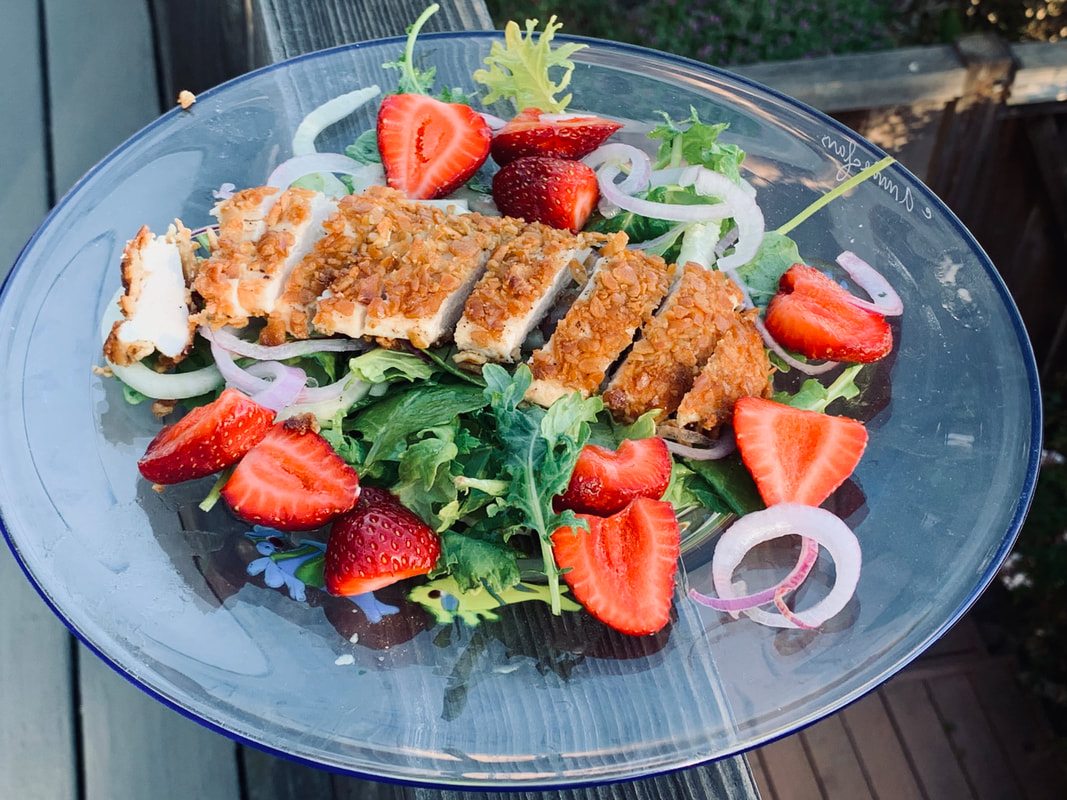 You can have these chicken cutlets on the table in about 25 minutes. It's a perfect weekday dinner dish. Serve it on a bun and make a crispy chicken burger. It makes a delicious dinner with my red cabbage and mashed potatoes. Younger children might have fun with this recipe . 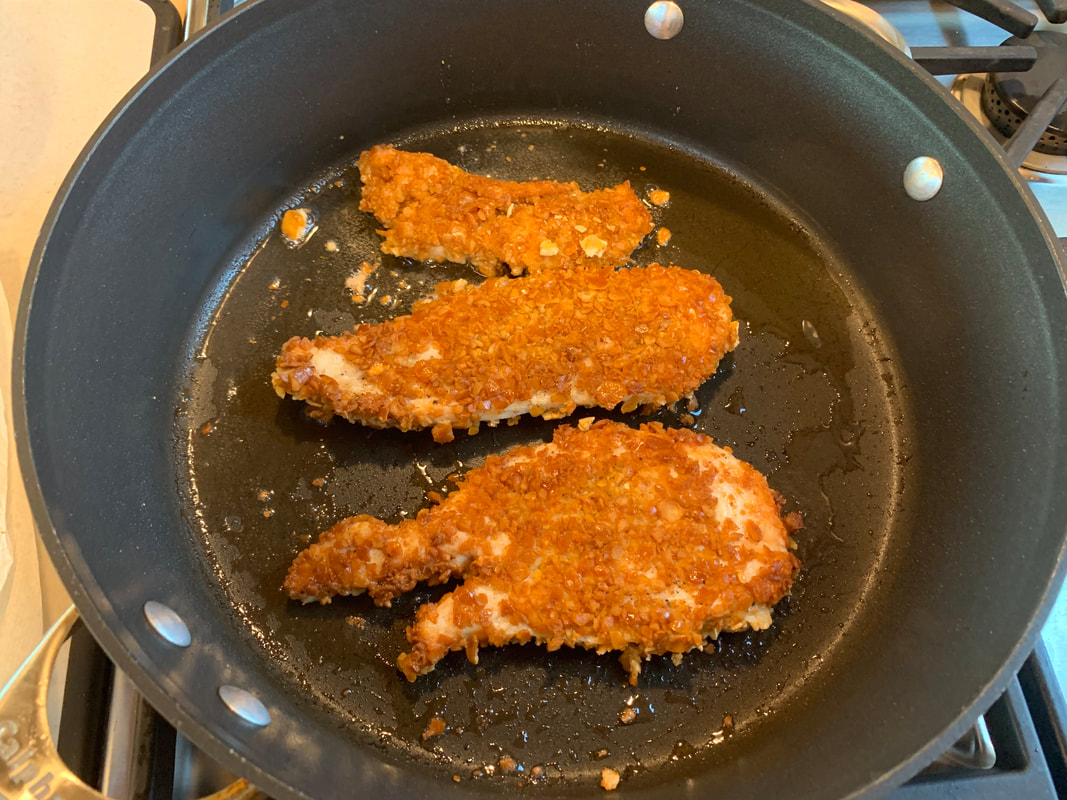
Recipe for Pretzel Crusted Chicken BreastYou can play with the recipe by adding some pepper flakes or other herbs to the crushed pretzels. Make sure you do not overcook the chicken. Check for an internal temperature of 165℉. For the pretzels, I used Thin & Crunchy Pretzel Slims from Trader Joe’s. But any miniature pretzel will do. Ingredients: 2 cups miniature pretzel twists or pretzel slims 1 egg 2 8-ounces boneless chicken breasts Canola oil for frying Salt and pepper for seasoning Directions: Place the pretzels in a ziplock bag and crush them with a rolling pin or put them in a food processor. I did mine in the food processor. Transfer the crumbs to a flat dish, add some freshly ground pepper and some hot pepper flakes if you want some heat. Beat the eggs in a separate flat dish. Cut the chicken breast in half horizontally to make four thin cutlets. Pound them with a meat tenderizer to flatten them evenly. Season with salt and pepper. Working with one cutlet at a time, dip it into egg and let excess drip off. Put the cutlet onto the plate with the pretzel crumbs, pressing down gently. Heat the oil in a frying pan over medium heat. Add the cutlets and cook for about four minutes. Flip the cutlets over and cook until the thermometer inserted in the thickest part registers 165 ℉, about another three minutes. Transfer the cutlets onto towel-lined plate. Slice your cutlets and add them to your favorite salad or make a chicken burger. I enjoyed eating them cold as a snack. Guten Appetit! Recipe from Real Simple Magazine adapted by the Sunnycovechef.com If you are hungry for some breaded pork cutlets with a mushroom pepper sauce click here
At the end of August (before the temperatures reached three-digit numbers), my husband and I spent three days In the Napa Valley. This time we chose Healdsburg as our headquarters. We had been there before with friends and enjoyed it. We visited several wineries and had some great food. One of the nights, we made reservation at Bravas. Travel & Leisure rates it as one of the top 20 tapas restaurants in the U.S. James Beard finalist, Mark Stark, is the executive chef. Mark and Terri Stark own and operate several restaurants in the area. My taste buds were elevated trying all the different tapas. Everything was top quality, the setting was simple and relaxing. We ate in the garden. The one dish that got my attention was a baby kale salad. 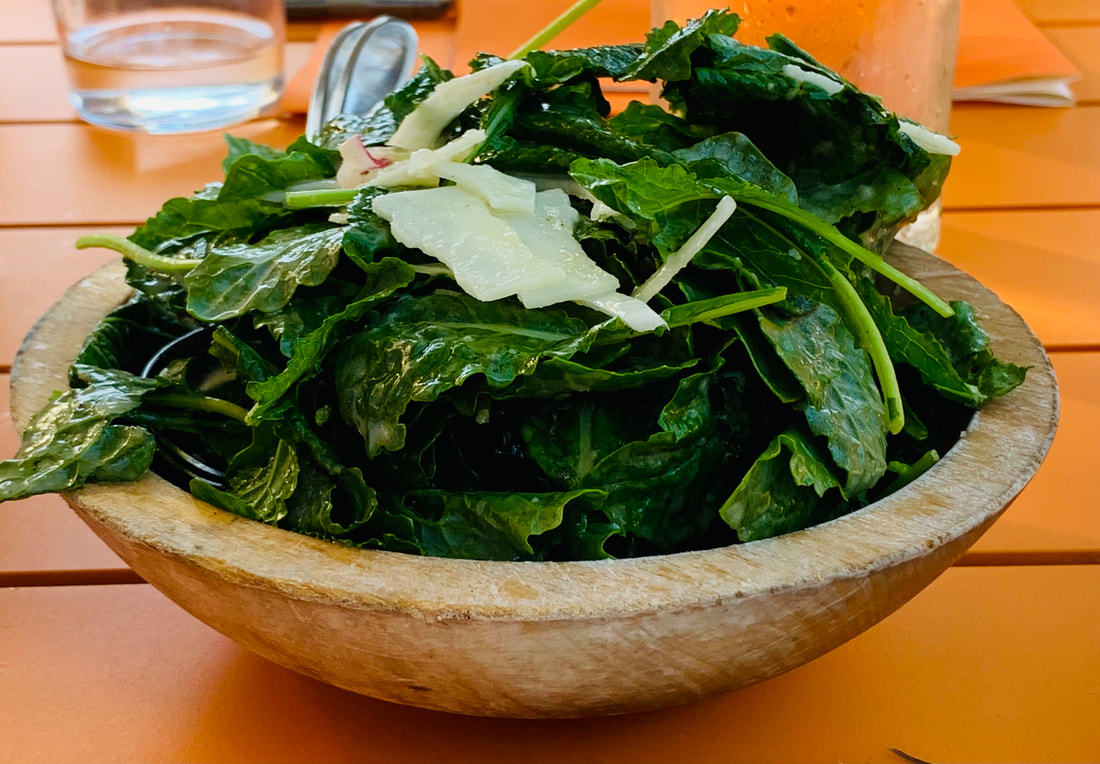 Baby Kale Salad at Bravos Mind you, I am not a kale salad person, but I ordered this one because of the preserved lemon vinaigrette. I enjoyed every bite of this the salad. Even my husband, (who as you all know is hard to please when it comes to vegetables and salads) liked it. It was our server’s first day on her job, and my maternal instinct kicked in. I helped her along since I was once a waitress at a Howard Johnson restaurant in Massachusetts when I first came to this country. Anyway, the server and I bonded and as a “thank you,“ I got the recipe for the preserved lemon vinaigrette. The recipe was for a large amount. It took some math and adjustment to get it where I liked the flavor as much as in the original vinaigrette. I made a few changes. I was lucky to find baby kale at Trader Joe’s. The baby kale reminds me of Rapunzel lettuces or field salad (Feldsalat). In English it is called lamb’s lettuce or māche. I have used this vinaigrette with other salads. 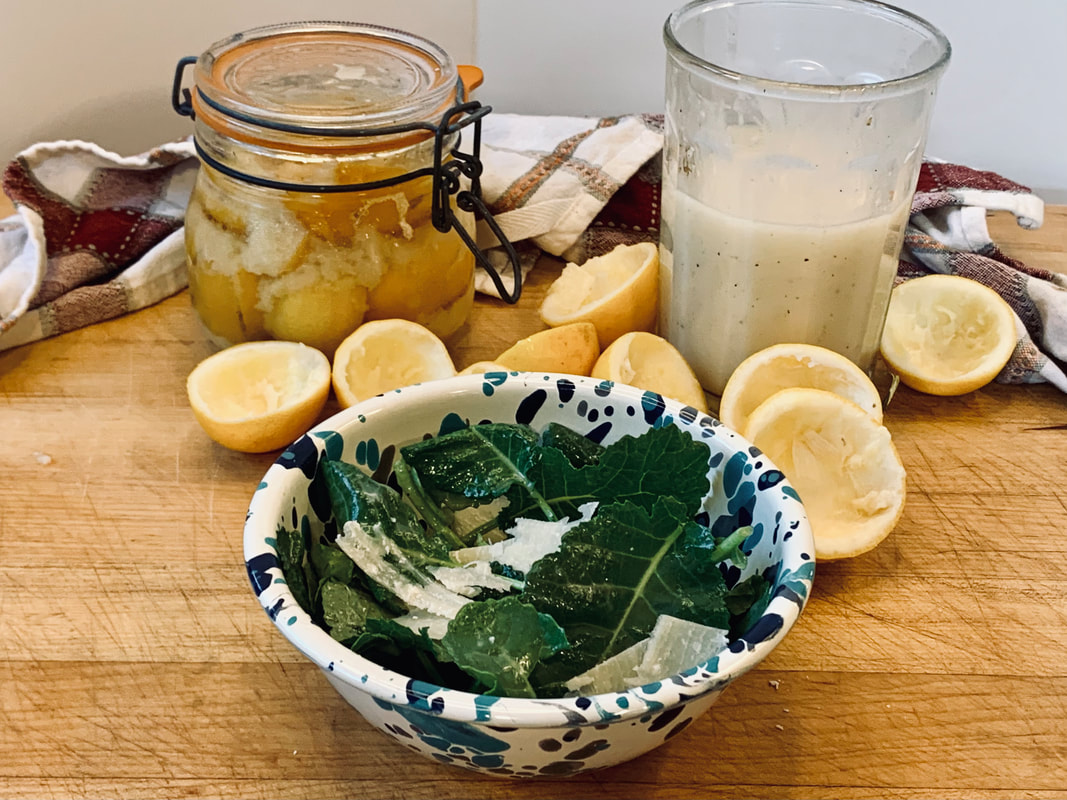 The salad at Bravas was made with baby kale, shaved Manchego cheese, and slivered fennel. I have made it several times and love it. I used the dressing for another salad with strawberries, sliced onions (soaked in cold water) and avocados. Add a sautéed chicken breast or piece of salmon and you have a meal. The recipe for a delicious chicken breast covered with pretzel crumbs will be my next post. To make this recipe you will need preserved lemon. I make my own every year, click here for the recipe. You can also buy them ( Amazon has them). You will not regret having a jar of this North African delicacy in your refrigerator. It's great on avocado toasts, couscous, in cocktails, and anything you can think of. REcipe for preserved Lemon VinaigretteThis preserved lemon vinaigrette yields about 1 ¼ cup and will last in the fridge for about a week or longer. The preserved lemons are very salty, so add salt sparingly as needed. Do not rinse the preserved lemons. Make sure that the vinaigrette is silky smooth. My Vitamix did the job. Ingredients: 1 generous TBS chopped shallots a dash of black pepper 1 generous TBS chopped preserved lemon 2 TBS honey ½ tsp. mustard ½ cup lemon juice 1 cup neutral oil like canola oil ½ cup sunflower oil Directions: Add shallots to the preserved lemon, honey and mustard to a mixer. I used my Vitamix. Puree the mix until everything is silky smooth. Slowly add the oil, creating a stable emulsification. Stir in the pepper and season with additional salt and honey if necessary. Guten Appetit! Recipe from the Bravas Restaurant in Healdsberg, CA Adapted by sunnycovechef.com Check out some of my other salad recipes. Click on the photo to get the recipe.
My last and final destination for my five-week trip to Europe was Sweden. I was taken by the glimmering light of the sky, the golden, deep red and often violet sunsets during midsummer days during my visit. There was an evening glow that was breathtaking. Unfortunately, I have no photos to show you. My trip to Sweden began when Barbie, our tour guide, picked us up in Copenhagen. I had taken a trip with Barbie to Provence in March 2020, where we stayed in Julia Child’s home. Read more about it here. So, I was excited to go on another trip with her. 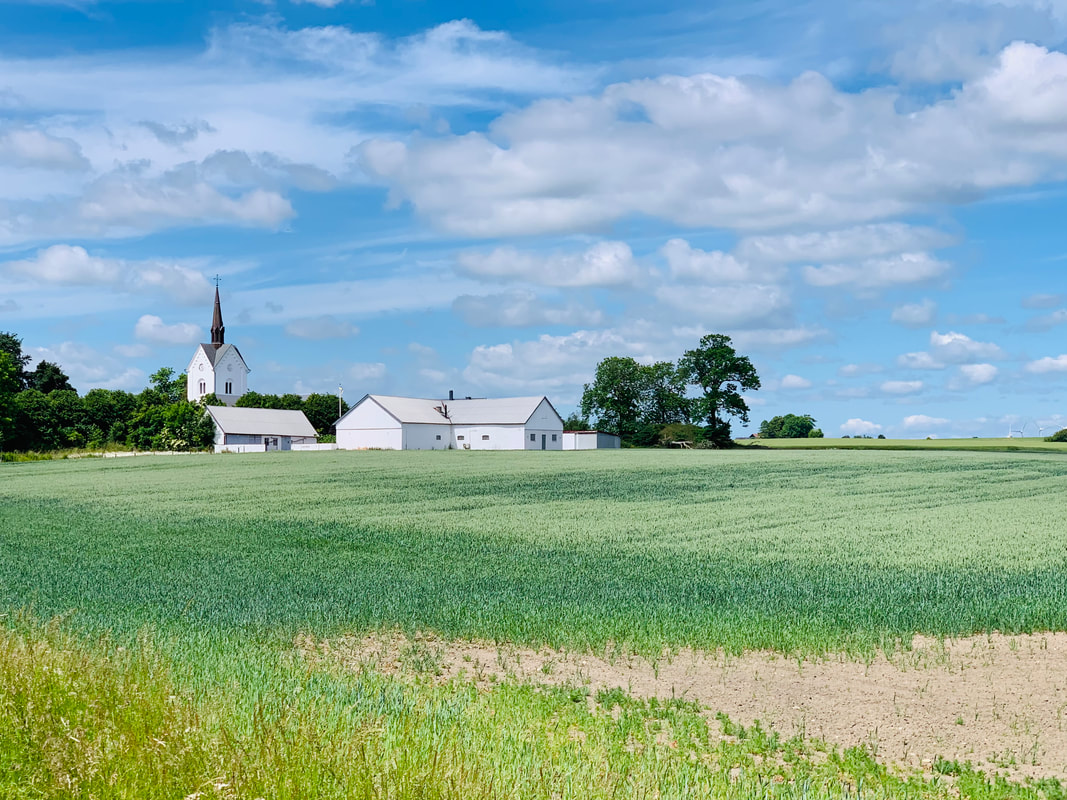 We were picked up on Monday afternoon in a hotel in Copenhagen and driven to our first lodging in Sweden. There we stayed in the countryside on a farm once owned by the king of Sweden in Kivik, a charming little town in Scane, part of Österlen. It is known as the breadbasket of Sweden. The setting reminded me very much of northern Germany, with its large wheat fields. We enjoyed a nice dinner the first night and got to know each other. The following day, we had a wonderful cooking lesson in a typical Swedish house with several cooking stations and a nicely decorated dining area. The garden was spectacular with all its herbs and veggies, a labor of love. I very much enjoyed this day in the kitchen and garden with Maria sharing her Swedish recipes and house with us. If you are ever in the area, don’t pass this by. Here is a link to her website The next day, we visited a farm where mustard is made. We learned a lot and made our own mustard. Mine did not pass quality control.
We visited Ale’s Stones, which I found fascinating. The function of Ale’s Stones is much disputed (according to Wikipedia), and there are many different theories about its purpose. It is generally believed to be either a grave monument, a ritual center or maybe a sun calendar. I tried to have my Outlander moment to go through the stones, but it didn’t work. And I am happy to still be here. The same day, we ate in a restaurant on the water. Of course, I had to have herring. Another day, we went foraging for wild herbs with Roland Rittman. He forages for restaurants, most notably René Redzepi’s Noma in Copenhagen. Roland is quite a character and showed us many edible plants that we picked and ate throughout the week. He and his wife invited us to have coffee and cake in his house. It was very pleasant and the homemade apple cake was delicious. We also met Johanna Kindvall, an illustrator and cook who has written two cookbooks. Barbie sent us one of her cookbooks and I can’t wait to pick a recipe to try. The name of the book is Smörgåsbord, the Art of Swedish Breads and Savory Treat, by Johanna Kindavall. On day four, we drove to Torekov in the Skane province. It’s a cute little town with its red and white clapboard houses. We settled into our rented house and started exploring the town. Barbie served us smoked salmon with fresh potatoes, which are the best I have ever eaten. The Swedes are very proud of the different varieties of potatoes they grow and I have to say that they are very good. Barbie added our foraged greens to them, which made for a very healthy dinner. Annette, our Swedish tour guide, had prepared lingonberries, I loved them.
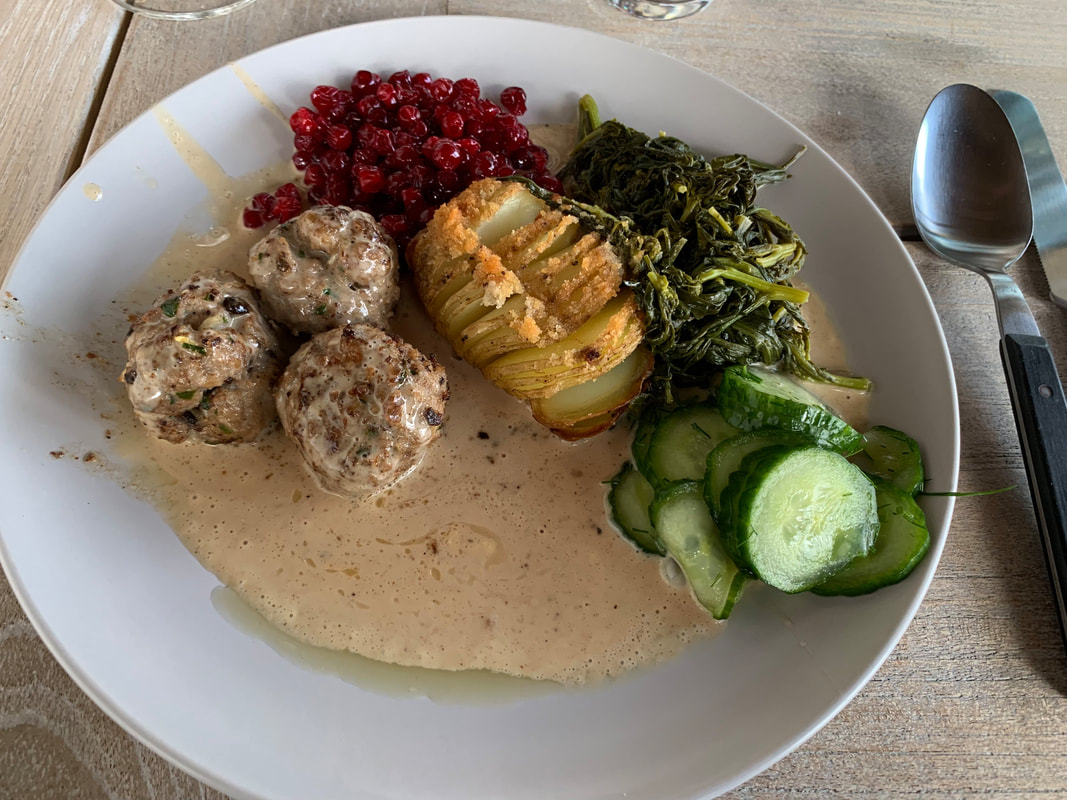 Swedish meatballs with leftover greens and ligonberries Annette encouraged me to participate in the Swedish custom of going for a morning dip in the North Sea. The ritual is that you have to walk to the sea in an old robe with old wooden clogs, take a quick dip in the sea (seven strokes to be precise). On the way home, it’s okay to stop in a bakery in your robe and buy some rolls for breakfast. I found it very invigorating. Barbie gave us some robes. 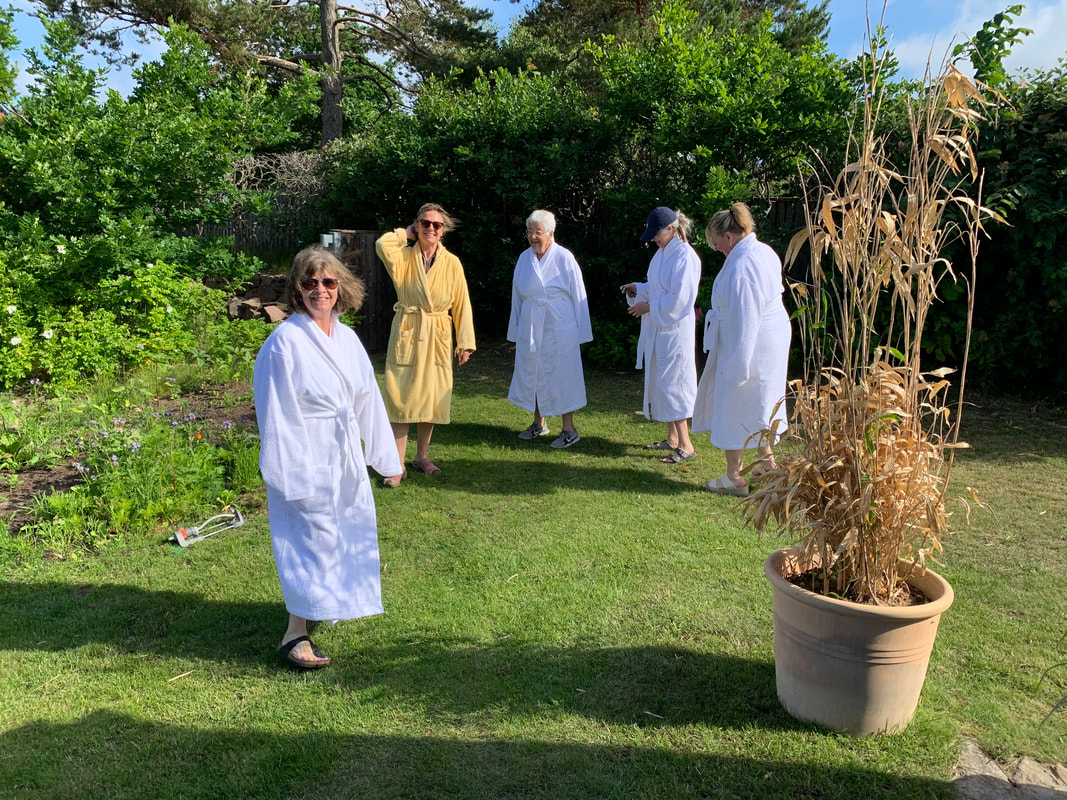 On one of the days, we visited the beautiful gardens of Norrviken. Norrviken Garden is a 14-hectare garden that was created in 1906-1920 by Rudolph Abelin. There are temporary art exhibits both outdoors and indoors, with beautiful water and Japanese gardens. Ingmar Bergman made All These Women (his first color film) here. We had a relaxing lunch at the Villa Abelin. I was taken by the beauty of this garden. Another wonderful dining experience was a delicious dinner, which Annette’s friend, Maria, served us at a fisherman’s boathouse by the sea. Thank you, Maria, for a magical evening and for sharing this wonderful place with us.
Our week went by fast and for our last night, three beautiful Ukrainian women prepared a feast for us. Annette’s husband, Anders, shared his crawfish with us and showed us how to eat them correctly. 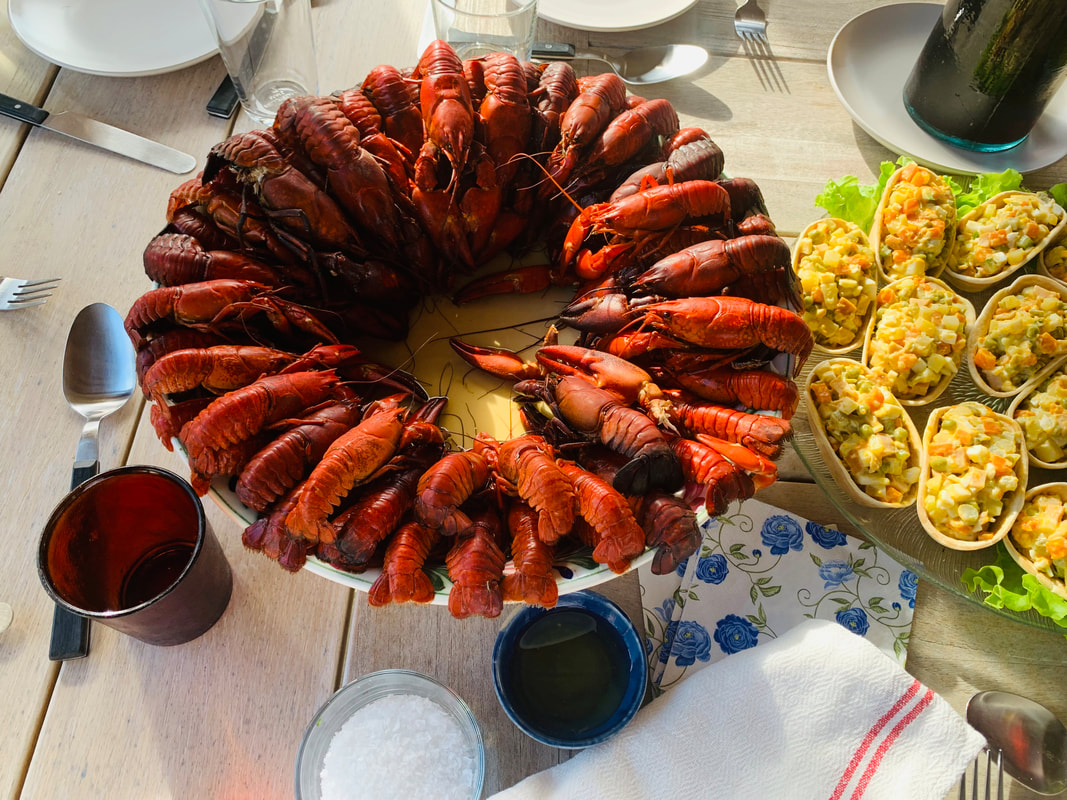 The next morning, Barbie and Annette put us on the train to Copenhagen where I checked into my airport hotel, as I had an early flight the next morning to return to the United States. Surprisingly, the hotel had a good restaurant where I had herring eggs with flatbread and cream cheese. Delicious! But I was ready to return home to my husband.
This is the fourth post about my trip to Europe when I visited five countries by train. Read about my days in Munich here and and then my week on Lake Garda in Italy here and my visit to Innsbruck and the village in Germany here. After a beautiful four-hour train ride from Hamburg I arrived in Copenhagen.I checked in to the Marriott Hotel on the waterfront, which is conveniently located near many attractions. They gave me a gorgeous room overlooking the bay.I enjoyed the scenic walk along the waterfront and canals. The first night I walked to the Tivoli Garden and bought a lobster roll from a vendor. It was a delicious snack.
The next day I bought a ticket in my hotel for the “hop on and hop off” bus that also included a boat tour. In my humble opinion, this is the best way to see any new city. The hotel concierge advised me about which tour to take. According to him, they are not all the same. He also made a reservation for me at a restaurant later that night. (More about that later.) During my bus tour, I got to see most of Copenhagen including the classic Little Mermaid statue, a small statue which is popular with tourists. I got off the bus downtown and walked through the shopping streets. There was an old-fashioned bakery where I would have loved to have tasted their sweets, but I was not the least bit hungry. After a walk through downtown , I hooked up with my boat ride. I saw small canals where houseboats were anchored, which reminded me of Amsterdam. After my hour long boat ride it was time to have little snack. I had a tasty shrimp toast in one of the historic restaurants on the waterfront. In the evening, I walked to the restaurant and had a very good meal by myself, sitting outside and watching people. I enjoyed every bite. The restaurant is named Koffoed. It is located on a little side street near the center of town. The menu was exquisite, it was an amazing experience .
The next day I decided to visit the Viking Museum. I walked through the canal streets, arriving at the museum before it started to rain. Copenhagen is a city with few cars. The locals seem to be relaxed, enjoying the long summer days. In the afternoon, I walked to Torvehallerne, a glass-covered food hall in the center of town. Here you can indulge in delicious treats, do your weekly grocery shopping, or as I did, admire all the choices being offered. This is a foodies' paradise. I ate more than I should have.
I was happy exploring Copenhagen never feeling unsafe, even at night. Before I knew it, it was time to get ready for my trip to Sweden.  It has been almost two months since I returned from my trip. Life has been very busy, cooking and trying out new recipes . I tried to make the semolina and bread dumplings I had in Innsbruck. Both turned out to be a total disaster. I had some help from a Facebook site I belong to but I think it takes a lot of experience to make them. I am still trying. Instead I made my apricot jam and plum jam. Plums are still in season and here are some of my recipes. 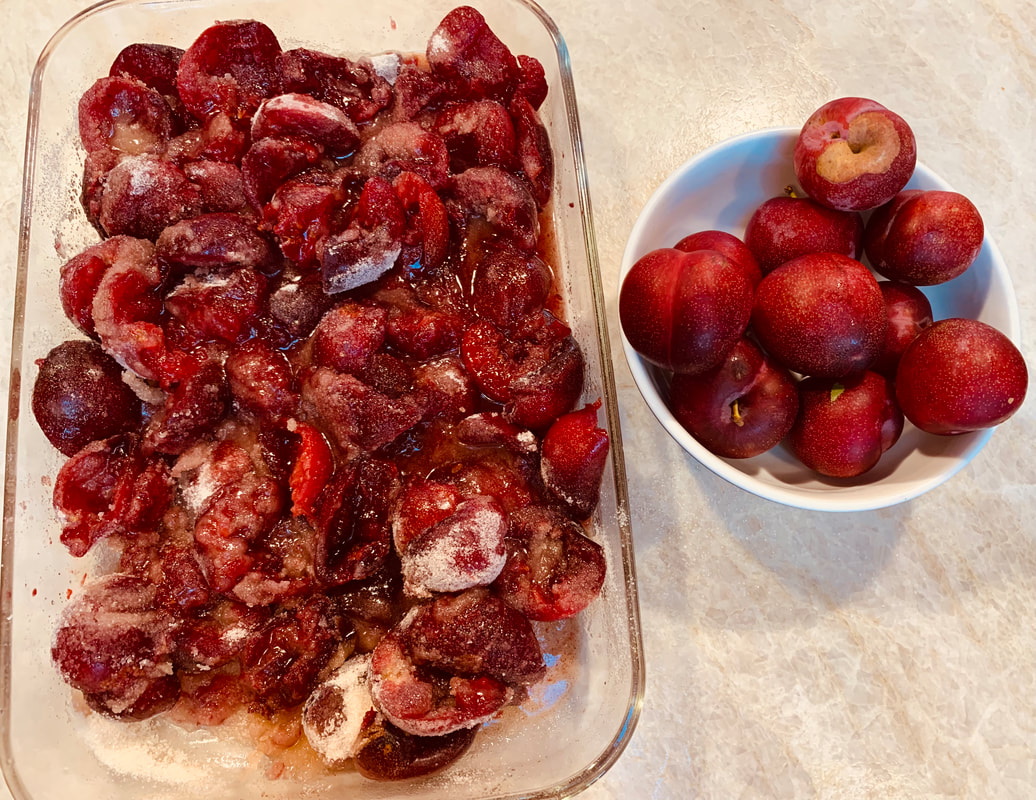 This plum jam bakes in the oven while you can have fun doing other things. Click here for the recipe.  This beautiful German plum tart made with Italian plums or Zwetschgen as we call them in Germany is delicious with whipped cream and is easy to make. Click here for the recipe. These plums are not easy to find in Santa Cruz. This easy to make and delicious recipe comes from Marian Burros and was printed in the New York Times for many years. Click here for the recipe. 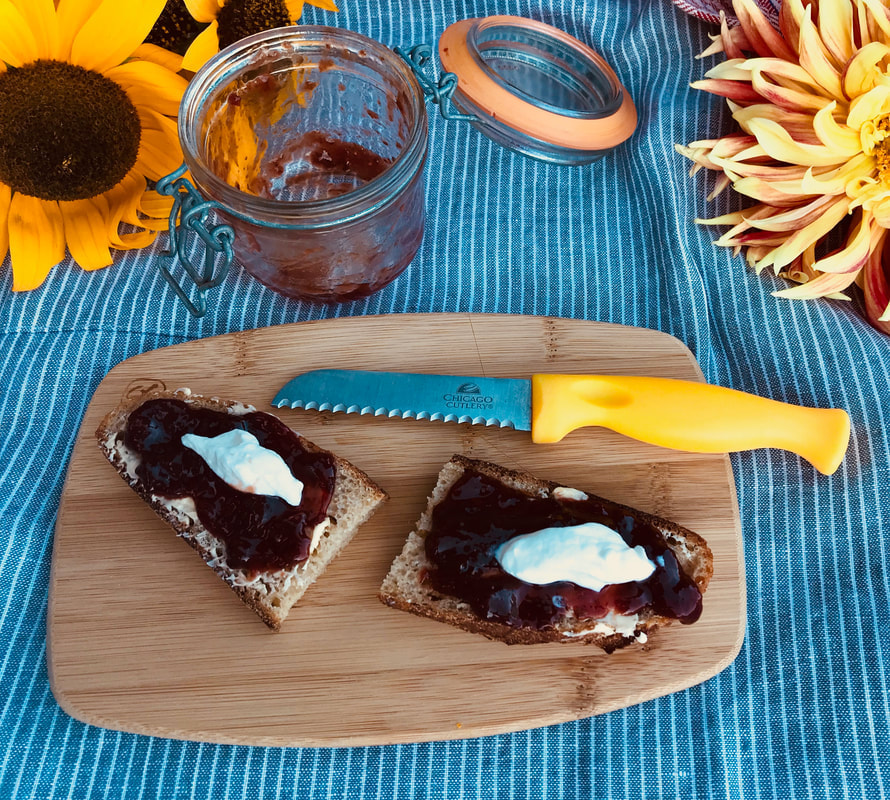 If you can find Italian plums try this recipe called Zwetschenmus in Germany. It is a tartly rich and earthy tasting plum butter with a taste of cinnamon and allspice. Click here for the recipe .
Guten Appetit! from the Sunnycovechef.com This is my third post of my trip to Europe. Click on the highlighted text to read about my first stop Munich and my second stop Lake Garda, Italy. When I made my travel plans I decided to break up the long train ride from Roverto, Italy to my village in northern Germany. My friend and I decided to stay in Innsbruck, Austria, for a few days before continuing our journey. We had planned to take the lift up the mountain and hike in the beautiful Tyrolean Alps surrounding Innsbruck. Well, the rainy weather changed our plans. The mountains would have been muddy, with no vistas and a cold rain.  So we decided to eat as many Austrian delicacies as possible. We started with a Sacher Torte in the Sacher Cafe next to the Hofburg (a castle for royalty) that we also visited.
Then came the apple strudel with vanilla sauce— nobody makes it as well as the Austrians. Kaiserschmarren (pancakes) with plum jam was my favorite Of course, let’s not forget clear broth with Griessnockerl (semolina dumpling soup). The first evening I had spinach dumplings that were to die for. One night at our hotel, after having tasted two desserts that afternoon, we had a small bowl of Hungarian goulash soup. It was the best goulash soup I have ever had.
A few facts about Innsbruck: it is the capital of the Tirol Province. Tirol is a popular tourist destination for Germans and lots of other Europeans. The landmark in Innsbruck is the Golden Roof in the middle of town. It was built in 1500 to commemorate the marriage of Emperor Maximilian I and Bianca Maria Sforza. The roof is not covered in gold, but in fire-gilded copper tiles . 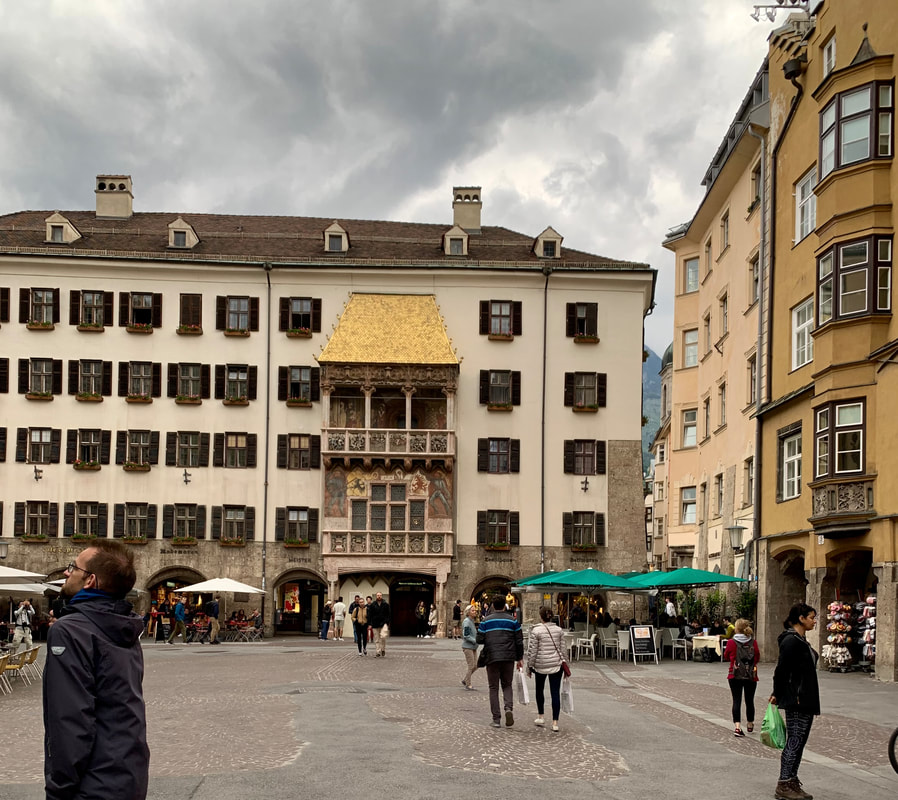 The 500-year-old town is settled in a pleasant valley with Baroque churches, gabled houses, and narrow, twisting walkways. There are plenty of cafes and restaurants with the food of the region. After two days of indulging , we took the train to my village. 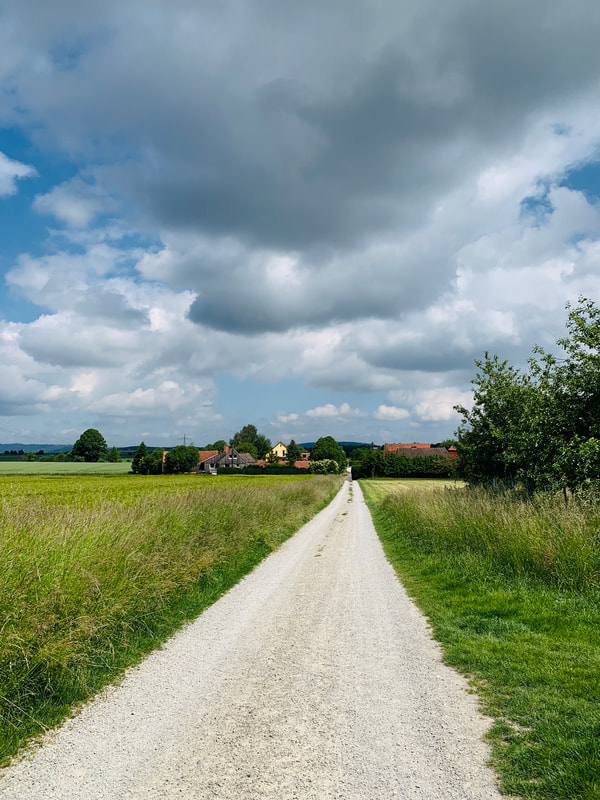 My village in northern Germany The apartment in my brother’s house (where I usually stay), has a family of three Ukrainian women from Kharkiv living in it. These three women fled without time to pack anything when they left their home. All they had was a purse and a small bag when they arrived. But my brother got them jobs, and the 14-year-old teenager is going to school. They needed a lot of help filling out forms and papers to get German health insurance and a monthly allowance. Everybody is trying to help. The Ukrainian mother and daughter baked two cakes for a Sunday afternoon coffee. They were delicious and my brother and I had several pieces.
My nephew’s tiny house is an Airbnb on our farm. It was a perfect place for me to stay. I loved every minute in it. It was the perfect retreat to reflect, relax, and enjoy my family. The days were long and I enjoyed visits with my grand nephews and friends. My nephew also took in a Ukrainian woman with two children and a cat. Now he has five teenagers living in his house. We went out for dinner and had coffee and cake with our extended Ukrainian family. Their English is limited, they speak very little German and none of us speaks Russian or Ukranian, which are their language. Sometimes, I just started to cry. Memories of my childhood with all the refugees from the old East Germany came welling up.
During my stay in the village, I prepared Matjes Herring with cream sauce and boiled potatoes for the family. Hopefully, I will post the recipe in the near future.
After ten wonderful days, it was time for me to leave and go north. Hamburg was my next destination. I stayed in the same hotel where I always stay, the Westin above the Elbephilharmonie in the Hafencity. This time, I just needed a day to rest and see some old friends before continuing on to Copenhagen. The Elbepilharmonie, nicknamed Elphi, always amazes me. It is among the largest concert halls in the world. The glassy construction resembles a hoisted sail or wave built on an old brick warehouse. The view from my room was spectacular. If you visit Hamburg and have some time, don’t miss this part of town. There is so much to see. Read more about the Elphi in a previous post here. My friend from Hamburg and I had a beautiful dinner at Vlet. This was actually my first gourmet meal on this trip. The food was exquisite.
Before I knew it, I was in the Hamburg railroad station waiting for my Danish train to Copenhagen. Let me tell you, I do not like the Hamburg Hauptbahnhof (main railroad station). It can be scary with the number of people and the constant construction going on. The station is on three separate levels with the trains departing on the lowest level. There have been times when the escalators didn’t work and I had to carry my suitcase down a long staircase. There are few elevators and they often don’t go the level you need to catch your train. I was lucky this time, and I used the escalator to get to the platform where my Danish train would arrive. I had a delightful conversation with a young man who was waiting for another train to go see his mother. I arrived in Copenhagen after a four hour scenic and interesting train ride .
My friend and I left Munich in the morning and embarked on a four-hour scenic train ride over the Alps to a small Italian town called Rovereto. It is located in the Trentino-Alto Adige region of northern Italy between Lake Garda and the Italian Alps.This was the easiest way to get from Munich to Malcesine on Lake Garda .
My nieces’s husband picked us up and drove us to our hotel in Malcesine. I could barely wait to hold my baby grand-niece in my arms. 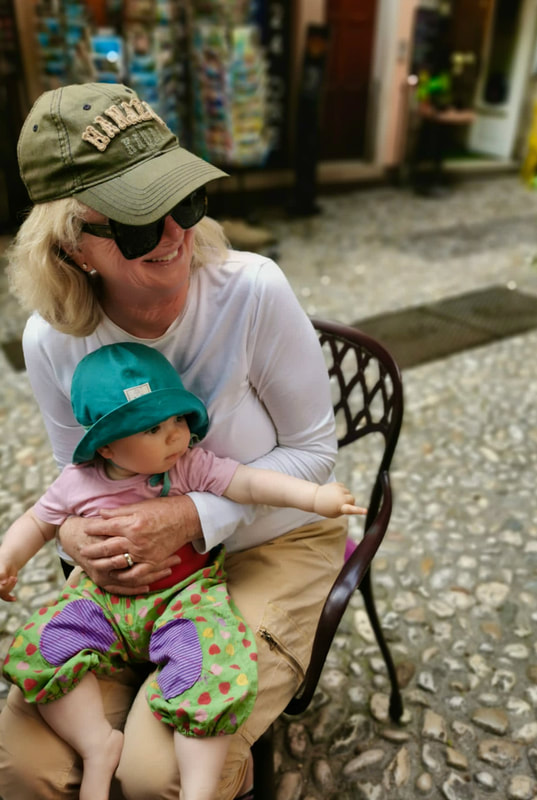 My niece’s travel agent had found the perfect hotel for all seven of us in Malcesine. It was a simple hotel in a beautiful setting away from the hustle and bustle of downtown. We adults rented rooms and my niece and her husband rented an apartment. This was the perfect (and relatively inexpensive) spot for a family gathering. The breakfast was great, everything was clean and comfortable. The grounds were specular, with a vast olive grove surrounding the hotel and apartments. There was a beautiful landscaped pool and a playground for children. The San Carlo hotel is run by a nice Italian family, and it became our home for one week. My niece’s in-laws arrived from near Berlin and were happy to see their grandchild.
Our focus was around the baby, but we still managed to go on boat excursions, and visited different towns around the lake. We never missed an afternoon coffee followed by an Aperol spritz. One day, we four elders visited the town of Riva, where we had a delicious lunch and explored the town while the young people visited a friend nearby.  Malcesine
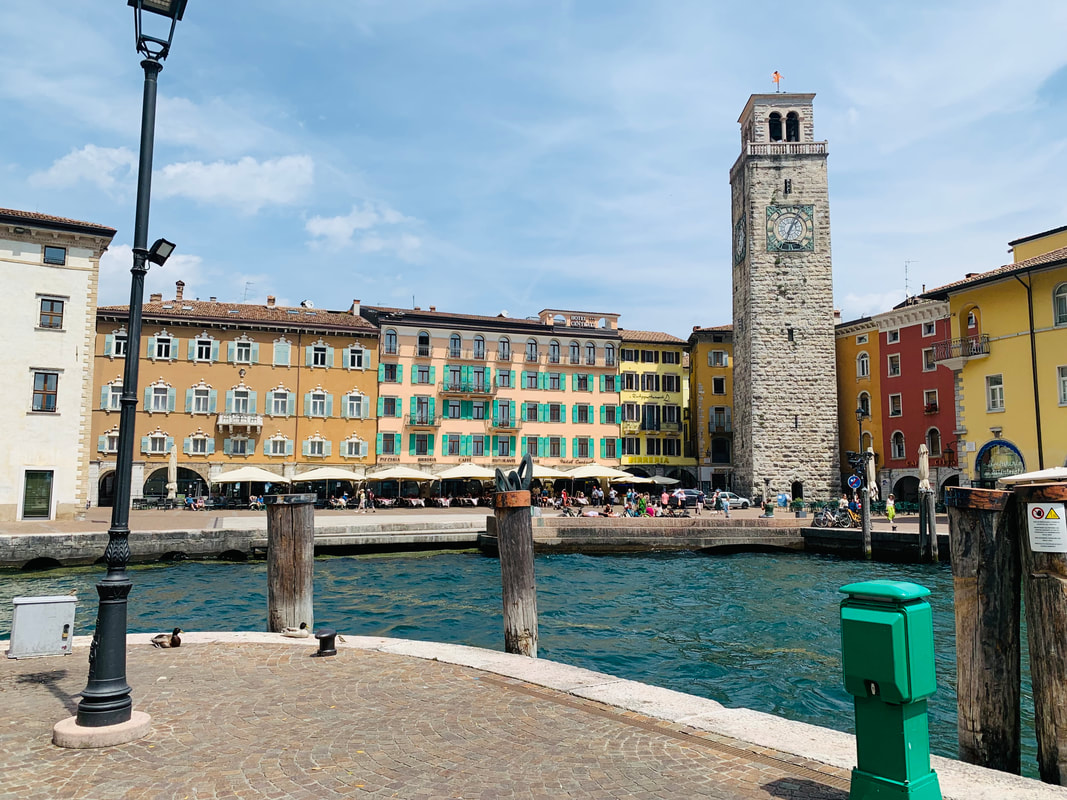 Riva del Garda Another day, all seven of us crossed the lake by boat and visited Limone. Limone is the Italian word for lemon and this part of Lake Garda is renowned for growing lemons and other citrus. Limone is set along a backdrop of rocky cliffs with stunning lakeside scenery. For me, the town had too many tourists, even in May. We ended up having a delicious lunch in a gorgeous setting. I felt like I was in a movie.
Another day, we took a taxi ride to Lazise, which is located southeast of Lake Garda.The wall, by which you enter the pedestrian medieval village, was built in the 14th century.The 12th century church San Nicola has several medieval frescos.There is a a lovely harbor with a promenade lined with colorful houses, many of them restaurants. We had lunch in one of them and enjoyed the ambience of this beautiful setting.
We declared our last day in Malcesine as a chill day and enjoyed the gorgeous pool at our hotel. It was hard to say goodbye the next morning, as I will cherish this week forever . 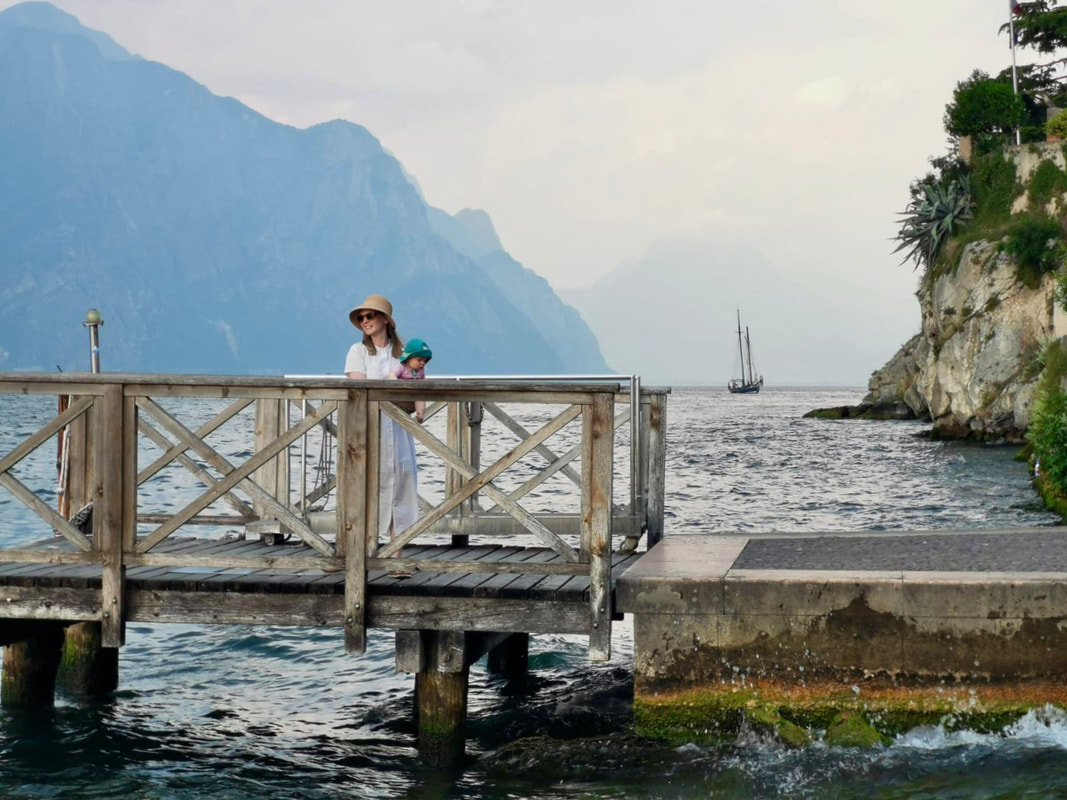 |
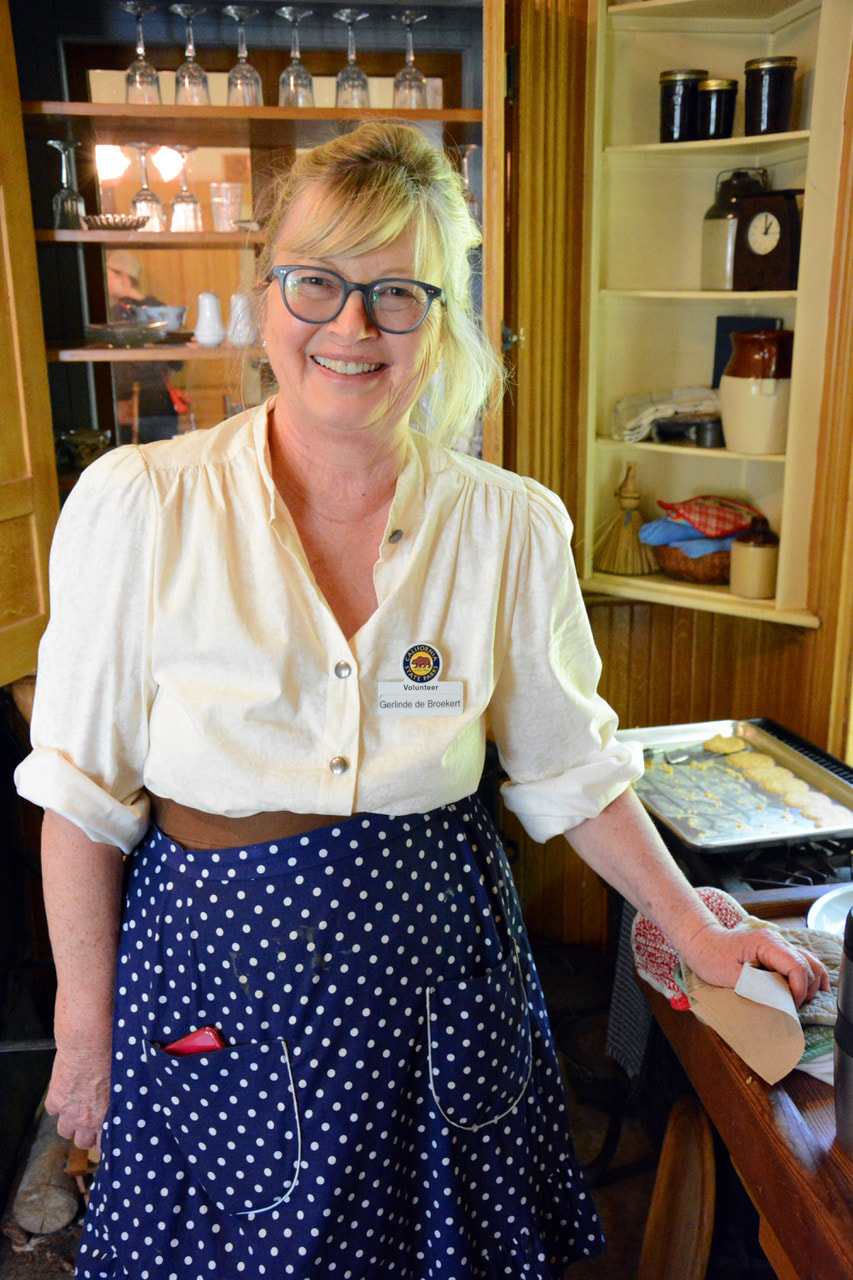
WELCOME TO SUNNY COVE CHEFThank you for visiting my blog. My two passions are cooking and traveling. Traveling exposes me to a wide variety of food and experiences. I walk around cities looking for markets, restaurants, bakeries, shops, you name it, and if it is related to food you will find me there, tasting, smelling, talking to vendors, and having a great time. Categories
All
Archives
February 2024
|


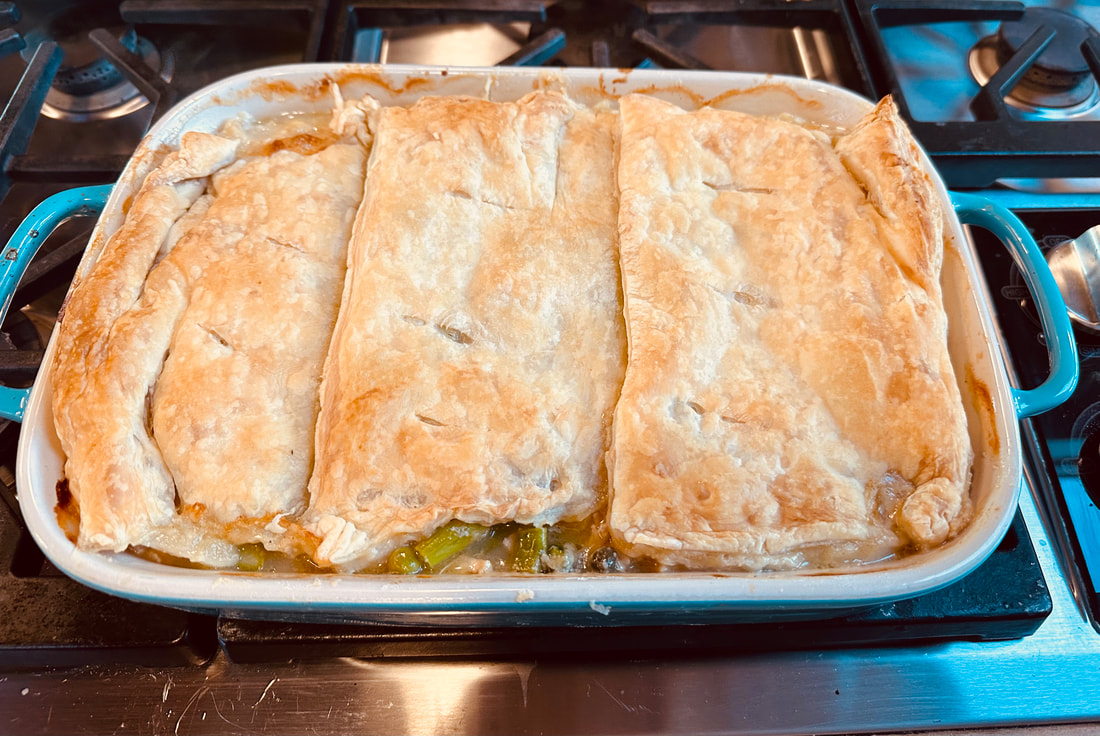
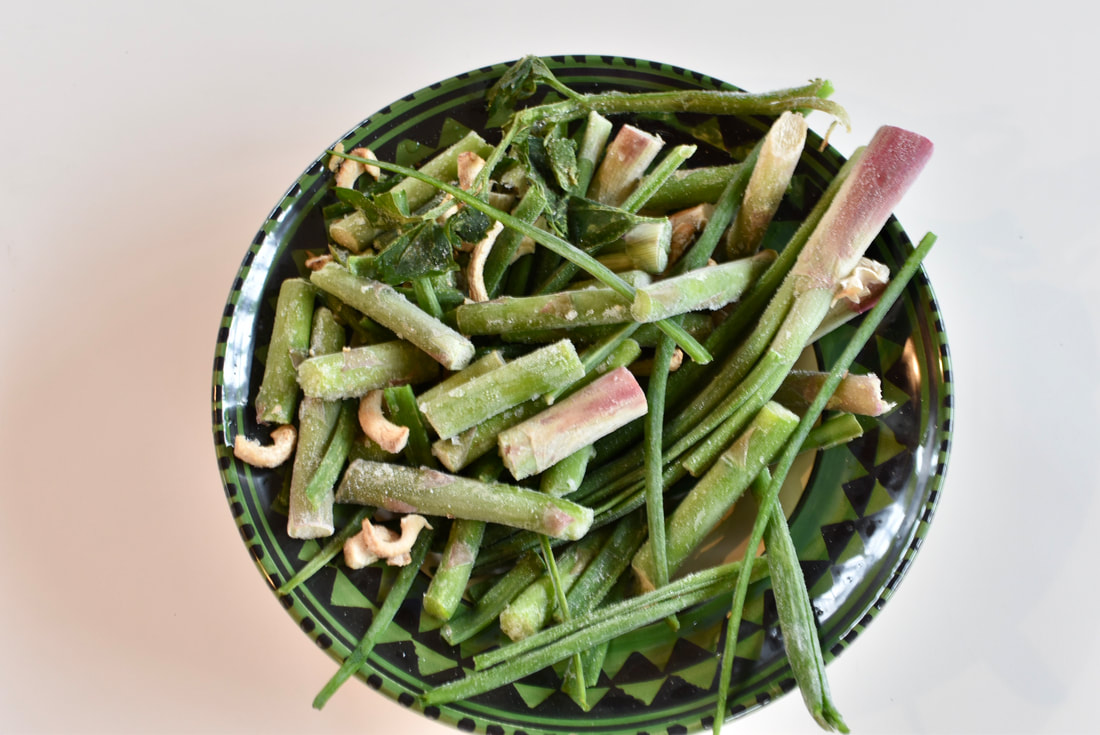
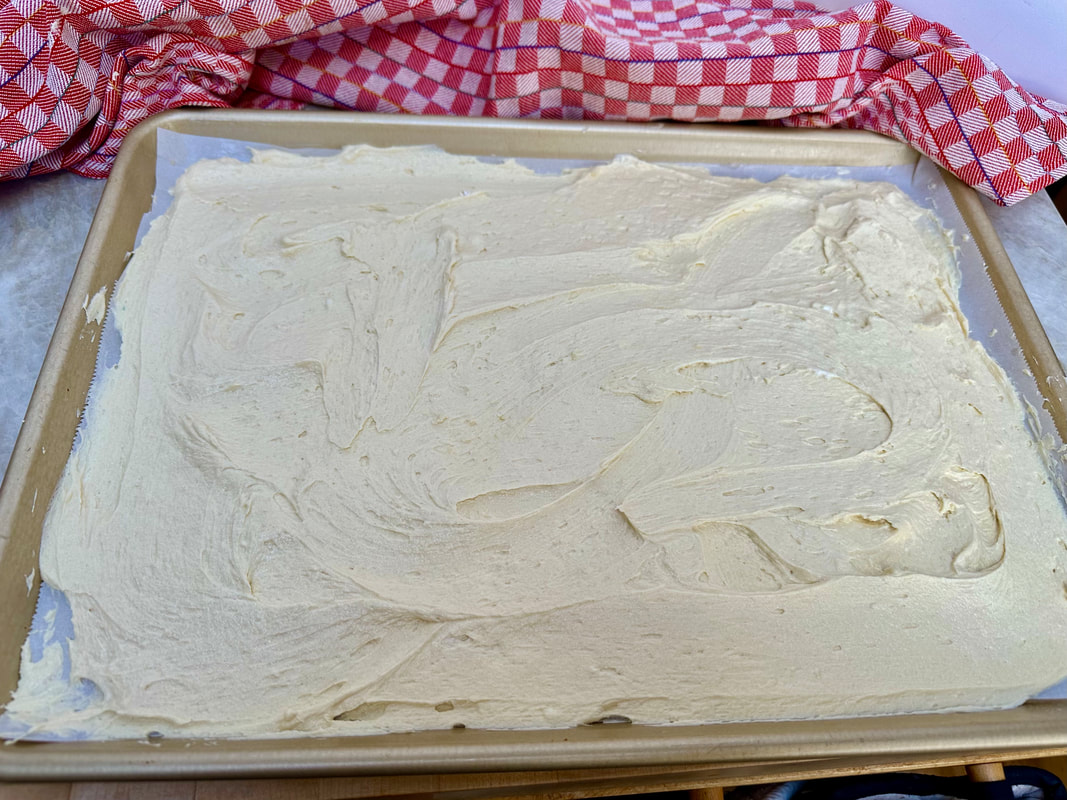
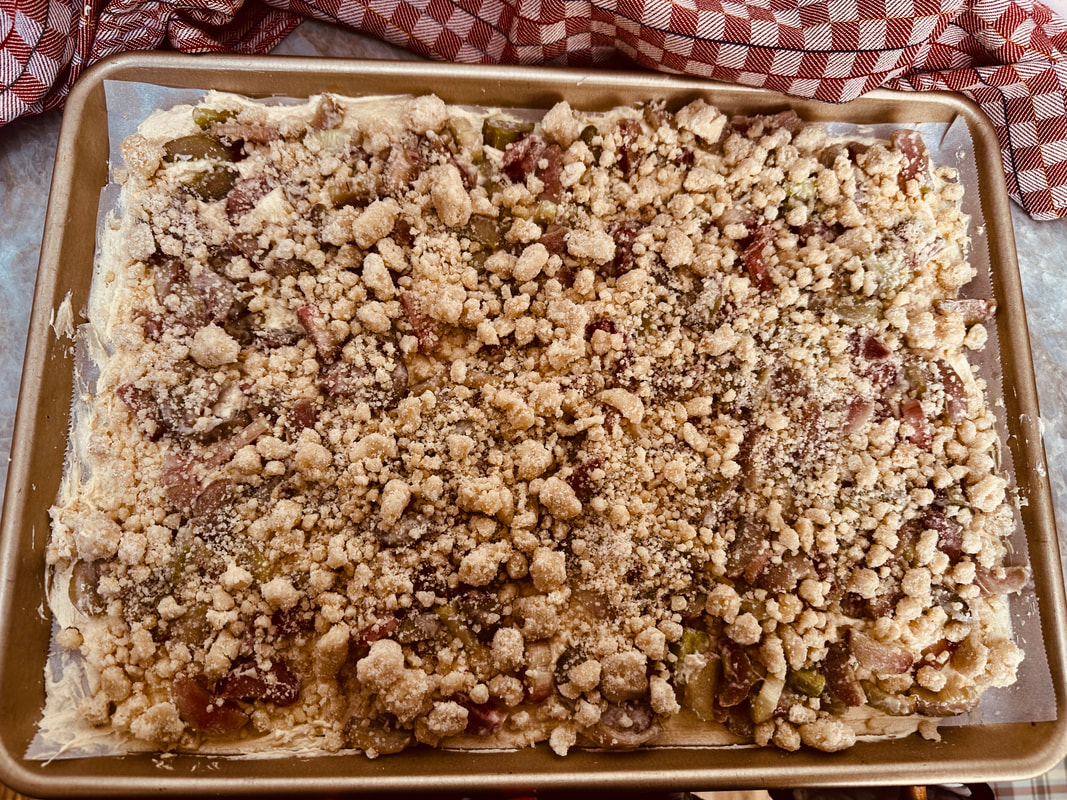
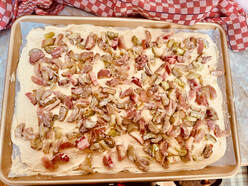
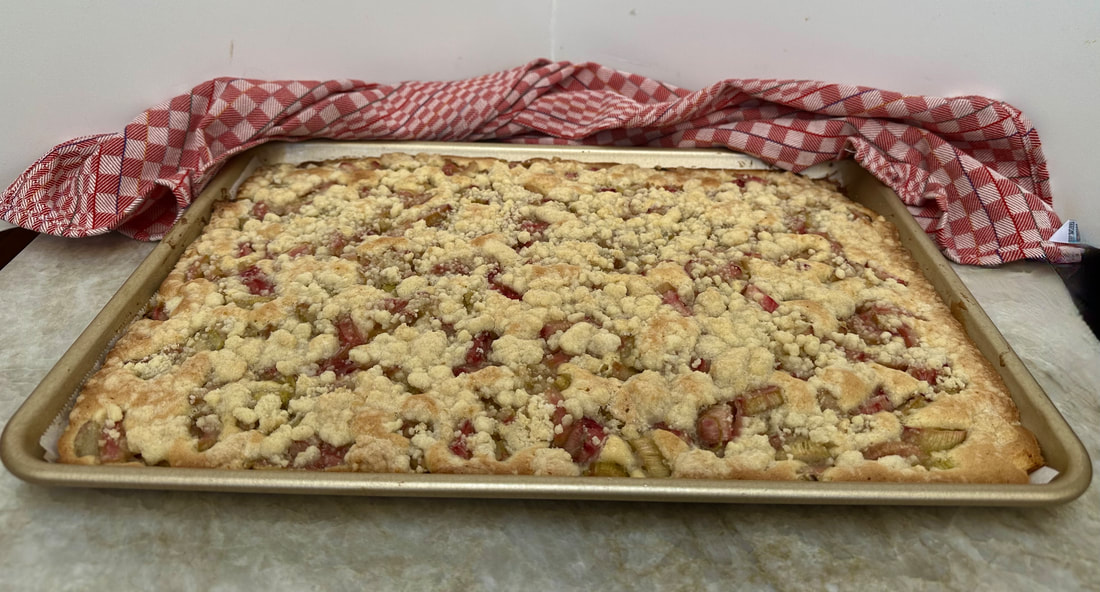
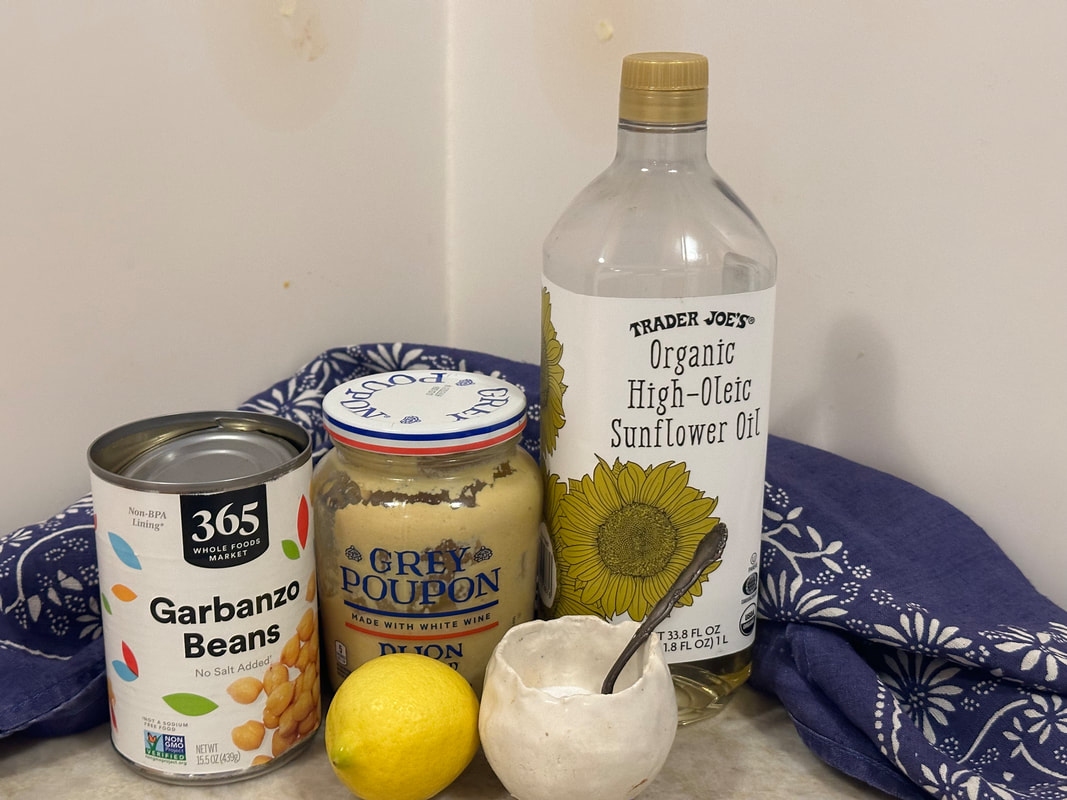

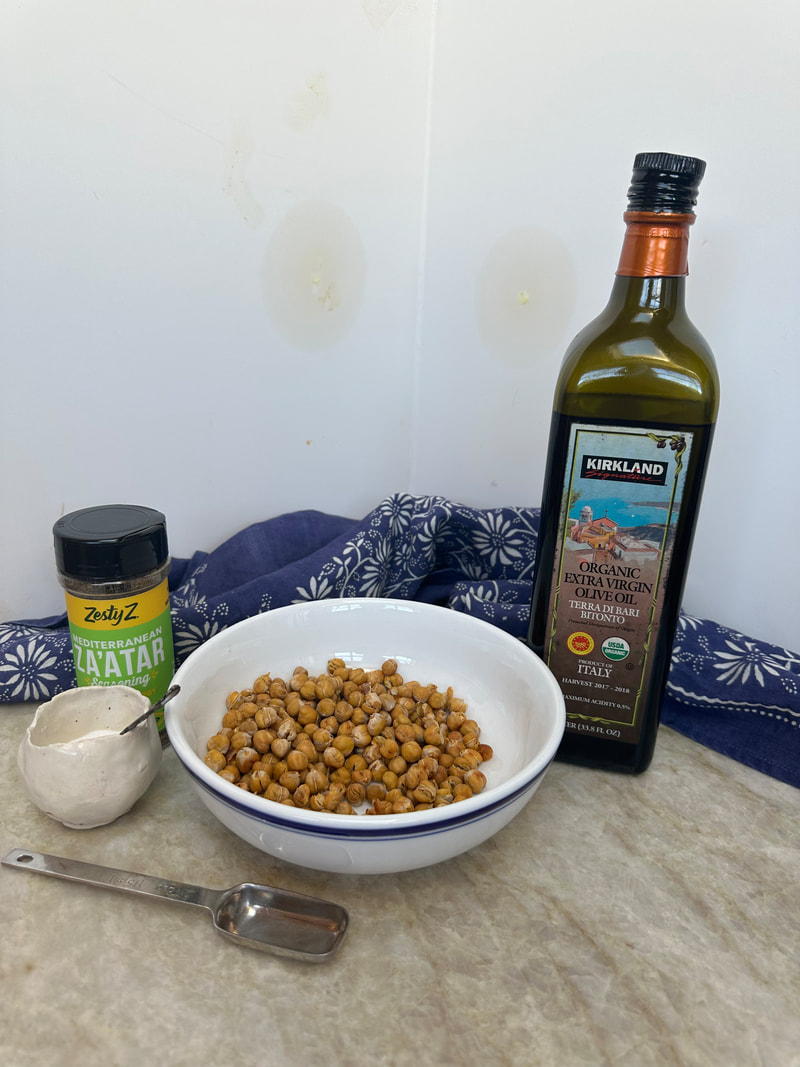
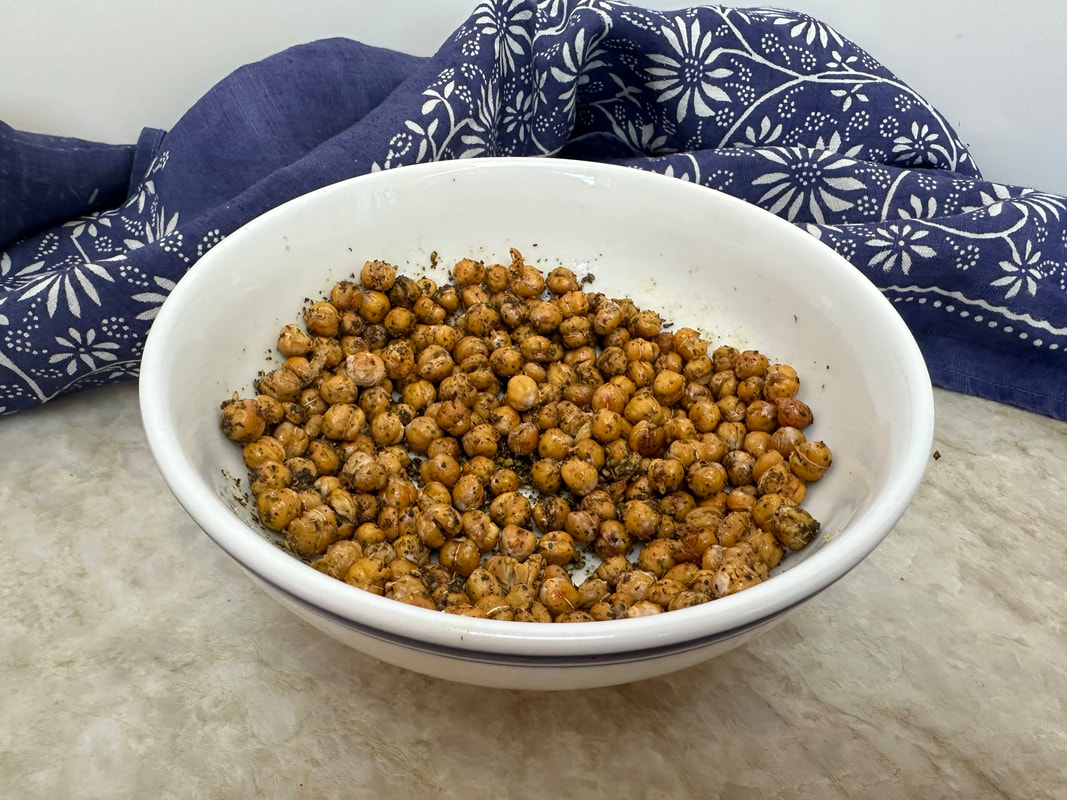


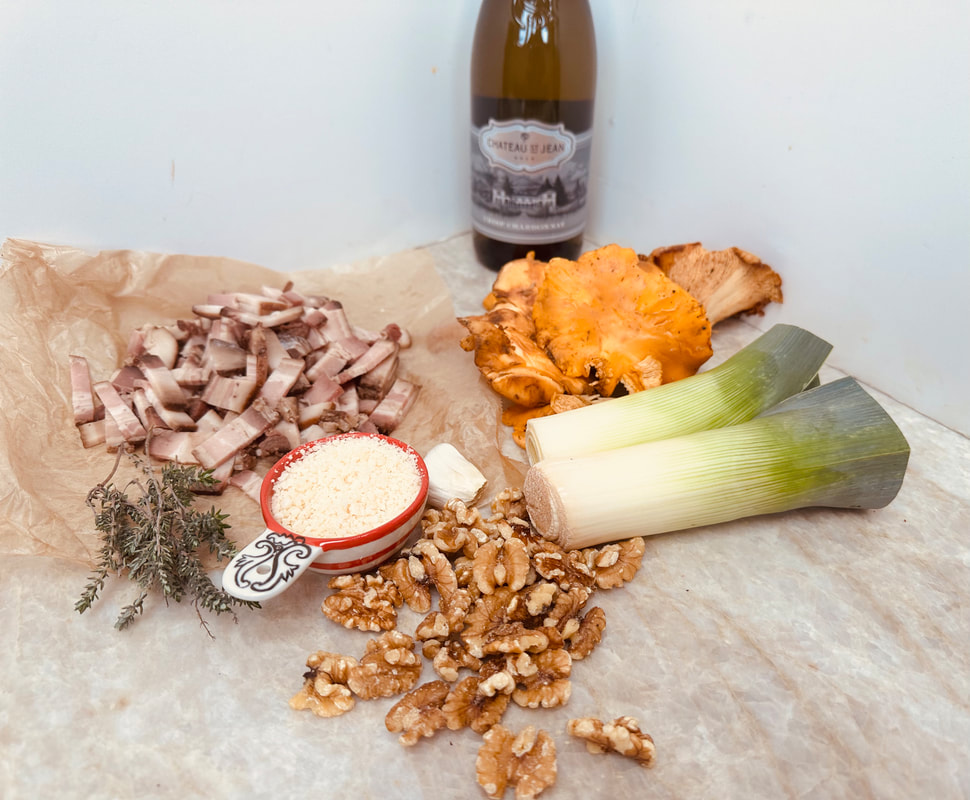
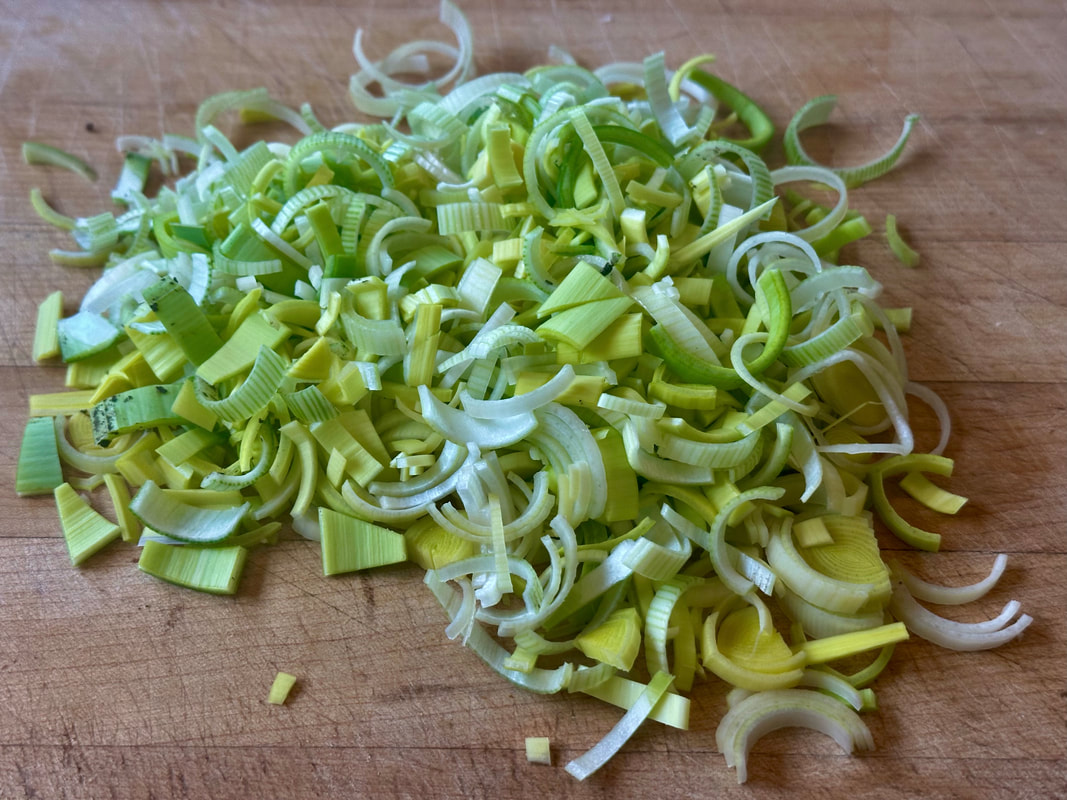
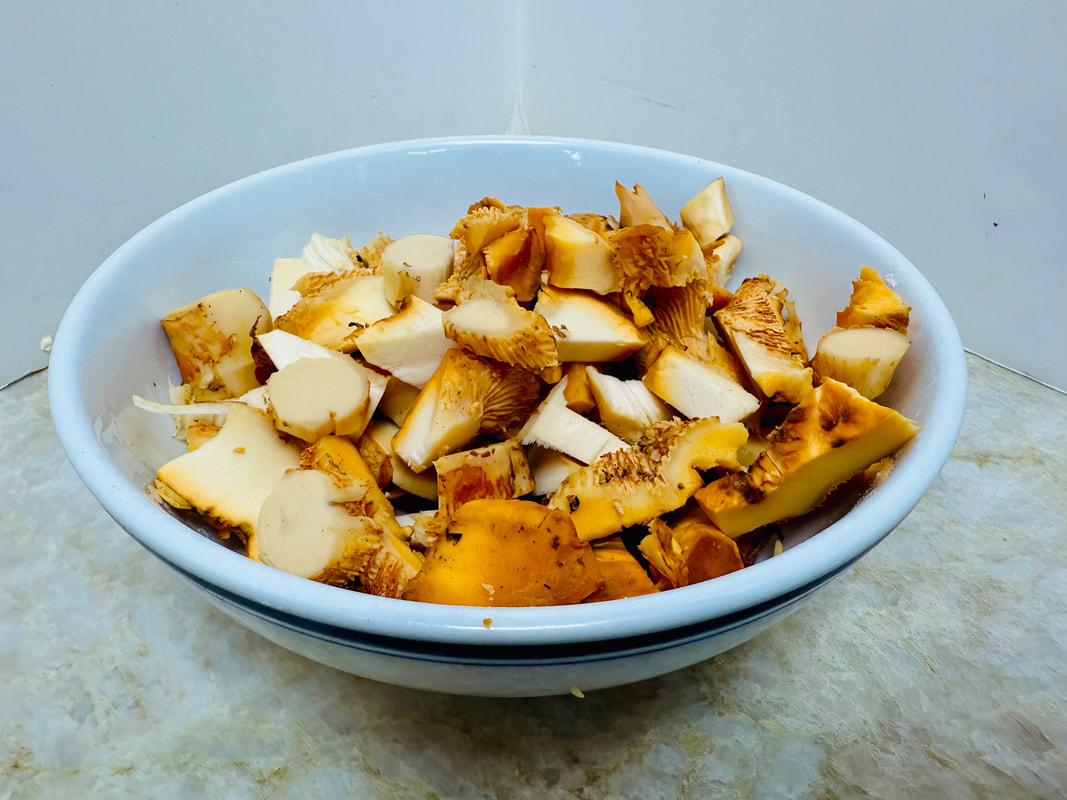
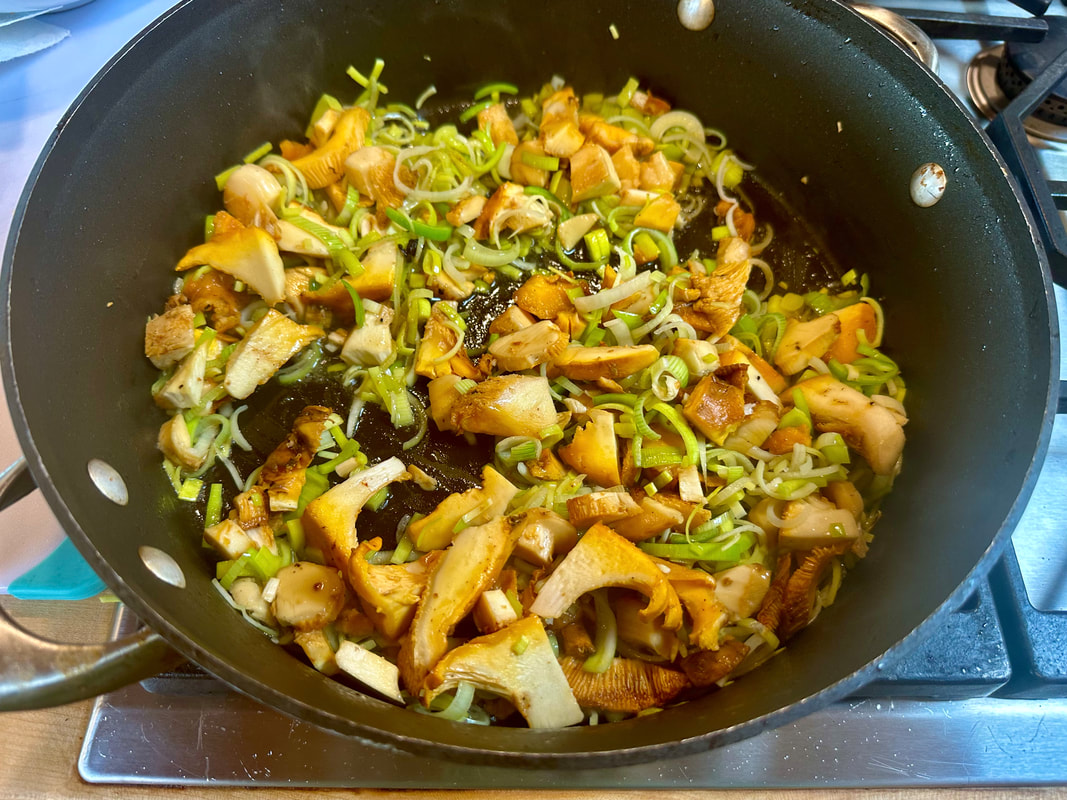
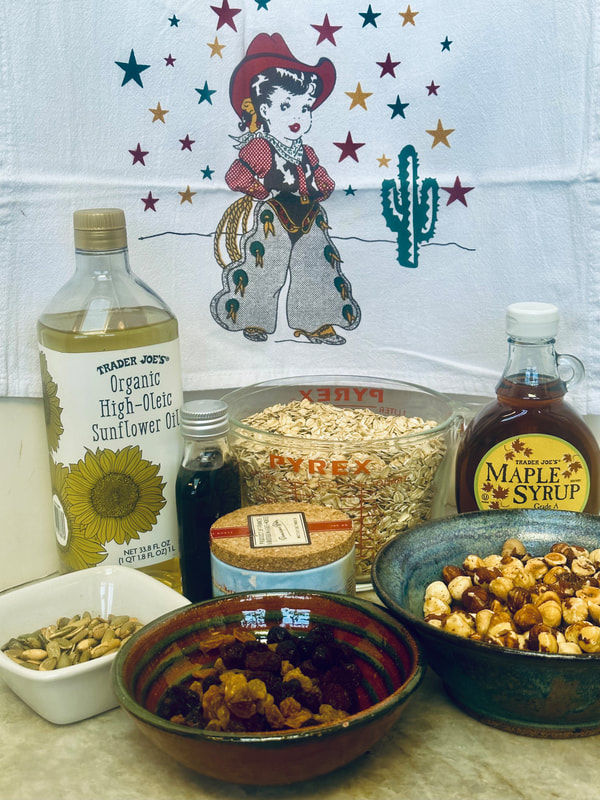
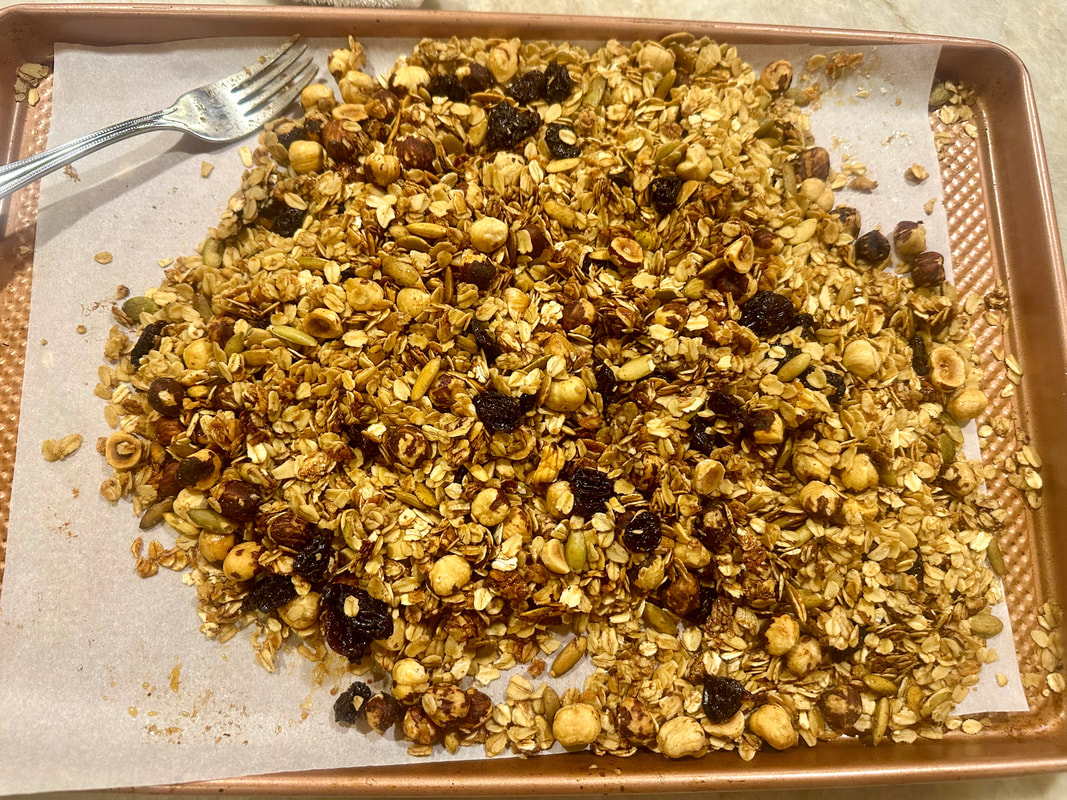
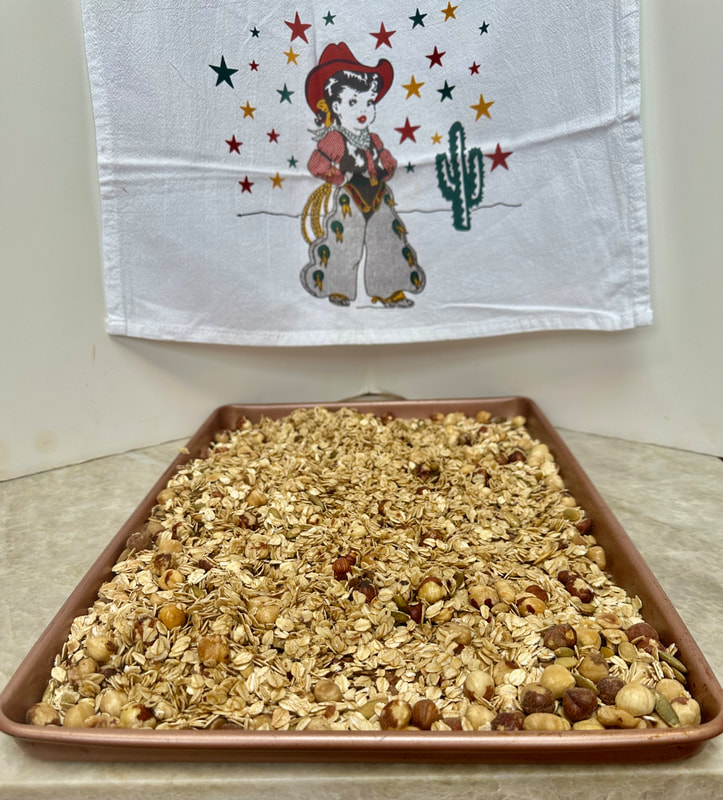
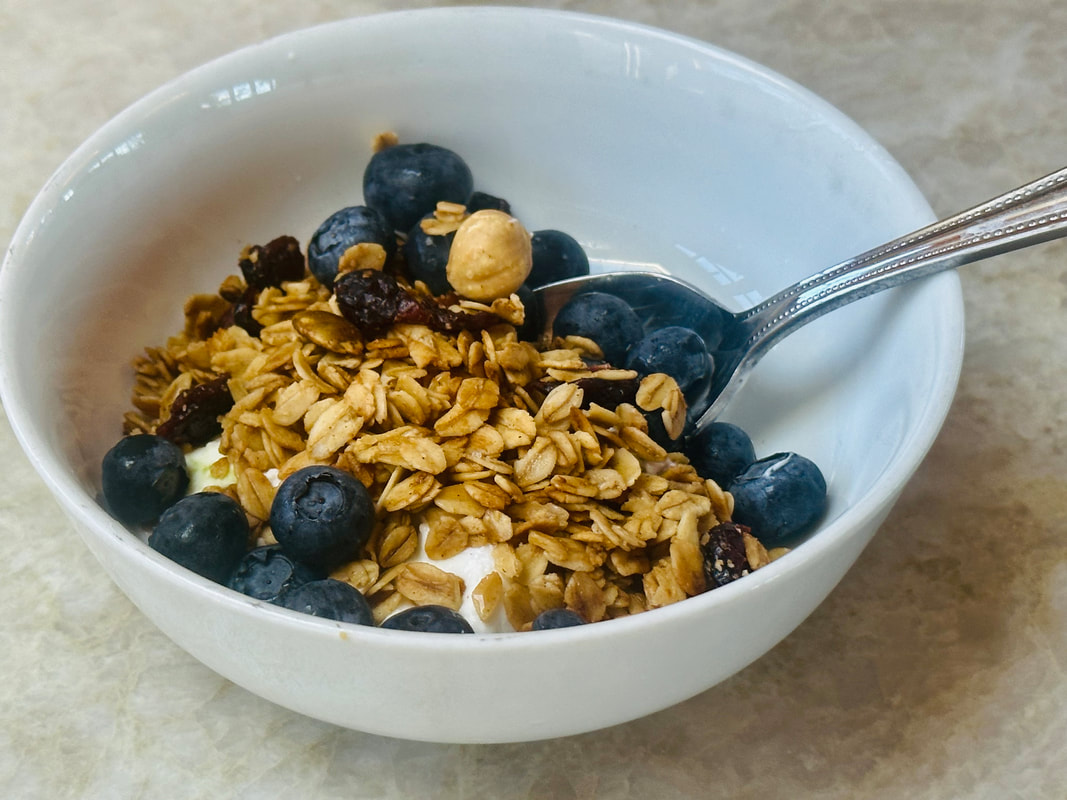
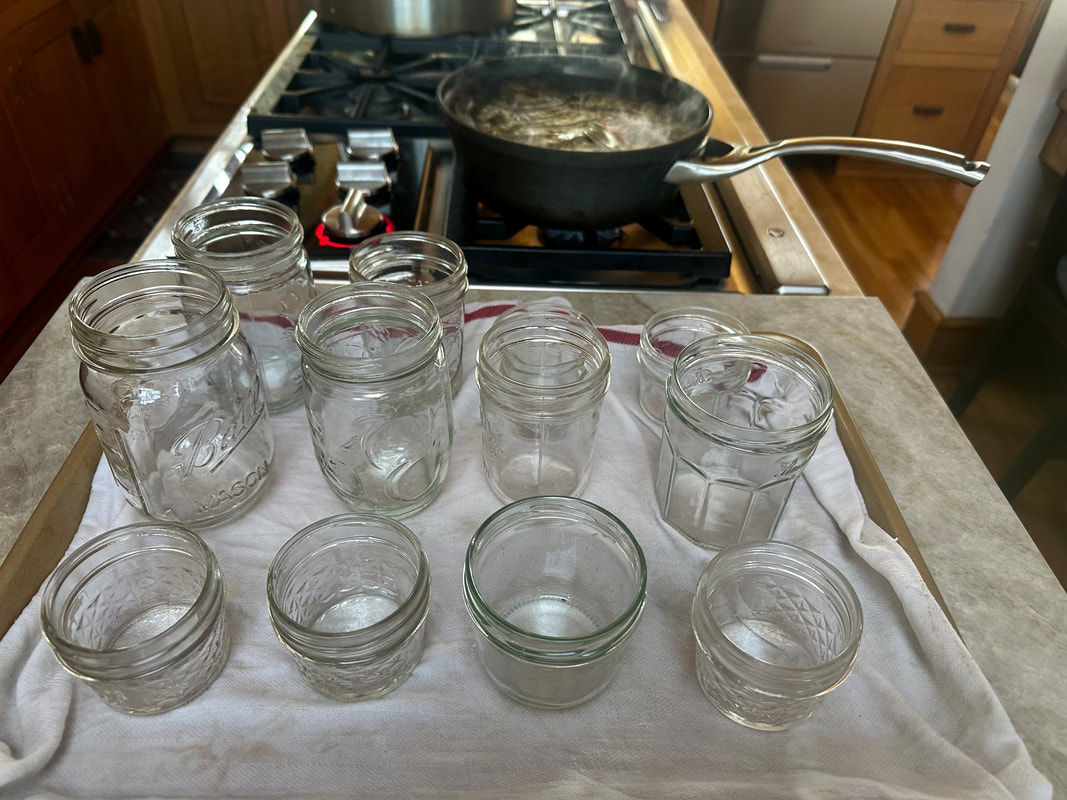
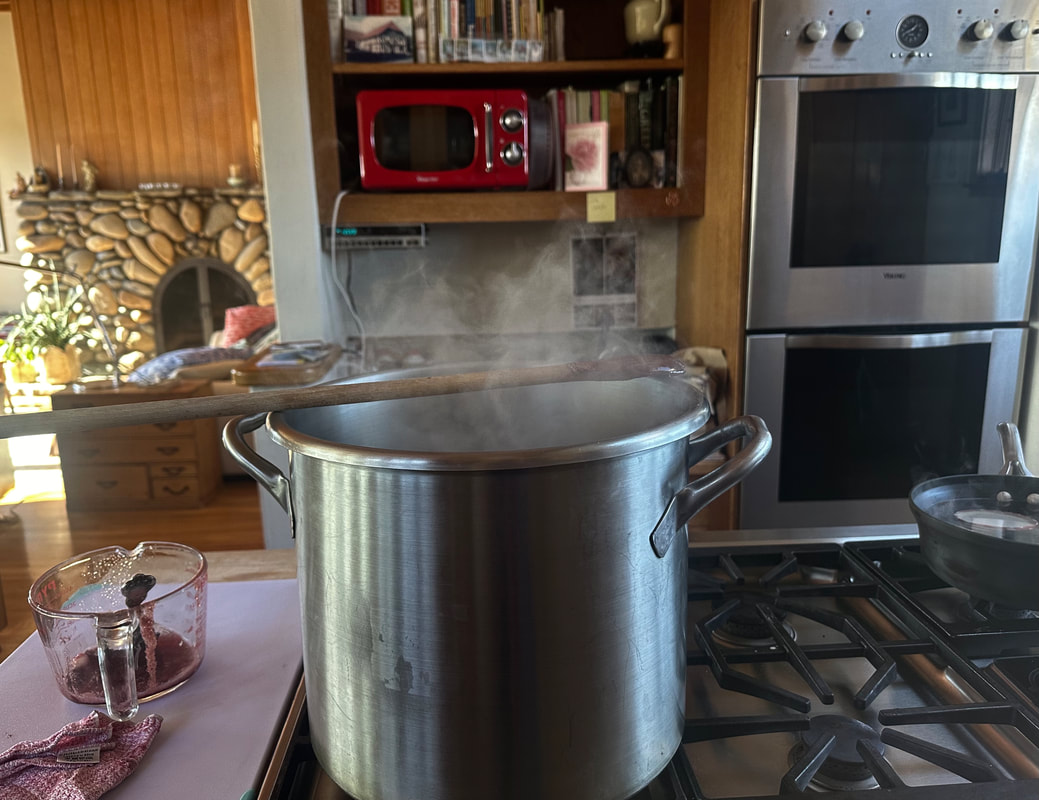
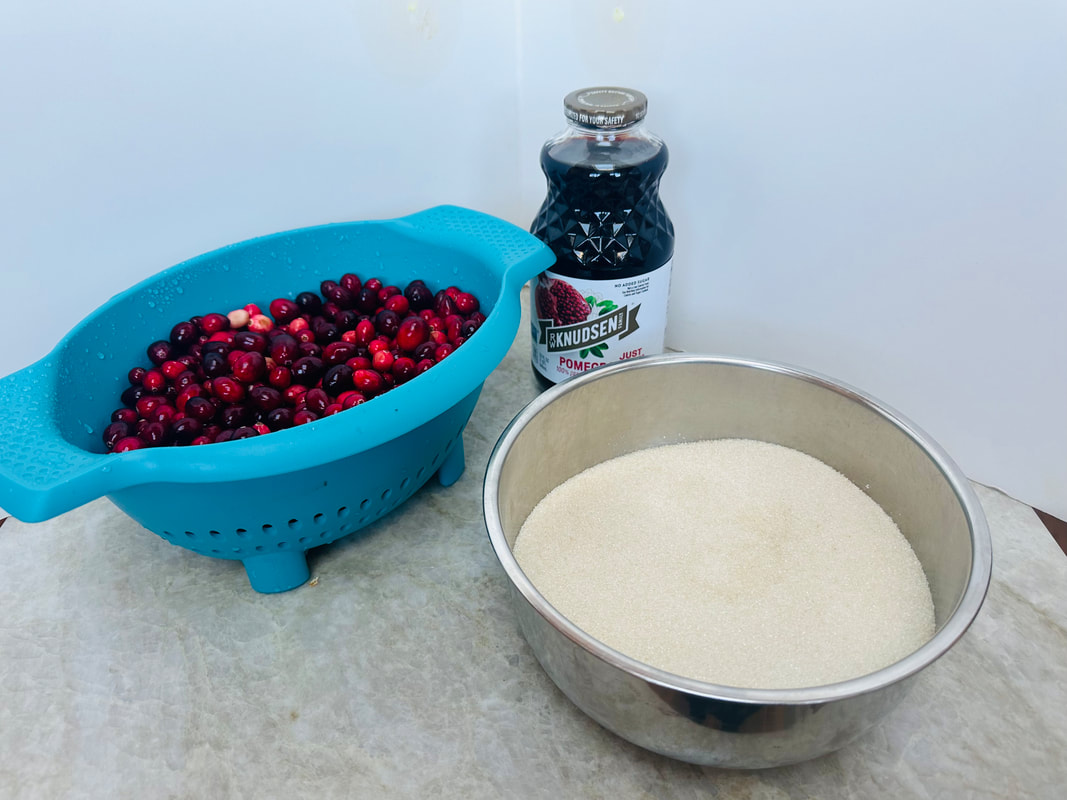
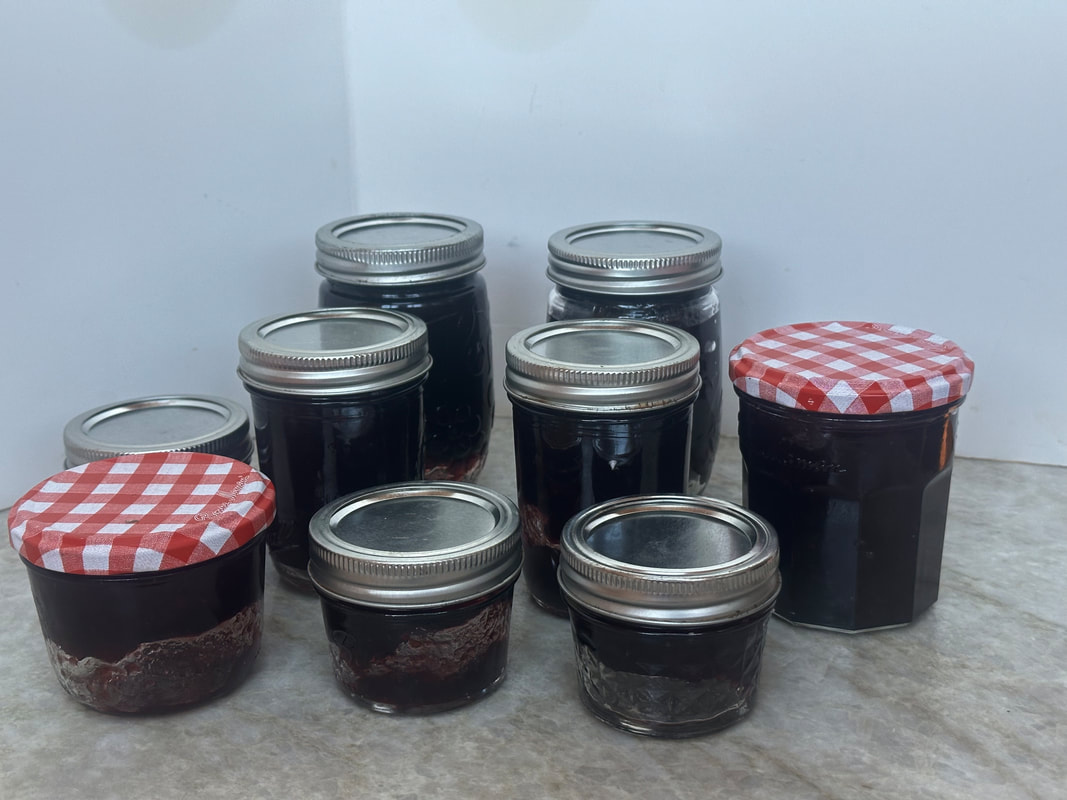
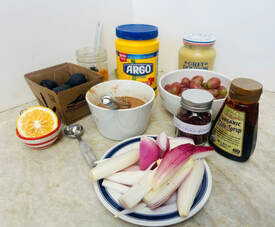
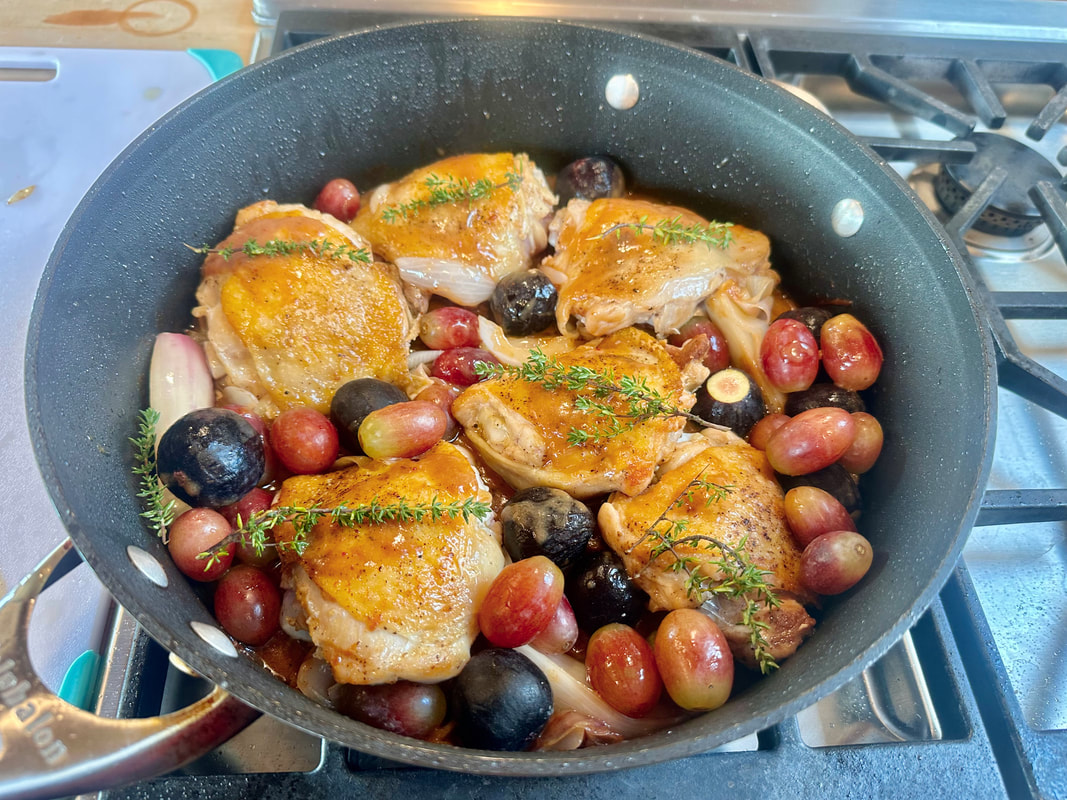
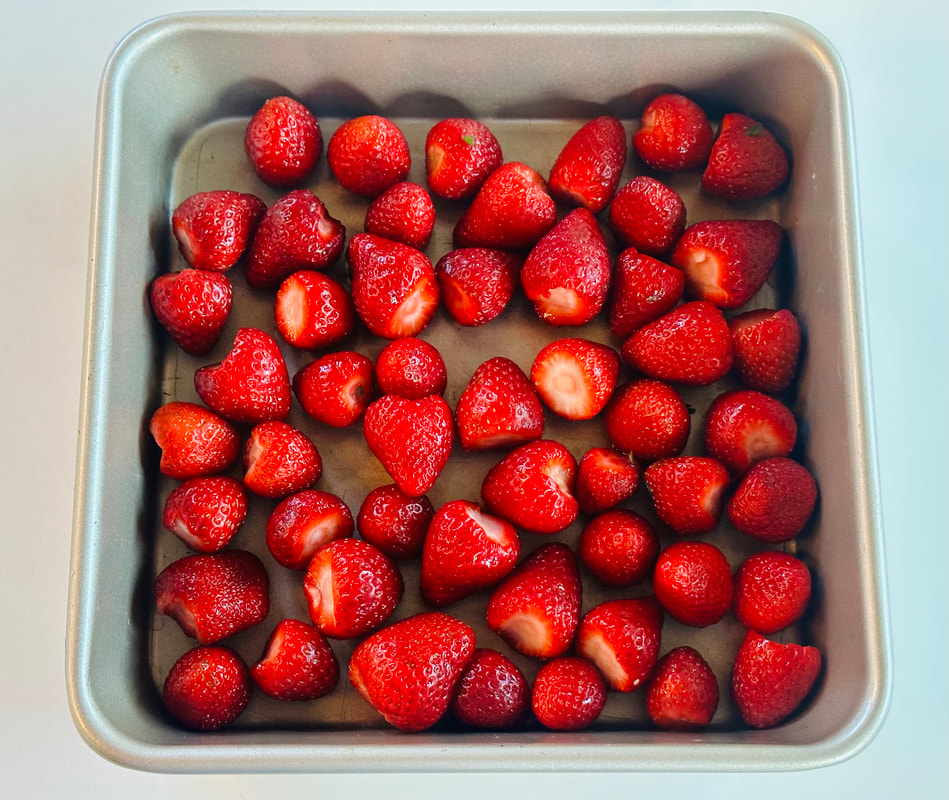
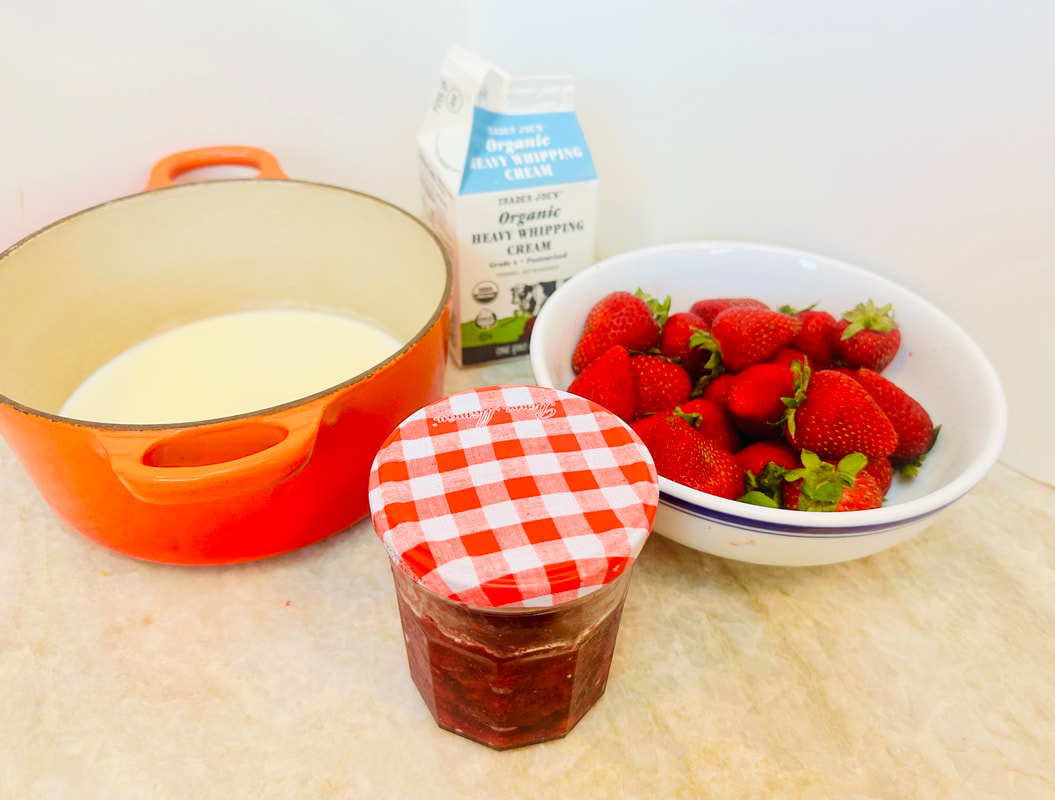
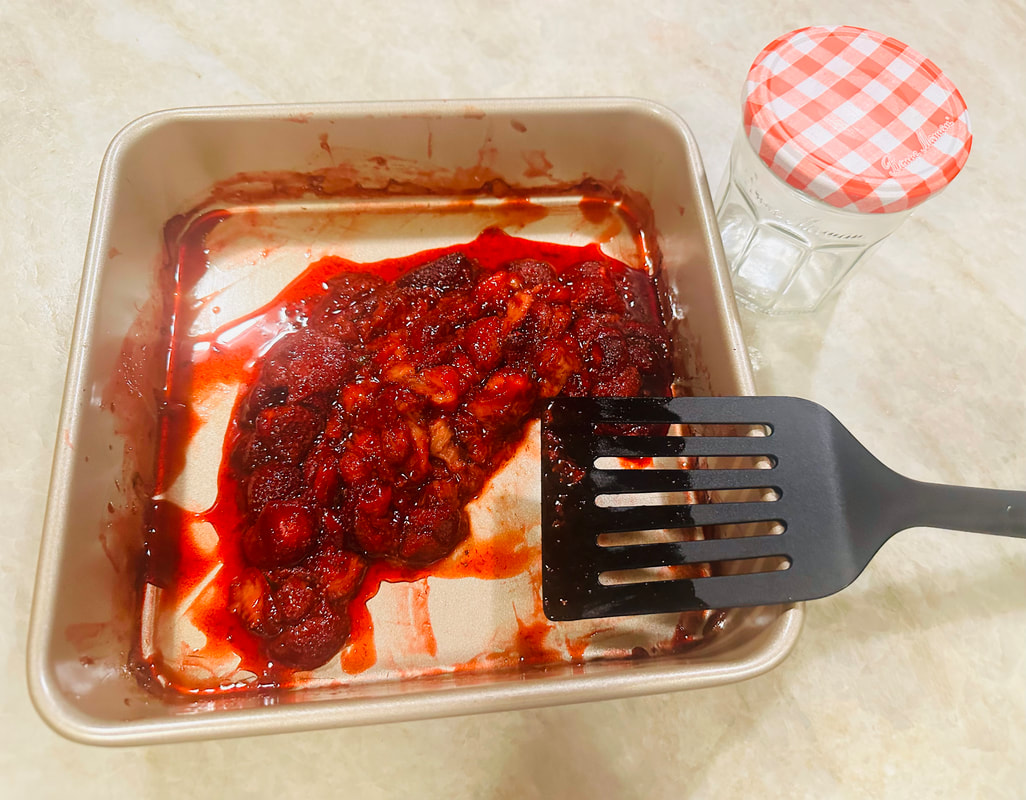
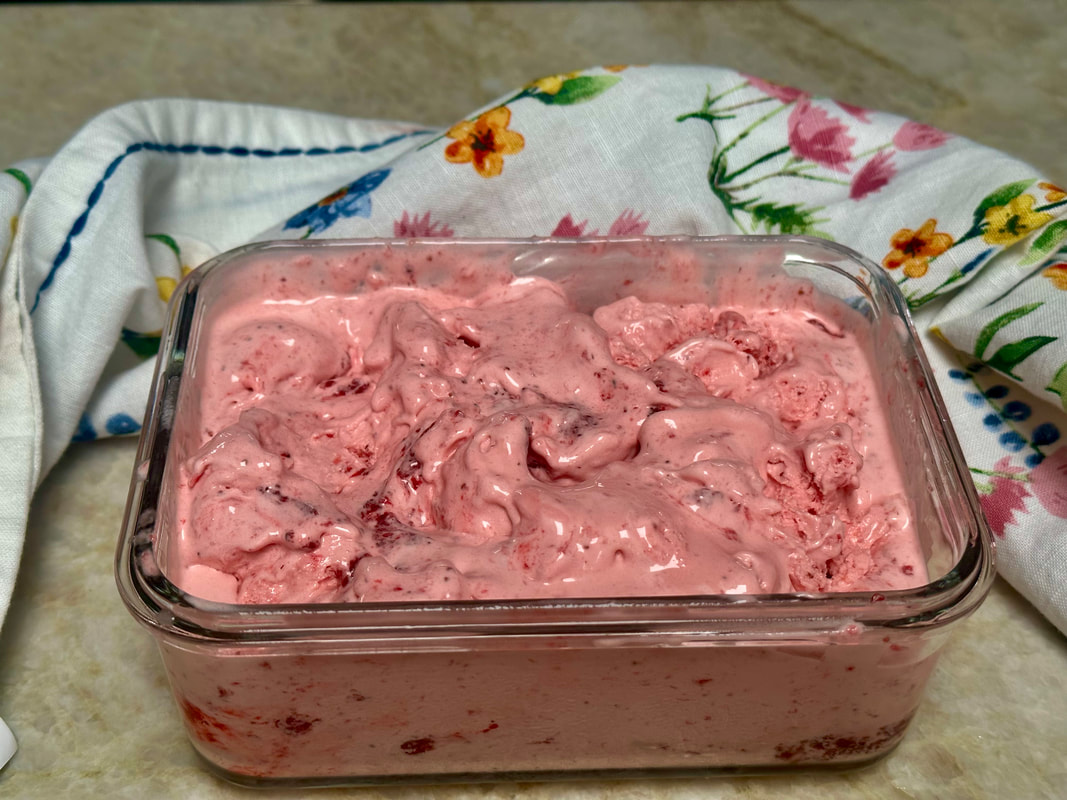
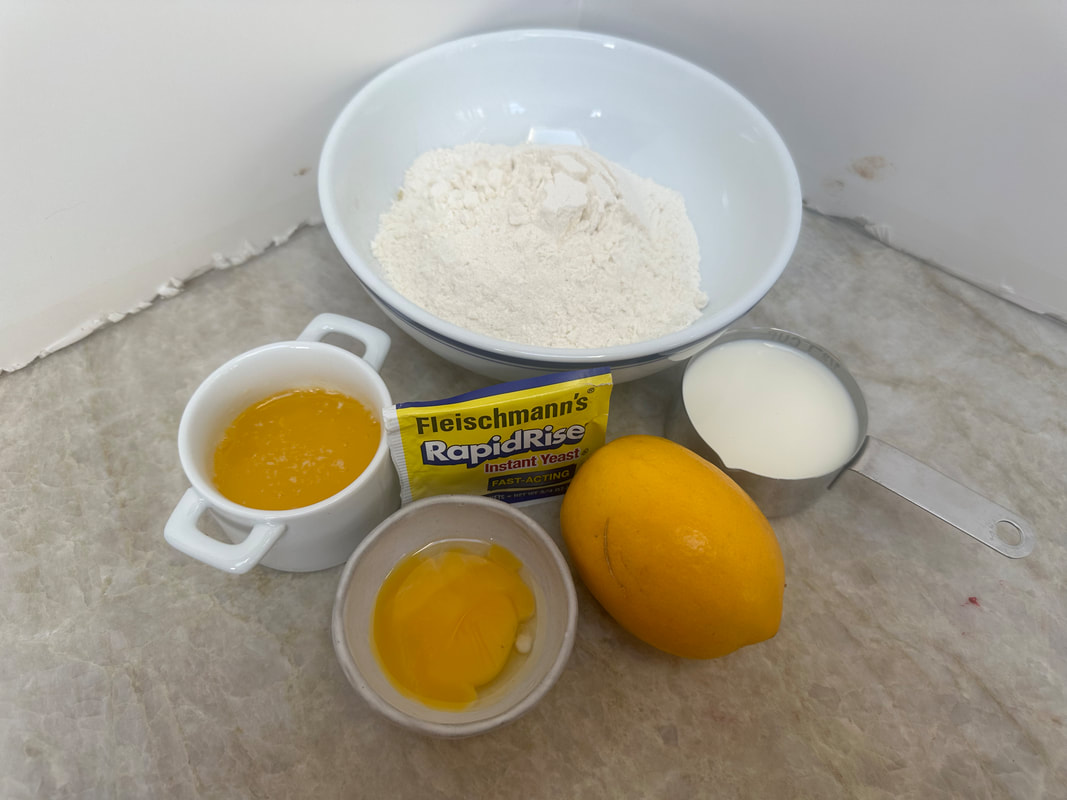
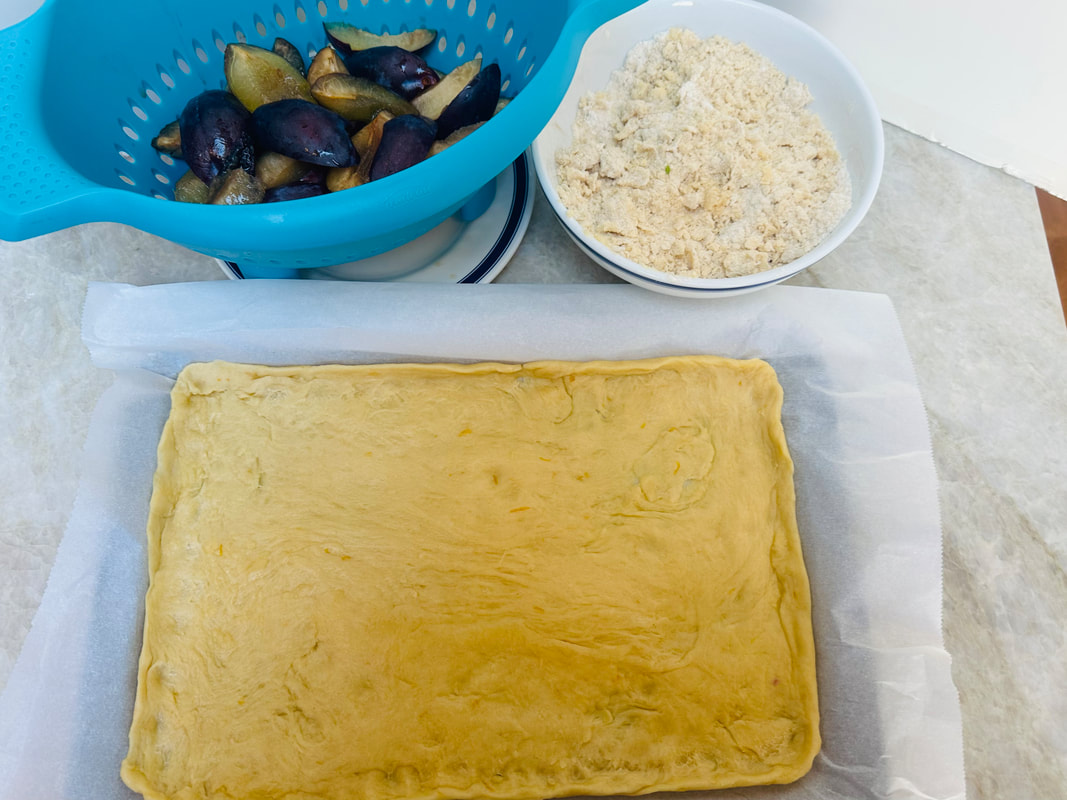
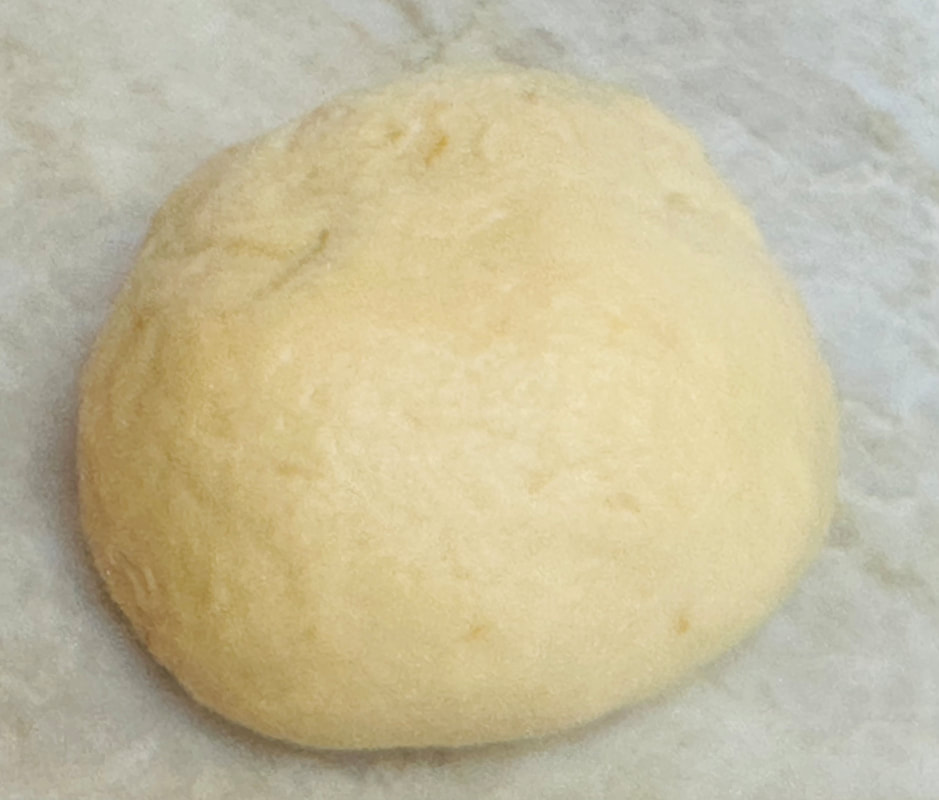
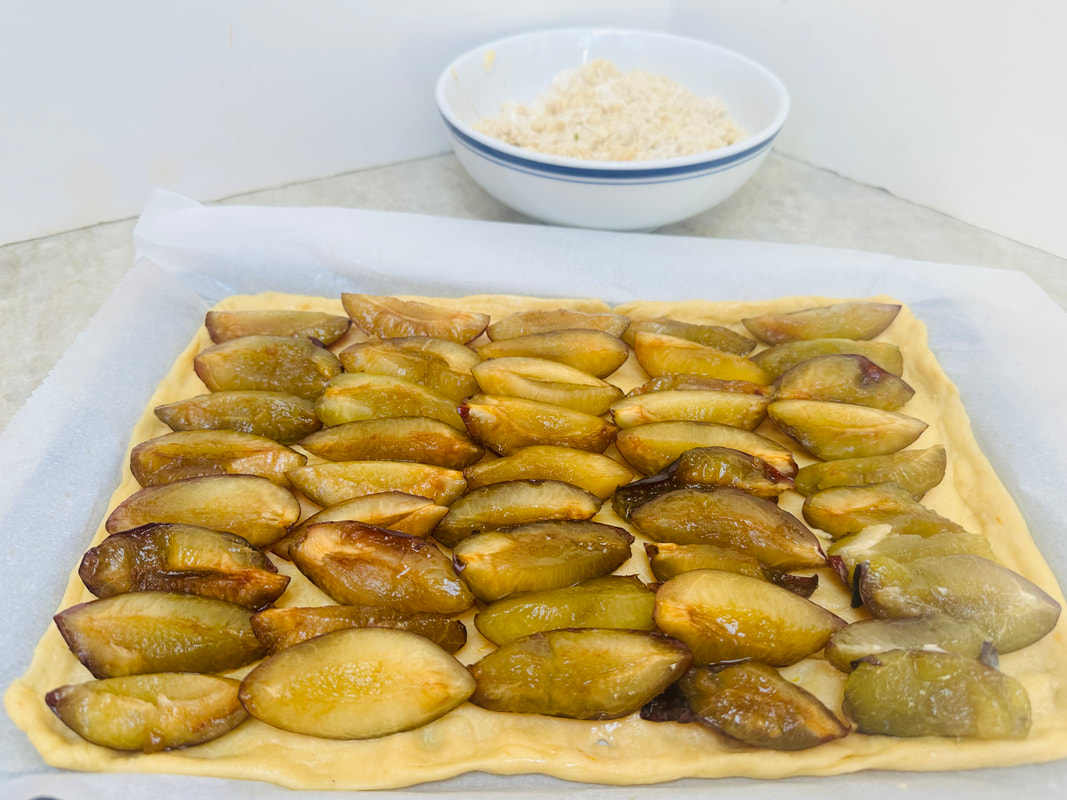

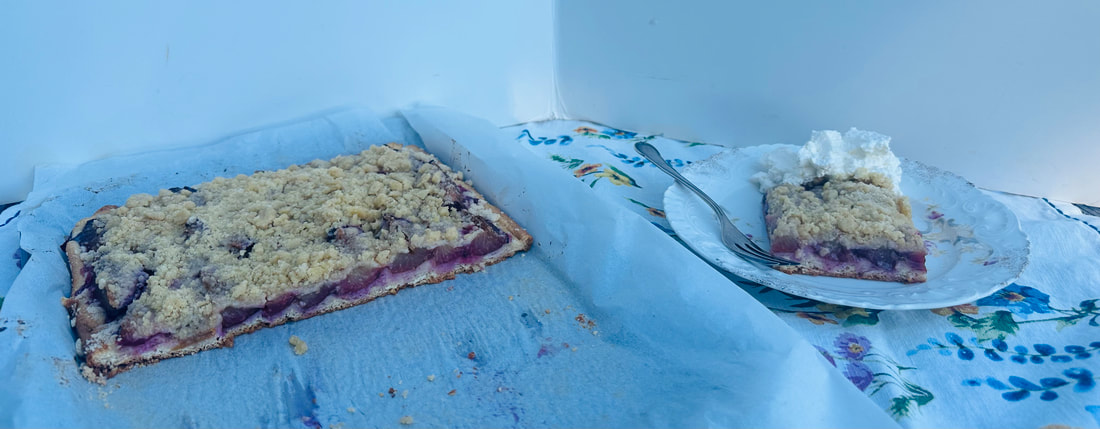
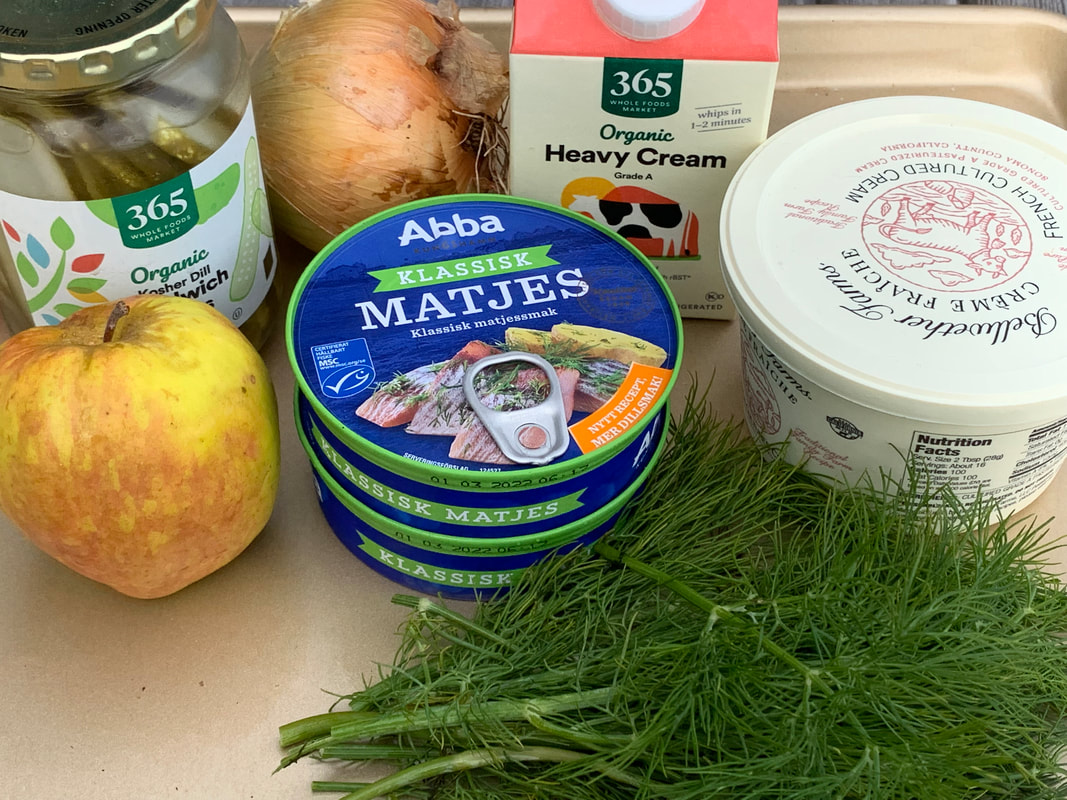
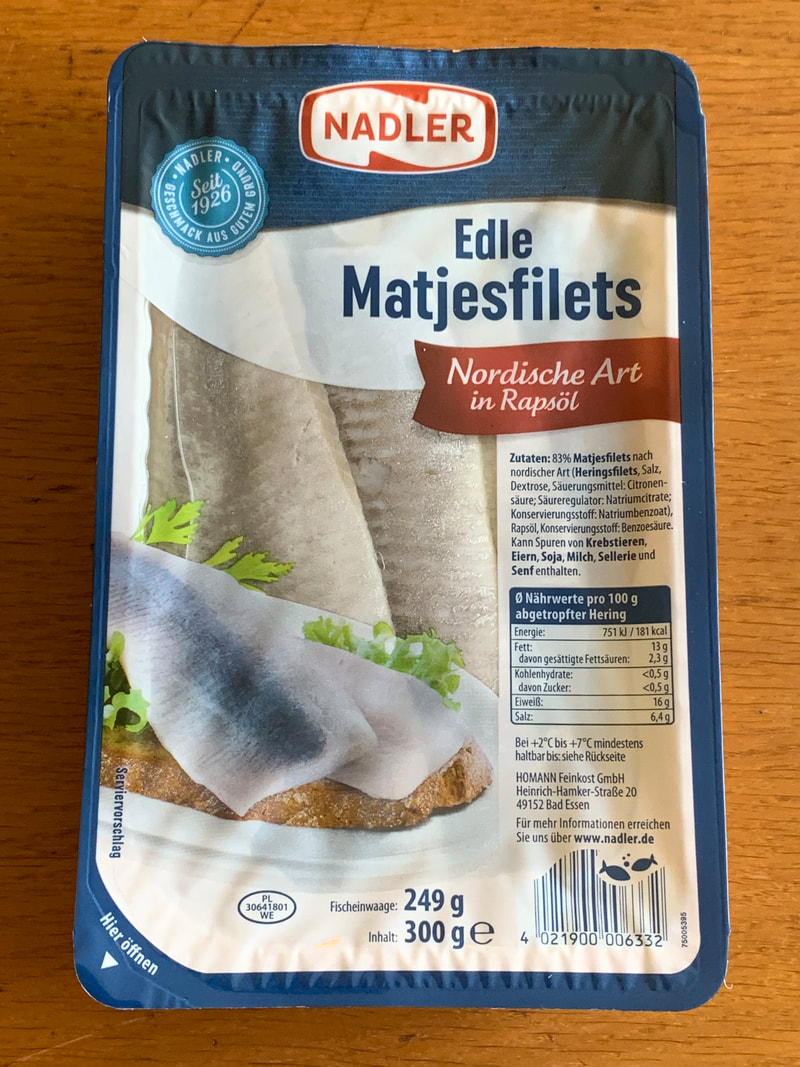
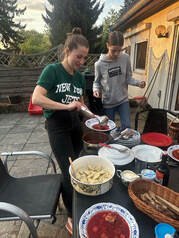
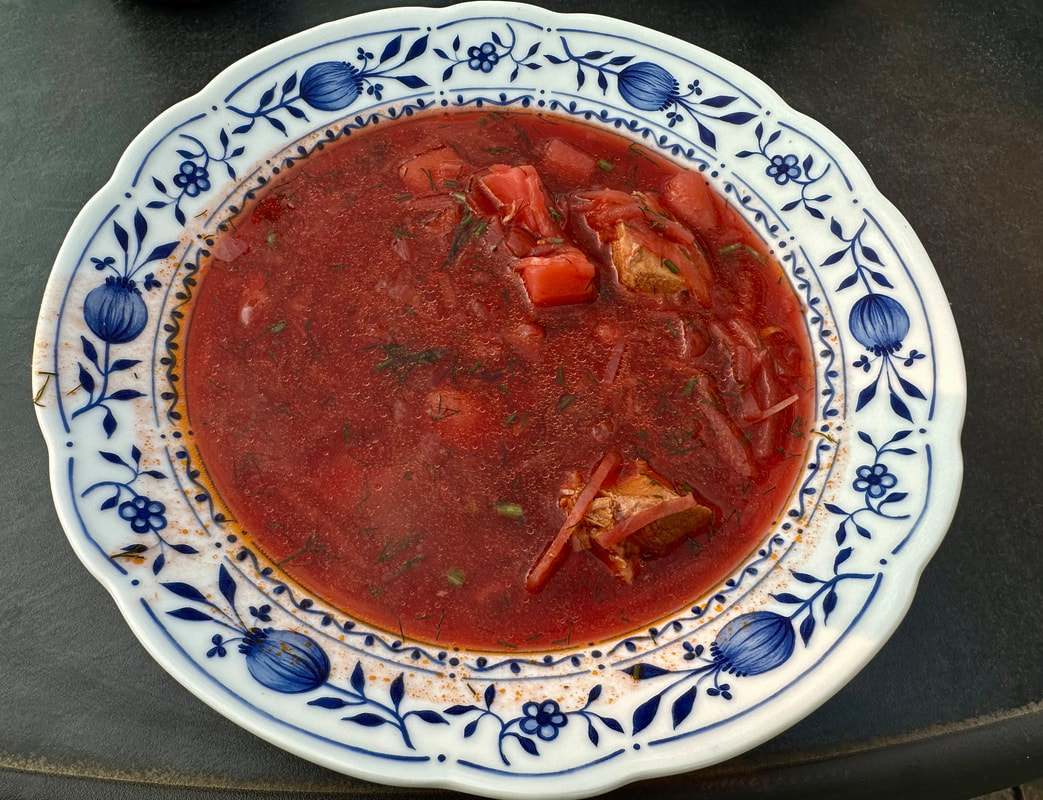

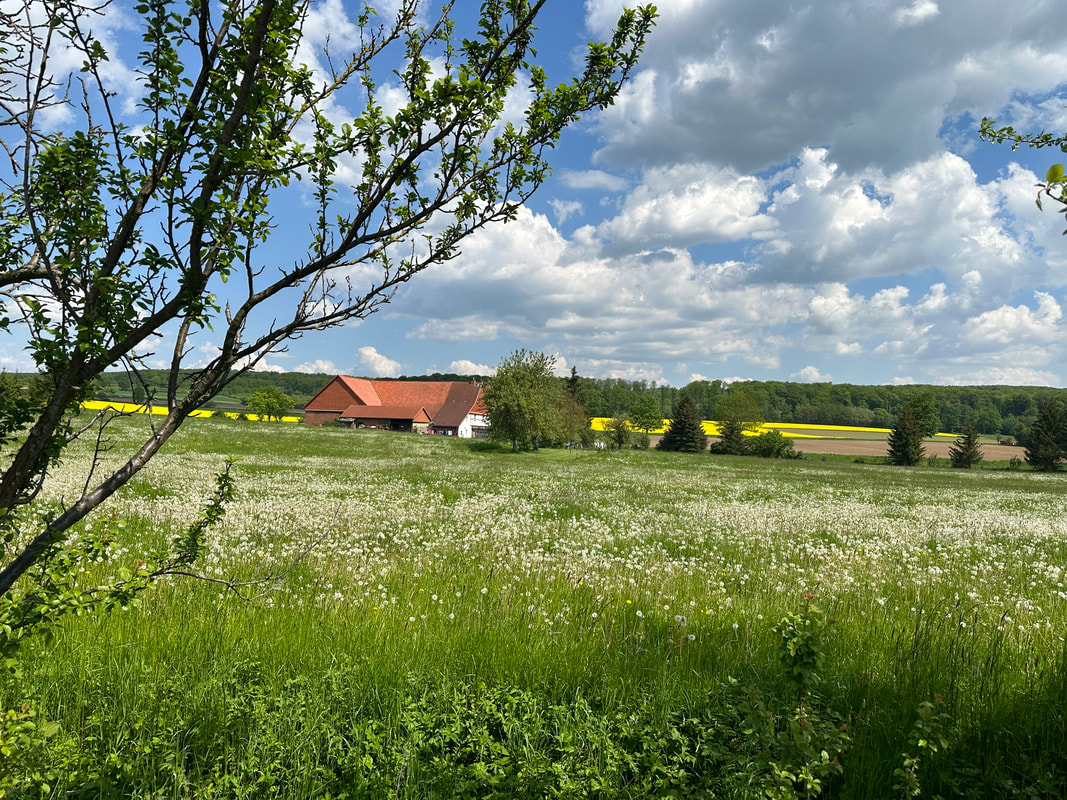
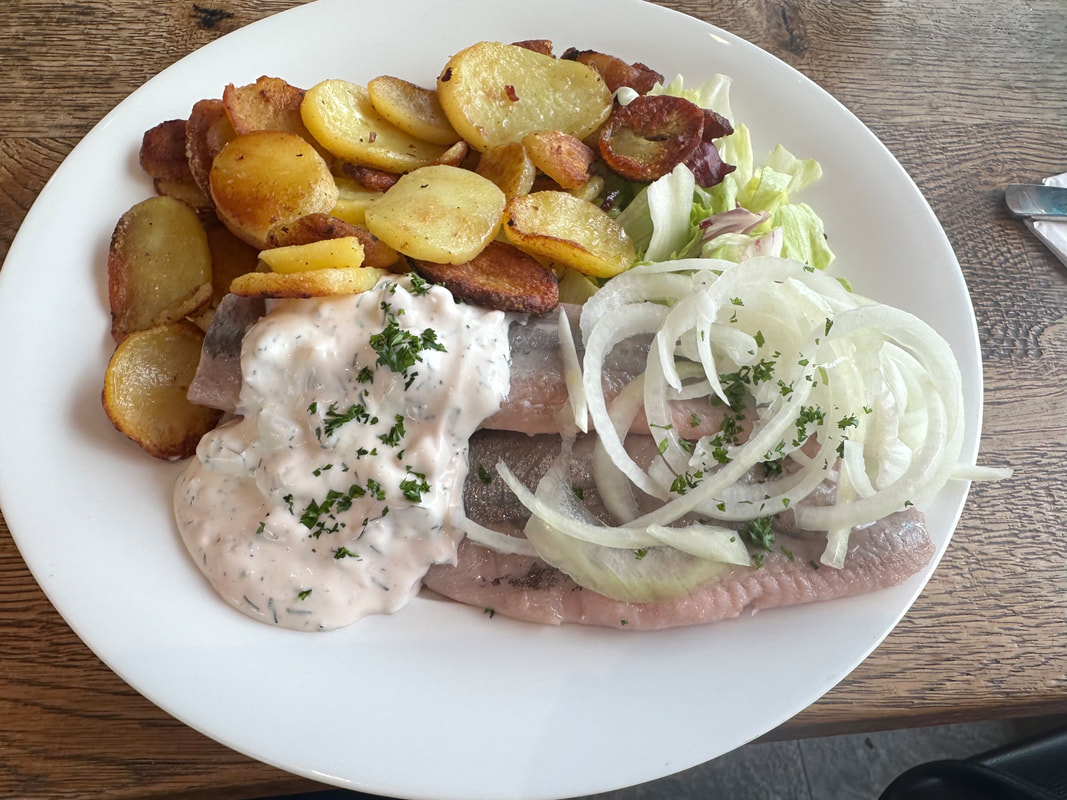

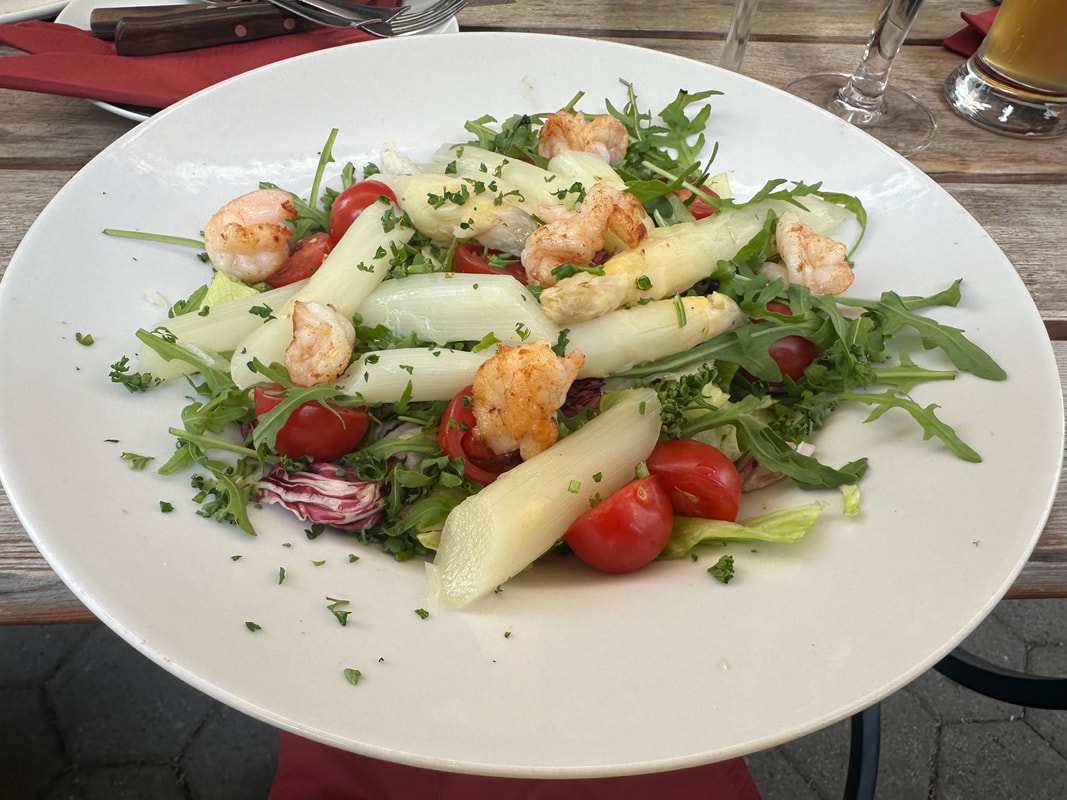

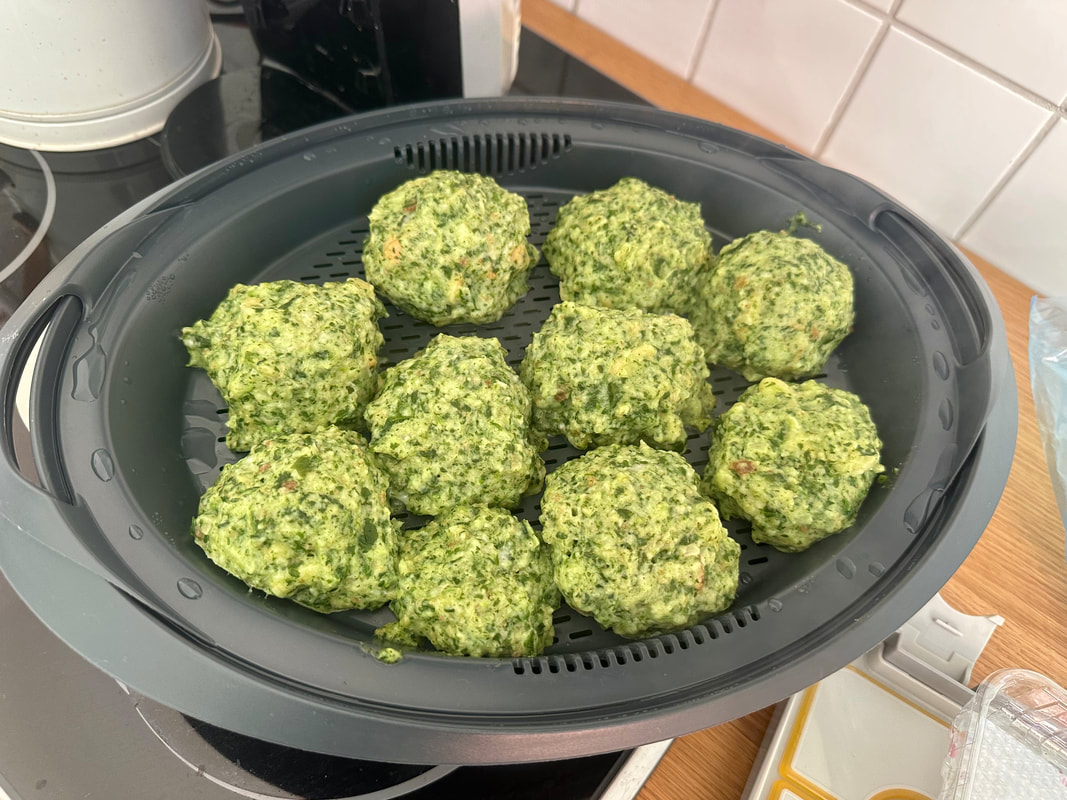
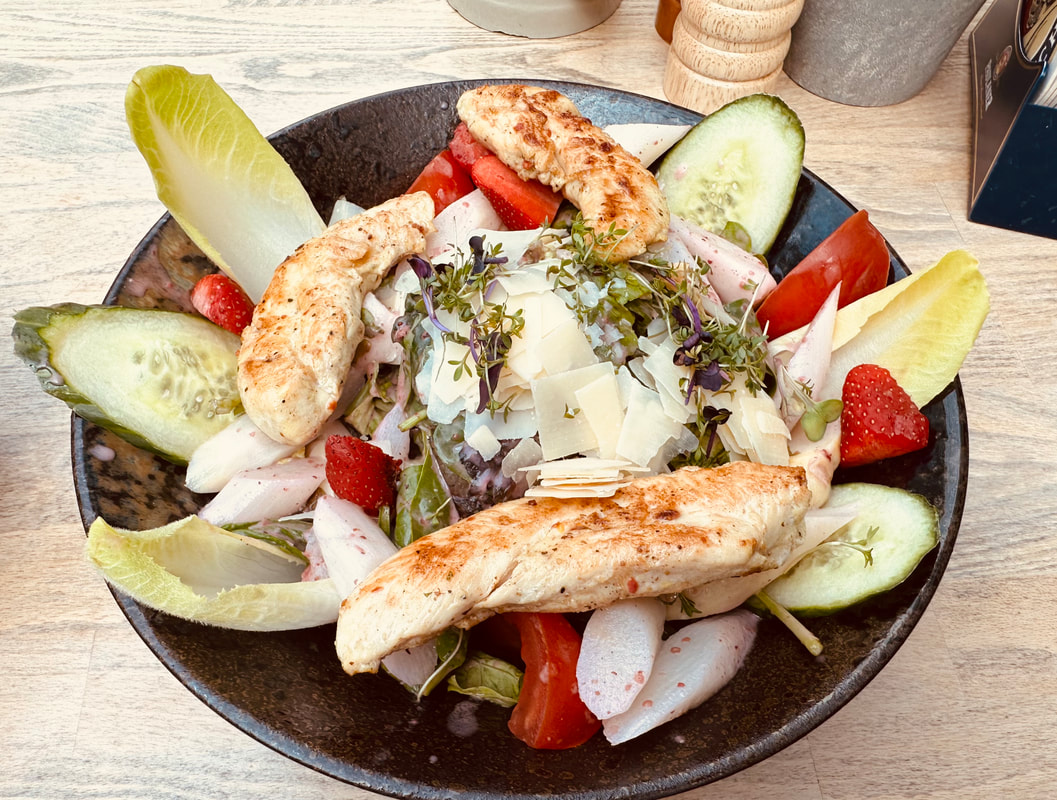
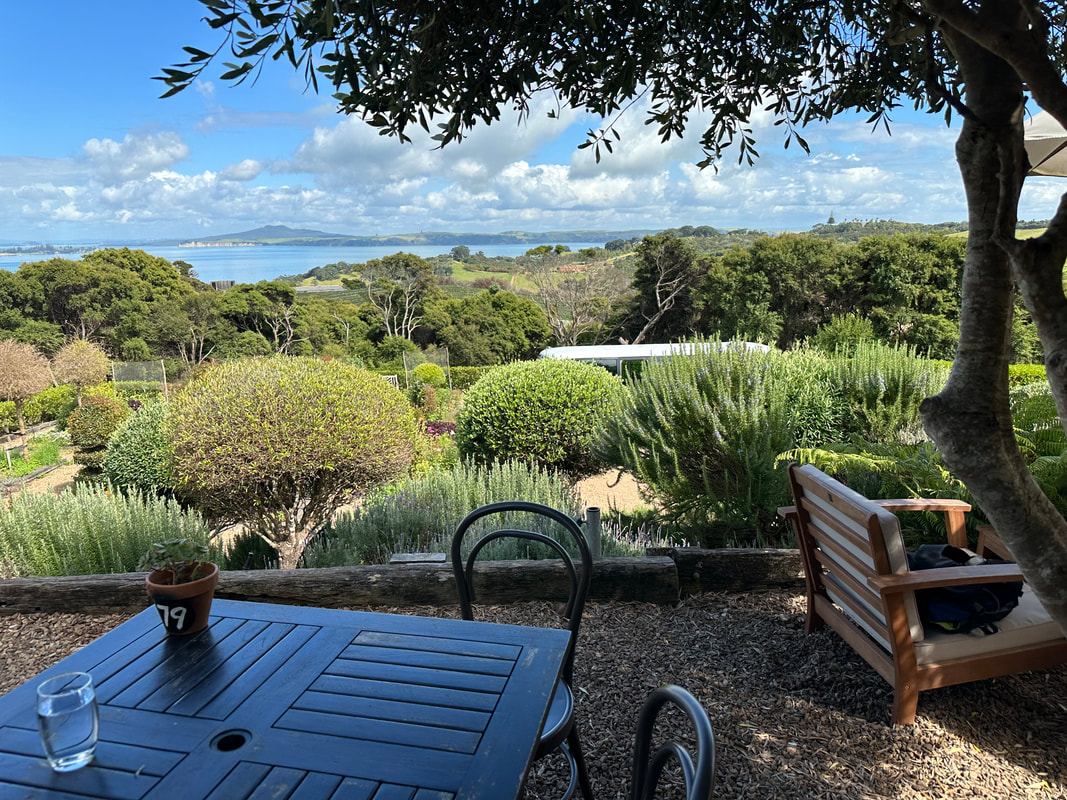

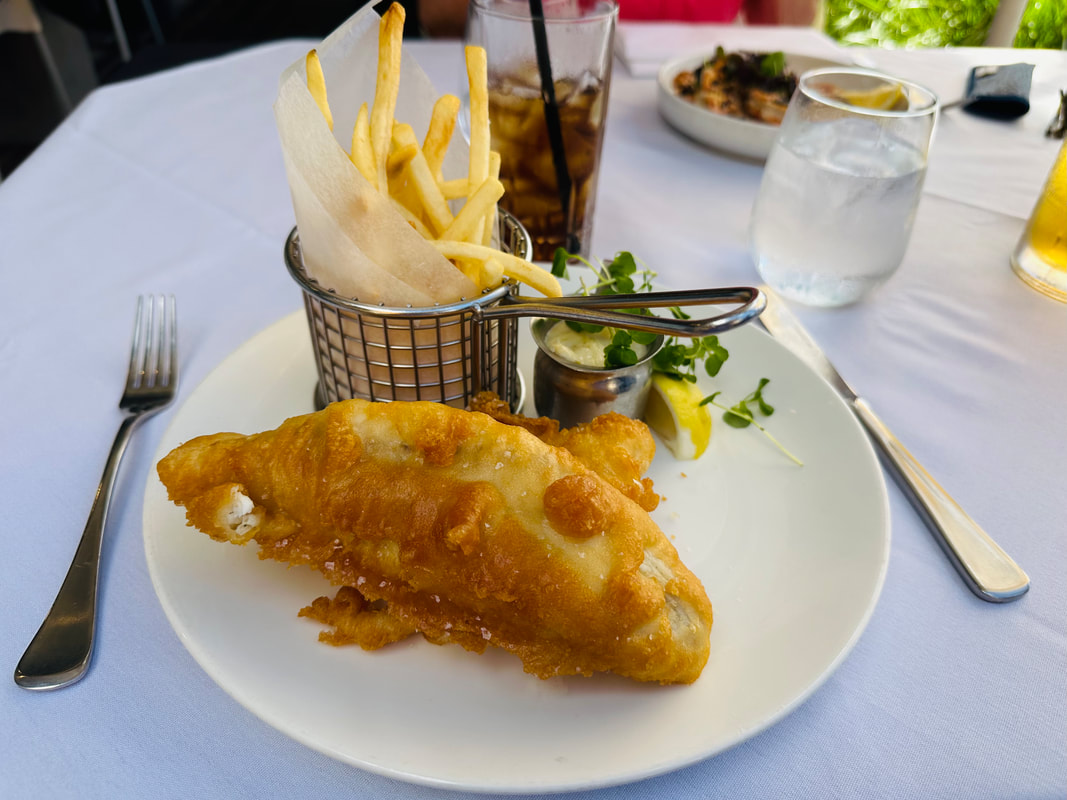
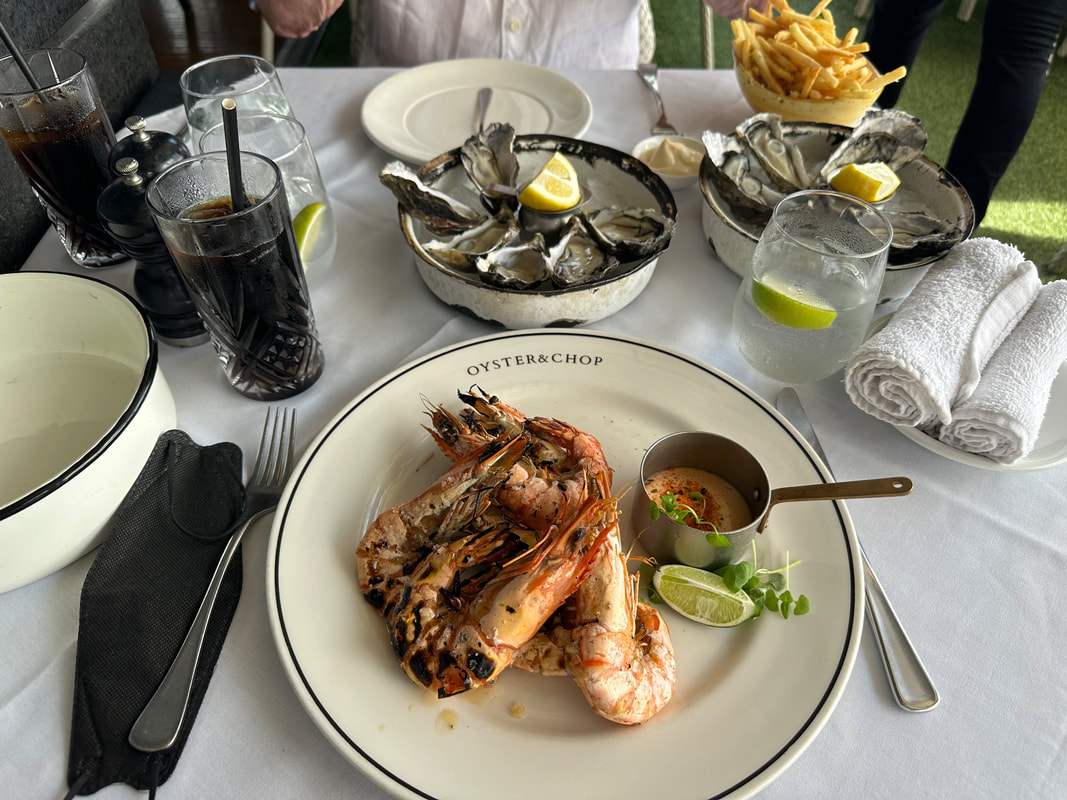
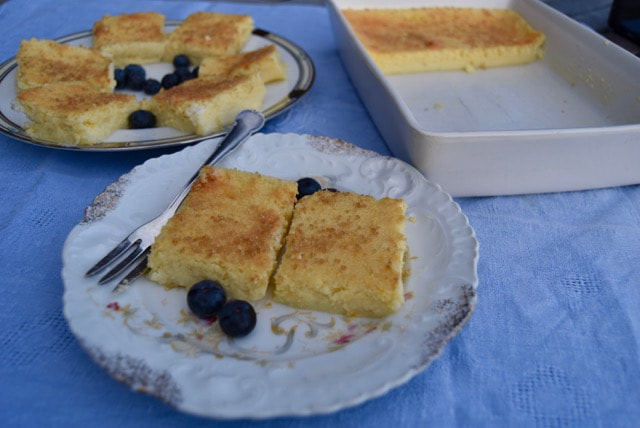
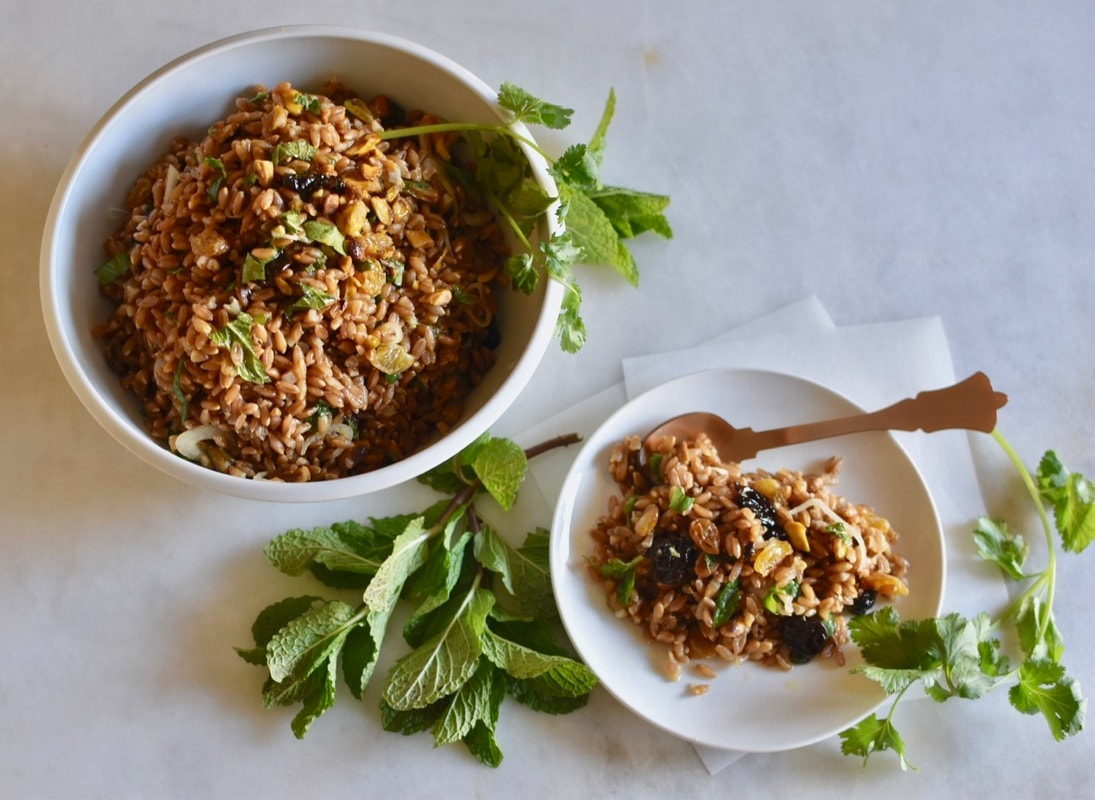
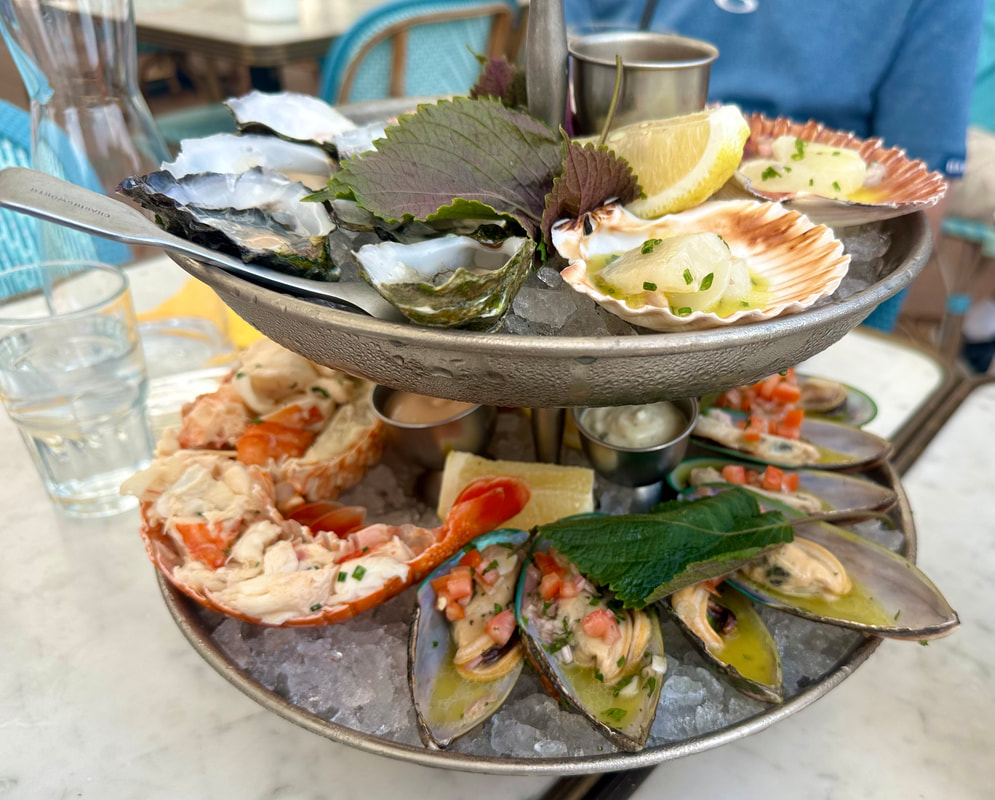
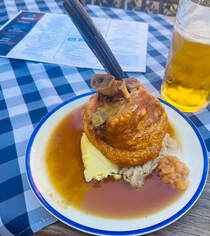
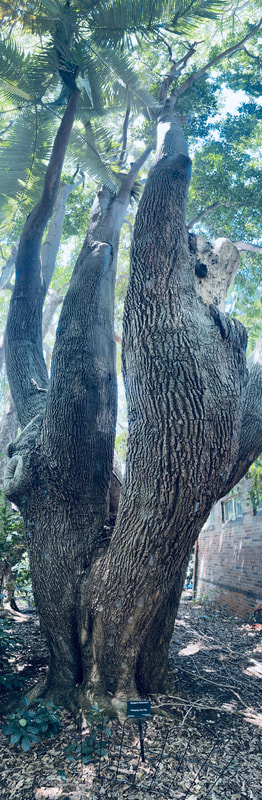
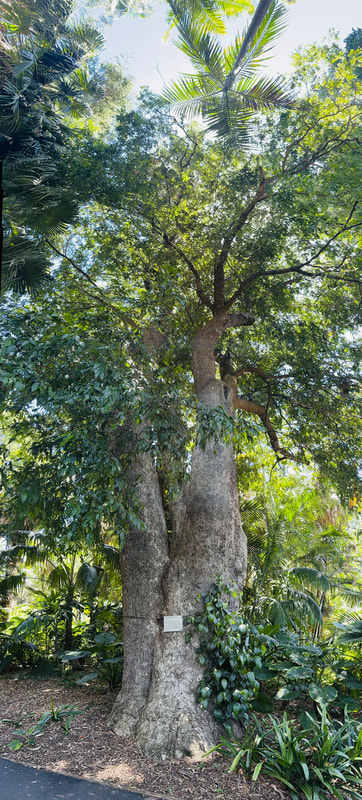
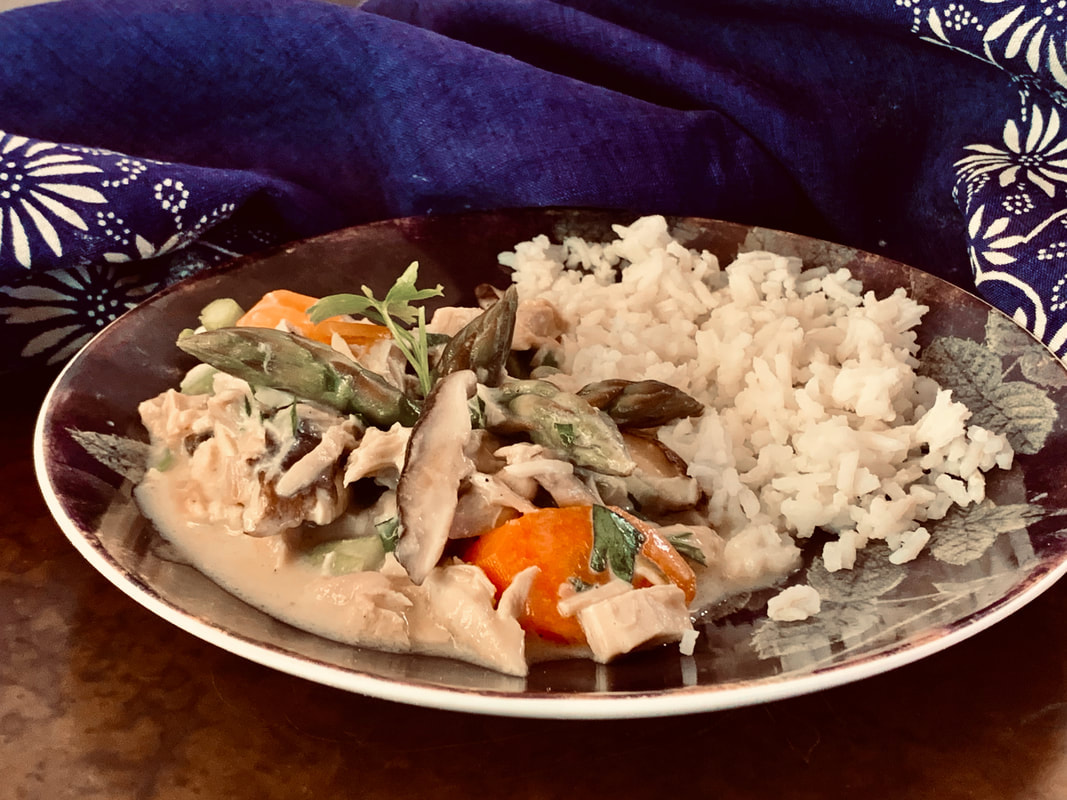
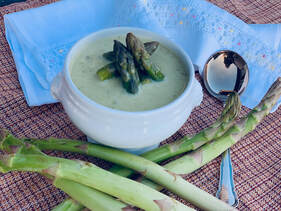

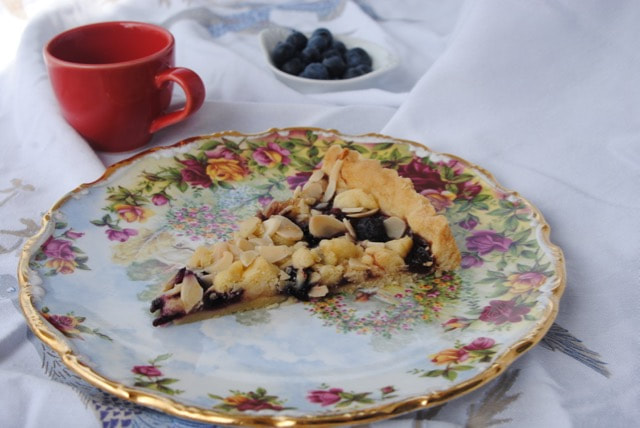
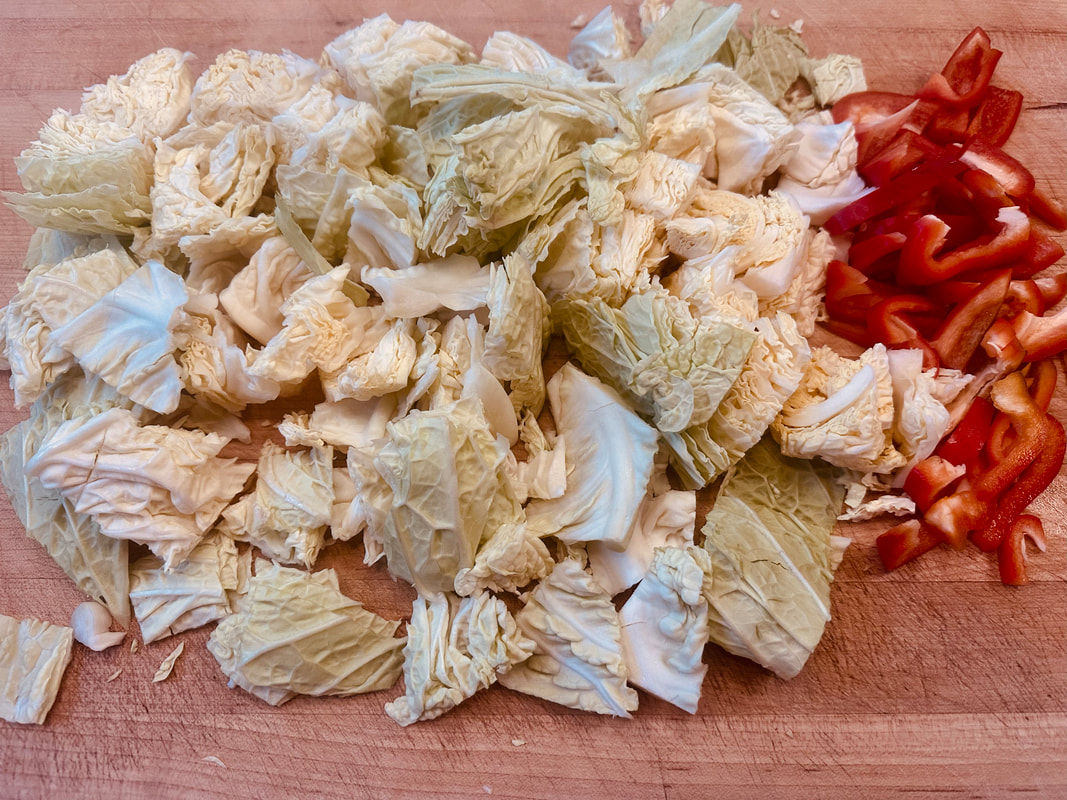
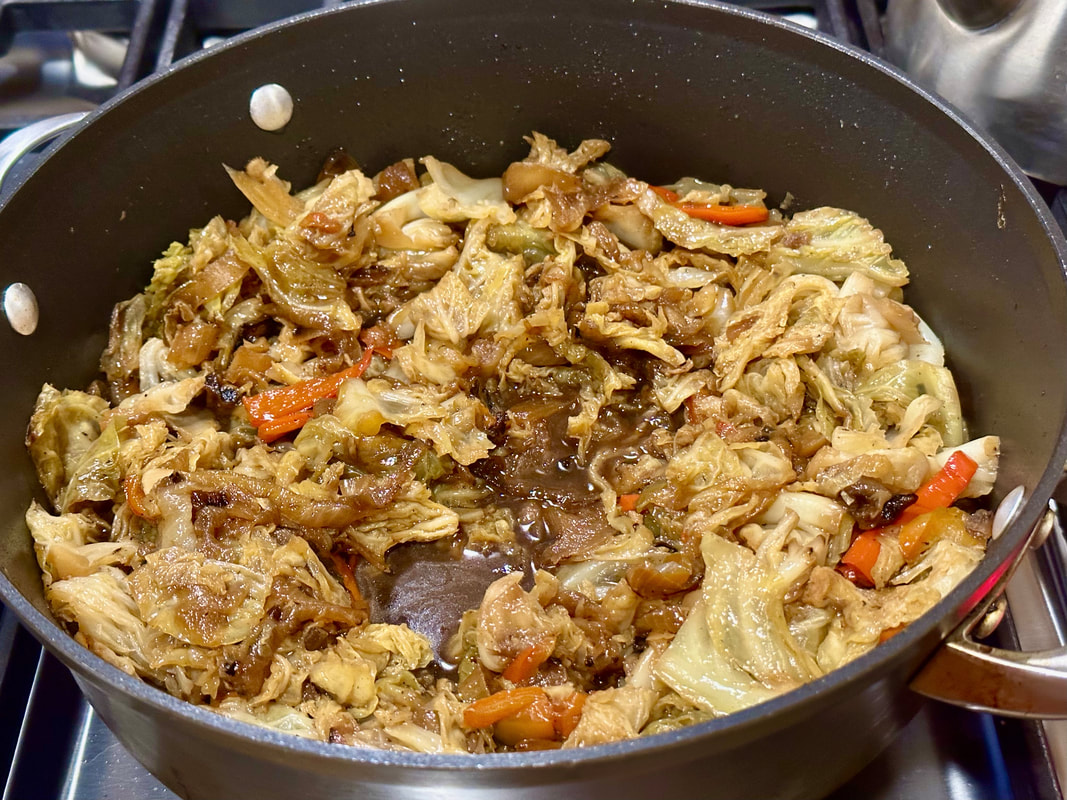
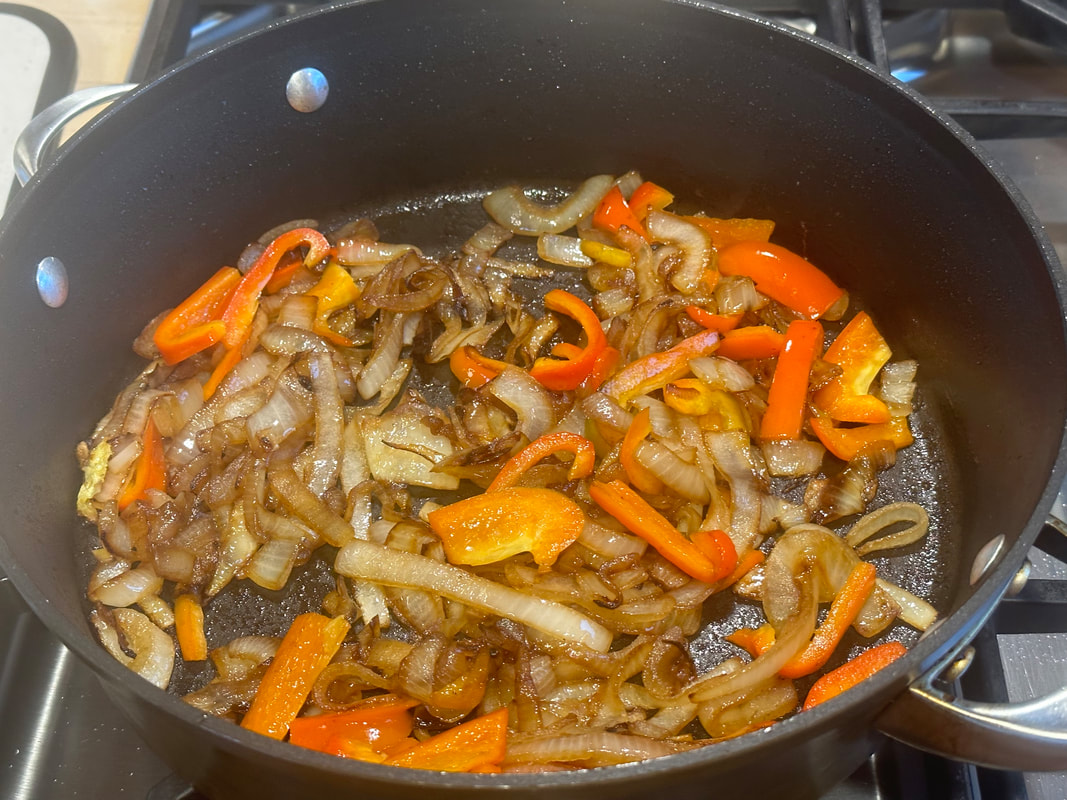
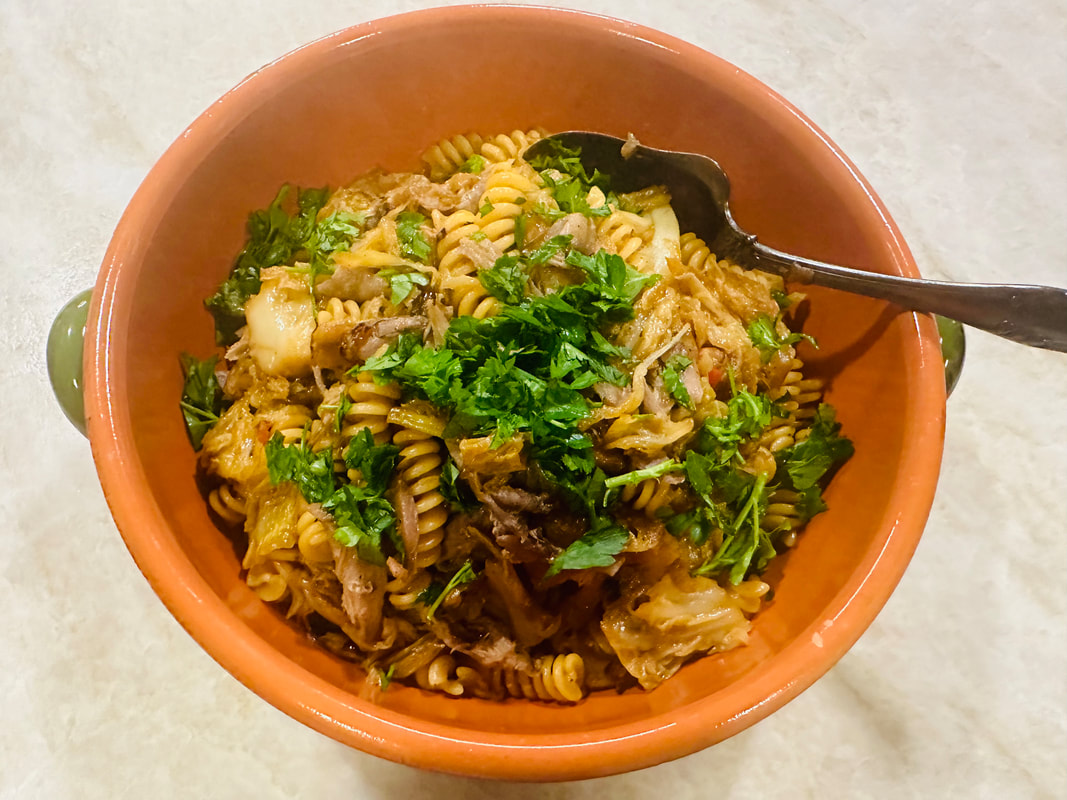
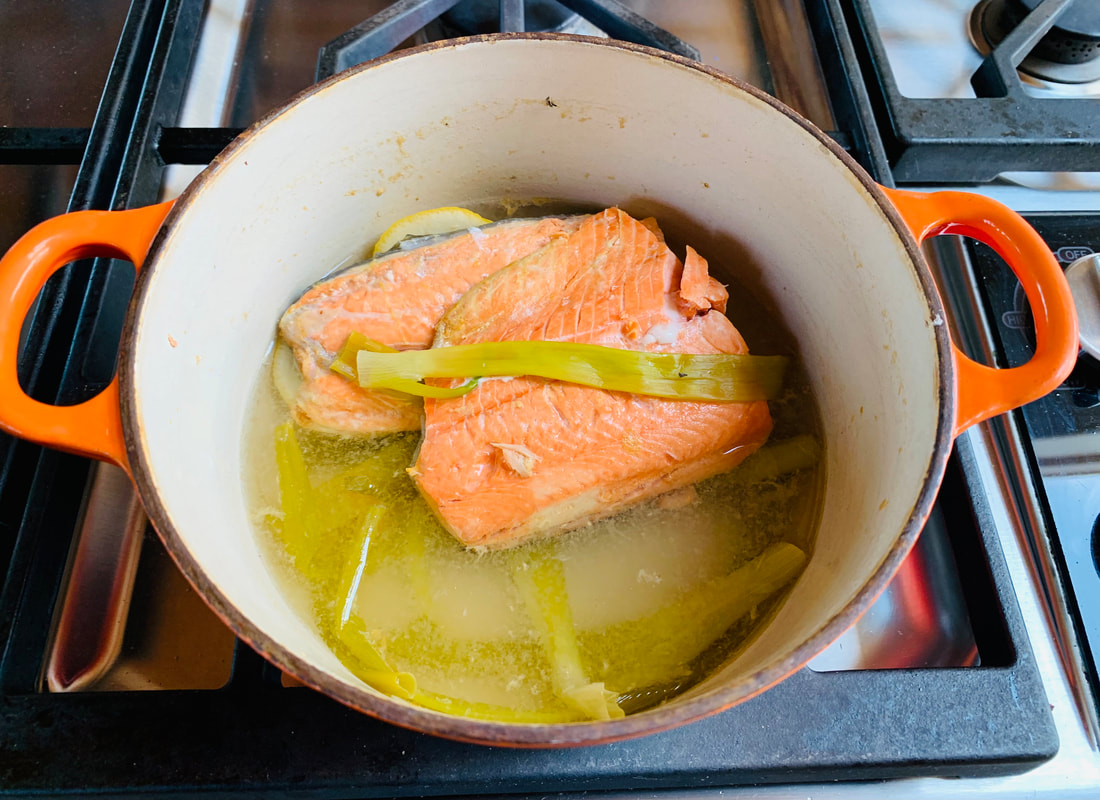
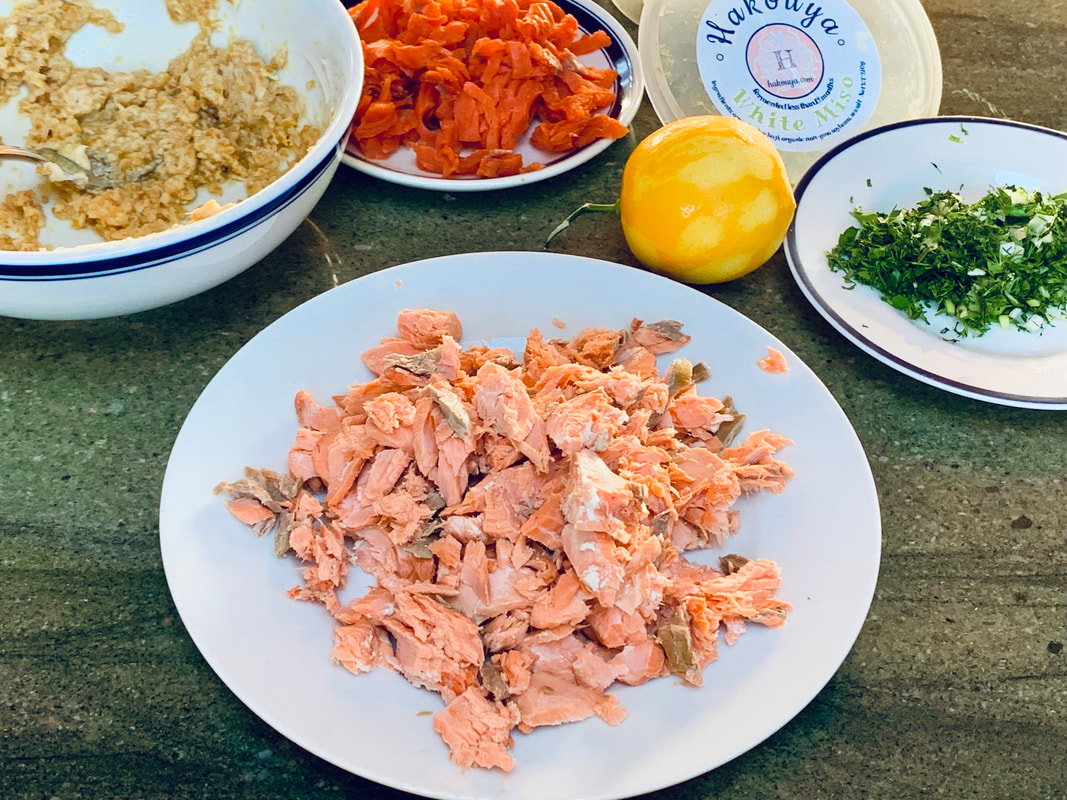
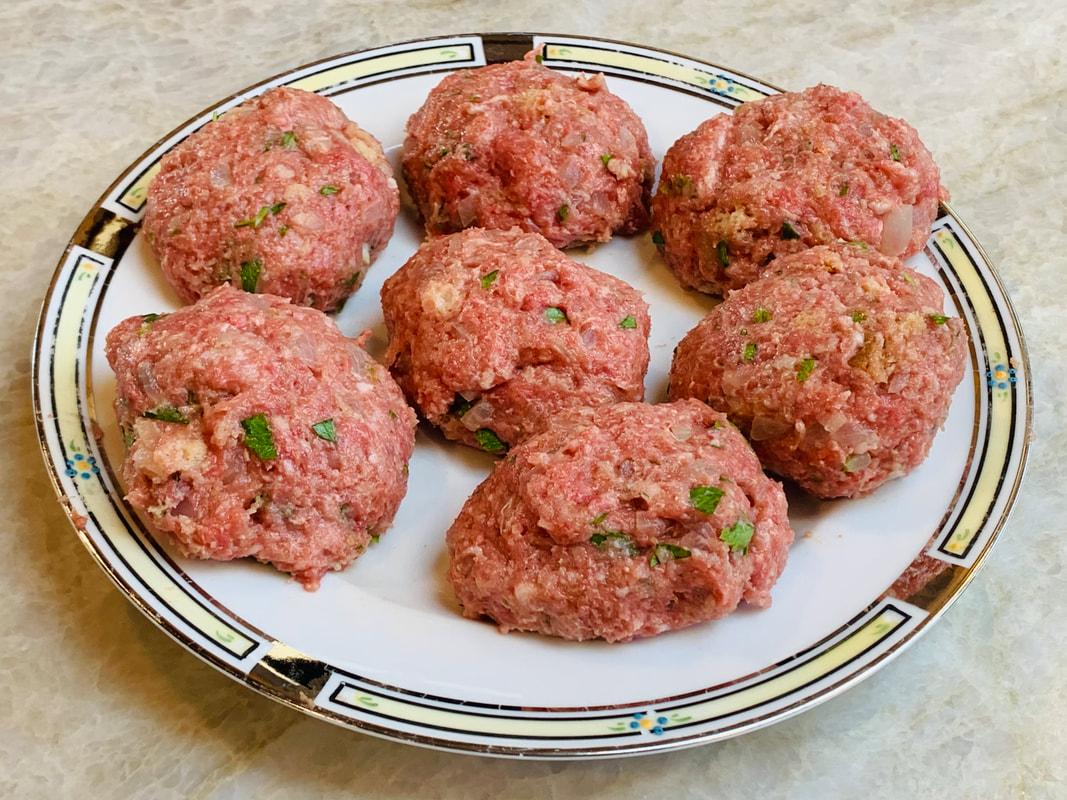
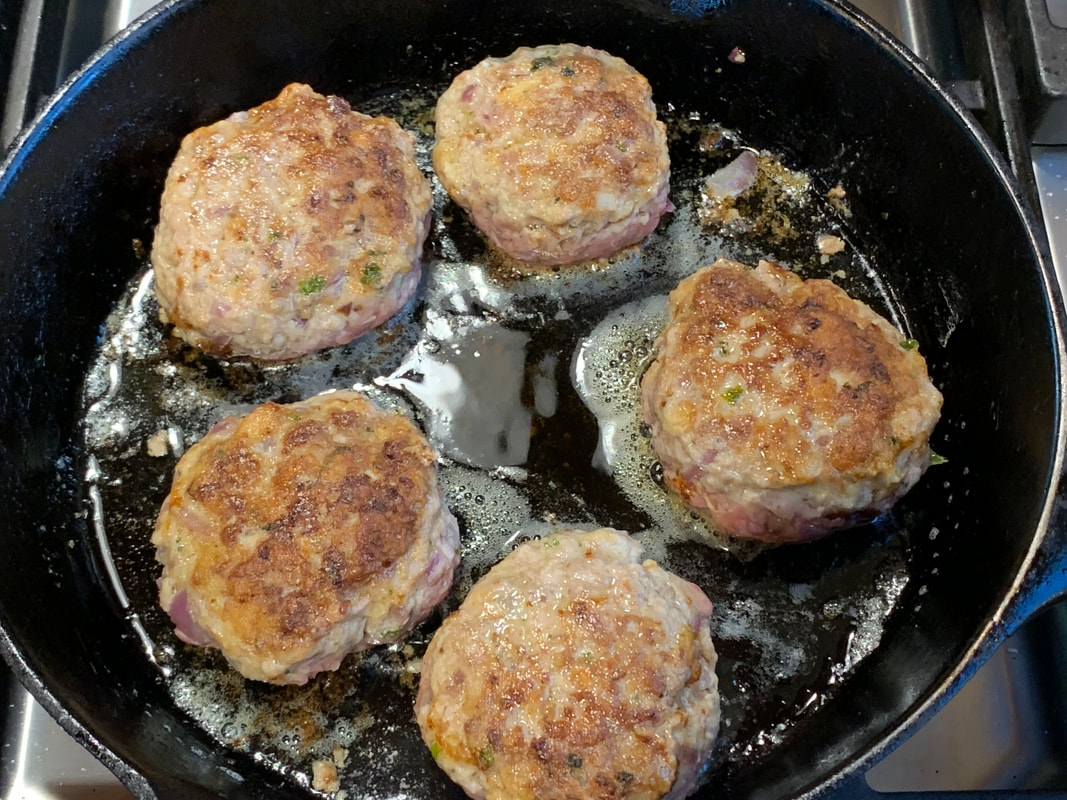
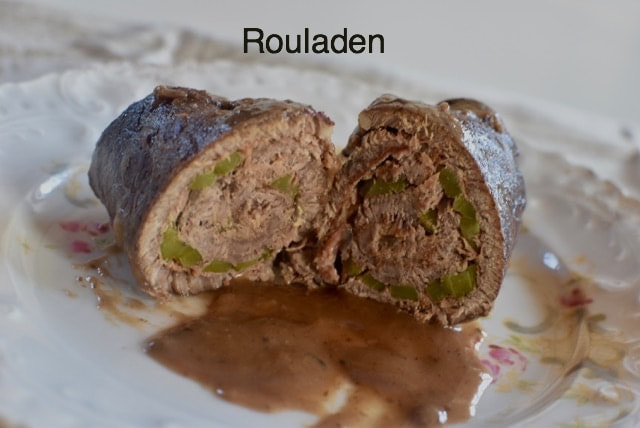
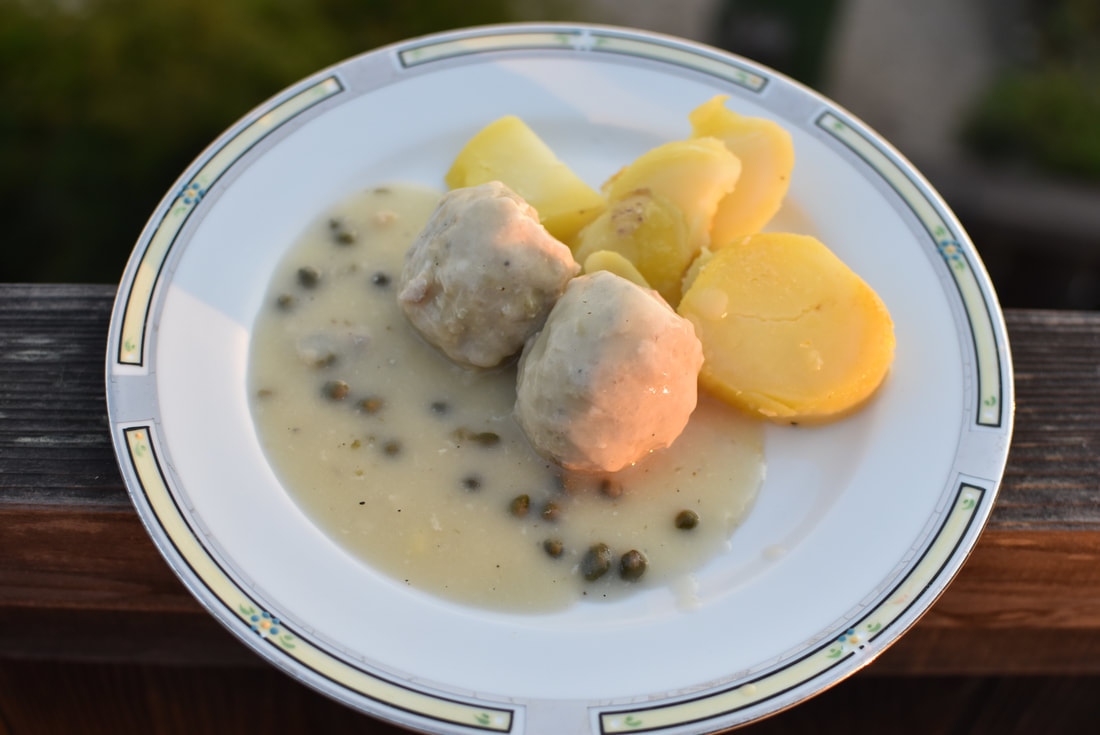

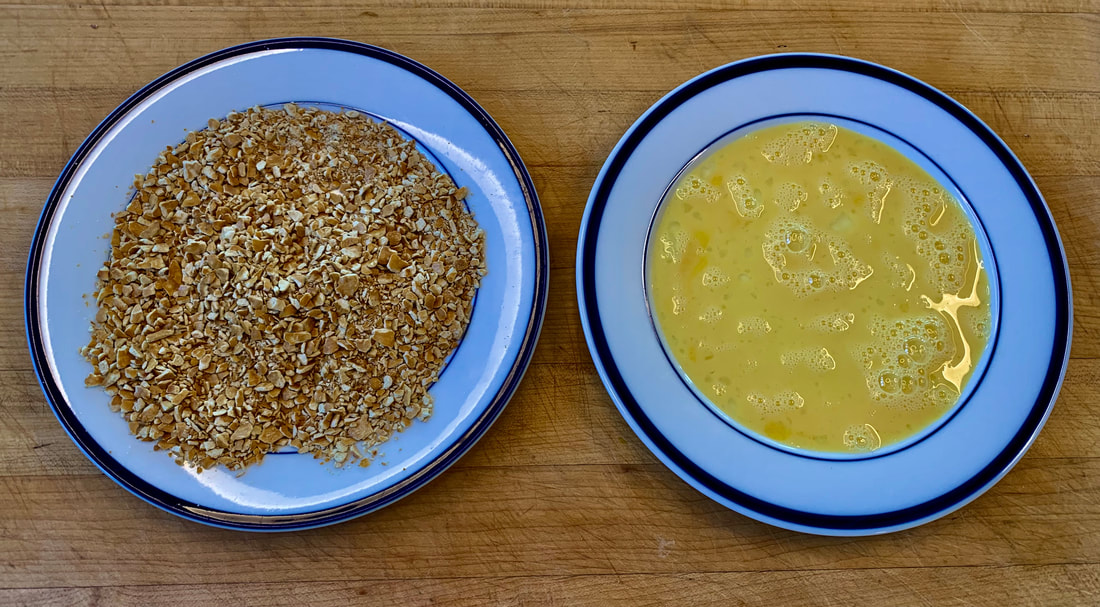

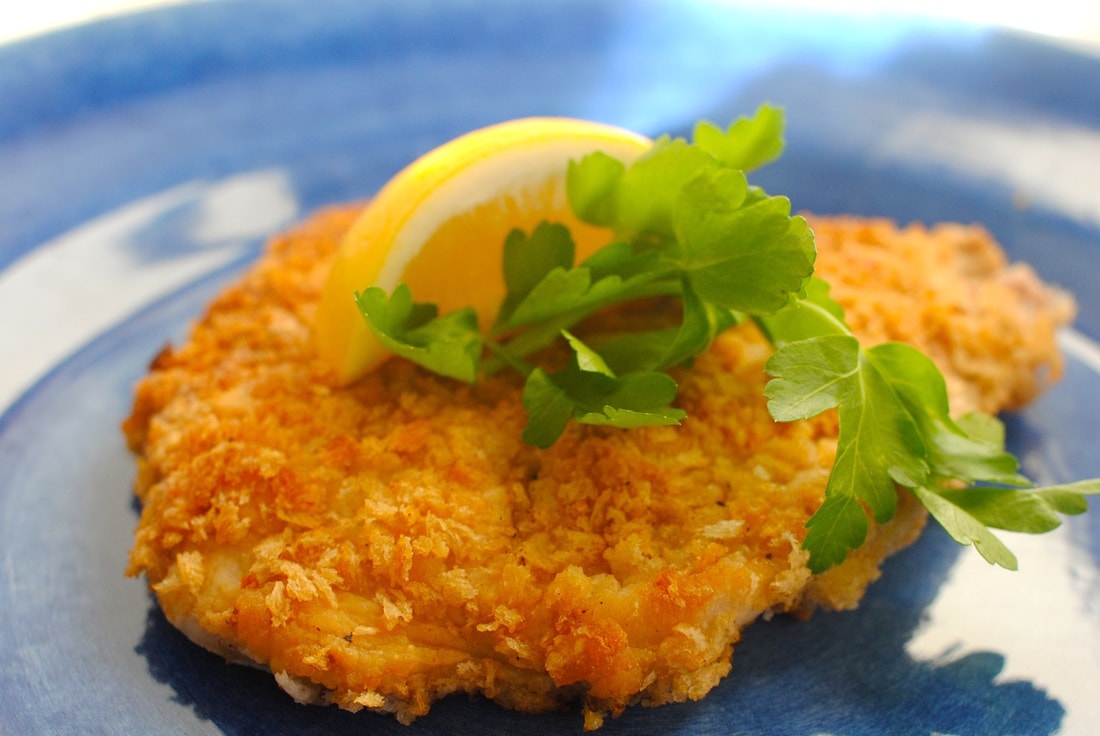
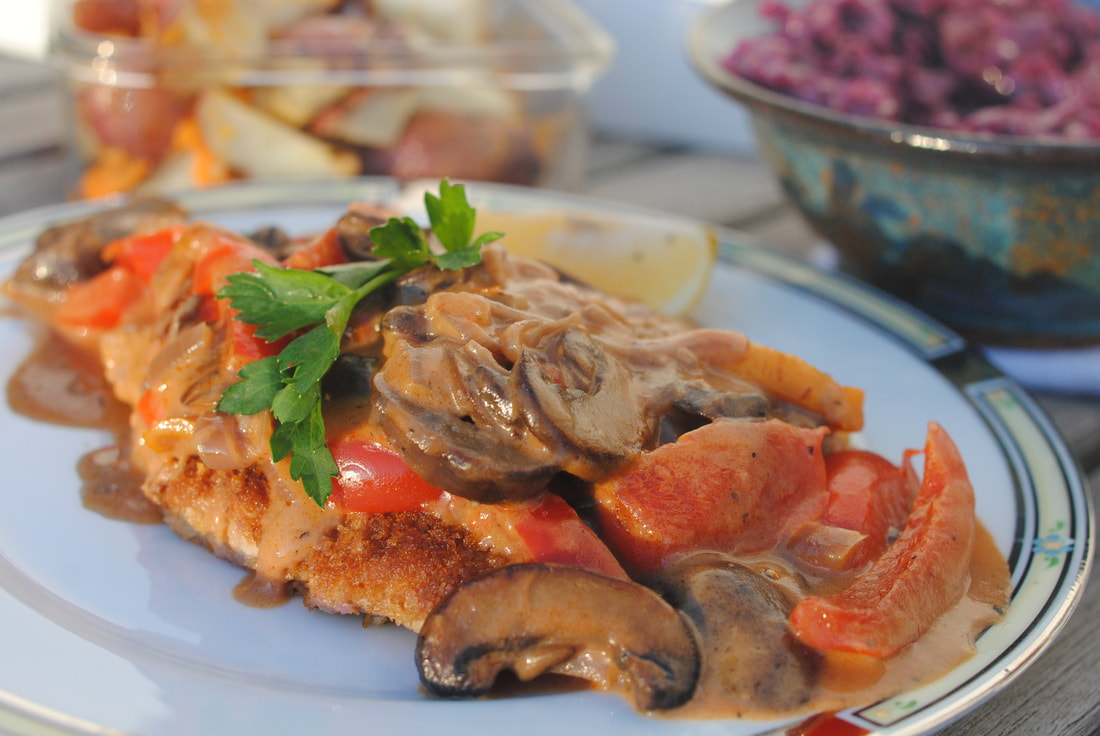
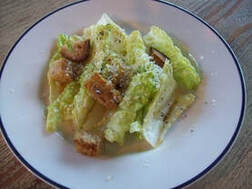
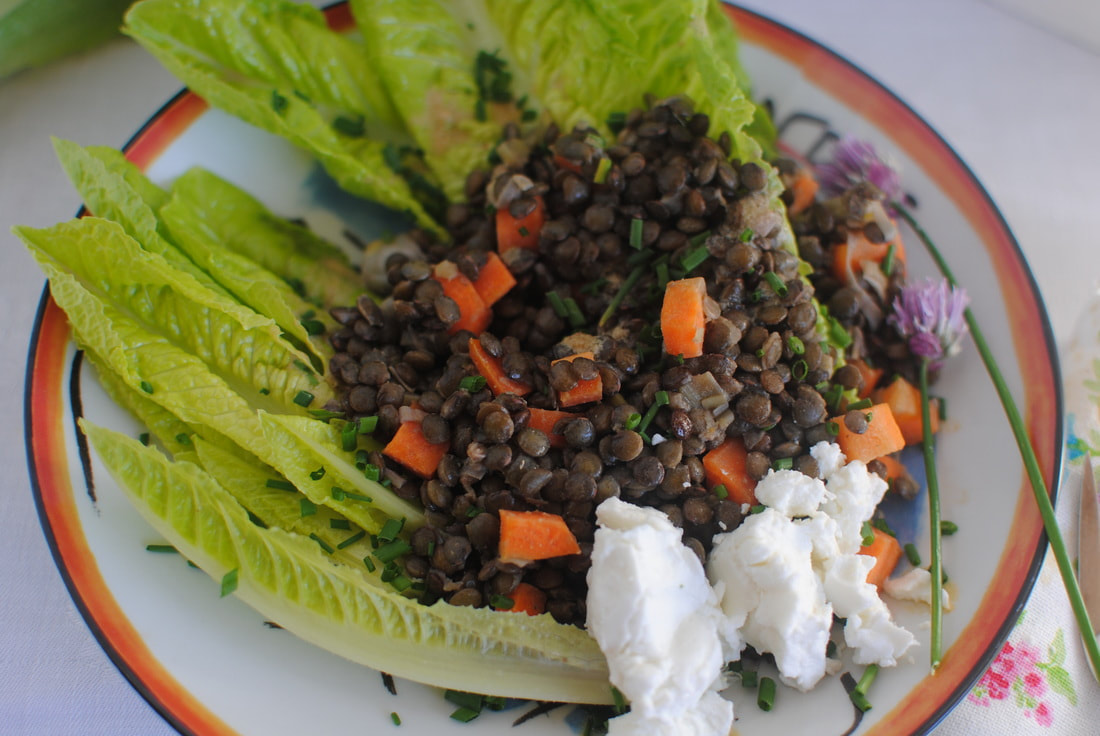
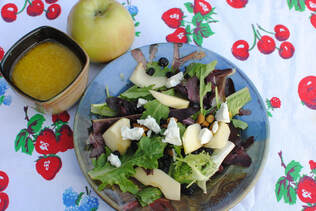
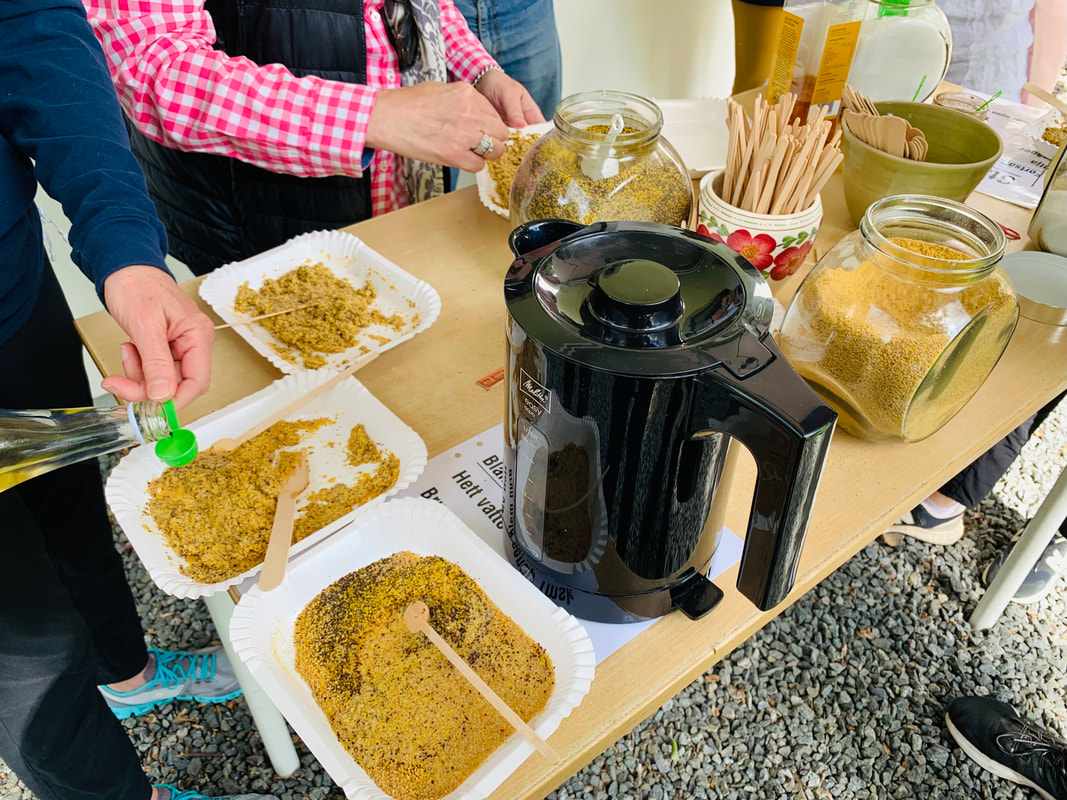
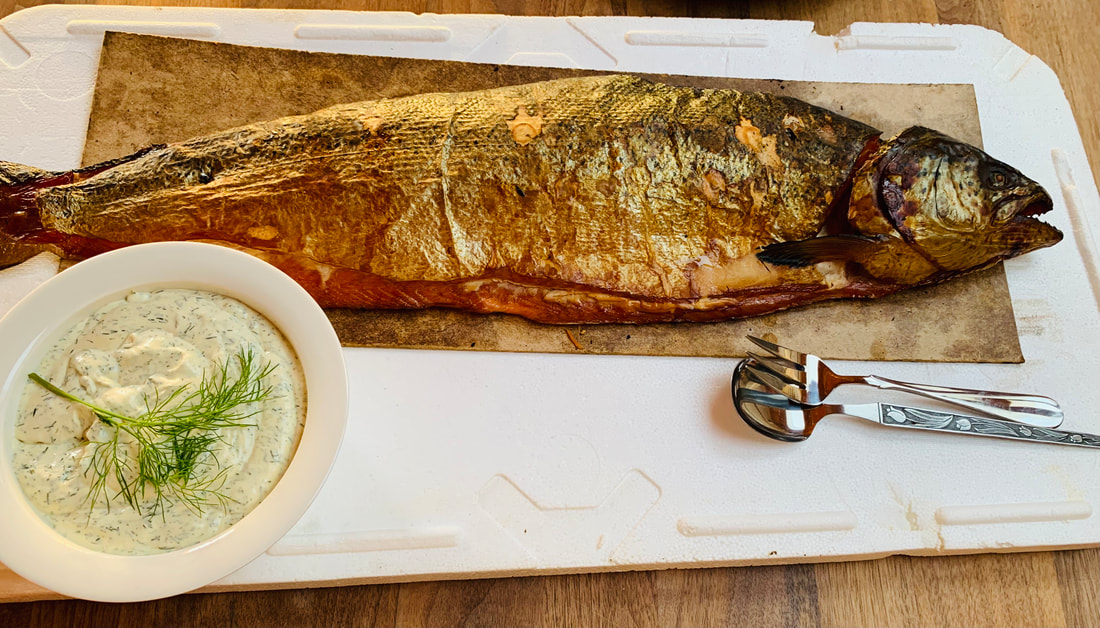


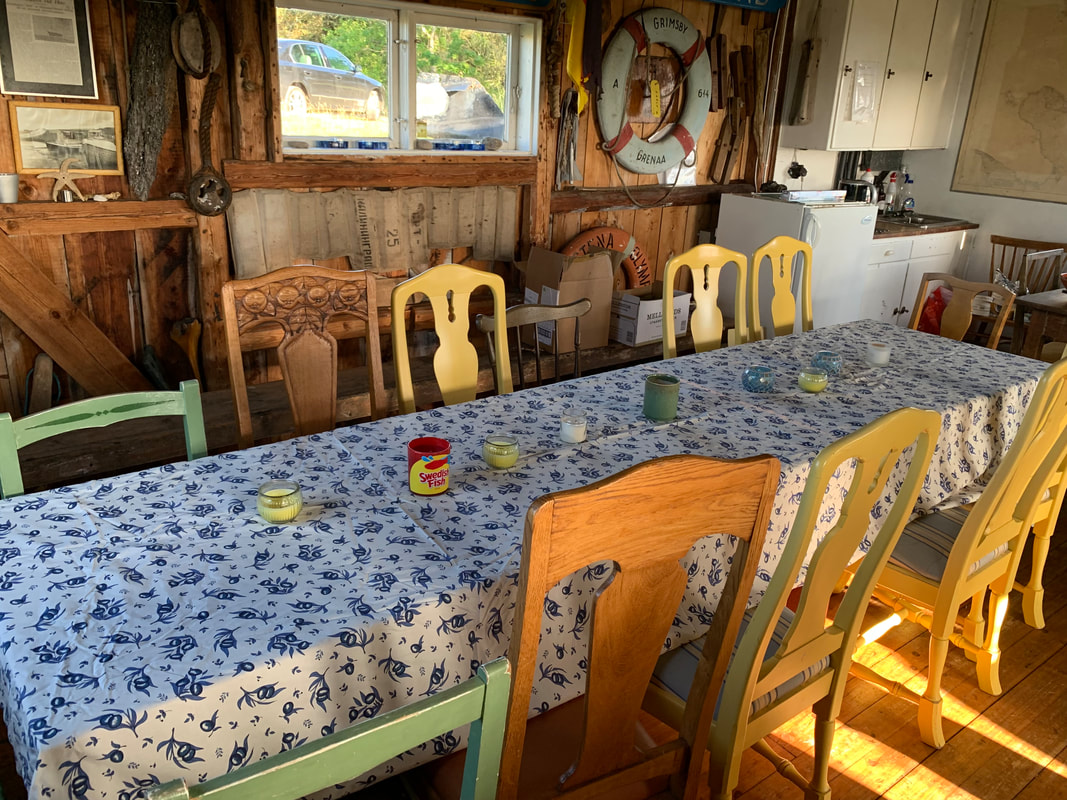
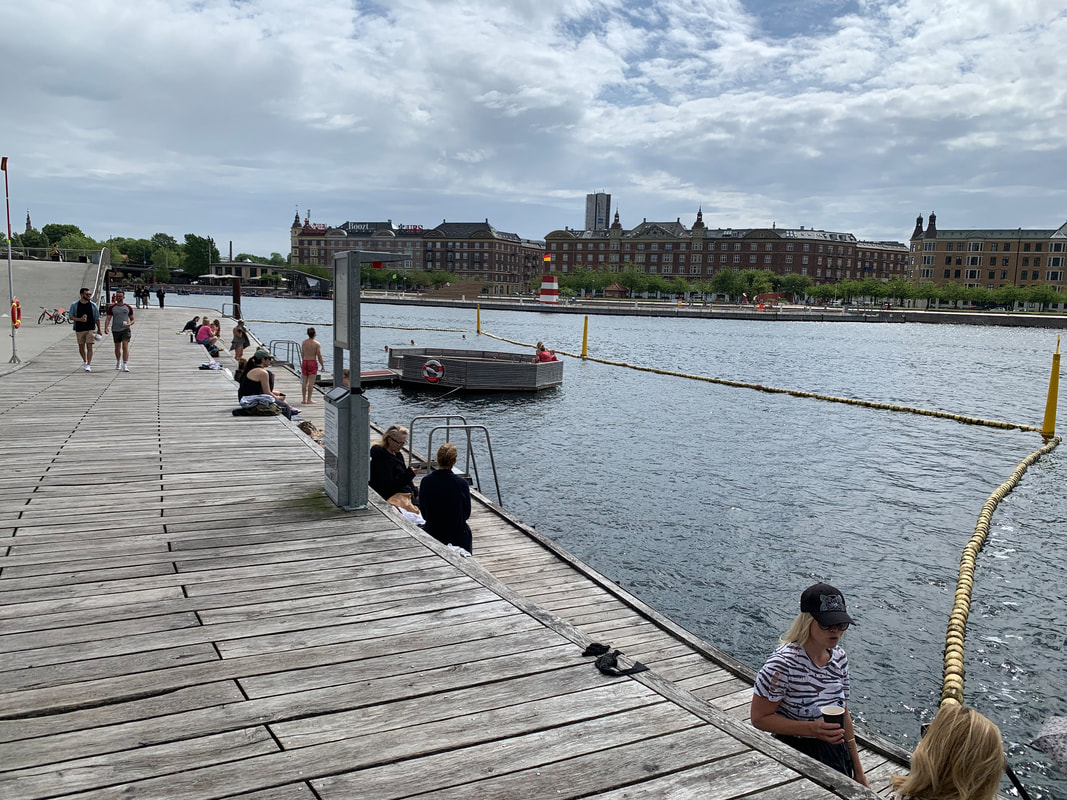
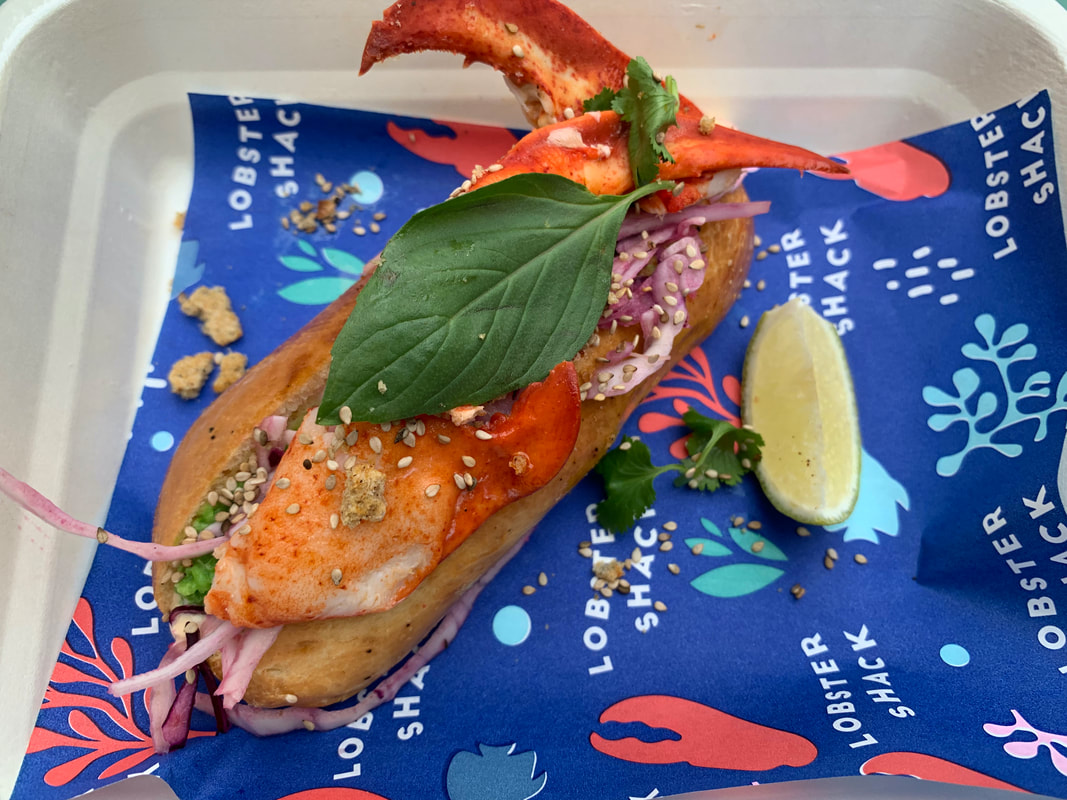
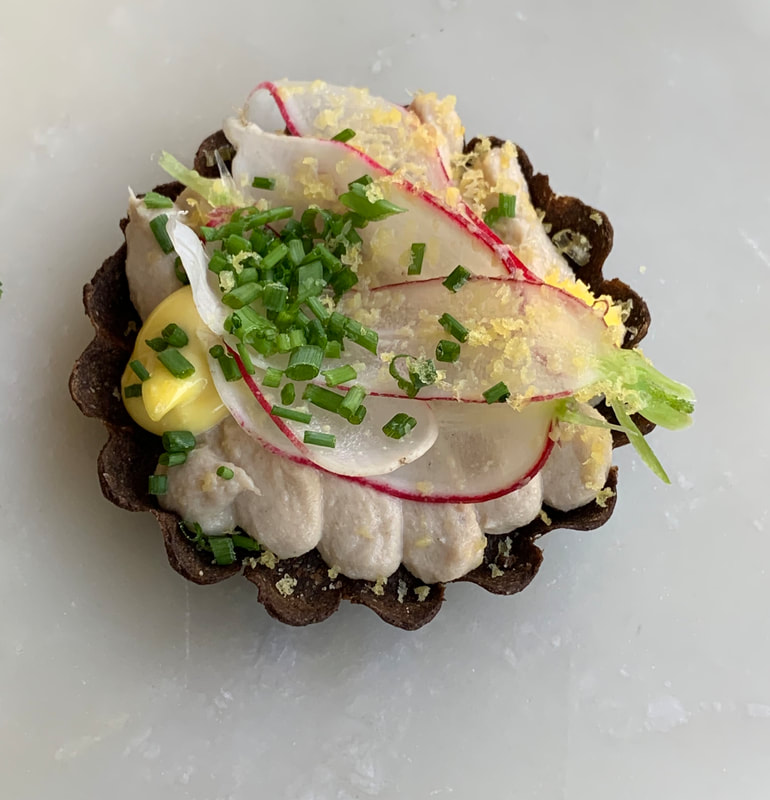
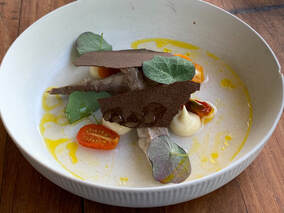

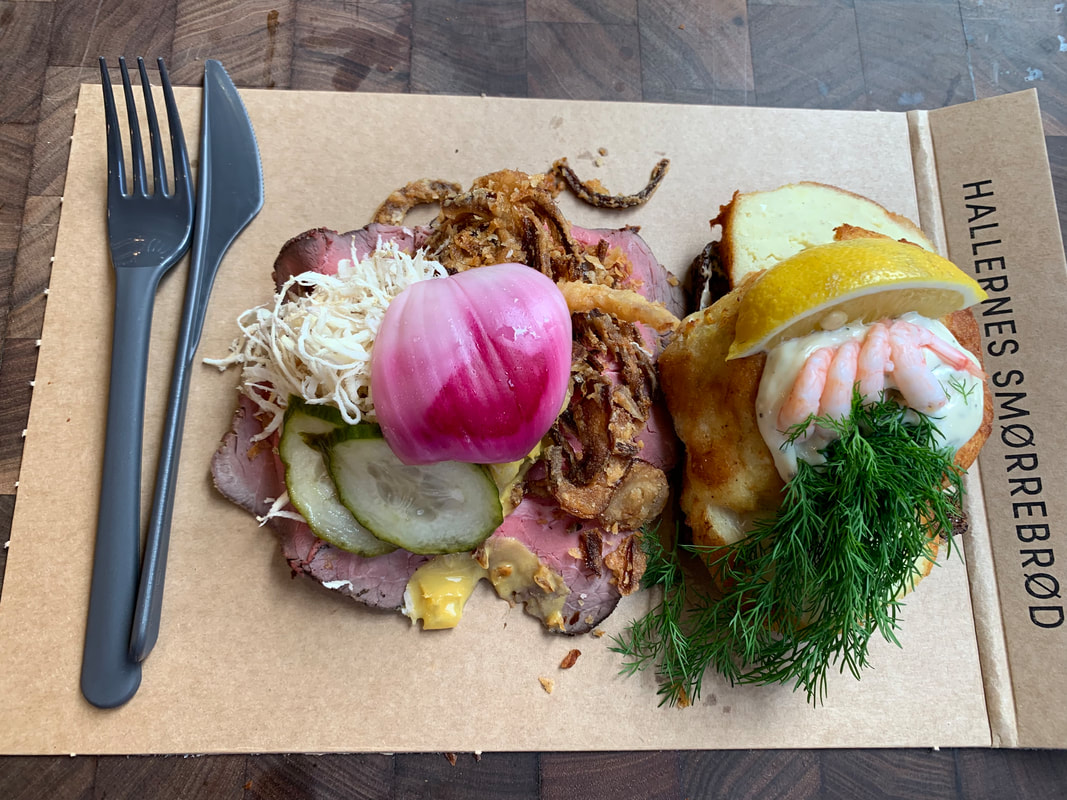
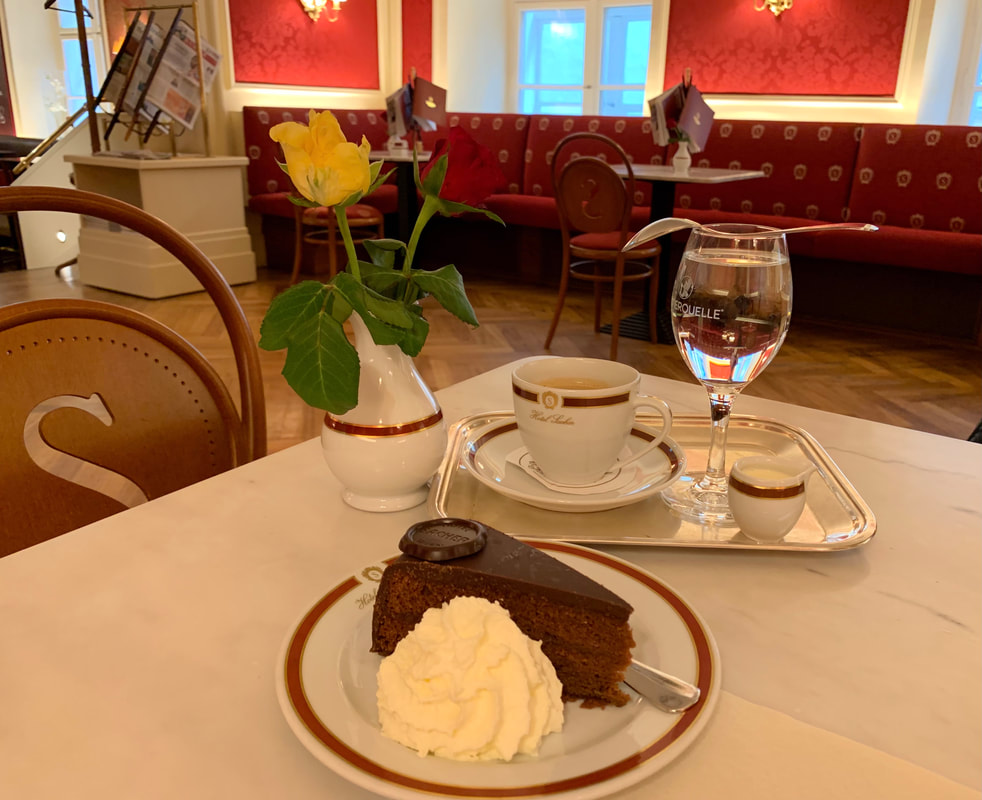
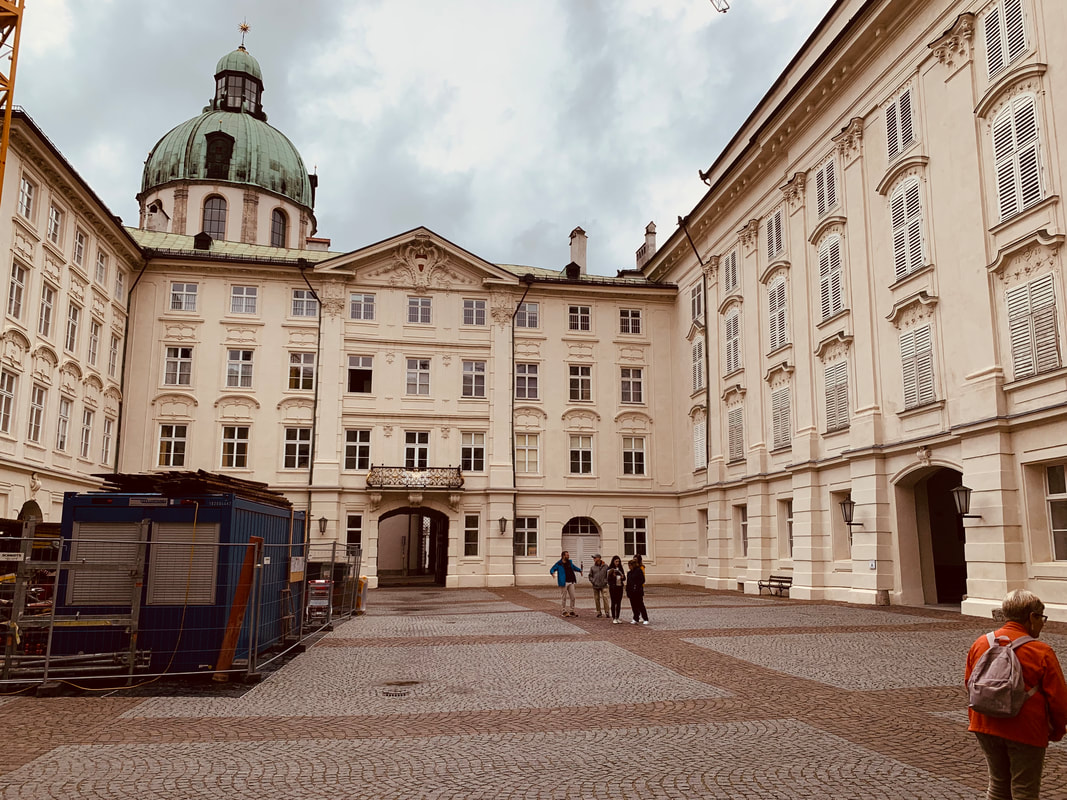
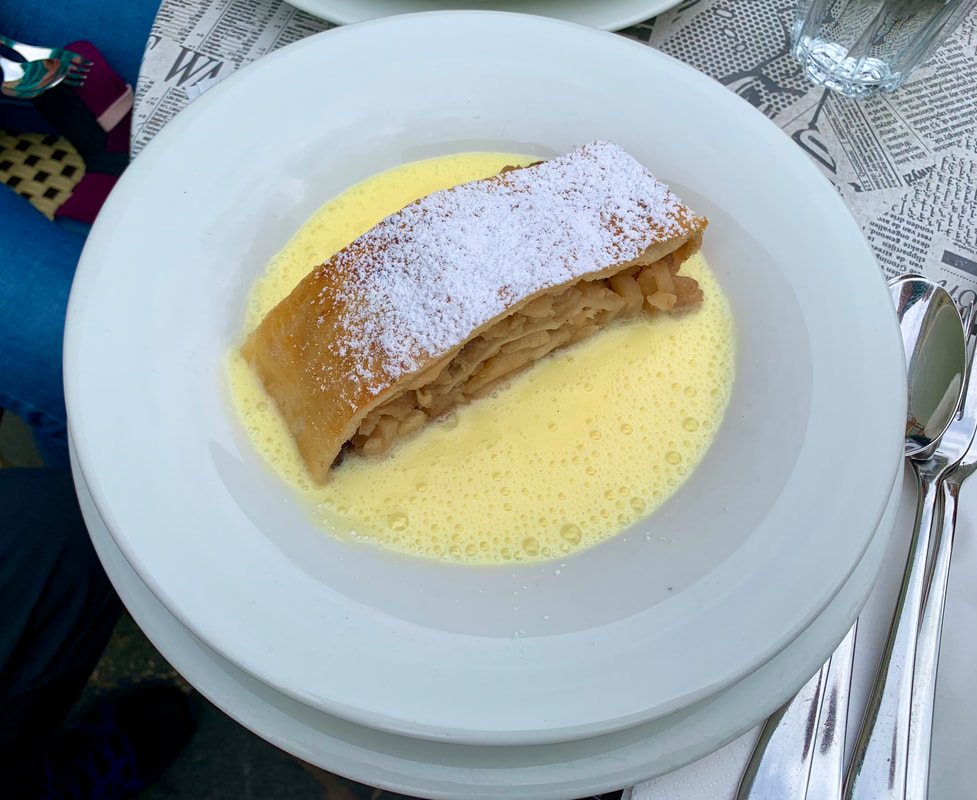
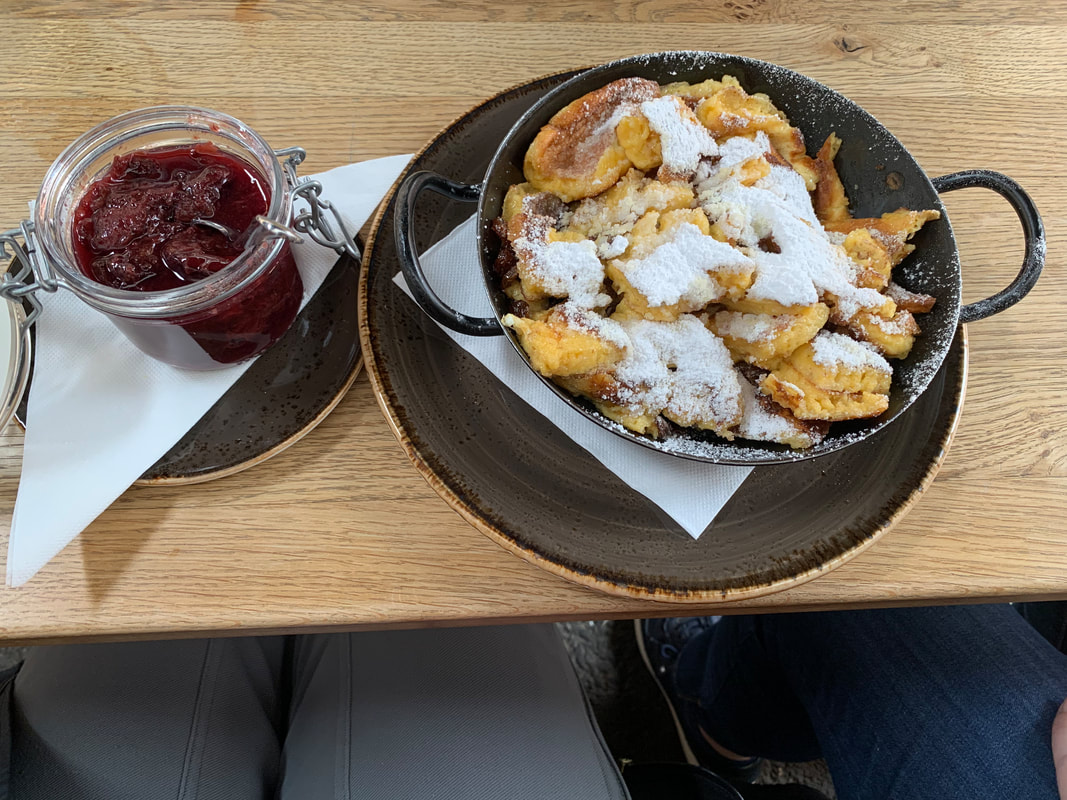
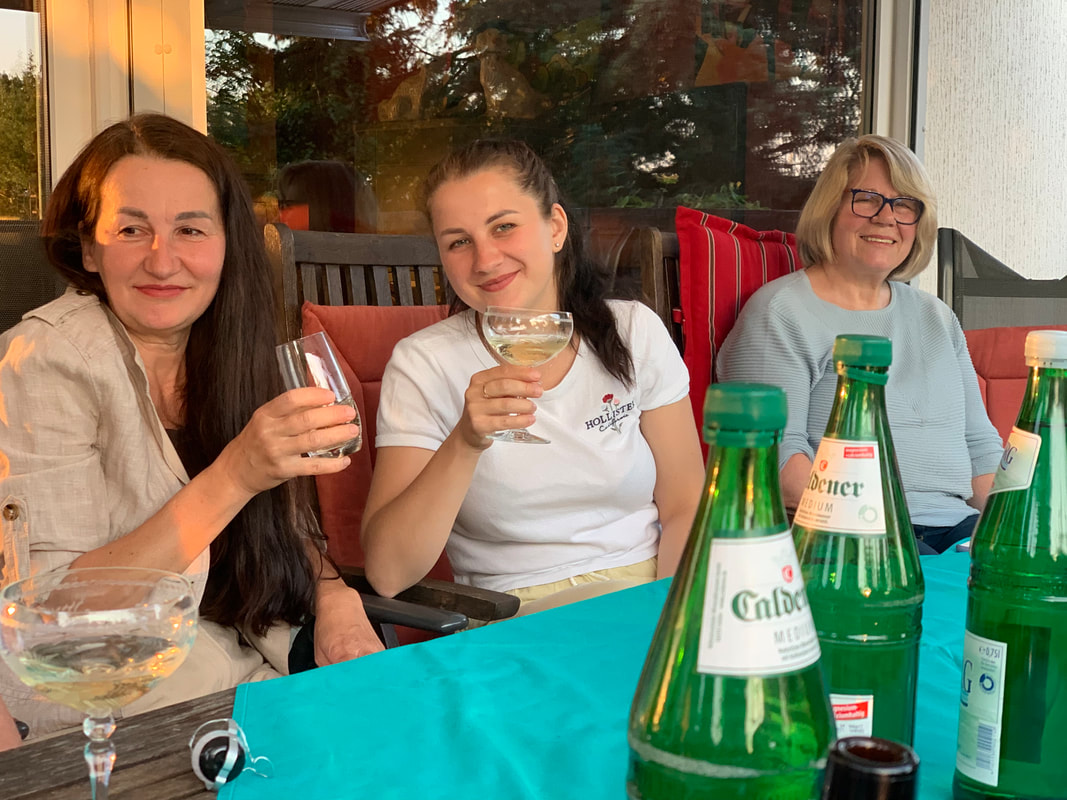
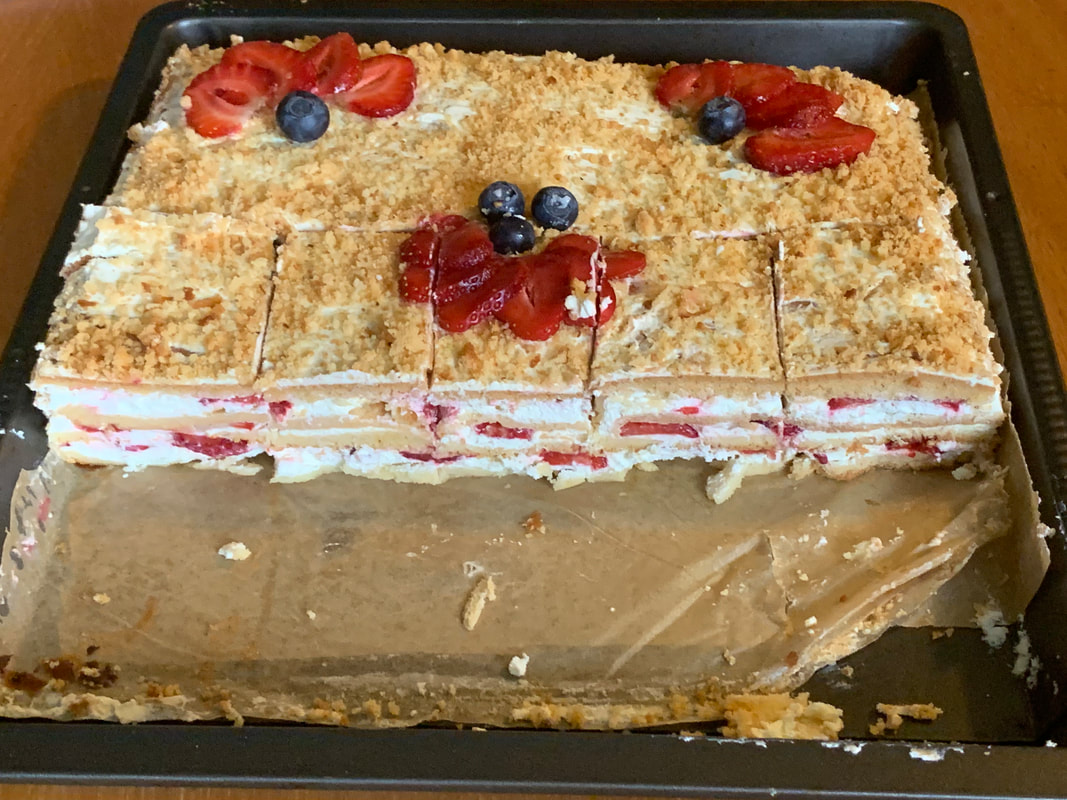
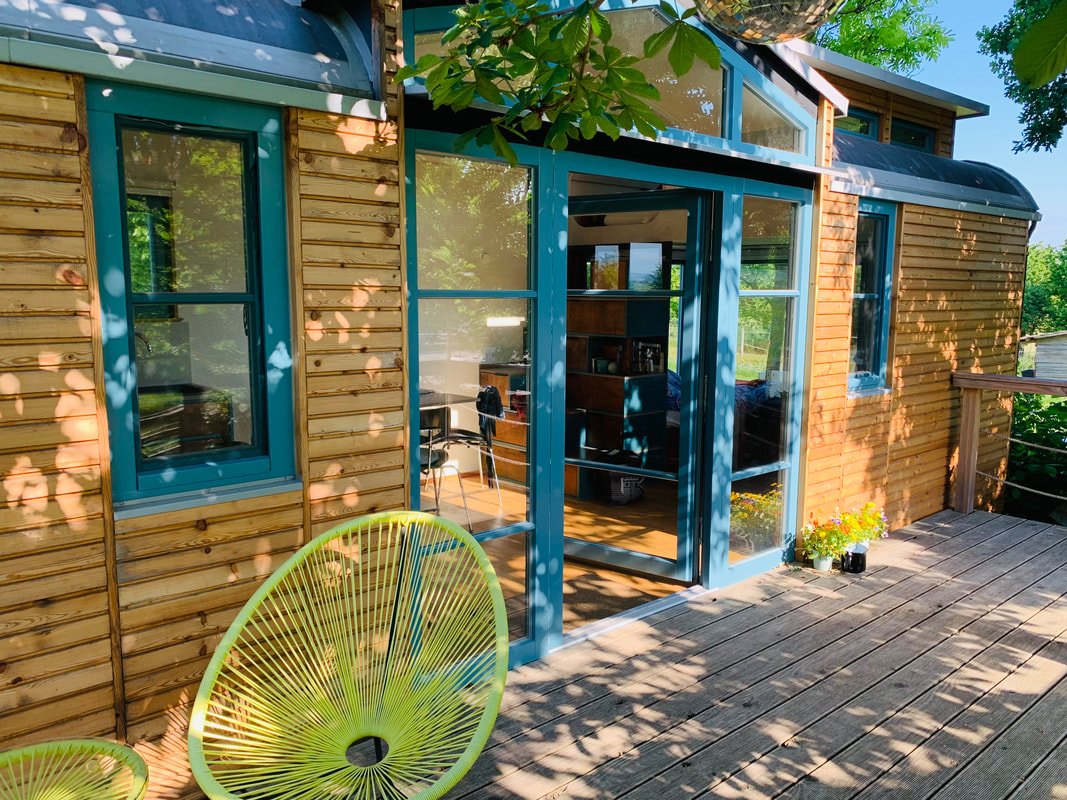
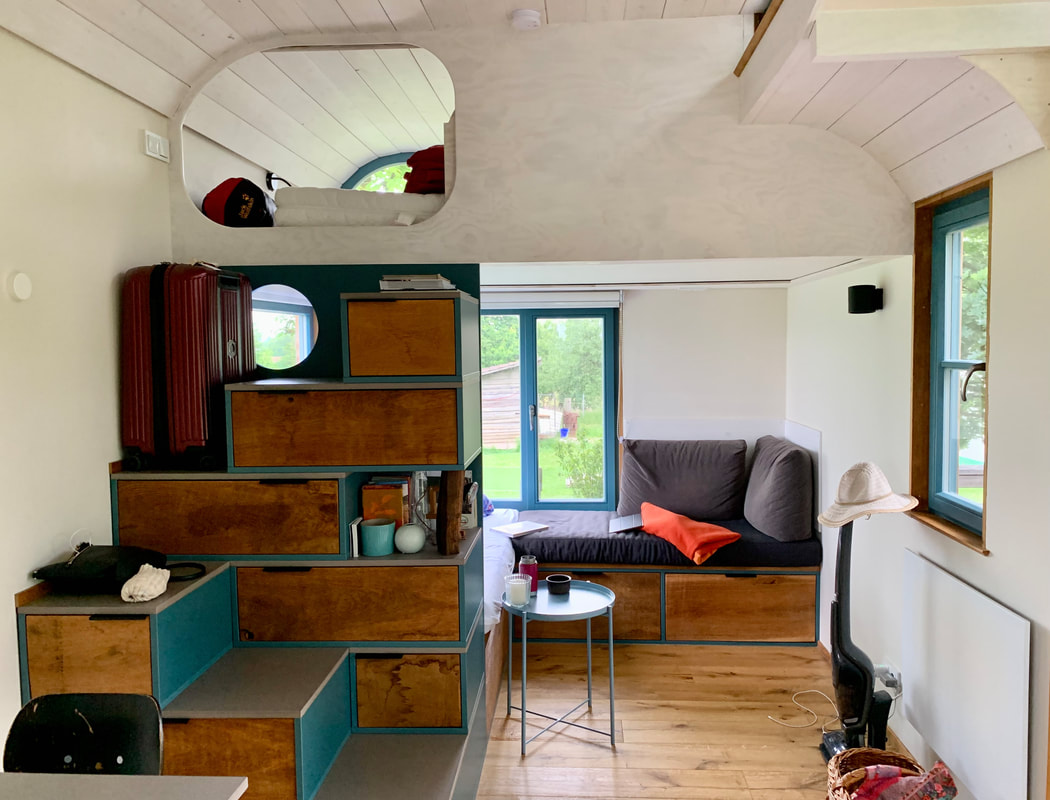
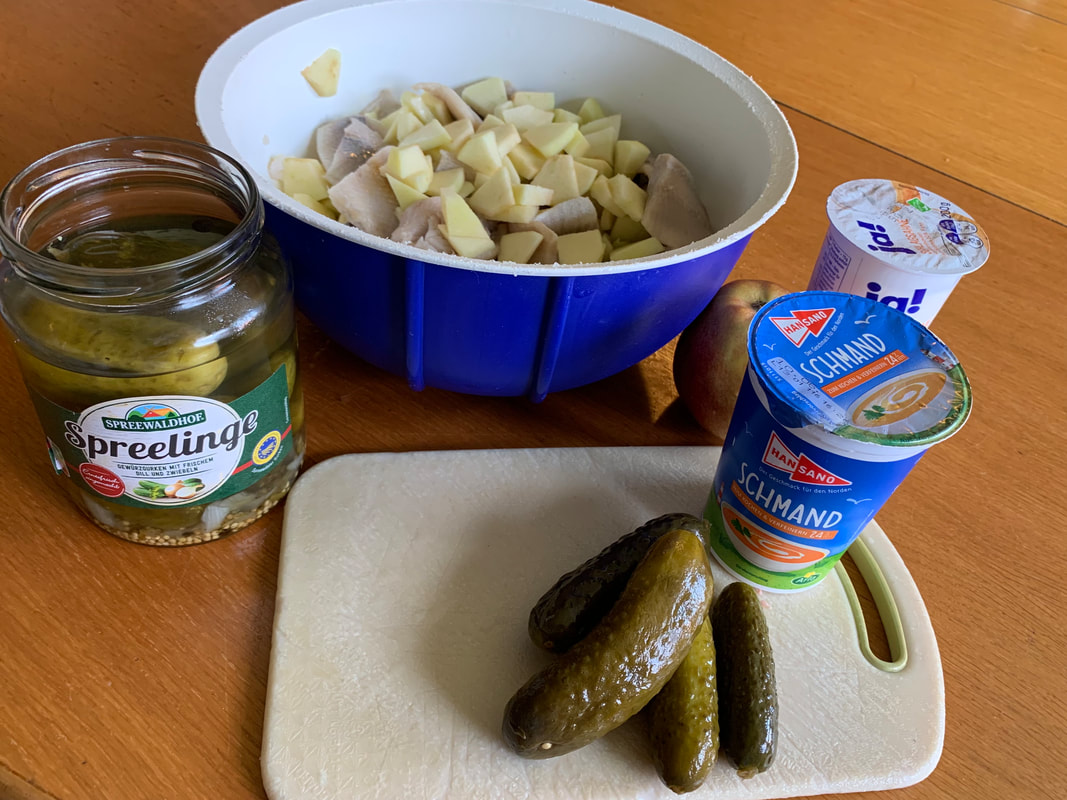


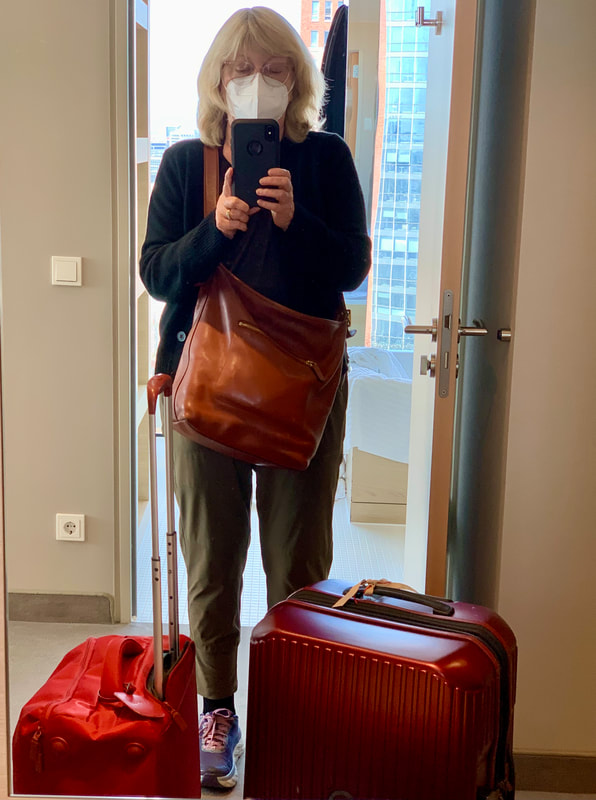

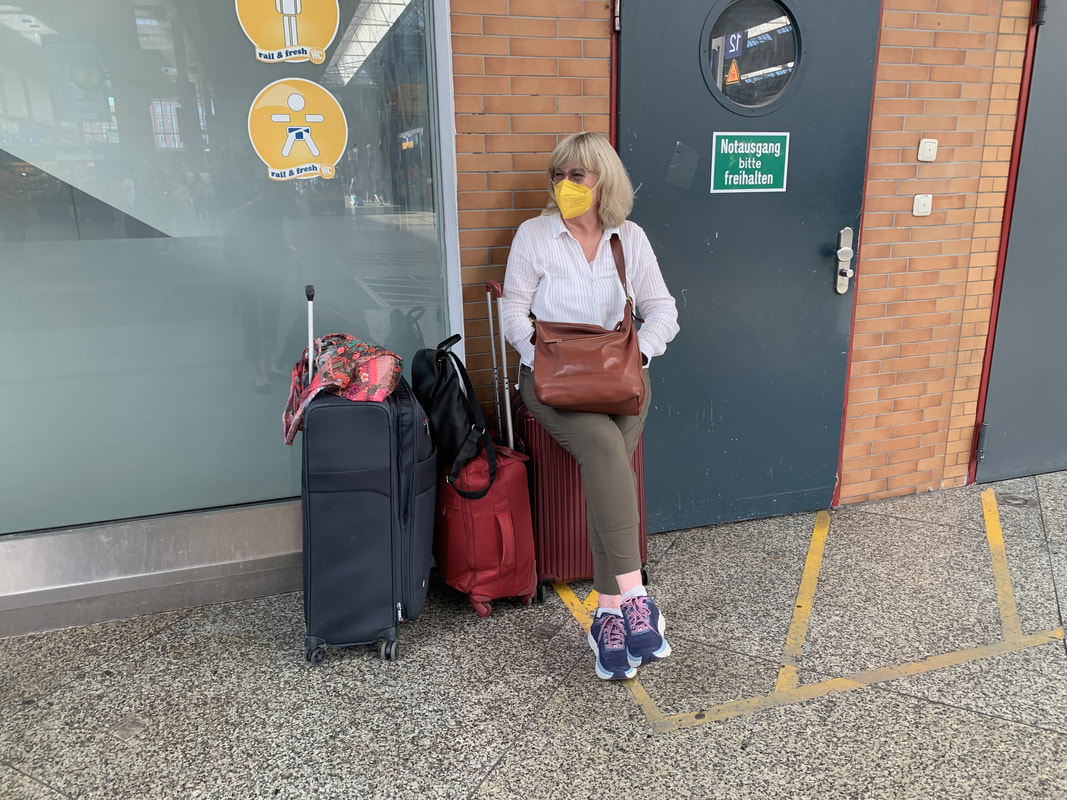
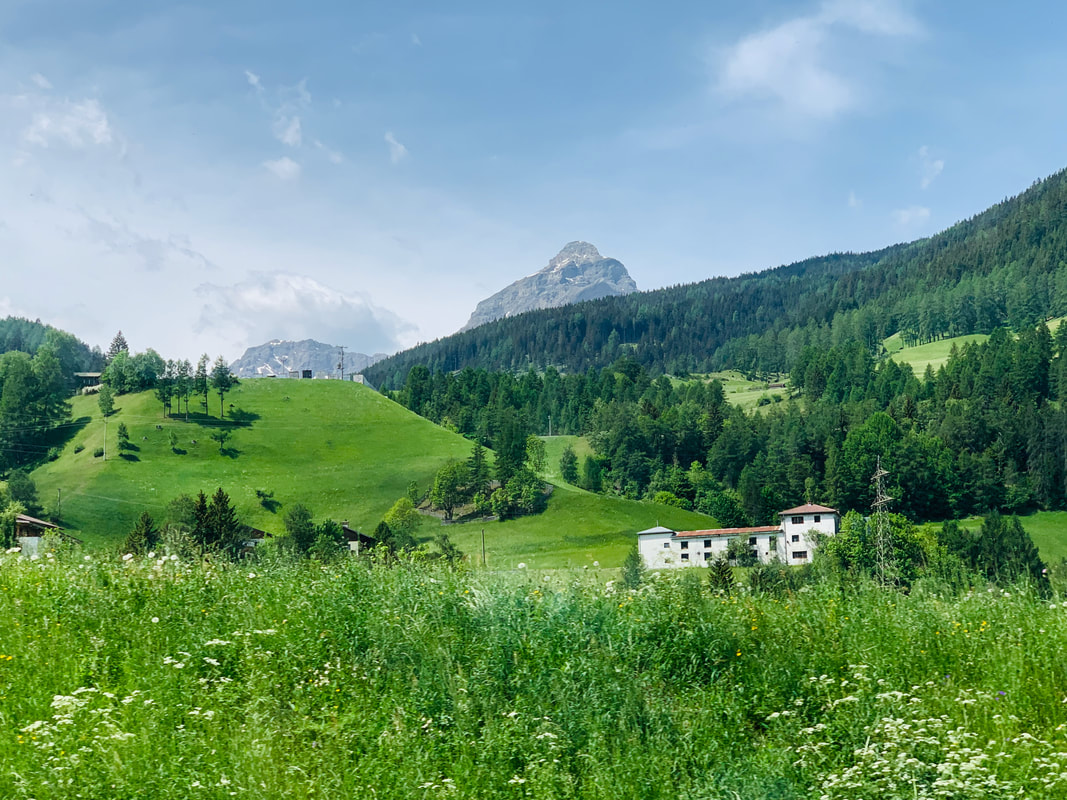
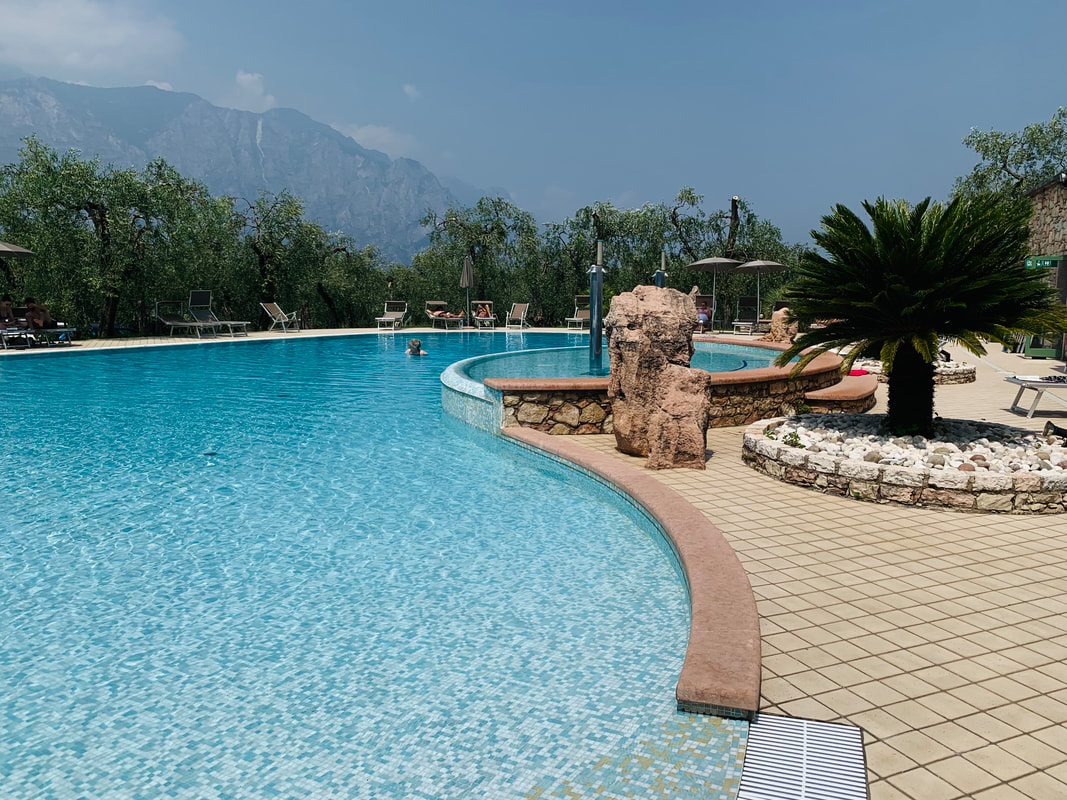
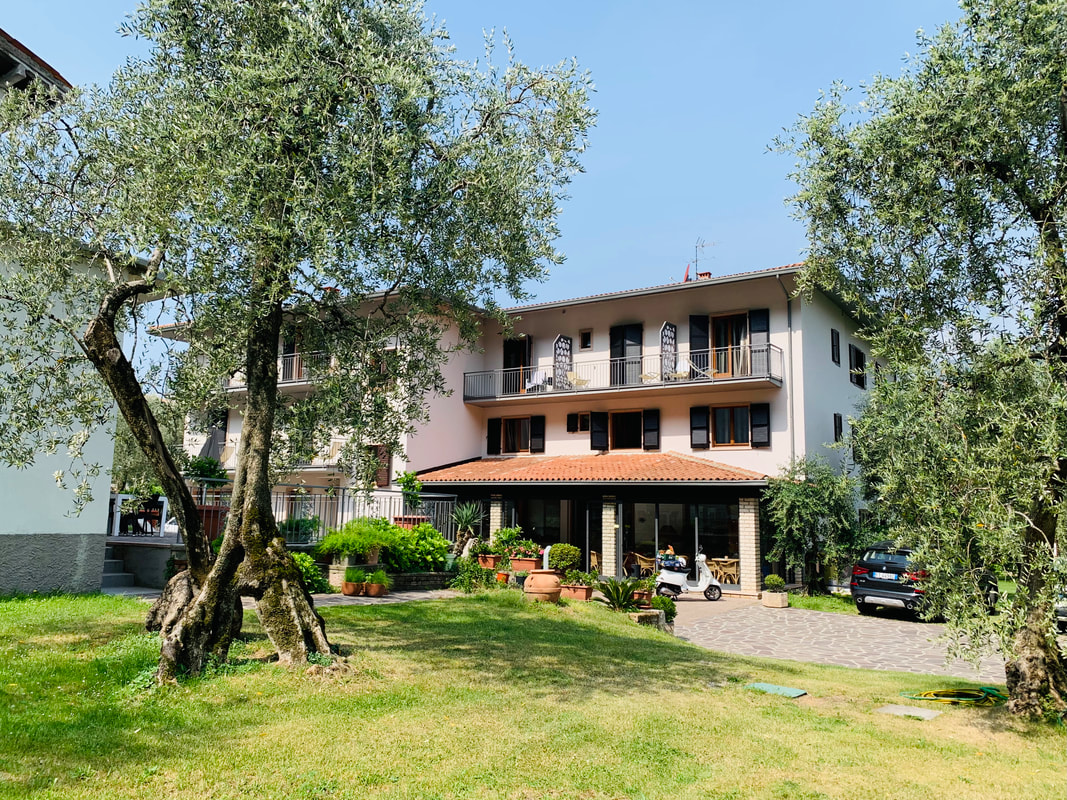
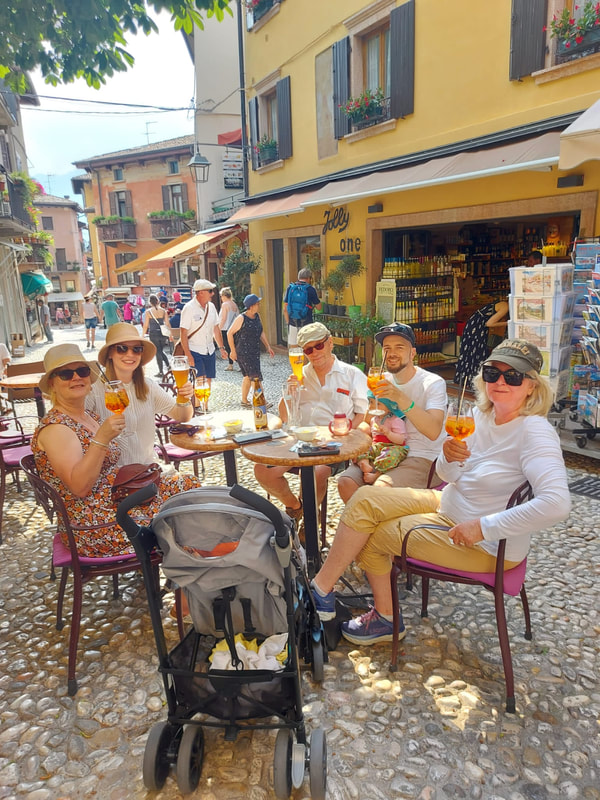
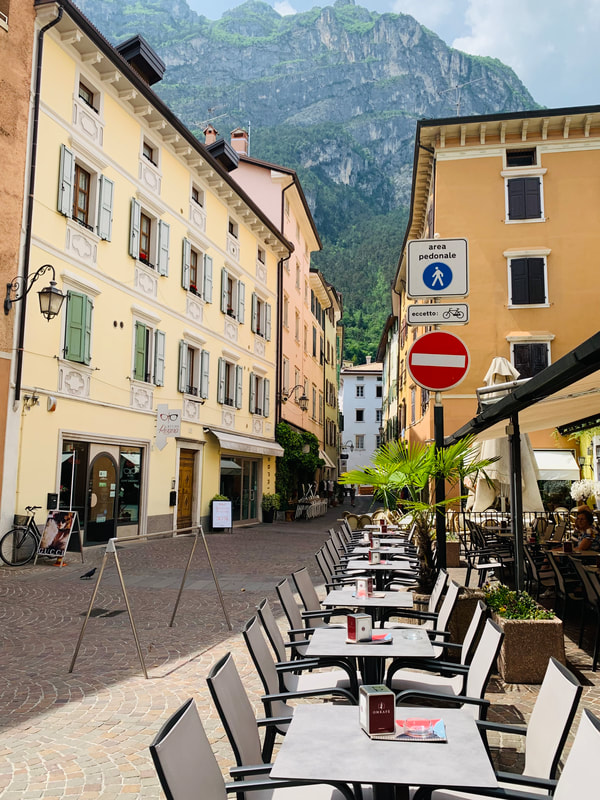
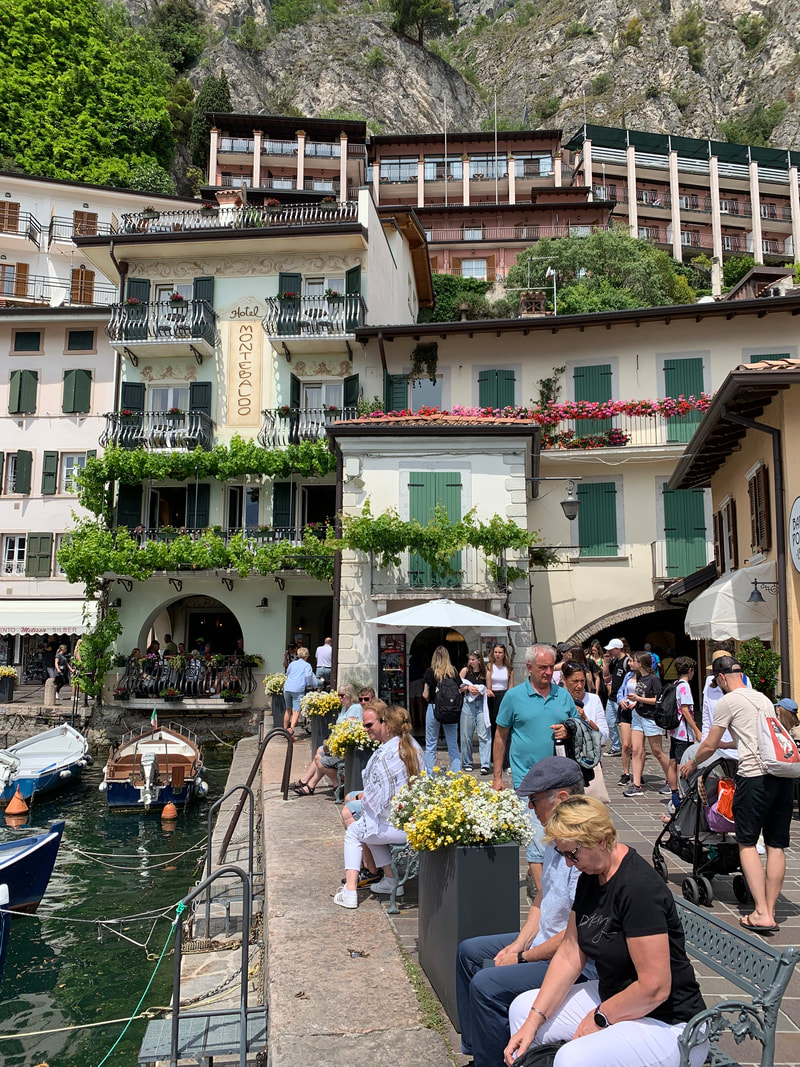
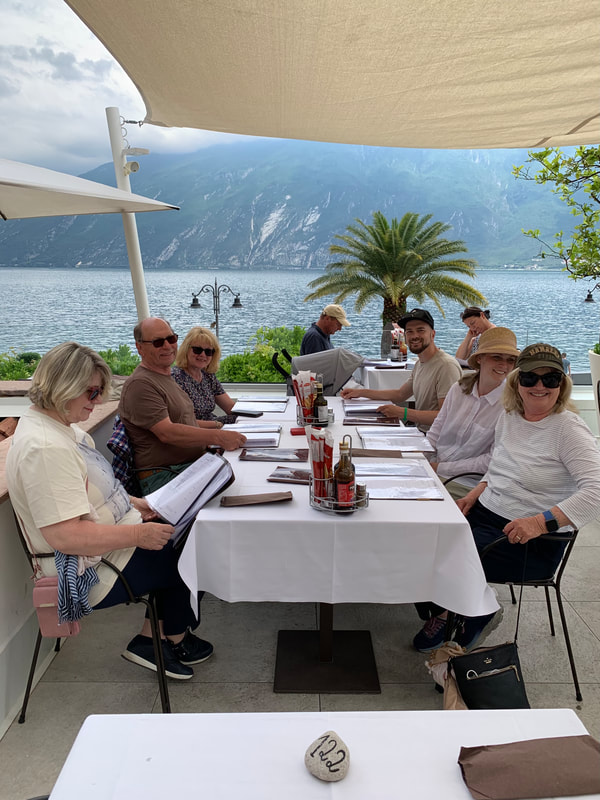
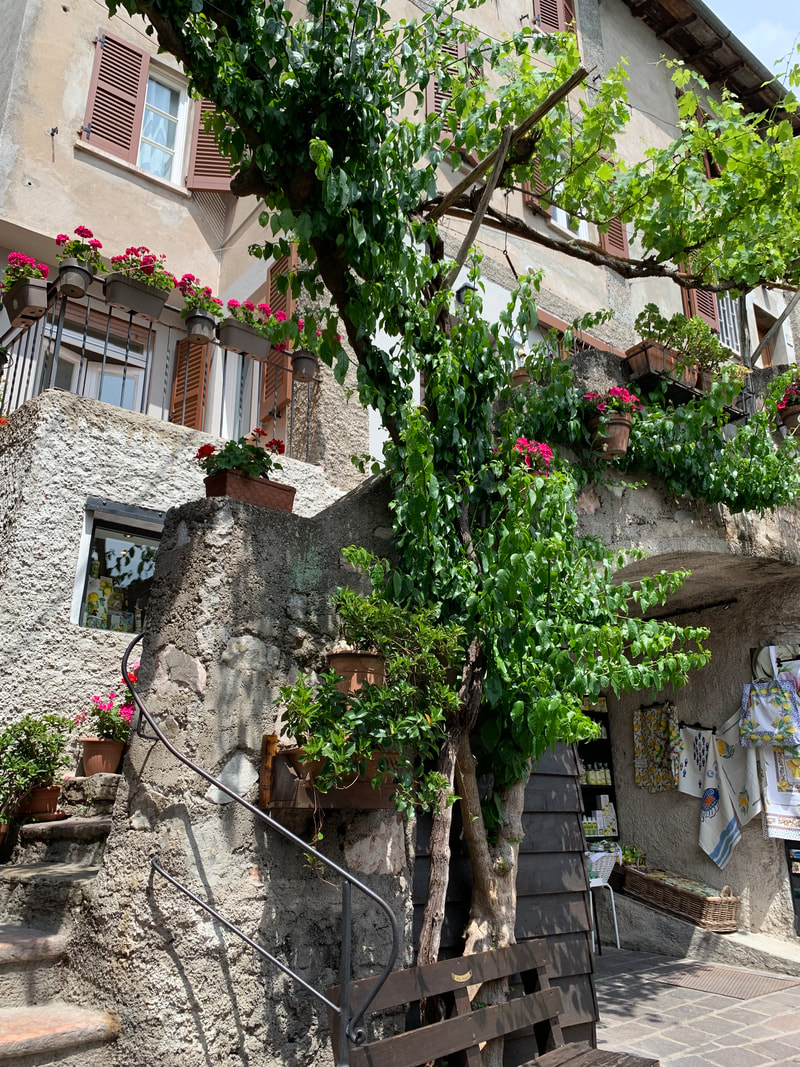
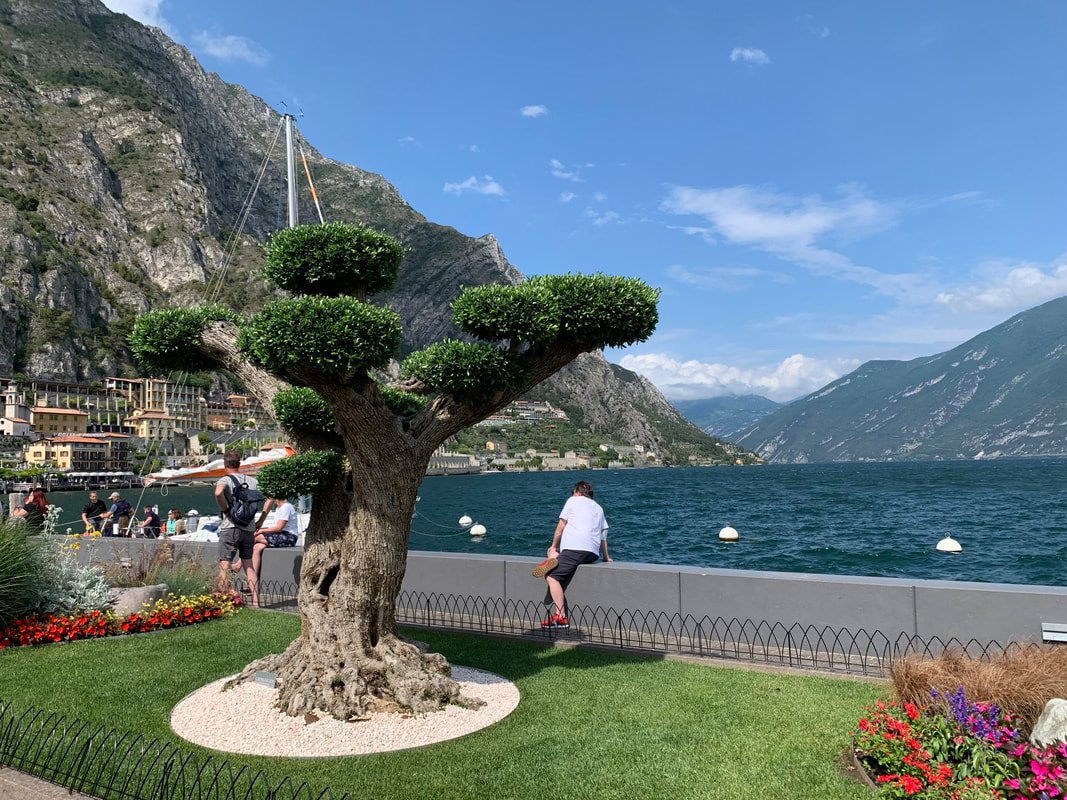
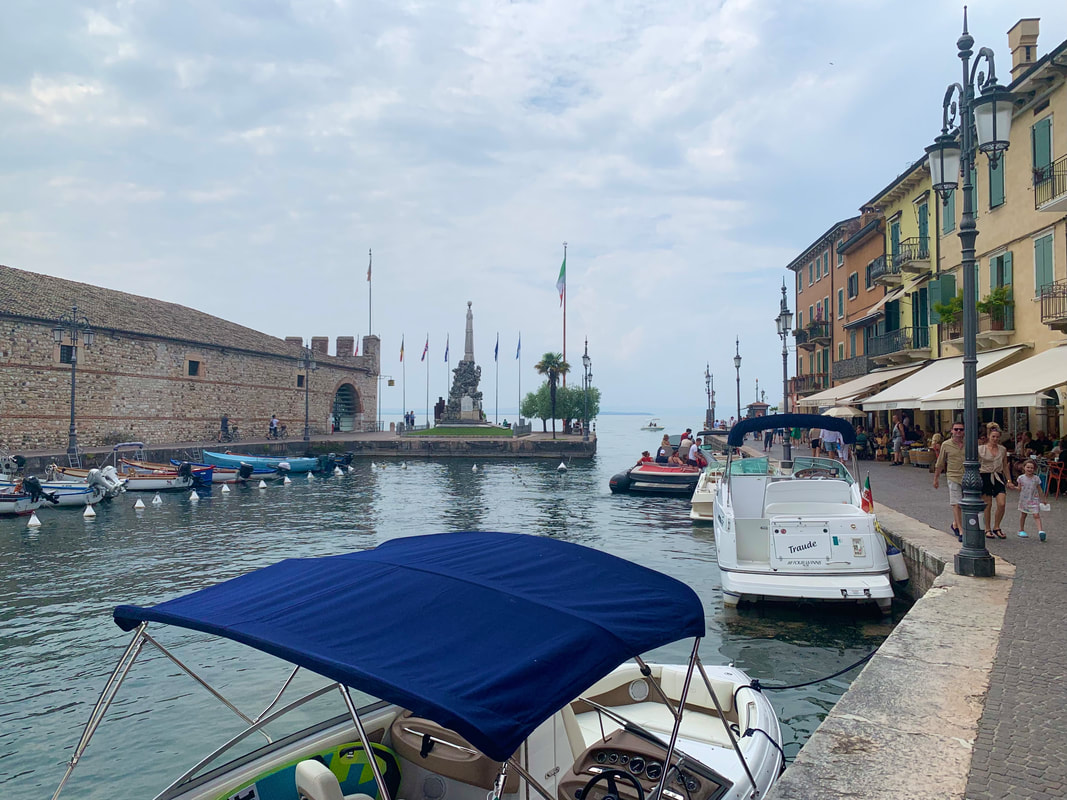
 RSS Feed